Love this? Save it for later!
Share the inspiration with your friends
The summer I turned thirty, I found myself in a rather odd spot: waiting for my car to get fixed at a tiny, dusty mechanic’s shop on the edge of town. While the mechanics were busy with engines and oil stains, I was fiddling with my phone when the shop’s owner, a quiet woman named Marie, started chatting about something totally unexpected—preserving sweet corn on the cob. Honestly, I wasn’t expecting cooking advice from a mechanic, but there I was, leaning against the peeling counter, listening to her describe exactly how to lock in the fresh, juicy goodness of corn in just 20 minutes.
She pulled out a crumpled piece of notebook paper, scribbled with her own handwriting, passed down from her grandmother. Marie’s method was simple, efficient, and perfect for anyone who, like me, sometimes finds themselves overwhelmed by the fleeting season of sweet corn. I remember the way the sunlight hit the cracked bowl on the counter as she demonstrated how to blanch the ears just right, and I accidentally knocked over a jug of water in my excitement (classic me, right?).
You know that feeling when you taste something so fresh it practically transports you back to that moment? That’s what this Perfect Sweet Corn on the Cob Preservation recipe does for me. Maybe you’ve been there too—wanting to save the taste of summer without fuss or fancy equipment. That’s why this method has stuck with me, and why I keep coming back to it every year. Let me tell you, it’s a game changer for preserving that sweet, tender crunch that makes corn on the cob so unforgettable.
Why You’ll Love This Recipe
After testing this Perfect Sweet Corn on the Cob Preservation recipe multiple times, I can honestly say it’s a keeper for anyone who loves fresh corn but hates the waste of letting it spoil. Here’s why you’ll want to try it out:
- Quick & Easy: You can preserve sweet corn on the cob in under 20 minutes, which is perfect when you’re juggling a busy schedule or craving that summer flavor at any time.
- Simple Ingredients: No need for fancy preservatives or complicated steps — just fresh corn, water, and a pinch of salt.
- Perfect for Seasonal Bounty: Great for saving your summer harvest or farmer’s market finds so you can enjoy them long after the season ends.
- Crowd-Pleaser: Whether you’re serving a family dinner or a backyard barbecue, preserved sweet corn tastes just as delightful as fresh.
- Unbelievably Delicious: The texture stays tender but crisp, and the natural sweetness shines through like it just came off the stalk.
This recipe isn’t just another quick blanch-and-freeze method. Marie’s approach taught me to time the blanch perfectly and cool the corn rapidly, locking in the flavor and texture in a way that other methods miss. It’s the kind of recipe that makes you close your eyes after the first bite and savor that pure corn taste. Honestly, it’s comfort food made practical for modern life—and that’s why it’s become my go-to preservation trick.
What Ingredients You Will Need
This recipe uses simple, wholesome ingredients to deliver bold flavor and satisfying texture without the fuss. Most of these are pantry staples or fresh from the market, so you won’t need to hunt down anything exotic.
- Fresh sweet corn on the cob (about 4-6 ears) – Choose ears with bright green husks and plump kernels for the best preservation results.
- Water – For blanching and cooling (filtered if possible for clean taste).
- Salt (1 tablespoon) – Enhances the natural sweetness during blanching.
- Ice cubes or ice water – Essential for shocking the corn immediately after blanching to stop the cooking process and maintain crispness.
If you want to get a bit creative, you can add a pinch of sugar to the blanch water to boost sweetness, but that’s totally optional. When I prepare this for my family, I stick to the basics to keep the pure corn flavor front and center.
For those looking to tweak the recipe, using organic corn is a nice touch, especially if you want to avoid pesticides or just support your local farmers. When it’s peak season, I like to grab corn from the nearby farmer’s market because it’s fresher and the flavor is unbeatable.
Equipment Needed
- Large pot or stockpot – Big enough to hold water and fully submerge the corn ears.
- Large bowl – For ice water bath to cool the corn quickly after blanching.
- Tongs or slotted spoon – To safely remove hot corn from boiling water.
- Knife – For trimming the ends of the corn if needed.
- Clean kitchen towels or paper towels – To dry the corn before freezing or storing.
If you don’t have a large pot, a deep saucepan works fine for smaller batches. I’ve also used a colander inside a bigger pot for easy draining. Marie swore by a wooden spoon for stirring during blanching, which I found charming and surprisingly effective for even heat distribution. For freezing, I recommend using freezer-safe bags or airtight containers to keep the corn fresh longer.
Preparation Method
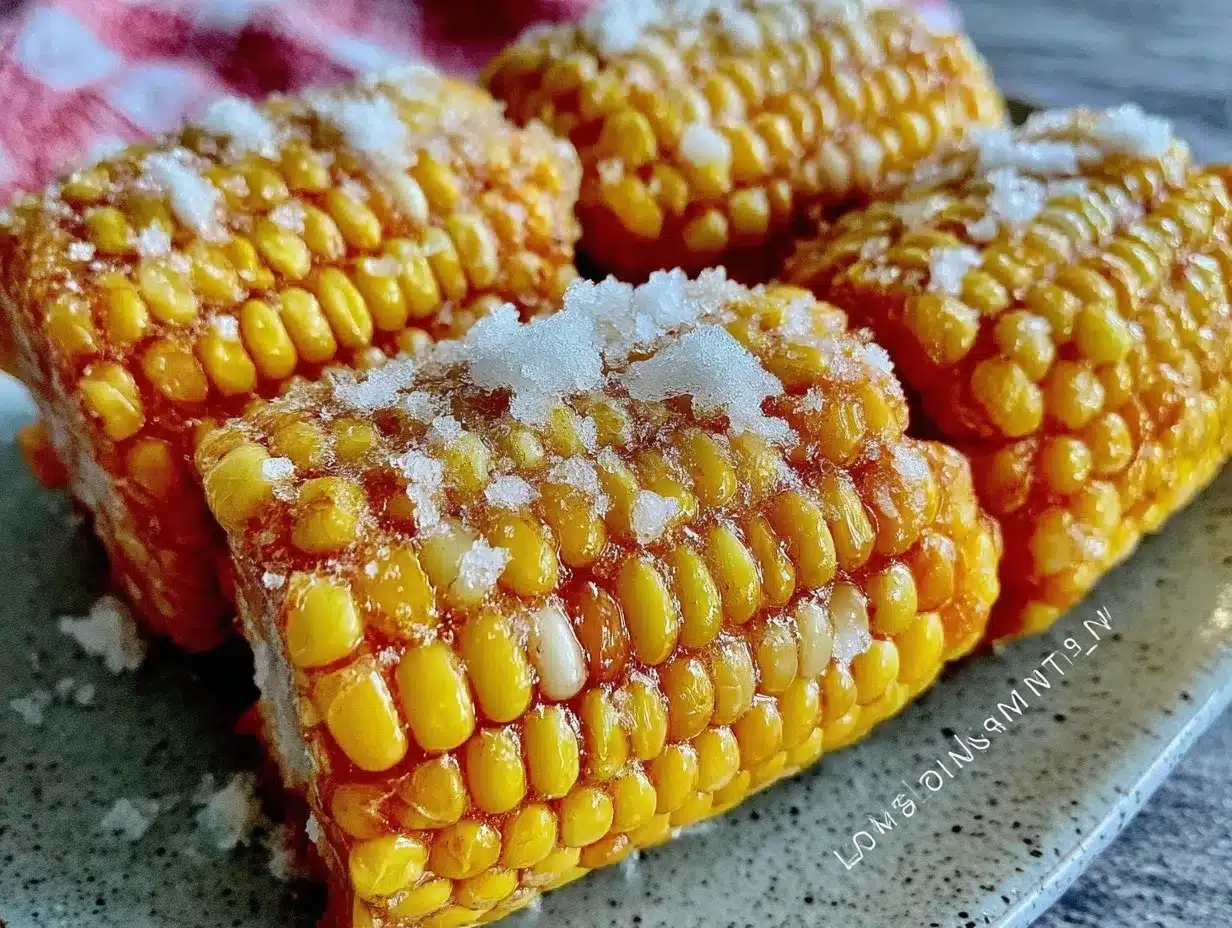
- Husk and clean the corn: Remove the husks and silk from each ear of sweet corn. Rinse under cool running water to get rid of any remaining silk or dirt. Trim the ends slightly if needed to fit the ears comfortably in your pot. (5 minutes)
- Bring water to a boil: Fill your large pot with enough water to cover the corn fully, add 1 tablespoon of salt, and bring it to a rolling boil over high heat. This salting helps season the corn right away. (7-8 minutes)
- Blanch the corn: Carefully place the ears into the boiling water using tongs. Let them cook for exactly 4 minutes – no more, no less. This timing is crucial; it cooks the corn just enough to preserve sweetness and texture without overcooking. (4 minutes)
- Prepare the ice bath: While the corn is blanching, fill a large bowl with cold water and plenty of ice cubes. This ice bath will stop the cooking instantly. (2 minutes)
- Shock the corn: Using tongs, quickly transfer each ear from the boiling water into the ice bath. Let them chill for 6-8 minutes until completely cooled. You’ll notice the kernels firming up and the color staying vibrant. (6-8 minutes)
- Dry and store: Remove the ears from the ice bath and pat dry with a towel. Once dry, wrap each ear tightly in plastic wrap or place them in freezer bags, removing as much air as possible to prevent freezer burn. Label with date. (5 minutes)
Marie warned me to avoid overcrowding the pot during blanching; I learned the hard way when the water temperature dropped and the corn ended up mushy. Also, timing the ice bath was a game changer — too short, and the cooking continues, too long, and the corn loses warmth and flavor balance. Trust me, these little details make all the difference.
Cooking Tips & Techniques
Getting perfect preserved sweet corn on the cob isn’t rocket science, but a few pointers from my experience can save you from common pitfalls:
- Use fresh corn: The fresher your corn, the better the end result. Corn starts to lose sweetness soon after harvest, so try to preserve it within a day or two.
- Don’t skip the ice bath: This step halts cooking immediately and keeps that crisp snap we all love. I once skipped it in a rush, and the corn turned out soggy and dull.
- Salt the blanch water: It’s a small detail with a big impact on flavor — it seasons the corn from the inside out.
- Work in batches: Overcrowding the pot lowers the water temperature, leading to uneven cooking. Keep it comfortable.
- Dry thoroughly before freezing: Moisture can cause ice crystals and freezer burn, so pat dry is your friend.
Timing is everything here — 4 minutes in boiling water and 6-8 minutes in ice water is the sweet spot. Multitasking by prepping the ice bath while waiting for water to boil helps keep the process smooth. Honestly, this simple routine took me a few tries to nail, but now it’s as automatic as brewing my morning coffee.
Variations & Adaptations
If you like to mix things up or have dietary needs, this preservation method is flexible:
- Herb-infused blanch water: Add sprigs of fresh thyme or rosemary to the boiling water for a subtle herbal note in the preserved corn.
- Spicy twist: Toss in a couple of sliced jalapeños into the blanch water for a gentle heat that complements the sweetness.
- Gluten-free & allergy-friendly: This recipe is naturally gluten-free and free from common allergens, making it great for most diets without changes.
- Grilled corn preservation: For a smoky flavor, grill the corn lightly before blanching and freezing—just be careful not to overcook.
- Cut kernels: If you prefer frozen corn kernels, cut the kernels off the cob after blanching and freeze in airtight bags.
Personally, I once tried adding a splash of lemon juice to the ice bath for a brighter flavor, and it worked surprisingly well. The best part? You can tailor this method depending on your taste or kitchen tools without losing the core benefits.
Serving & Storage Suggestions
When ready to enjoy your preserved sweet corn, here’s how to get the most out of it:
- Serving temperature: Thaw the corn in the refrigerator overnight or boil briefly for 2-3 minutes to warm up without overcooking.
- Presentation tips: Serve with a pat of butter, sprinkle of sea salt, or your favorite seasoning blend to bring out the natural sweetness.
- Complementary dishes: Sweet corn pairs beautifully with grilled meats, fresh salads, and creamy mashed potatoes. It’s also fantastic alongside a creamy garlic mashed potatoes dinner.
- Storage instructions: Keep frozen corn wrapped tightly in freezer bags or containers for up to 6 months for best quality.
- Reheating tips: Avoid microwaving straight from frozen to prevent uneven heating; instead, thaw first or reheat gently on the stovetop.
Flavors really mellow and develop if you let the corn rest in the freezer for a couple of weeks before using it, which is a nice bonus I didn’t expect. Just be sure to label your bags so you don’t lose track!
Nutritional Information & Benefits
Sweet corn is more than just a tasty treat—it offers some solid nutritional perks. One cup (about 164g) of cooked sweet corn provides roughly 140 calories, 3g of protein, 2g of fiber, and plenty of B vitamins like folate and thiamin. It’s also a good source of antioxidants such as lutein and zeaxanthin, which support eye health.
This preservation method keeps most nutrients intact since the blanching time is brief and the corn is frozen quickly. Plus, it’s naturally gluten-free and low in fat, making it a wholesome addition to any meal.
When I’m thinking about health, I appreciate that this recipe doesn’t call for extra oils or sugars, letting the natural sweetness shine through. It’s a clean, simple way to enjoy the summer harvest all year round.
Conclusion
If you’re looking for a straightforward, fast way to save the taste of summer, this Perfect Sweet Corn on the Cob Preservation recipe is just what you need. It’s simple, practical, and yields corn that tastes fresh and sweet even months later. I love how it brings back memories of that unexpected chat in the mechanic’s shop and the way it makes my meals feel a little more special without extra effort.
Feel free to adjust the timing or seasonings to fit your family’s tastes, and don’t hesitate to share your own twists with friends. I’d love to hear how you make this recipe your own, so drop a comment below and let’s keep the corn conversation going!
Remember, keeping summer alive on your plate has never been this easy or satisfying.
Frequently Asked Questions
Can I preserve sweet corn on the cob without blanching?
Blanching is important because it stops enzyme actions that cause spoilage. Skipping it can lead to loss of flavor, texture, and color over time.
How long does preserved sweet corn last in the freezer?
When properly wrapped and stored, frozen sweet corn on the cob stays good for up to 6 months while maintaining quality.
Can I use this method for other types of corn?
This method works best for sweet corn. Field or dent corn varieties aren’t suited for eating fresh or preserving this way.
Is it necessary to salt the blanch water?
Adding salt enhances flavor and helps maintain the corn’s natural sweetness, but it’s optional if you prefer unsalted.
What’s the best way to thaw frozen corn on the cob?
Thaw overnight in the refrigerator or briefly boil for 2-3 minutes. Avoid microwaving directly from frozen to prevent uneven cooking.
PrintPerfect Sweet Corn on the Cob Preservation Recipe Easy 20 Minute Method

A quick and easy method to preserve fresh sweet corn on the cob by blanching and shocking in ice water, locking in flavor and texture for up to 6 months.
- Prep Time: 7 minutes
- Cook Time: 4 minutes
- Total Time: 20 minutes
- Yield: 4-6 servings 1x
- Category: Preservation
- Cuisine: American
Ingredients
- 4–6 ears fresh sweet corn on the cob
- Water (enough to cover corn for blanching)
- 1 tablespoon salt
- Ice cubes or ice water
Instructions
- Husk and clean the corn: Remove husks and silk, rinse under cool running water, and trim ends if needed. (5 minutes)
- Bring water to a boil: Fill a large pot with enough water to cover corn, add 1 tablespoon salt, and bring to a rolling boil. (7-8 minutes)
- Blanch the corn: Place ears into boiling water using tongs and cook for exactly 4 minutes. (4 minutes)
- Prepare the ice bath: Fill a large bowl with cold water and ice cubes. (2 minutes)
- Shock the corn: Transfer ears from boiling water to ice bath and chill for 6-8 minutes until cooled.
- Dry and store: Remove corn from ice bath, pat dry, wrap tightly in plastic wrap or place in freezer bags removing air, label with date. (5 minutes)
Notes
Avoid overcrowding the pot to maintain water temperature. Timing is crucial: 4 minutes blanching and 6-8 minutes ice bath. Pat dry thoroughly before freezing to prevent freezer burn. Optional: add sugar to blanch water or herbs for flavor variations.
Nutrition
- Serving Size: 1 ear of corn
- Calories: 140
- Sugar: 6
- Sodium: 230
- Fat: 2
- Saturated Fat: 0.3
- Carbohydrates: 31
- Fiber: 2
- Protein: 3
Keywords: sweet corn, corn on the cob, preservation, blanching, freezing, summer recipe, easy corn recipe


