Love this? Save it for later!
Share the inspiration with your friends
This was supposed to be a simple cucumber salad. I grabbed what I thought was Korean chili powder but ended up with something way hotter — the whole kitchen felt like a fire drill. The cucumbers were sliced unevenly because I was distracted by a buzzing phone, and honestly, the salt-to-cucumber ratio was all over the place. I was already late for dinner plans when I shoved the mix into the fridge, bracing for a salty, fiery mess.
But, you know, I was wrong. What came out was nothing like the bland salad I’d intended — it was crunchy, spicy, and had this tangy punch that made me pause and take another bite. It turned into a perfect batch of Crispy Spicy Korean Cucumber Kimchi, or Oi Sobagi, as the Korean cooks call it. Maybe you’ve been there — the kitchen disasters that somehow turn into your new favorite dish.
I still remember that cracked ceramic bowl and the way the spicy juice clung to my fingers when I tasted it. That accidental recipe has stayed with me ever since, popping up on my table every summer when cucumbers are fresh and the heat calls for something cool but lively. Honestly, this recipe is a keeper — it’s crunchy, tangy, and carries just the right kick to keep you coming back.
Why You’ll Love This Recipe
After many batches, this Crispy Spicy Korean Cucumber Kimchi recipe has become a staple in my kitchen, and here’s why it might become one in yours too:
- Quick & Easy: Ready in under 30 minutes, perfect when you want something fresh without fuss.
- Simple Ingredients: Uses pantry staples and fresh cucumbers you can find at your local market or grocery store.
- Perfect for Summer Meals: Great alongside grilled meats, rice bowls, or just as a tangy snack on hot days.
- Crowd-Pleaser: Kids and adults alike love the crispy texture and spicy zing — it’s a guaranteed hit.
- Unbelievably Delicious: The balance of spice, saltiness, and crunch is just right — not too overpowering, but enough to make you close your eyes after the first bite.
This isn’t just another cucumber kimchi recipe. What sets it apart is the careful layering of seasonings and the way the cucumbers stay crisp without getting soggy. The secret is in quick salting and a short fermentation time that keeps that fresh crunch alive. Plus, I’ve adjusted the spice blend after countless tries to get that perfect Korean chili powder heat without overwhelming the cucumber’s natural flavor.
Whether you’re a kimchi pro or a newbie, this recipe brings an authentic taste that’s approachable and rewarding. It’s that kind of dish that feels like a little celebration every time you eat it — trust me, your taste buds will thank you.
What Ingredients You Will Need
This recipe uses fresh, crisp cucumbers and a handful of straightforward ingredients to create bold flavor and satisfying texture without complicated prep. Most items are pantry staples, and substitutions are easy if needed.
- Korean cucumbers (Oi): About 4 medium-sized cucumbers, sliced lengthwise or into spears (choose firm, fresh ones for the best crunch).
- Coarse sea salt or kosher salt: 2 tablespoons (for salting cucumbers, helps draw out moisture and keep crispness).
- Garlic: 3 cloves, minced (adds pungent depth).
- Ginger: 1 teaspoon, finely grated (for a fresh zing).
- Green onions: 2 stalks, sliced thinly (adds mild onion flavor).
- Korean red chili powder (gochugaru): 2 tablespoons (this is key — I recommend Jung Food brand for authentic heat and color).
- Fish sauce: 2 tablespoons (gives umami richness; substitute with soy sauce for vegetarian/vegan version).
- Sweet rice flour (optional): 1 teaspoon mixed with 2 tablespoons water to form a slurry (helps thicken the kimchi paste, but you can skip it).
- Sugar: 1 teaspoon (balances the spice and salt).
- Water: 1/4 cup (used to mix with rice flour if using).
If you can’t find Korean cucumbers, Persian cucumbers are a good stand-in. For a gluten-free option, check that your fish sauce and chili powder are certified gluten-free. Fresh ingredients make all the difference here — I always pick mine up from the neighborhood Asian market on Saturdays.
Equipment Needed
- Mixing bowls: One large for salting cucumbers, one medium for mixing the kimchi paste.
- Sharp knife: For slicing cucumbers evenly — a serrated knife can work if your cucumbers are slippery.
- Cutting board: Keep it stable; a damp towel underneath helps prevent slipping.
- Measuring spoons: For precise spices and sauces.
- Colander or sieve: To drain excess cucumber water after salting.
- Glass jar or airtight container: For fermenting and storing the kimchi.
For budget-friendly options, any sturdy glass jar works — I once used an old pickle jar and it held up fine. If you have a kimchi fermentation crock, that’s fantastic, but not necessary. Just make sure your container seals well to keep out unwanted air.
Pro tip: Keep your knives sharp — it makes slicing cucumbers much easier and safer, especially when working quickly.
Preparation Method
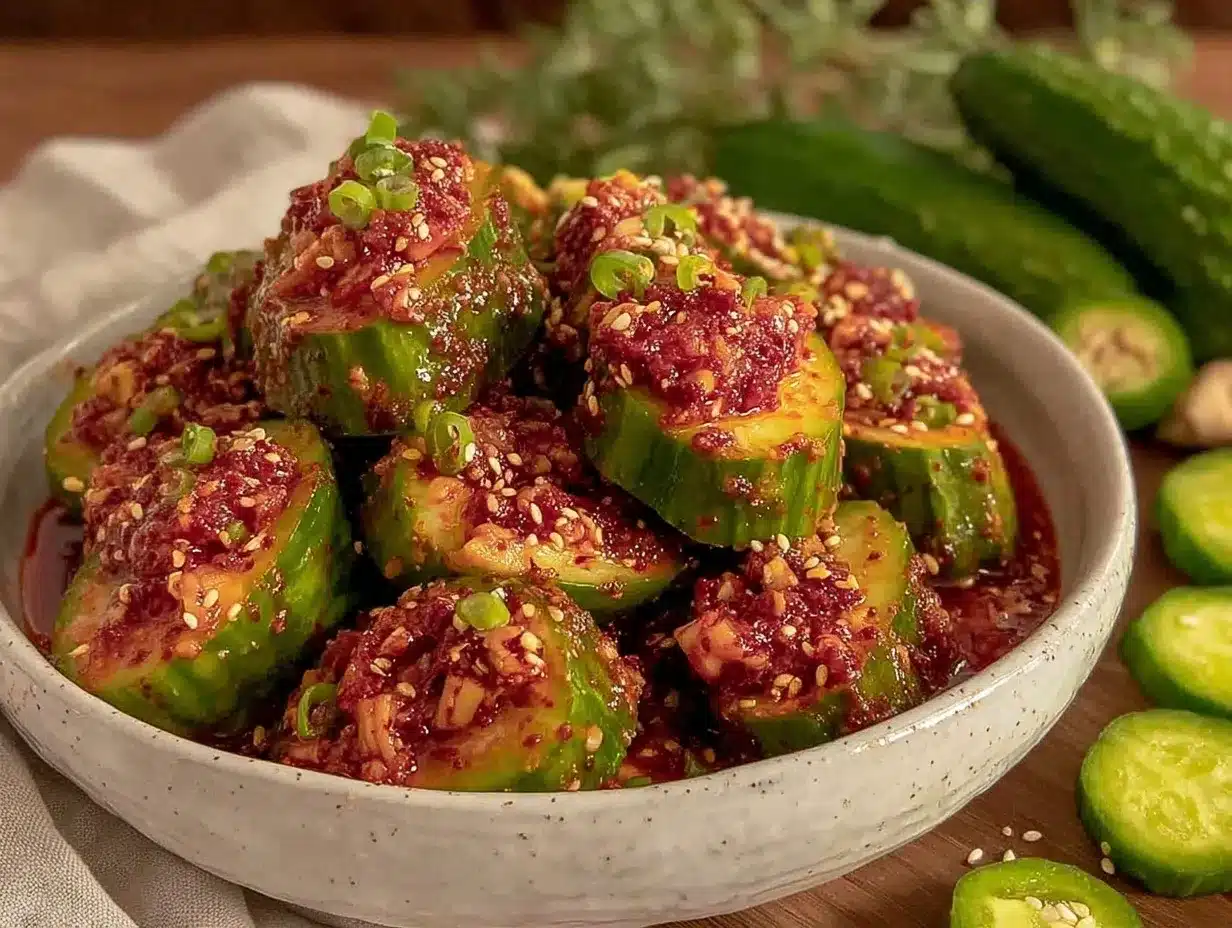
- Prepare the cucumbers: Rinse 4 medium Korean cucumbers and slice them into quarters lengthwise (or spears about 3 inches long). Place cucumbers in a large bowl and sprinkle 2 tablespoons coarse sea salt evenly over them. Toss gently to coat all pieces. Let sit for 30 minutes to draw out excess moisture, tossing halfway through. (This step keeps the cucumbers crispy and prevents sogginess.)
- Make the kimchi paste: While cucumbers are salting, combine 3 minced garlic cloves, 1 teaspoon grated ginger, 2 sliced green onions, 2 tablespoons Korean chili powder, 2 tablespoons fish sauce, and 1 teaspoon sugar in a medium bowl. If using sweet rice flour, mix 1 teaspoon with 2 tablespoons water in a small saucepan, heat gently until thickened, then add to the mixture. Stir everything together until a paste forms. (This paste packs the spicy, savory punch.)
- Rinse and drain cucumbers: After 30 minutes, rinse cucumbers briefly under cold water to remove excess salt. Drain well using a colander and gently pat dry with a clean towel to remove extra water. (Too much water will dilute the flavor and affect texture.)
- Combine cucumbers and paste: Toss cucumbers with the kimchi paste using your hands or a spoon, making sure all pieces are evenly coated. I recommend wearing gloves to protect your hands from the chili powder. (At this point, your kitchen will smell amazing but spicy!)
- Pack and ferment: Transfer the coated cucumbers into a clean glass jar or airtight container. Press down lightly to remove air pockets. Seal the container and leave it at room temperature for 12–24 hours to ferment slightly, depending on your kitchen’s temperature. (Warmer climates require less time.)
- Refrigerate and enjoy: After fermentation, store the kimchi in the fridge. It’s best eaten within 3–5 days for maximum crunch and fresh flavor. The kimchi will continue to develop tang over time but might soften.
Here’s a tip: If your cucumbers start to release too much water after mixing, just drain some off and press gently — keeps the texture spot on. And hey, if you want to see how this tangy cucumber kimchi pairs with crispy garlic chicken, I’ve got a recipe you might like.
Cooking Tips & Techniques
Let me tell you, making this Crispy Spicy Korean Cucumber Kimchi is as much about technique as it is about ingredients. Here’s what I’ve learned:
- Salting is key: Don’t rush the salting. It pulls out bitter moisture and keeps cucumbers crisp. Rinse well to avoid overly salty kimchi.
- Chili powder matters: Gochugaru isn’t just spicy — it adds color and that signature Korean flavor. Avoid substituting with regular chili powder, or you’ll miss the authentic taste.
- Mix carefully: When coating cucumbers with the paste, gentle tossing preserves cucumber integrity; harsh stirring can bruise them.
- Use gloves: Trust me, chili powder on your hands is no joke — it burns! Gloves help avoid irritation.
- Fermentation timing: This kimchi ferments quickly due to the high water content in cucumbers. Keep an eye on it to catch your preferred tanginess.
- Keep it chilled: After fermentation, refrigeration slows down the process and maintains crispness.
I once made the mistake of skipping the rinsing step, and wow — the kimchi was way too salty the next day. Lesson learned! Also, multitasking here is your friend. While cucumbers are salting, prep your paste and clean up — it saves time and keeps you organized.
Variations & Adaptations
This recipe is pretty flexible, so don’t hesitate to tweak it to your taste or dietary needs:
- Less spicy: Reduce gochugaru to 1 tablespoon or swap half for sweet paprika for a milder kick.
- Vegan option: Replace fish sauce with soy sauce or tamari for a plant-based kimchi.
- Seasonal twist: In late summer, add julienned carrots or radishes for extra crunch and color.
- Longer fermentation: If you like funkier kimchi, leave it fermenting at room temp for 2 days before refrigerating.
- Alternative cucumbers: Persian or English cucumbers work well if Korean cucumbers aren’t available.
Once, I tried adding a splash of yuzu juice to the paste — it added a lovely citrus brightness that surprised me. Feel free to experiment, because that’s part of the fun with Oi Sobagi.
Serving & Storage Suggestions
Serve this kimchi chilled or slightly cool as a refreshing side dish. It pairs beautifully with grilled meats, bibimbap bowls, or even alongside a simple steamed rice dish. The crisp texture and spicy tang make it a natural palate cleanser during heavier meals.
Store your kimchi in the fridge in an airtight container. It keeps well for up to a week, though I find it best eaten within 3–5 days when cucumbers are still crunchy. If it softens too much, it’s still delicious but better for mixing into fried rice or stews.
To reheat, gently warm it for a few seconds in the microwave, but honestly, it’s best enjoyed cold or at room temperature to preserve that satisfying crunch. Over time, the flavors deepen and the tang intensifies, so you get a different experience each day.
For a meal idea, try serving this with spicy Korean BBQ beef or a comforting bowl of vegetarian steamed rice to balance the heat.
Nutritional Information & Benefits
This Crispy Spicy Korean Cucumber Kimchi is low in calories and packed with probiotics from fermentation, which is great for gut health. Cucumbers provide hydration and fiber, while garlic and ginger add antioxidants and anti-inflammatory properties.
One serving (about 100g) contains approximately:
| Calories | 30 kcal |
|---|---|
| Carbohydrates | 5 g |
| Protein | 1 g |
| Fat | 0.2 g |
| Sodium | 400 mg |
Be mindful if you’re watching sodium intake due to the salt and fish sauce content. For gluten-free diets, confirm your fish sauce brand’s certification. This recipe is naturally low carb and gluten-free, making it friendly for many dietary preferences.
Conclusion
Making Crispy Spicy Korean Cucumber Kimchi at home may start with a little chaos — trust me, I’ve been there — but the result is a crunchy, spicy delight worth every step. It’s a recipe that’s approachable, packed with flavor, and feels authentic without complicated prep.
Feel free to adjust the heat, salt, or fermentation time to suit your taste. Honestly, once you get this right, you’ll find yourself reaching for it again and again, especially when summer rolls around and fresh cucumbers call your name.
If you give this Oi Sobagi recipe a try, I’d love to hear how it turns out! Share your experiences, tweaks, or questions in the comments below. Cooking is a journey, and this kimchi has been a surprising and delicious stop along mine.
Happy fermenting, and may your cucumbers always be crisp and your spice just right!
FAQs
- What is Oi Sobagi? Oi Sobagi is a Korean cucumber kimchi known for its crisp texture and spicy, tangy flavor. It’s typically made with cucumbers stuffed or coated in a chili paste and fermented briefly.
- Can I use regular cucumbers instead of Korean cucumbers? Yes! Persian or English cucumbers are good substitutes. Just choose firm, fresh ones to keep the crunch.
- How long can I store cucumber kimchi? It’s best eaten within 3–5 days when the cucumbers are still crisp, but it can last up to a week in the fridge. The flavor will continue to develop and the texture will soften over time.
- Is it necessary to ferment cucumber kimchi? Short fermentation (12-24 hours) adds tang and depth, but if you prefer, you can eat it fresh without fermenting. The flavor will be milder.
- Can I make this recipe vegan? Absolutely. Simply substitute fish sauce with soy sauce or tamari for a plant-based version.
Pin This Recipe!

Crispy Spicy Korean Cucumber Kimchi Recipe Easy Homemade Oi Sobagi Tutorial

A crunchy, spicy, and tangy Korean cucumber kimchi (Oi Sobagi) that is quick to prepare and perfect for summer meals. This recipe balances spice, saltiness, and crispness with a short fermentation for authentic flavor.
- Prep Time: 10 minutes
- Cook Time: 30 minutes (including 30 minutes salting and 12-24 hours fermentation at room temperature)
- Total Time: 12-24 hours 40 minutes
- Yield: 4 servings 1x
- Category: Side Dish
- Cuisine: Korean
Ingredients
- 4 medium Korean cucumbers (or Persian cucumbers as substitute), sliced lengthwise or into spears
- 2 tablespoons coarse sea salt or kosher salt
- 3 cloves garlic, minced
- 1 teaspoon fresh ginger, finely grated
- 2 stalks green onions, thinly sliced
- 2 tablespoons Korean red chili powder (gochugaru)
- 2 tablespoons fish sauce (substitute soy sauce for vegan version)
- 1 teaspoon sweet rice flour (optional)
- 2 tablespoons water (to mix with rice flour if using)
- 1 teaspoon sugar
Instructions
- Rinse 4 medium Korean cucumbers and slice them into quarters lengthwise or spears about 3 inches long. Place cucumbers in a large bowl and sprinkle 2 tablespoons coarse sea salt evenly over them. Toss gently to coat all pieces. Let sit for 30 minutes to draw out excess moisture, tossing halfway through.
- While cucumbers are salting, combine 3 minced garlic cloves, 1 teaspoon grated ginger, 2 sliced green onions, 2 tablespoons Korean chili powder, 2 tablespoons fish sauce, and 1 teaspoon sugar in a medium bowl. If using sweet rice flour, mix 1 teaspoon with 2 tablespoons water in a small saucepan, heat gently until thickened, then add to the mixture. Stir everything together until a paste forms.
- After 30 minutes, rinse cucumbers briefly under cold water to remove excess salt. Drain well using a colander and gently pat dry with a clean towel to remove extra water.
- Toss cucumbers with the kimchi paste using your hands or a spoon, making sure all pieces are evenly coated. Wearing gloves is recommended to protect your hands from chili powder.
- Transfer the coated cucumbers into a clean glass jar or airtight container. Press down lightly to remove air pockets. Seal the container and leave it at room temperature for 12–24 hours to ferment slightly, depending on your kitchen’s temperature.
- After fermentation, store the kimchi in the fridge. It’s best eaten within 3–5 days for maximum crunch and fresh flavor.
Notes
Use gloves when mixing with chili powder to avoid skin irritation. Rinse cucumbers well after salting to prevent overly salty kimchi. Adjust fermentation time based on room temperature and desired tanginess. Sweet rice flour slurry is optional but helps thicken the paste. Substitute fish sauce with soy sauce or tamari for vegan version. Use Persian or English cucumbers if Korean cucumbers are unavailable.
Nutrition
- Serving Size: About 100 grams per
- Calories: 30
- Sodium: 400
- Fat: 0.2
- Carbohydrates: 5
- Protein: 1
Keywords: Korean cucumber kimchi, Oi Sobagi, spicy cucumber kimchi, fermented cucumber, Korean side dish, gochugaru kimchi, easy kimchi recipe, summer kimchi


