Love this? Save it for later!
Share the inspiration with your friends
“I wasn’t planning to make a cheese ball that night,” I admitted to my friend Lisa as we rummaged through my fridge, hunting for something quick to throw together before her arrival. It was a random Thursday, and honestly, I was a bit frazzled after work. The power flickered once—then went out completely—right when I was about to start dinner. So, there I was, in the dim glow of my phone flashlight, improvising with whatever I found. Five simple ingredients later, I had this creamy cheese ball that not only saved the evening but also impressed Lisa so much she asked for the recipe on the spot.
You know that feeling when you whip up something unexpectedly good with barely any effort? That’s exactly what this Easy Creamy Cheese Ball with 5 Simple Ingredients is all about. It’s one of those recipes that feels fancy but is incredibly straightforward. The texture is luscious and smooth, with just enough tang and richness to make it addictive. Honestly, this little cheese ball has become my go-to for last-minute gatherings or when I want a snack that’s both comforting and elegant without the fuss.
Maybe you’ve been there too—staring into your fridge, wondering how to turn a handful of ingredients into something memorable. This recipe doesn’t ask for fancy gadgets or tricky steps. Plus, it’s perfect for pairing with crunchy crackers, fresh veggies, or even spreading on warm bread. Let me tell you, the first time I made it, I forgot to add the herbs (classic me), but even then, it was a hit. That little imperfect moment just made me realize how forgiving and adaptable this recipe truly is.
Why does this cheese ball stay in my rotation? Because it proves you don’t need a thousand ingredients or hours of prep to impress. Simple, creamy, and crowd-pleasing, it’s my little secret weapon when I want something satisfying and easy. Let’s get into why you’ll love this recipe as much as I do.
Why You’ll Love This Recipe
This Easy Creamy Cheese Ball with 5 Simple Ingredients isn’t just a snack; it’s a reliable crowd-pleaser that comes together quickly. I’ve tested it multiple times—sometimes rushing, sometimes relaxed—and it never lets me down. Here’s why it’s a kitchen favorite:
- Quick & Easy: Ready in under 15 minutes, making it perfect for busy weeknights or unexpected guests.
- Simple Ingredients: You probably have all the ingredients in your pantry or fridge already—no special trips needed.
- Perfect for Entertaining: Whether it’s a casual game night or a holiday gathering, this cheese ball always gets compliments.
- Crowd-Pleaser: Kids, adults, picky eaters—everyone loves its creamy texture and balanced flavors.
- Unbelievably Delicious: The combination of cream cheese, sharp cheddar, and just the right herbs makes it taste way more complex than it really is.
What sets this cheese ball apart? It’s the texture. I blend the cream cheese just enough to keep it creamy but still firm enough to shape. Adding a touch of garlic powder and fresh herbs gives it a bright, fresh flavor without overpowering the cheese. Plus, rolling it in chopped nuts or fresh herbs adds a delightful crunch or vibrant look that makes it eye-catching on any snack table.
This isn’t one of those recipes that feels like work; it’s the kind that makes you close your eyes after the first bite and say, “Wow, I made this?” Honestly, it’s comfort food with a little twist of elegance, perfect for impressing guests without any stress.
What Ingredients You Will Need
This Easy Creamy Cheese Ball recipe uses simple, wholesome ingredients to deliver rich flavor and smooth texture without fuss. Most are pantry staples or easily found at any grocery store. Here’s what you’ll need:
- Cream Cheese (8 oz / 225 g), softened – This is the base that makes the cheese ball luxuriously creamy. I usually use Philadelphia for consistent results.
- Sharp Cheddar Cheese (1 cup / 100 g), shredded – Adds bold flavor and a pleasant tang. I recommend a medium-sharp variety for balance.
- Garlic Powder (1 tsp) – Brings a subtle savory depth without overpowering the cheese.
- Fresh Chives (2 tbsp), finely chopped – Gives a mild oniony freshness. Substitute with green onions if needed.
- Chopped Pecans or Walnuts (1/2 cup / 60 g) – For rolling the cheese ball, adding a crunchy texture and nutty finish. You can swap for almonds or skip if you prefer a nut-free version.
Optional additions include a pinch of smoked paprika or a dash of Worcestershire sauce for more complex flavor, but honestly, the five ingredients listed are all you need to get that creamy, crowd-pleasing effect.
For seasonal touches, mix in finely chopped dried cranberries or swap chives with fresh parsley in summer for a bright twist. If you want to keep it keto-friendly, stick with the nuts for coating and skip any sugary add-ins.
Equipment Needed
- Mixing Bowl: A medium-sized bowl to combine your ingredients. I prefer glass or stainless steel for easy cleanup.
- Hand Mixer or Stand Mixer: Helpful but not mandatory. You can use a sturdy spoon or spatula to mix, but a mixer makes the cream cheese ultra-smooth quickly.
- Grater: For shredding the cheddar cheese finely. Box graters work great; just watch your fingers!
- Measuring Spoons and Cups: Accuracy helps keep the balance just right.
- Plastic Wrap or Parchment Paper: To shape and chill the cheese ball neatly.
- Small Bowl: For chopping and rolling nuts or herbs to coat the cheese ball.
If you don’t have a mixer, no worries—just let the cream cheese soften at room temperature and mix with a sturdy spoon. I once made this cheese ball during a camping trip with just a fork and it still turned out great (a little chunkier, but delicious nonetheless!).
Preparation Method

- Soften the Cream Cheese (5 minutes): Remove the cream cheese from the fridge about 30 minutes ahead to soften. If you’re short on time, microwave it in 10-second bursts until just soft but not melted.
- Grate the Cheddar Cheese (5 minutes): Use a fine shredder for the cheddar. This helps it blend smoothly and gives the cheese ball that lovely texture.
- Mix Ingredients (5 minutes): In your mixing bowl, combine the softened cream cheese, shredded cheddar, garlic powder, and chopped chives. If using a hand mixer, blend on low speed until smooth and creamy but still a bit firm. Using a spoon, stir vigorously until well combined. The mixture should hold shape but feel soft to the touch.
- Shape the Cheese Ball (3 minutes): Lay out a sheet of plastic wrap or parchment paper. Scoop the cheese mixture onto the center and fold the wrap over, shaping it into a ball with your hands. Don’t worry if it’s not perfectly round; rustic is charming here.
- Coat the Cheese Ball (3 minutes): Spread chopped pecans or walnuts on a plate. Unwrap the cheese ball and roll it gently in the nuts until evenly coated. Press lightly so nuts stick well.
- Chill (at least 1 hour): Wrap the coated cheese ball tightly in plastic wrap and refrigerate. Chilling firms it up and lets the flavors meld beautifully.
- Serve: Remove from fridge 10 minutes before serving to soften slightly. Pair with crackers, sliced baguette, or fresh veggies.
Tip: If the cheese ball feels too soft after chilling, pop it in the freezer for 10 minutes to firm up. Also, if you accidentally forget the garlic powder (been there!), you can sprinkle a bit on top before serving for that extra kick.
Cooking Tips & Techniques
Here are some tips I’ve picked up while making this cheese ball repeatedly:
- Softening Cream Cheese: Don’t rush this. Properly softened cream cheese blends evenly and prevents lumps.
- Mixing: Overmixing can make the mixture too loose. Stop once the ingredients are just combined for the best texture.
- Rolling in Nuts: Toast nuts lightly beforehand to boost flavor and crunch. But if you’re in a hurry, raw nuts work fine too.
- Chilling Time: Don’t skip the chilling step. It helps the cheese ball hold its shape and deepens the flavors. I usually make it a couple of hours ahead to avoid last-minute stress.
- Multitasking: While the cheese ball chills, prep the dippers or set the table. Saves time and keeps you organized.
One time, I tried rolling the cheese ball in fresh herbs instead of nuts. It looked stunning but was a bit messier to serve—still delicious, though! You can experiment with coatings to find your favorite.
Variations & Adaptations
This recipe is super flexible. Here are some ways to make it your own:
- Spicy Kick: Add 1/2 tsp of cayenne pepper or chopped jalapeños to the mix for a little heat.
- Herbaceous Delight: Replace chives with a mix of fresh dill and parsley for a brighter, garden-fresh flavor.
- Vegan Version: Use a dairy-free cream cheese alternative and vegan cheddar shreds. Roll in toasted sunflower seeds instead of nuts.
- Smoky Flavor: Mix in a teaspoon of smoked paprika or chipotle powder for a smoky twist.
- Sweet & Savory: Fold in chopped dried cranberries or apricots and roll the ball in chopped pistachios for a festive vibe.
Personally, I once made this cheese ball with a splash of maple syrup and crushed pecans for a fall-inspired appetizer—unexpectedly delicious! Feel free to get creative and tweak it to suit your taste buds.
Serving & Storage Suggestions
This cheese ball is best served slightly chilled but not too cold. Let it sit out for 10 minutes before serving to soften just a bit. Arrange it on a pretty platter surrounded by an assortment of crackers, sliced cucumbers, bell peppers, or even apple slices for a sweet contrast.
For a complete snack board, pair with olives, pickles, and cured meats—the creamy cheese ball balances those nicely.
Store leftovers wrapped tightly in plastic wrap or an airtight container in the fridge for up to 5 days. If you want to keep it longer, wrap well and freeze for up to a month. Thaw in the fridge overnight before serving.
Reheating isn’t recommended, but flavors tend to mellow and deepen after a day in the fridge, making it even better the next day.
Nutritional Information & Benefits
This cheese ball offers a satisfying blend of protein and fat, making it a great snack for keeping hunger at bay. One serving (about 2 tbsp) contains roughly:
| Nutrient | Amount |
|---|---|
| Calories | 120 |
| Protein | 5g |
| Fat | 10g |
| Carbohydrates | 1g |
The cream cheese and cheddar provide calcium and vitamin A, while nuts contribute healthy fats and fiber. This recipe is naturally gluten-free if served with gluten-free crackers or veggies.
For those mindful of dairy, swapping in vegan cream cheese keeps it plant-based while maintaining creaminess. Just watch out for nut allergies if using nuts for coating.
Conclusion
In short, this Easy Creamy Cheese Ball with 5 Simple Ingredients is proof that simple can be stunning. It’s quick to make, uses everyday ingredients, and tastes like you spent hours in the kitchen. I love it because it’s forgiving, adaptable, and always a hit—whether I’m throwing together a last-minute snack or impressing guests with something that feels special but isn’t complicated.
Feel free to tweak the herbs, spices, or coatings to match your mood or season. And please, come back and tell me how your version turned out! Comments and recipe twists from readers are the best part of sharing recipes here.
Go on—grab those five ingredients and make your next appetizer spread a creamy, cheesy success. You deserve that little moment of “Wow, I made this!”
Frequently Asked Questions
Can I make the cheese ball ahead of time?
Absolutely! It tastes even better after chilling for a few hours or overnight, which allows the flavors to meld nicely.
What can I use instead of nuts for coating?
If you want to avoid nuts, try rolling the cheese ball in finely chopped fresh herbs, crispy bacon bits, or even crushed crackers.
Is this recipe gluten-free?
The cheese ball itself is gluten-free. Just be sure to serve with gluten-free crackers or veggies to keep it safe for gluten-sensitive guests.
How do I soften cream cheese quickly?
Microwave in 10-second intervals until soft but not melted, or leave it on the counter for about 30 minutes before starting.
Can I add other cheeses to the mix?
Yes! Mixing in a bit of parmesan or gouda can add interesting flavors, but keep the total cheese volume the same to maintain texture.
For more tasty, approachable appetizers, you might enjoy my recipe for crispy garlic chicken or the crowd-favorite classic deviled eggs that often make appearances alongside this cheese ball at parties.
Pin This Recipe!
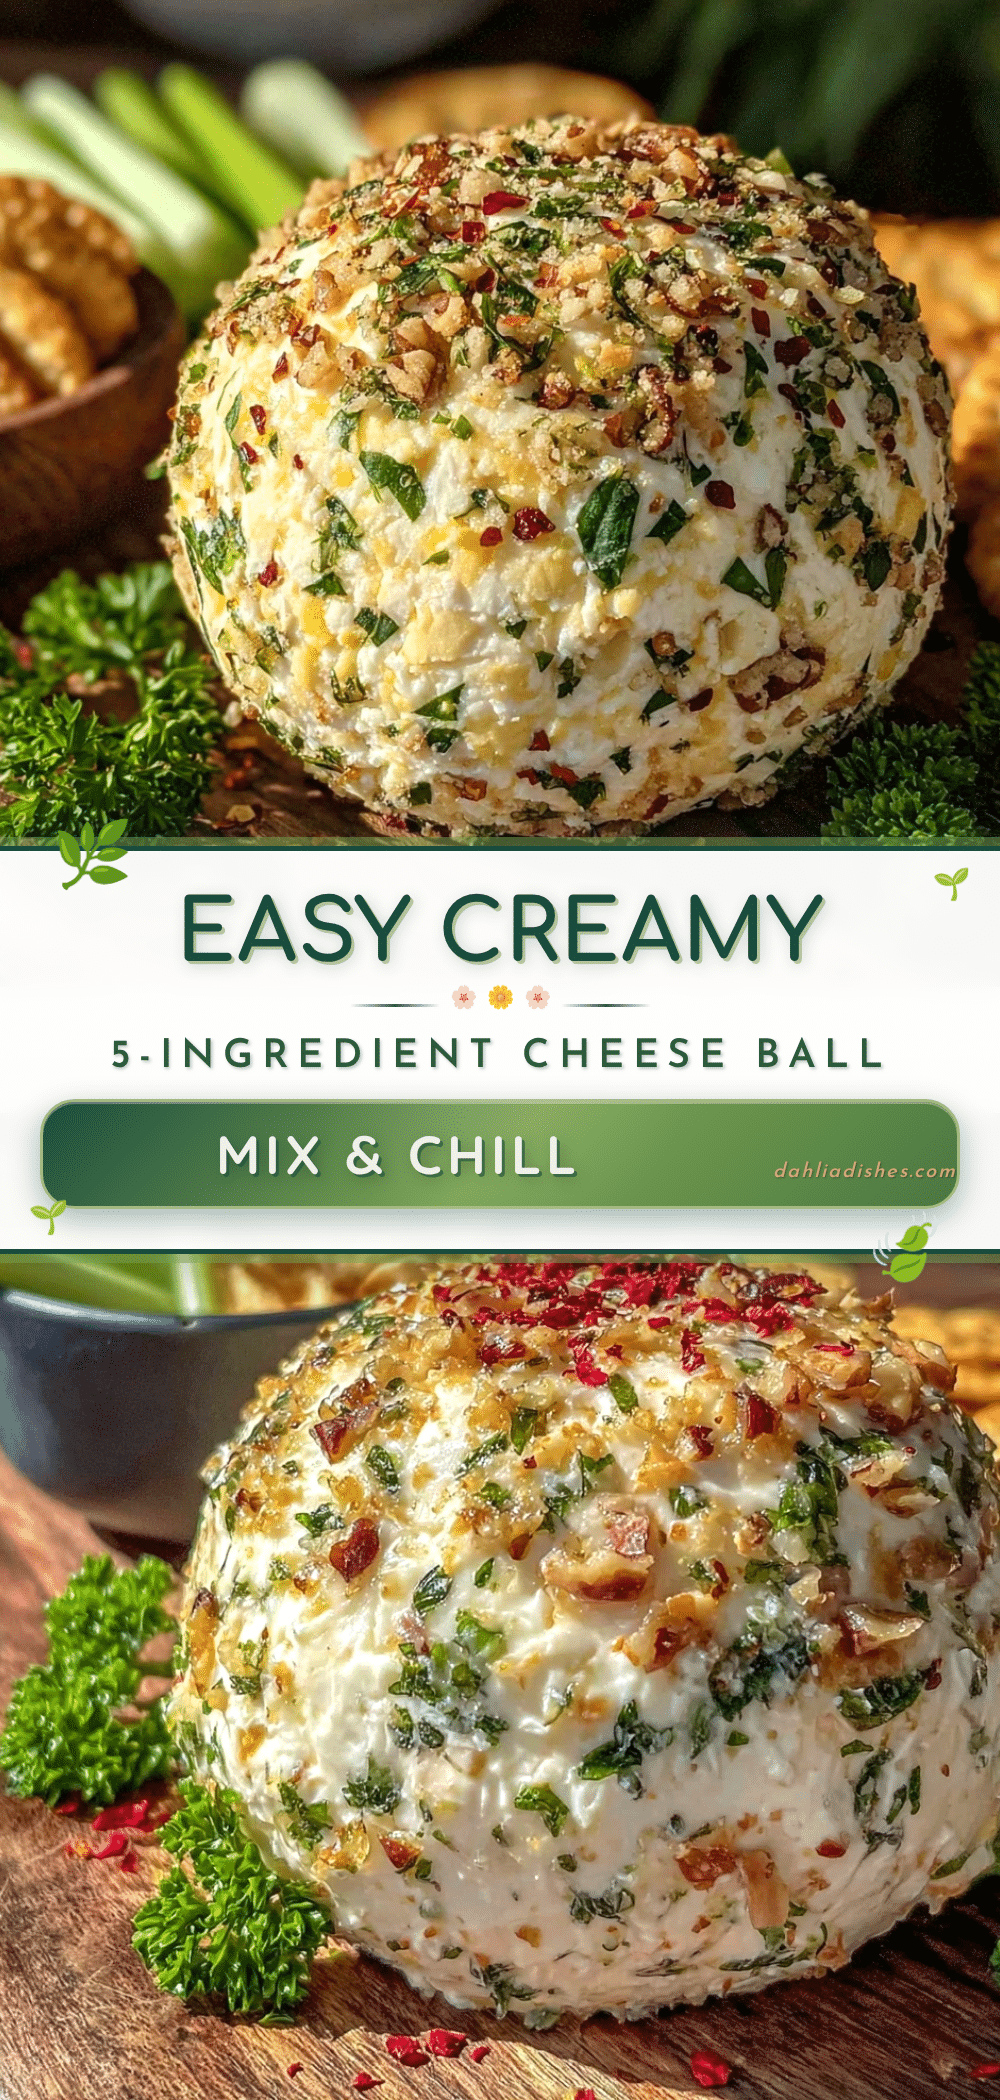
Easy Creamy Cheese Ball Recipe with 5 Simple Ingredients to Impress

A quick and easy creamy cheese ball made with just five simple ingredients, perfect for last-minute gatherings or snacks that impress without fuss.
- Prep Time: 15 minutes
- Cook Time: 0 minutes
- Total Time: 1 hour 15 minutes
- Yield: 12 servings 1x
- Category: Appetizer
- Cuisine: American
Ingredients
- 8 oz (225 g) cream cheese, softened
- 1 cup (100 g) sharp cheddar cheese, shredded
- 1 tsp garlic powder
- 2 tbsp fresh chives, finely chopped
- 1/2 cup (60 g) chopped pecans or walnuts for coating
Instructions
- Soften the cream cheese by removing it from the fridge about 30 minutes ahead or microwave in 10-second bursts until just soft but not melted.
- Grate the sharp cheddar cheese finely.
- In a mixing bowl, combine the softened cream cheese, shredded cheddar, garlic powder, and chopped chives. Mix with a hand mixer on low speed until smooth and creamy but still firm, or stir vigorously with a spoon until well combined.
- Lay out plastic wrap or parchment paper. Scoop the cheese mixture onto the center and shape it into a ball using the wrap.
- Spread chopped pecans or walnuts on a plate. Unwrap the cheese ball and roll it gently in the nuts until evenly coated, pressing lightly so nuts stick well.
- Wrap the coated cheese ball tightly in plastic wrap and refrigerate for at least 1 hour to firm up and meld flavors.
- Remove from fridge 10 minutes before serving to soften slightly. Serve with crackers, sliced baguette, or fresh veggies.
Notes
Properly soften cream cheese to avoid lumps. Do not overmix to keep the right texture. Toast nuts lightly for extra flavor or use raw nuts if short on time. Chill at least 1 hour; longer chilling improves flavor. If too soft after chilling, freeze for 10 minutes to firm up. Can roll in fresh herbs or bacon bits as nut-free alternatives.
Nutrition
- Serving Size: About 2 tablespoons
- Calories: 120
- Fat: 10
- Carbohydrates: 1
- Protein: 5
Keywords: cheese ball, creamy cheese ball, easy appetizer, party snack, cream cheese recipe, quick cheese ball, crowd-pleaser


