Love this? Save it for later!
Share the inspiration with your friends
“I wasn’t expecting to become a dessert hero that Saturday afternoon,” I confessed to my friend Emily as we scrambled in my kitchen, the sound of popping balloons and distant laughter from the backyard party drifting in. It was graduation day for my nephew, and the usual dessert order got canceled last minute. Honestly, I had zero time to bake anything complicated—plus, the oven decided to take a nap. So, I grabbed the Oreo cookies from the pantry, some cream cheese, and a few pantry staples, thinking, “Well, let’s see what happens.”
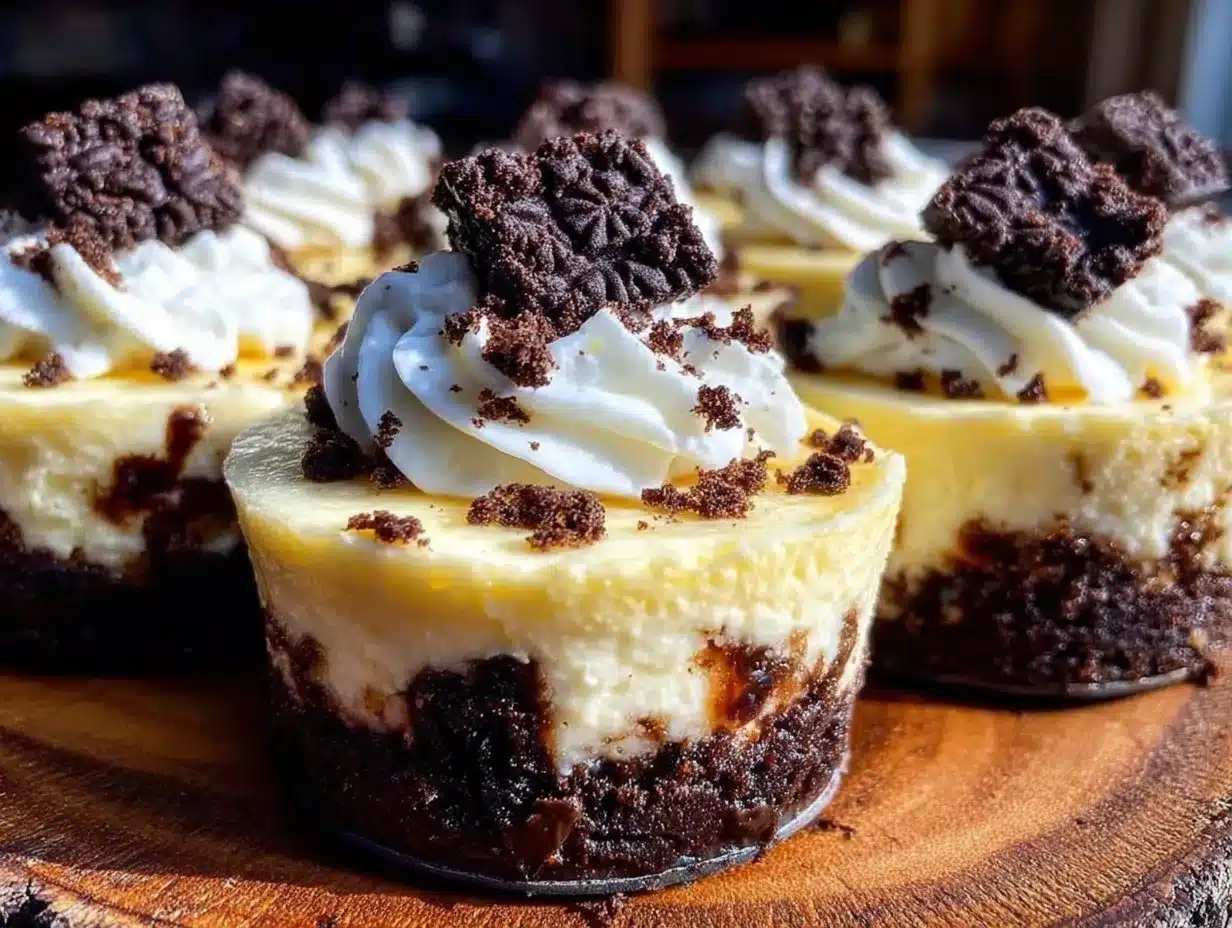
The sizzle was missing, but the magic wasn’t. I layered smooth, tangy cream cheese filling with crunchy Oreo crumble in little cups, kept them cool, and—surprise!—the crowd adored it. You know that feeling when a simple, no-fuss recipe pulls you out of a pinch and ends up stealing the show? That’s exactly what these Creamy No-Bake Graduation Cheesecake Cups with Oreo Crumble did. And believe me, the cracked mixing bowl, the spilled crumbs on the floor, and the frantic timer resets all added to the charm of that day.
Maybe you’ve been there, too—needing a quick, crowd-pleasing dessert that looks fancy but comes together in minutes. This recipe stuck with me not just because it saved the party, but because it tastes like pure indulgence without the stress. So, if you’re looking for a simple yet impressive treat for your next celebration (or just a sweet escape), let me tell you why these cheesecake cups might just become your go-to.
Why You’ll Love This Recipe
After testing and tweaking this recipe through several celebrations, I can confidently say it’s a winner every time. Here’s why this creamy no-bake cheesecake with Oreo crumble deserves a spot in your dessert rotation:
- Quick & Easy: Whips up in under 20 minutes—perfect for last-minute party plans or busy weeknights.
- Simple Ingredients: No fancy or hard-to-find items; just basics you probably already have on hand.
- Perfect for Parties: Individual servings make it ideal for graduations, birthdays, or family gatherings.
- Crowd-Pleaser: Loved by kids and adults alike—everyone can’t get enough of that Oreo crunch paired with creamy filling.
- Unbelievably Delicious: The smooth, tangy cheesecake contrasts beautifully with the crisp, chocolatey Oreo crumble for a texture and flavor combo that’s pure comfort.
What sets this recipe apart? It’s not just another no-bake cheesecake. The Oreo crumble adds a nostalgic twist that feels both familiar and decadent. Plus, the cream cheese filling isn’t overly sweet, making it a balanced treat that doesn’t leave you feeling weighed down. Honestly, it’s the kind of dessert that makes you close your eyes after the first bite and smile—comfort food that’s effortless and fuss-free.
What Ingredients You Will Need
This recipe uses simple, wholesome ingredients to deliver bold flavor and satisfying texture without the fuss. Most are pantry staples, and you can easily swap a few to fit your preferences or dietary needs.
- For the Cheesecake Filling:
- 8 oz (225 g) cream cheese, softened (I like using Philadelphia for its smooth texture)
- 1/2 cup (120 ml) heavy cream, cold (for that perfect whipped cream consistency)
- 1/3 cup (67 g) granulated sugar
- 1 tsp vanilla extract (pure vanilla makes a difference!)
- 1 tbsp lemon juice (adds a subtle tang and brightness)
- For the Oreo Crumble:
- 15 Oreo cookies, crushed (leave some chunks for texture!)
- 2 tbsp unsalted butter, melted (helps bind the crumble)
- Optional Toppings:
- Fresh berries or mint leaves for garnish
- Chocolate shavings or drizzle
Notably, if you want a dairy-free version, swapping cream cheese for a plant-based alternative and using coconut cream works surprisingly well. For gluten-free, simply use gluten-free chocolate sandwich cookies instead of Oreos. And if it’s summer and you want a fruity twist, fresh berries on top add a lovely seasonal freshness.
Equipment Needed
- Mixing bowls (one large for the filling, one for crushing Oreos)
- Electric hand mixer or stand mixer (makes whipping cream and cream cheese smooth and easy)
- Food processor or rolling pin (to crush the Oreos; I find a rolling pin inside a ziplock bag works just fine)
- Measuring cups and spoons
- Spatula (flexible is best for scraping bowls clean)
- Serving cups or small jars (I love using clear cups so you can see the layers!)
If you don’t have a stand mixer, a sturdy whisk and some elbow grease will do in a pinch. For the Oreo crushing, a food processor is speedy, but the manual method is satisfying too—just watch out for flying cookie bits!
Preparation Method
- Prepare the Oreo Crumble: Place 15 Oreo cookies in a ziplock bag, seal it tightly, and crush with a rolling pin until you have a mix of fine crumbs and small chunks. Transfer to a bowl and stir in 2 tablespoons of melted unsalted butter until evenly coated. Set aside. (About 5 minutes)
- Whip the Cream Cheese: In a large mixing bowl, beat 8 oz softened cream cheese with 1/3 cup granulated sugar, 1 teaspoon vanilla extract, and 1 tablespoon lemon juice until smooth and creamy. Use an electric mixer for best results. (3-4 minutes)
- Whip the Heavy Cream: In a separate chilled bowl, whip 1/2 cup cold heavy cream until stiff peaks form. This usually takes about 3-5 minutes with an electric mixer. Be careful not to overwhip, or it will turn grainy.
- Combine Filling: Gently fold the whipped cream into the cream cheese mixture using a spatula. Fold carefully to keep it light and airy—not a vigorous mix. The filling should have a fluffy, smooth texture. (2 minutes)
- Assemble Cups: Spoon a layer of Oreo crumble into the bottom of each serving cup. Add a generous dollop of cheesecake filling on top, smoothing the surface. Repeat layers if your cups are tall enough, finishing with a crumble layer or a few cookie chunks on top. (10 minutes)
- Chill: Refrigerate the cups for at least 2 hours to set properly. Overnight chilling is even better for flavors to meld. (2+ hours)
- Serve: Just before serving, garnish with fresh berries, mint leaves, or chocolate shavings if desired. Enjoy the creamy, crunchy goodness!
Quick tip: If your cream cheese isn’t soft enough, pop it in the microwave for 10 seconds—don’t skip this or you’ll end up with lumps! Also, folding the whipped cream gently is key; I learned the hard way that too much mixing deflates the airiness. You’ll know you’ve got it right when the filling looks light and fluffy, almost cloud-like.
Cooking Tips & Techniques
Honestly, no-bake desserts can sometimes feel tricky, but this recipe is pretty forgiving—here’s what I’ve learned making these cheesecake cups over the years:
- Softening Cream Cheese: Always soften cream cheese to room temperature before mixing. Cold cream cheese leads to lumps and a gritty texture. If you forget, a quick zap in the microwave (10-15 seconds) helps.
- Whipping Cream: Chill your mixing bowl and beaters beforehand to get that perfect stiff peak. If the cream isn’t cold enough, it won’t whip properly.
- Folding Technique: Use a spatula to gently fold whipped cream into the cream cheese base rather than stirring vigorously. You want to keep as much air as possible for a light texture.
- Crust Texture: Mix melted butter thoroughly with the crushed Oreos to help the crumbs stick together and provide a nice base. If it feels too dry, add a touch more melted butter.
- Layering: Don’t overload the cups. Balanced layering of crumble and filling creates the best bite experience.
- Chilling Time: Don’t rush the chill. The longer it sits, the better the flavors marry and the filling firms up into that perfect creamy consistency.
Once, I accidentally overwhipped the cream into butter (yes, it happens!)—so keep an eye on it and stop as soon as stiff peaks appear. Also, multitasking by prepping the crumble while the cream cheese softens saves time and kitchen chaos.
Variations & Adaptations
This recipe is pretty flexible, so here are a few ways I’ve made it my own or adapted it for different situations:
- Fruit Twist: Swap Oreo crumble for graham cracker crumbs and swirl in fresh strawberry or blueberry puree into the cream cheese filling for a fruity surprise.
- Peanut Butter Oreo Cups: Add 1/4 cup creamy peanut butter to the cream cheese mix for a rich, nutty flavor that pairs amazingly with the chocolate crumbs.
- Vegan Version: Use vegan cream cheese and coconut cream whipped to stiff peaks. Replace Oreos with vegan-certified sandwich cookies for a dairy-free treat.
- Mini Cheesecake Pops: Spoon the filling and crumble into silicone molds, freeze, then pop out for bite-sized frozen treats—perfect for summer parties.
- Chocolate Lovers: Mix a tablespoon of cocoa powder into the filling for a chocolaty cheesecake base.
One time, I made a layered dessert using the Oreo crumble base with a caramel drizzle between layers—my guests went nuts over it! Feel free to get creative with toppings and mix-ins; this recipe is a great canvas.
Serving & Storage Suggestions
These cheesecake cups are best served chilled—take them out of the fridge about 10 minutes before eating to soften slightly for that melt-in-your-mouth feel. Presentation-wise, clear glass cups or mason jars really show off the layers and make them party-ready.
Pair these with a fresh fruit salad or a light sparkling lemonade for a balanced spread. At one graduation party, we served these alongside mini crispy garlic chicken bites, and the combo was a hit.
Store leftovers in an airtight container in the refrigerator for up to 3 days. They hold up well, but the crumble may soften slightly over time—still delicious but best fresh. If you want to prep ahead, you can assemble and freeze the cups, then thaw in the fridge overnight before serving.
Reheating isn’t recommended, but if you want a softer texture, let them sit at room temperature for 15 minutes. Flavors tend to deepen after chilling—honestly, they taste better the next day!
Nutritional Information & Benefits
Each serving of these creamy no-bake cheesecake cups (about 1 small cup) contains roughly:
| Calories | Fat | Carbohydrates | Protein |
|---|---|---|---|
| 320 kcal | 22 g | 28 g | 5 g |
The cream cheese provides a decent amount of protein and calcium, while the Oreo crumble adds that indulgent chocolate flavor. Using heavy cream contributes to the richness, but feel free to swap with lighter cream options if you want to cut calories.
This dessert is gluten-friendly if made with gluten-free cookies, and can be adapted for dairy-free diets as mentioned earlier. It’s definitely a treat, but the portion control in individual cups helps keep indulgence in check.
Conclusion
So here you have it—Creamy No-Bake Graduation Cheesecake Cups with Oreo Crumble that come together in a flash and taste like a dreamy celebration in each bite. You can easily tailor these cups to your taste or dietary needs, making them a versatile recipe to have in your back pocket.
I keep making these because they remind me of that scrappy, joyful party when I saved the day with what felt like dessert magic. Plus, they reliably bring smiles and second servings, which honestly is the best compliment in the kitchen. Give this recipe a try and tweak it as you like—then, let me know how your crowd reacts!
Feel free to leave a comment sharing your favorite twist or any questions, and if you loved this, sharing it with fellow dessert lovers would make my day.
Frequently Asked Questions
Can I make these cheesecake cups ahead of time?
Absolutely! You can assemble them up to 24 hours in advance and keep them refrigerated until serving. Just add any fresh toppings right before serving.
What can I use instead of Oreos for the crumble?
Graham crackers, digestive biscuits, or gluten-free sandwich cookies all work well as substitutes.
How do I soften cream cheese quickly?
Cut it into small cubes and let it sit at room temperature for 20-30 minutes, or microwave for 10-15 seconds—just don’t overheat.
Can I freeze these cheesecake cups?
Yes, freeze assembled cups in airtight containers and thaw overnight in the fridge before serving.
Is there a lighter version of this recipe?
Try using light cream cheese and whipping cream or substitute heavy cream with Greek yogurt for a tangier, lower-fat filling.
Pin This Recipe!
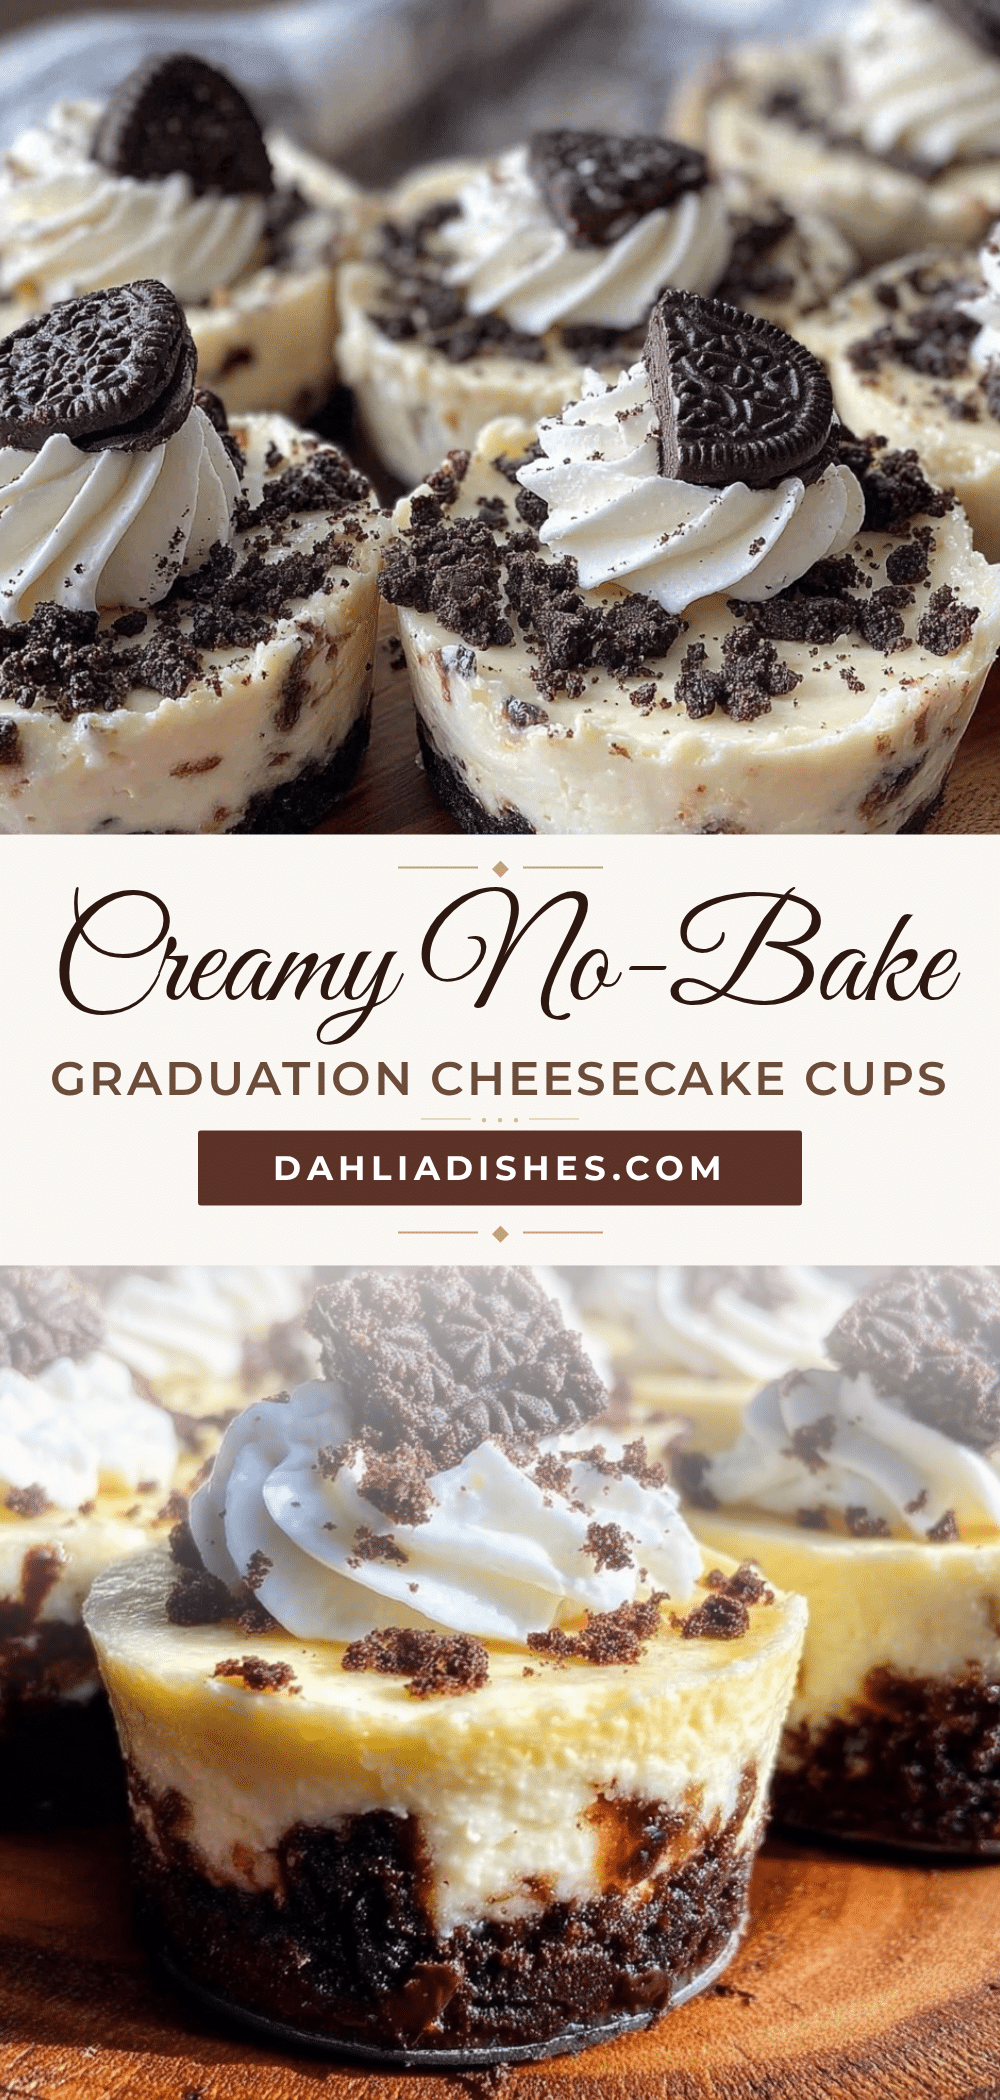
Creamy No-Bake Graduation Cheesecake Cups with Oreo Crumble
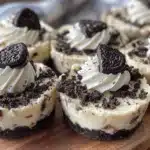
A quick and easy no-bake cheesecake dessert layered with creamy filling and crunchy Oreo crumble, perfect for parties and celebrations.
- Prep Time: 15 minutes
- Cook Time: 0 minutes
- Total Time: 2 hours 15 minutes
- Yield: 8 servings 1x
- Category: Dessert
- Cuisine: American
Ingredients
- 8 oz cream cheese, softened
- 1/2 cup heavy cream, cold
- 1/3 cup granulated sugar
- 1 tsp vanilla extract
- 1 tbsp lemon juice
- 15 Oreo cookies, crushed
- 2 tbsp unsalted butter, melted
- Optional toppings: fresh berries, mint leaves, chocolate shavings or drizzle
Instructions
- Place 15 Oreo cookies in a ziplock bag, seal it tightly, and crush with a rolling pin until you have a mix of fine crumbs and small chunks. Transfer to a bowl and stir in 2 tablespoons of melted unsalted butter until evenly coated. Set aside.
- In a large mixing bowl, beat 8 oz softened cream cheese with 1/3 cup granulated sugar, 1 teaspoon vanilla extract, and 1 tablespoon lemon juice until smooth and creamy using an electric mixer.
- In a separate chilled bowl, whip 1/2 cup cold heavy cream until stiff peaks form, about 3-5 minutes.
- Gently fold the whipped cream into the cream cheese mixture using a spatula to keep it light and airy.
- Spoon a layer of Oreo crumble into the bottom of each serving cup. Add a generous dollop of cheesecake filling on top, smoothing the surface. Repeat layers if cups are tall enough, finishing with a crumble layer or a few cookie chunks on top.
- Refrigerate the cups for at least 2 hours to set properly; overnight chilling is recommended for best flavor.
- Just before serving, garnish with fresh berries, mint leaves, or chocolate shavings if desired.
Notes
Softening cream cheese to room temperature is essential to avoid lumps. Chill mixing bowl and beaters before whipping cream for best results. Fold whipped cream gently into cream cheese mixture to keep it airy. Crushed Oreos mixed with melted butter help bind the crumble base. Chill at least 2 hours or overnight for best flavor and texture. Can be made dairy-free or gluten-free with substitutions. Assemble up to 24 hours ahead and refrigerate. Freeze assembled cups for longer storage.
Nutrition
- Serving Size: 1 small cup
- Calories: 320
- Sugar: 20
- Sodium: 210
- Fat: 22
- Saturated Fat: 13
- Carbohydrates: 28
- Fiber: 1
- Protein: 5
Keywords: no-bake cheesecake, Oreo crumble, party dessert, easy cheesecake cups, graduation dessert, quick dessert