Love this? Save it for later!
Share the inspiration with your friends
This was supposed to be a simple cornbread to go with the chili I was making for a big game-day gathering. I had everything measured out, my favorite cast-iron skillet was preheating in the oven, and I felt pretty good about myself for being so organized. Then my phone rang—my sister, needing to vent about her day—and I got completely distracted. I grabbed the wrong can from the pantry, tossed in a whole cup of sour cream instead of the buttermilk I’d set aside, and somehow dumped in a handful of pickled jalapeños I’d been snacking on. The batter looked way too wet, and I honestly thought about just scraping it into the trash. But I was out of time and out of ingredients, so I poured it into the skillet anyway, crossed my fingers, and hoped for the best.
What came out of the oven was nothing like the plan—and better. The top was golden and bubbly, the edges were crispy, and the inside was this creamy, almost custard-like texture that soaked up the chili juices perfectly. My guests devoured it, asking for the recipe before they even finished their first bowl. I mean, I stood there with my spatula, half-laughing, half-shocked. I’d accidentally created something way more memorable than the cornbread I’d intended. Maybe you’ve been there—you know that feeling when a kitchen mistake turns into your most requested dish?
That happy accident is how this Perfect Cheesy Corn Casserole with Jalapeño was born. It’s got that sweet corn flavor, a rich and creamy center, little pops of heat from the jalapeños, and plenty of melted cheese on top. I’ve made it for every gathering since—Thanksgiving, potlucks, casual Sunday dinners—and it always steals the show. Honestly, I’m a little embarrassed to admit how many times I’ve “accidentally” grabbed the wrong ingredients on purpose just to recreate it.
Why You’ll Love This Recipe
Let me tell you why this casserole has earned a permanent spot in my hosting rotation. It’s not just another side dish—it’s the one people hover around, sneaking extra scoops when they think no one’s looking.
- Incredibly Easy: This comes together in about 10 minutes of active prep. No sautéing, no complicated steps, no fuss. Just stir, pour, bake, and wow your guests.
- Simple Ingredients: You probably have most of these in your pantry and fridge right now. Canned corn, sour cream, butter, cheese, and jalapeños—that’s the backbone of this dish.
- Perfect for Hosting: This casserole is a dream for dinner parties and potlucks. It feeds a crowd, pairs with almost anything, and stays warm for a good while on the table.
- Always a Crowd-Pleaser: I’ve served this to kids, picky eaters, and serious foodies. The combination of sweet corn, creamy texture, and mild heat wins everyone over.
- Unbelievably Delicious: The contrast between the crispy, cheesy top and the soft, pudding-like interior is next-level comfort food. It’s the kind of dish that makes people close their eyes after the first bite.
What makes this recipe different from the dozens of corn casseroles out there? It’s the texture. Most versions are either too dry and cakey or too loose and soupy. This one hits that sweet spot—creamy but sliceable, rich but not heavy. The secret is using a mix of creamed corn and whole kernel corn, plus just the right amount of sour cream and eggs. And those jalapeños? They’re not just for heat. They add a bright, tangy note that cuts through all that richness perfectly.
This isn’t just good side dish. It’s the kind that makes you look like a rockstar host with almost zero effort. Perfect for impressing guests without stress, or turning a simple weeknight meal into something memorable.
Ingredients Needed
This recipe uses simple, humble ingredients to create something truly special. Most are pantry staples, but I’ve included notes on what to look for and how to swap things out if needed.
For the Casserole Base
- 1 can (15 oz) whole kernel corn, drained — I prefer the sweet yellow corn for this. (Adds nice pops of texture)
- 1 can (15 oz) creamed corn — This is non-negotiable for that creamy texture. I like the Del Monte brand, but any works.
- 1 cup sour cream — Full-fat gives the best richness, but light sour cream works too. (Just don’t use fat-free—it gets watery)
- 1/2 cup unsalted butter, melted — Salted butter is fine, just reduce the added salt later. Let it cool slightly so it doesn’t cook the eggs.
- 2 large eggs, lightly beaten — Room temperature eggs blend in more smoothly. Set them out 15 minutes before starting.
- 1 box (8.5 oz) corn muffin mix — I use Jiffy because it’s sweet and affordable. (Gluten-free versions work well too)
- 1 cup shredded cheddar cheese — Sharp cheddar adds the most flavor. Shred it yourself from a block—it melts so much better than pre-shredded.
- 1/4 cup pickled jalapeños, chopped — These are milder than fresh and add that perfect tangy heat. (Drain them well so they don’t water down the batter)
- 1/2 teaspoon salt — Go easy if using salted butter or salty cheese.
- 1/4 teaspoon black pepper — Just a touch to balance the sweetness.
For the Topping
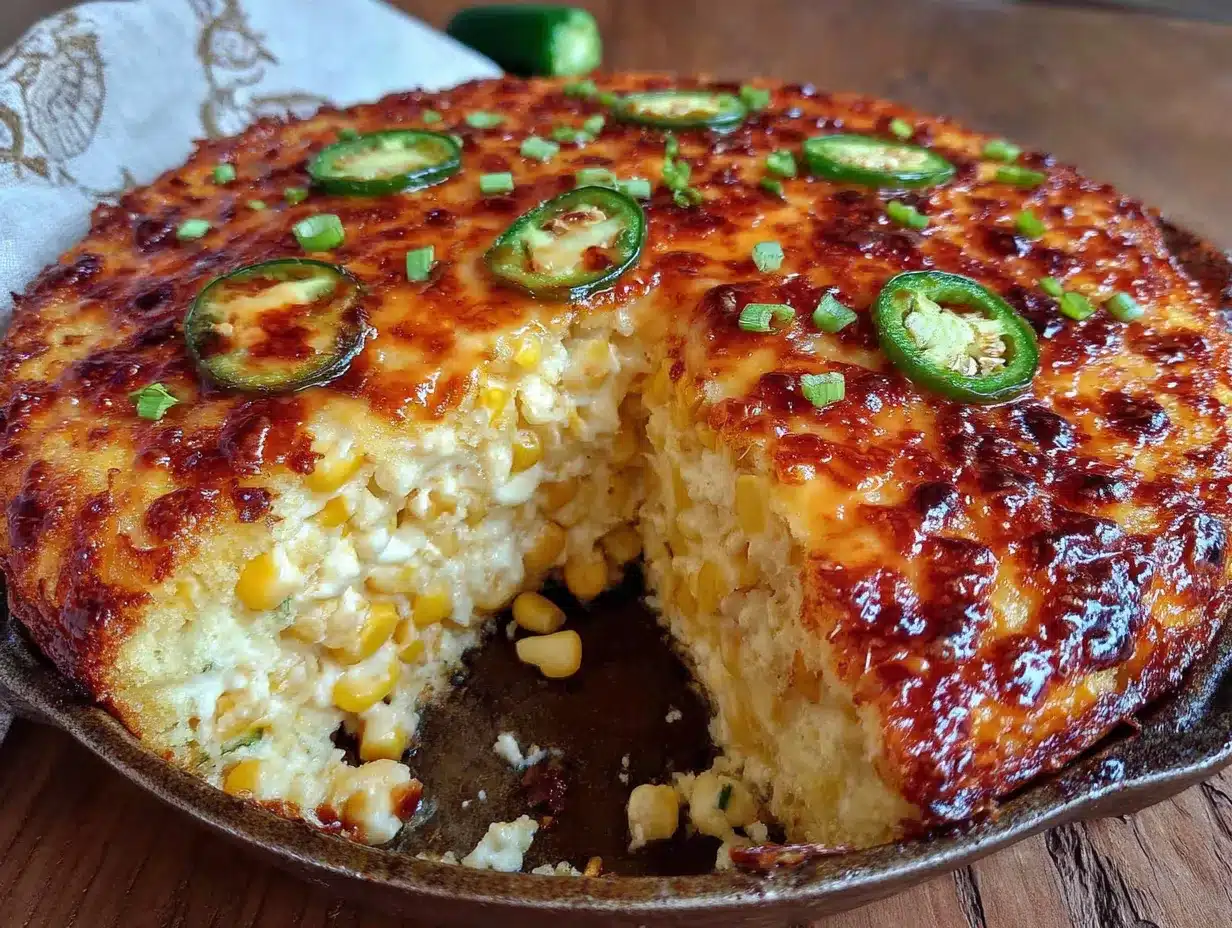
- 1/2 cup shredded cheddar cheese — For that golden, bubbly crust. (Try mixing in some Monterey Jack for extra meltiness)
- Additional pickled jalapeño slices — Arrange a few on top before baking for a pretty presentation. (Optional, but recommended for the visual)
Ingredient Selection Tips: For the creamed corn, look for cans without added sugar or starch if you want to control the sweetness. If you’re using fresh jalapeños instead of pickled, roast them first to mellow the heat. And please—please—shred your own cheese. The pre-shredded stuff has anti-caking agents that prevent it from melting into that gooey, cohesive layer we’re after.
Substitution Guidance: Need this gluten-free? Use a gluten-free corn muffin mix. Dairy-free? Swap the sour cream for a thick coconut yogurt, use vegan butter, and pick a dairy-free melting cheese. Want less heat? Leave out the jalapeños entirely, or use just a tablespoon for a whisper of warmth.
Equipment Needed
You don’t need a fancy kitchen to pull this off. Here’s what you’ll need:
- 9×13-inch baking dish — Glass or ceramic works best. I use a Pyrex dish and it bakes evenly every time. (A metal pan will work, but keep an eye on the edges so they don’t over-brown)
- Large mixing bowl — Any big bowl will do. I’ve used my grandmother’s old ceramic one for years.
- Whisk or wooden spoon — A whisk helps break up any lumps in the muffin mix, but a sturdy spoon works just fine.
- Measuring cups and spoons — For accuracy, especially with the corn muffin mix and butter.
- Can opener — Obvious, but worth mentioning so you’re not digging through drawers mid-recipe.
- Cheese grater — If you’re shredding your own block of cheese (which you should).
Budget-Friendly Options: No 9×13 dish? Use a 10-inch cast-iron skillet for a rustic look, or divide the batter into two 8×8 pans (just reduce the baking time by about 10 minutes). No whisk? Two forks held together work in a pinch.
Personal Experience: I once tried making this in a disposable aluminum pan for a camping trip. It worked, but the edges got a little too dark. Stick with glass or ceramic for the most even bake.
Preparation Method
Alright, let’s get cooking. This is so simple, you’ll barely break a sweat.
- Preheat your oven to 350°F (175°C). Spray your 9×13-inch baking dish with non-stick cooking spray or grease it lightly with butter. Set it aside.
- In your large mixing bowl, combine the wet ingredients. Add the drained whole kernel corn, the entire can of creamed corn, the sour cream, and the melted butter. Stir until everything is well combined. It should look pale yellow and a little lumpy—that’s fine.
- Add the beaten eggs and stir again. Make sure the melted butter isn’t too hot, or you’ll end up with scrambled eggs. (Learn from my mistake on that one.)
- Now add the dry ingredients. Sprinkle in the corn muffin mix, salt, and pepper. Stir gently until just combined. A few small lumps are okay—over-mixing will make the casserole tough.
- Fold in the cheese and jalapeños. Add the 1 cup of shredded cheddar and the chopped pickled jalapeños. Fold them in with a spatula until evenly distributed. The batter will be thick and slightly chunky—that’s exactly what you want.
- Pour the batter into your prepared dish. Spread it into an even layer with your spatula. It won’t look super smooth, and that’s perfect.
- Add the topping. Sprinkle the remaining 1/2 cup of shredded cheddar evenly over the top. Arrange a few extra jalapeño slices on top if you’re feeling fancy. (They make for a gorgeous presentation.)
- Bake for 45-55 minutes. The casserole is done when the top is golden brown and the edges are bubbly. A knife inserted into the center should come out clean, or with just a few moist crumbs. The center should be set but still slightly jiggly—it will firm up as it cools.
- Let it rest for 10-15 minutes before serving. This is crucial. The casserole needs time to set so it slices cleanly. If you cut into it right away, you’ll get a soupy mess. (Trust me, I’ve been impatient plenty of times.)
Sensory Cues: At the 30-minute mark, your kitchen will smell like buttery corn and toasted cheese. The top should be starting to brown. At 45 minutes, give the dish a gentle shake—the center should wobble just a little, like a firm custard. The edges will be pulling away from the sides of the dish.
Personal Tip for Efficiency: While the casserole bakes, I like to prep the rest of my meal. It pairs beautifully with chili, pulled pork, or even a simple green salad. The 45-minute bake time is perfect for getting everything else ready.
Cooking Tips & Techniques
Over the years, I’ve learned a few things the hard way so you don’t have to. Here’s what I wish someone had told me the first time.
Don’t over-mix the batter. I know it’s tempting to keep stirring until it’s perfectly smooth, but that activates the gluten in the corn muffin mix and makes the casserole dense and rubbery. Stir until the dry ingredients are just moistened—a few lumps are your friend.
Let the melted butter cool. I once poured hot butter directly into the eggs and ended up with little flecks of cooked egg white throughout the batter. Not a disaster, but not pretty either. Let the butter sit for a couple of minutes after melting.
Use room temperature ingredients. Cold eggs and cold sour cream can make the batter seize up and bake unevenly. Set everything out on the counter for 15-20 minutes before you start. It makes a real difference in the final texture.
Shred your own cheese. I cannot stress this enough. Pre-shredded cheese is coated with cellulose and starch to prevent clumping, which also prevents it from melting into that glorious, stretchy layer we all crave. Spend the two minutes shredding a block of cheddar—your casserole will thank you.
Watch the baking time. Every oven runs a little differently. Mine is a bit hot on the bottom, so I sometimes slide a baking sheet on the rack below to diffuse the heat. Start checking at 45 minutes. The top should be deep golden brown, and the edges should be bubbling.
My biggest failure: I once forgot to drain the whole kernel corn. The casserole came out watery and never set properly. It still tasted good, but it was more like corn soup than a sliceable casserole. Drain that corn well, folks.
Variations & Adaptations
This recipe is wonderfully flexible. Here are a few ways I’ve adapted it over the years.
Spicy Southwest Version
Add 1/2 cup of diced green chiles and 1/4 teaspoon of cumin to the batter. Swap the cheddar for pepper jack cheese. The result is a smoky, spicy casserole that’s incredible with tacos or fajitas.
Bacon & Chive Version
Cook 6 strips of bacon until crispy, crumble them, and fold into the batter along with 1/4 cup of fresh chopped chives. The salty, smoky bacon pairs beautifully with the sweet corn. (This version disappears fastest at parties.)
Vegetable-Packed Version
Add 1 cup of finely chopped bell peppers (any color) and 1/2 cup of diced zucchini. Sauté them briefly in a pan to remove excess moisture before folding them in. This adds color, nutrients, and a nice subtle crunch.
Dairy-Free Adaptation
Use a thick coconut yogurt in place of sour cream, vegan butter, and your favorite dairy-free melting cheese. I’ve tested this with Violife cheddar shreds and it worked beautifully—just keep an eye on the baking time as dairy-free cheeses can brown faster.
Muffin Tin Version
For individual servings, spoon the batter into a greased muffin tin (about 3/4 full). Bake at 350°F for 18-22 minutes. These are perfect for brunch buffets or meal prep—they reheat beautifully.
Personal Variation: My favorite twist is adding a handful of fresh or frozen corn kernels (about 1/2 cup) along with the canned corn. It adds an extra pop of sweetness and texture that makes the dish feel even more special.
Serving & Storage Suggestions
This casserole is best served warm, right after that 10-minute rest. The cheese is still stretchy, the center is creamy, and the edges are perfectly crisp. It’s a beautiful side dish for so many mains.
What to serve alongside: This casserole is a natural partner for chili, pulled pork, barbecue chicken, or grilled sausages. It also works beautifully with a simple roasted chicken or a big green salad with tangy vinaigrette. For holiday tables, it sits happily next to ham, turkey, or roast beef.
Presentation tips for hosting: Sprinkle a few fresh jalapeño slices and a pinch of smoked paprika on top before serving. Serve it straight from the baking dish for a casual, family-style feel, or use a large spoon to portion it onto individual plates for a more polished look.
Storage Instructions: Cover any leftovers tightly with foil or plastic wrap and refrigerate for up to 4 days. The flavors actually meld and deepen overnight—I sometimes think it tastes even better the next day.
Reheating Methods: The best way to reheat is in a 350°F oven for about 15 minutes, covered with foil to prevent the top from burning. You can also microwave individual portions for 45-60 seconds, though the top won’t be as crispy. For a quick fix, I’ve even reheated slices in a toaster oven—works great.
Freezer Instructions: This casserole freezes beautifully. Bake it completely, let it cool, then wrap the entire dish tightly in plastic wrap and foil. Freeze for up to 3 months. Thaw overnight in the fridge, then reheat in a 350°F oven until warmed through (about 25-30 minutes).
Flavor Development Note: If you’re making this for a party, I actually recommend making it a day ahead. The corn and jalapeño flavors meld together overnight, and the texture becomes even creamier. Just reheat before serving.
Nutritional Information & Benefits
Here’s an approximate nutritional breakdown per serving (based on 12 servings):
- Calories: 285
- Fat: 17g
- Saturated Fat: 10g
- Cholesterol: 75mg
- Sodium: 520mg
- Carbohydrates: 27g
- Fiber: 2g
- Sugar: 7g
- Protein: 8g
Health Benefits: Corn is a good source of fiber, which supports digestion, and contains antioxidants like lutein and zeaxanthin that are great for eye health. Jalapeños add a boost of vitamin C and capsaicin, which may help boost metabolism. The eggs and cheese provide protein and calcium.
Dietary Considerations: This recipe can be made gluten-free with a simple swap of the corn muffin mix. It’s naturally nut-free and can be adapted to be vegetarian. For a lower-fat version, use light sour cream and reduced-fat cheese, though the texture will be slightly less creamy.
Potential Allergens: This recipe contains dairy (butter, sour cream, cheese, eggs) and gluten (corn muffin mix). Please adjust accordingly for your guests’ needs.
My Personal Wellness Perspective: I love that this dish feels indulgent but uses real, whole-food ingredients. It’s the kind of comfort food that nourishes both body and soul—especially when shared with people you love.
Conclusion
This Perfect Cheesy Corn Casserole with Jalapeño started as a complete accident, but it’s become one of my most requested recipes. It’s the perfect example of how a little kitchen chaos can lead to something truly wonderful. The creamy texture, the sweet corn, the melty cheese, and that subtle kick of jalapeño—it all comes together in a dish that’s both comforting and impressive.
I hope you give this recipe a try, whether for your next dinner party, a holiday gathering, or just a cozy night in. Don’t be afraid to make it your own—add more jalapeños if you like heat, throw in some bacon, or swap the cheese for something new. That’s the beauty of cooking, you know? The best recipes are the ones that evolve with you.
I’d love to hear how it turns out! Drop a comment below and let me know if your guests asked for seconds. And if you made any fun variations, share those too—I’m always looking for new ideas. Happy cooking, friends!
Frequently Asked Questions
Can I make this corn casserole ahead of time?
Absolutely! You can assemble the casserole completely (minus the topping) up to 24 hours in advance. Cover and refrigerate, then add the cheese topping just before baking. You may need to add 5-10 minutes to the baking time since you’re starting from cold.
Can I use fresh corn instead of canned?
Yes, you can! You’ll need about 3 cups of fresh corn kernels (from about 4-5 ears of corn). Since fresh corn has less moisture than canned, you might want to add an extra tablespoon of sour cream to keep the texture creamy. I’ve done this in summer when corn is at its peak—it’s fantastic.
How do I make this less spicy?
Simply leave out the jalapeños entirely, or use just 1 tablespoon of finely chopped pickled jalapeños for a very mild hint of flavor without the heat. You can also substitute diced green bell peppers for a similar crunch with zero spice.
Why did my casserole turn out watery?
This usually happens for one of two reasons: either the whole kernel corn wasn’t drained well enough, or the casserole wasn’t baked long enough. Make sure to drain your corn thoroughly, and always let the casserole rest for 10-15 minutes after baking so it can set properly.
Can I double this recipe for a larger crowd?
Definitely! Double all ingredients and bake in a larger dish (like a 11×15-inch pan) or two 9×13 dishes. The baking time will increase slightly—start checking at 55 minutes. This recipe is perfect for potlucks and big family gatherings.
Pin This Recipe!
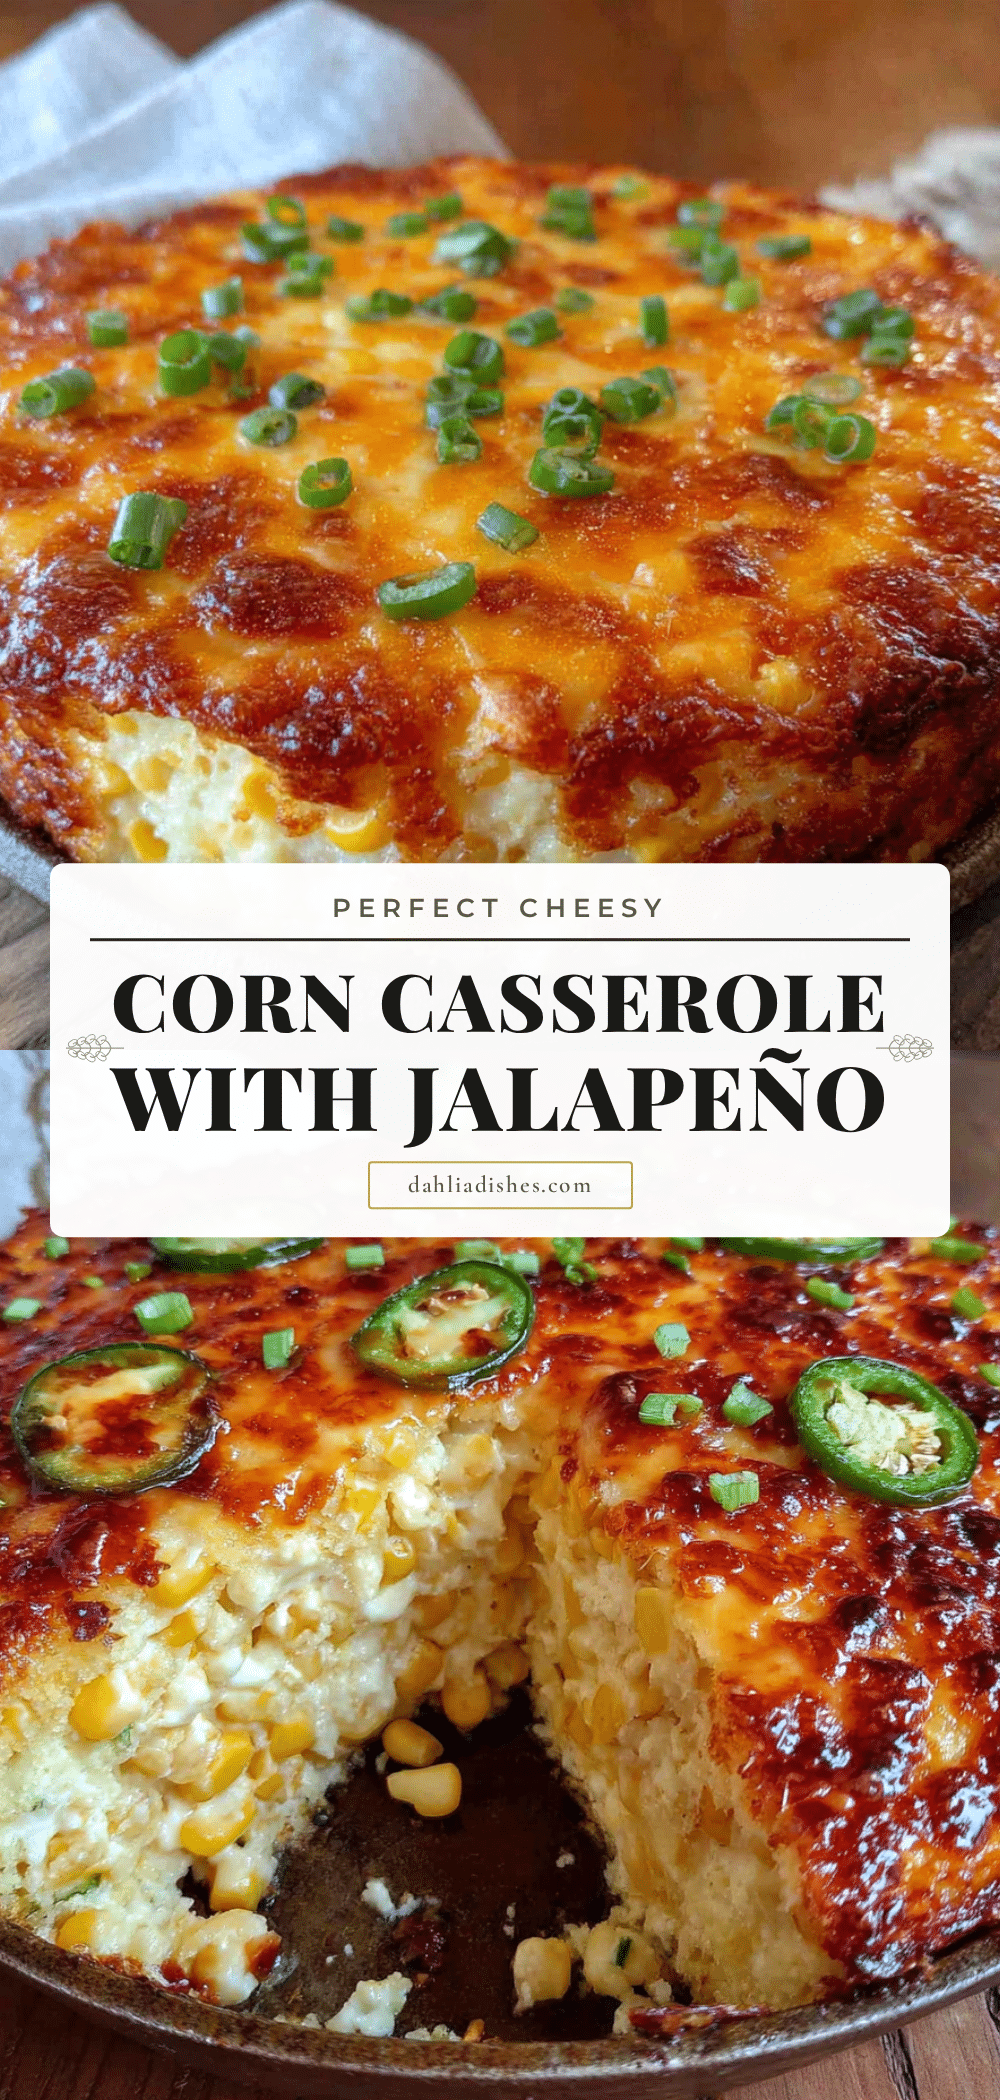
Perfect Cheesy Corn Casserole with Jalapeño

A creamy, cheesy corn casserole with a kick of jalapeño, born from a happy kitchen accident. It’s the perfect side dish for game days, potlucks, or holiday dinners.
- Prep Time: 10 minutes
- Cook Time: 50 minutes
- Total Time: 1 hour
- Yield: 12 servings 1x
- Category: Side Dish
- Cuisine: American
Ingredients
- 1 can (15 oz) whole kernel corn, drained
- 1 can (15 oz) creamed corn
- 1 cup sour cream
- 1/2 cup unsalted butter, melted
- 2 large eggs, lightly beaten
- 1 box (8.5 oz) corn muffin mix (e.g., Jiffy)
- 1 cup shredded cheddar cheese
- 1/4 cup pickled jalapeños, chopped
- 1/2 teaspoon salt
- 1/4 teaspoon black pepper
- 1/2 cup shredded cheddar cheese (for topping)
- Additional pickled jalapeño slices (optional, for topping)
Instructions
- Preheat your oven to 350°F (175°C). Spray a 9×13-inch baking dish with non-stick cooking spray or grease lightly with butter.
- In a large mixing bowl, combine the drained whole kernel corn, creamed corn, sour cream, and melted butter. Stir until well combined.
- Add the beaten eggs and stir again. Ensure the melted butter is not too hot to avoid scrambling the eggs.
- Sprinkle in the corn muffin mix, salt, and pepper. Stir gently until just combined. A few small lumps are okay.
- Fold in 1 cup of shredded cheddar and the chopped pickled jalapeños until evenly distributed.
- Pour the batter into the prepared dish and spread into an even layer.
- Sprinkle the remaining 1/2 cup of shredded cheddar evenly over the top. Arrange extra jalapeño slices on top if desired.
- Bake for 45-55 minutes, until the top is golden brown and the edges are bubbly. A knife inserted into the center should come out clean or with a few moist crumbs.
- Let the casserole rest for 10-15 minutes before serving to allow it to set.
Notes
Don’t over-mix the batter to avoid a dense texture. Let melted butter cool before adding to eggs. Use room temperature ingredients for best results. Shred your own cheese for optimal melting. Drain the whole kernel corn well to prevent a watery casserole. Let the casserole rest before serving to set properly.
Nutrition
- Serving Size: 1 serving
- Calories: 285
- Sugar: 7
- Sodium: 520
- Fat: 17
- Saturated Fat: 10
- Carbohydrates: 27
- Fiber: 2
- Protein: 8
Keywords: corn casserole, cheesy corn casserole, jalapeño corn casserole, easy side dish, potluck recipe, game day food, comfort food