Love this? Save it for later!
Share the inspiration with your friends
This was supposed to be a batch of perfectly piped, intricately decorated sugar cookies for a school bake sale. I had the royal icing measured, the piping bags ready, and a vision of magazine-worthy cookies. Then my three-year-old woke up from his nap early, and my carefully laid plans went right out the window. He toddled into the kitchen, saw the rolling pin, and announced he wanted to help. I mean, how do you say no to a flour-covered face?
So I did what any exhausted parent does—I scrapped the fancy plan and grabbed his hand. Not to hold, but to trace. I pressed his little palm into the dough, cut around it, and threw it in the oven with zero expectations. What came out was lopsided, a little too thick on one side, and absolutely perfect. The kids at the bake sale went wild for them, and I spent the next hour explaining that yes, that was an actual handprint in the cookie.
Honestly, this recipe saved me that day. It turned a potential meltdown (mine, not his) into a core memory. These hand sugar cookies are the kind of thing you make when you need a win—when the kids are cranky, you’re out of patience, and you just need something fun to do together. Maybe you’ve been there, standing in a messy kitchen wondering why you thought baking with kids was a good idea. Trust me, this one makes it worth the flour on the floor.
Why You’ll Love This Recipe
Let’s be real—baking with kids is rarely as cute as the Instagram reels make it look. But this recipe? It actually works. I’ve tested it with my own kids, with a classroom of twenty hyper first-graders, and even with a group of adults who thought they were too cool for handprint cookies (they weren’t). Here’s why this one’s a keeper:
- Quick & Easy: From start to finish, you’re looking at about 30 minutes of active time. The dough comes together in one bowl, no electric mixer required.
- Simple Ingredients: You probably have everything in your pantry right now. Butter, sugar, flour, eggs, vanilla—no weird specialty items.
- Perfect for Weeknights: Need a quick activity after dinner? This is it. Minimal cleanup, maximum fun.
- Crowd-Pleaser: I’ve yet to meet a kid who doesn’t lose their mind over a cookie shaped like their own hand. It’s basically magic.
- Unbelievably Delicious: These aren’t just cute—they’re actually good. Soft, buttery, with that perfect sugar cookie crunch on the edges.
What makes this different from every other sugar cookie recipe out there? It’s the texture. I spent months tweaking the flour-to-butter ratio until the dough was sturdy enough to hold a handprint shape without puffing up into a blob. You get a cookie that keeps its shape, bakes evenly, and still tastes like something you’d actually want to eat, not just decorate.
There’s something about seeing your own handprint in cookie form that makes you smile. It’s comfort food and a keepsake all in one. Perfect for those evenings when you need a win, or for making a regular Tuesday feel a little special.
What Ingredients You Will Need
This recipe uses simple, pantry-friendly ingredients to create a dough that’s easy to work with and bakes up beautifully. No fancy stuff here—just the basics done right.
- Unsalted butter, softened: 1 cup (2 sticks, 226g). Make sure it’s truly at room temperature—soft enough that your finger leaves a dent but not melted. I prefer Land O’Lakes for consistent results.
- Granulated sugar: 1 cup (200g). Regular white sugar gives these cookies that classic sweet flavor and helps them spread just enough.
- Large egg: 1, at room temperature. Cold eggs can make the dough seize up, so let it sit out for 15 minutes first.
- Vanilla extract: 2 teaspoons. Pure vanilla makes a difference here. I use Nielsen-Massey, but any good quality extract works.
- All-purpose flour: 2 ½ cups (312g). Spoon and level your flour—don’t scoop directly from the bag or you’ll end up with dry dough.
- Baking powder: 1 teaspoon. This gives the cookies a little lift without making them puffy.
- Salt: ½ teaspoon. Don’t skip this—it balances the sweetness.
- For decorating: Royal icing or store-bought frosting, food coloring, sprinkles, candy eyes, and mini candy-coated chocolates for the turkey feathers and face.
If you’re using salted butter, just cut the added salt to ¼ teaspoon. For a dairy-free version, swap the butter for a high-quality vegan butter stick (I like Miyoko’s). The texture will be slightly different, but it still works beautifully.
When it comes to food coloring, I recommend gel-based colors over liquid drops. They give you vibrant shades without thinning out your icing. For the turkey feathers, you’ll want red, orange, yellow, and brown—classic Thanksgiving colors that pop against the cookie.
Equipment Needed
You don’t need much for this recipe, which is part of the beauty. Here’s what you’ll want on hand:
- Large mixing bowl: Any bowl works, but a wide one makes it easier to mix by hand.
- Wooden spoon or spatula: No electric mixer required—this dough comes together with elbow grease.
- Rolling pin: I use a standard wooden one, but a wine bottle works in a pinch (I’ve done it).
- Sharp knife or pizza cutter: For cutting around the handprint. A pizza cutter is actually easier for this.
- Baking sheets: Two standard half-sheet pans. No need to grease them—the parchment does the work.
- Parchment paper: Non-negotiable. It prevents sticking and makes cleanup a breeze.
- Cooling rack: Helps the cookies cool evenly so the icing doesn’t melt off.
- Piping bags or small zip-top bags: For decorating. Snip a tiny corner off a zip-top bag for a makeshift piping tip.
If you don’t have a rolling pin, don’t stress. I’ve used a clean wine bottle and even a smooth water bottle in a hotel kitchen once. The key is even thickness, not fancy equipment.
Preparation Method
- Cream the butter and sugar. In your large bowl, beat the softened butter and granulated sugar together with a wooden spoon until light and fluffy. This takes about 2 minutes of honest effort. You’re looking for a pale, creamy mixture that looks like soft frosting. If you’re using a hand mixer, go for it, but I actually prefer doing this by hand—less cleanup.
- Add the egg and vanilla. Crack in the egg and pour in the vanilla extract. Mix until fully combined. The mixture might look a little curdled at this point—that’s normal. Don’t panic.
- Mix the dry ingredients. In a separate small bowl, whisk together the flour, baking powder, and salt. Add this to the wet mixture in two batches, stirring just until no streaks of flour remain. Overmixing here makes tough cookies, so stop as soon as it comes together.
- Chill the dough. Shape the dough into a flat disc, wrap it in plastic wrap, and refrigerate for at least 30 minutes. This step isn’t optional—warm dough is sticky and impossible to work with for handprints. I’ve skipped this before and ended up with a floury mess on my counter.
- Preheat and prep. Preheat your oven to 350°F (175°C). Line two baking sheets with parchment paper.
- Roll out the dough. On a lightly floured surface, roll the dough to about ¼-inch thickness. Don’t go thinner—the handprint needs some depth to hold its shape. Flour your rolling pin if it starts sticking.
- Make the handprints. Here’s the fun part. Have your child press their hand firmly into the dough. Don’t let them wiggle their fingers—a steady press gives the cleanest shape. Use a sharp knife or pizza cutter to cut around the handprint, about ½ inch outside the actual impression. You want a border around the hand.
- Bake the cookies. Place the handprint cookies on the prepared baking sheets, spacing them about 2 inches apart. Bake for 8-10 minutes, or until the edges are just barely golden. The centers should look set but not brown. They’ll continue cooking on the sheet after you pull them out.
- Cool completely. Let the cookies rest on the baking sheet for 5 minutes, then transfer to a cooling rack. Do not attempt to decorate warm cookies—the icing will slide right off. I learned this the hard way with a batch of melted, sad-looking turkeys.
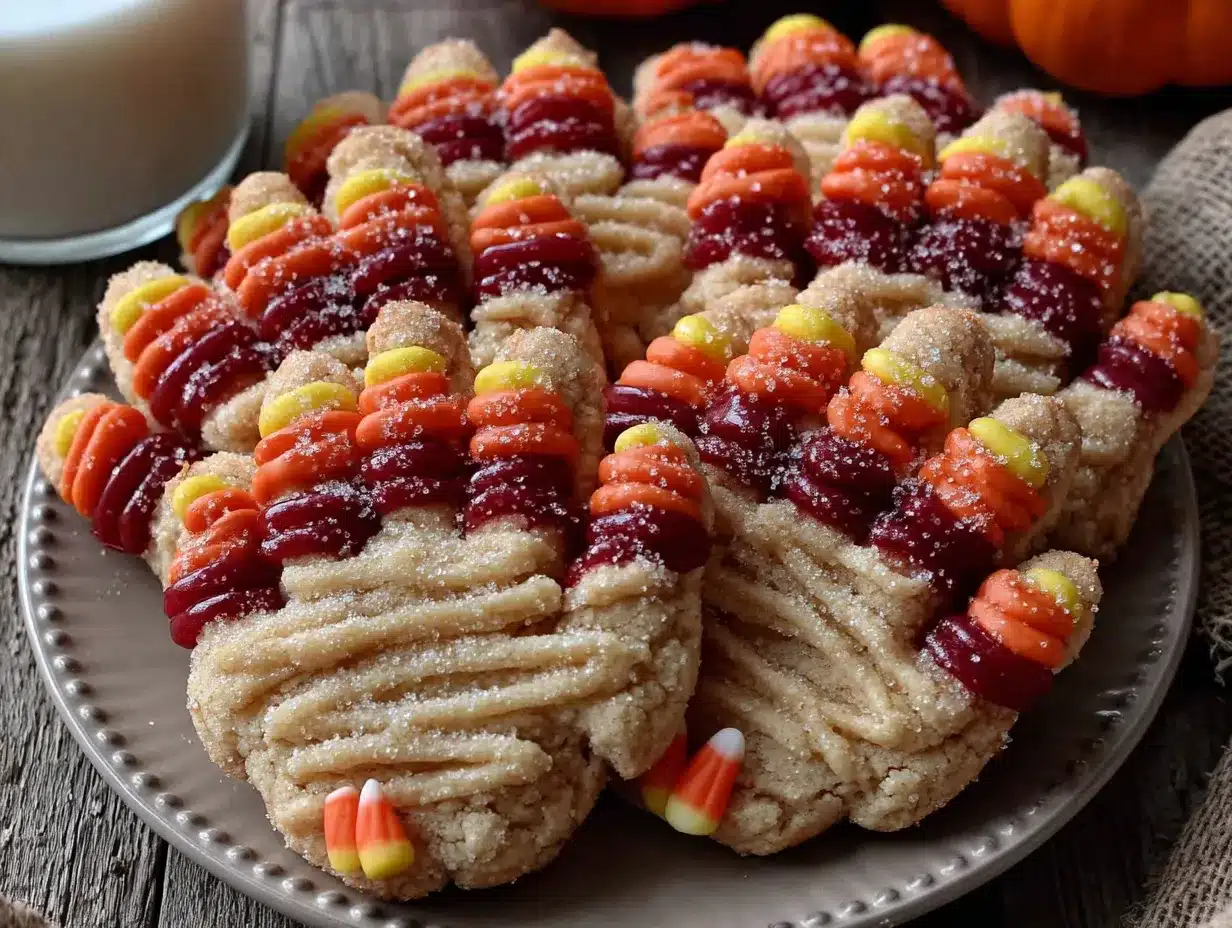
- Decorate as turkeys. Once cooled, use royal icing or frosting to create the turkey feathers on the fingers and thumb. Add candy eyes, a small candy corn or chocolate for the beak, and a red M&M for the wattle. The palm of the hand becomes the turkey’s body—keep it simple or add a little brown frosting.
A quick note on timing: the chilling step is where most people get impatient. If you’re in a hurry, pop the dough in the freezer for 10-15 minutes instead of the fridge for 30. It works, but don’t push it past 15 or the dough gets too hard to roll.
Cooking Tips & Techniques
I’ve made these cookies more times than I can count, and I’ve messed up plenty along the way. Here’s what I’ve learned:
The dough needs to be cold, but not rock hard. If it’s too cold, it cracks when you press the hand in. Let it sit at room temperature for 5 minutes if it’s been in the fridge too long. You want it firm but pliable—like Play-Doh that’s been sitting out for a bit.
Press firmly and evenly. Kids tend to press harder with their palm and lighter with their fingers. Guide their hand down gently but firmly, making sure all parts of the hand make contact. If the fingers don’t leave a clear impression, the cookie won’t look like a turkey—it’ll just look like a blob.
Don’t overbake. I cannot stress this enough. Sugar cookies go from perfect to overdone in about 60 seconds. Pull them when the edges are just barely golden. The centers will look slightly underdone—that’s exactly what you want. They’ll set up as they cool.
Flour your surface generously. Sticky dough is the enemy of handprint cookies. If the dough starts sticking to the counter or the rolling pin, dust with more flour. It’s easier to add flour than to scrape dough off your counter.
For consistent thickness, use rolling pin rings. These little silicone bands slide onto the ends of your rolling pin and guarantee even thickness. I didn’t use them for years and my cookies were always uneven. Total game changer.
One time I forgot to chill the dough and tried to press my son’s hand into warm, sticky dough. It was a disaster—his hand got covered in dough, he started crying, and I ended up throwing the whole batch away. Learn from my mistakes. Chill the dough.
Variations & Adaptations
These handprint cookies are endlessly adaptable. Here are some of my favorite twists:
- Thanksgiving Turkey: The classic version. Use red, orange, and yellow frosting for the feathers on the fingers. Add candy eyes, a candy corn beak, and a red M&M wattle. The palm becomes the turkey body—pipe on some brown frosting or leave it plain.
- Christmas Handprint Reindeer: Skip the turkey theme and turn the handprint into a reindeer. The palm is the face, the thumb is the nose (paint it red!), and the fingers become antlers. Add googly eyes and a little smile. My kids went nuts for these last December.
- Spring Flower Handprints: Press the hand into the dough with fingers spread wide. After baking, decorate each finger as a different colored flower petal. The palm becomes the center of the flower. Add a green frosting stem below. Perfect for Mother’s Day or spring bake sales.
- Gluten-Free Version: Substitute the all-purpose flour with a 1:1 gluten-free baking flour blend. I’ve used King Arthur’s Measure for Measure with great results. The texture is slightly more crumbly, so be extra gentle when cutting around the handprint.
- Vegan Version: Use vegan butter sticks and a flax egg (1 tablespoon ground flaxseed mixed with 3 tablespoons water, let sit for 5 minutes). The cookies won’t be as tender, but they’ll still taste great and hold their shape.
I once made these for a classroom of kids with various allergies and did a mix of regular, gluten-free, and vegan versions. I labeled them with different colored sprinkles so the kids could tell which was which. It worked perfectly, and no one felt left out.
Serving & Storage Suggestions
These cookies are best served at room temperature, after the icing has fully set. If you decorated with royal icing, let them sit out for at least 2 hours (or overnight) so the icing hardens completely. This makes them stackable and portable—great for bake sales or school parties.
For presentation, I like to arrange them on a platter with the handprints facing up so everyone can see the turkey feathers. They’re a conversation starter, honestly. Every adult who sees them says, “Wait, is that a real handprint?” and then smiles.
Storage: Keep undecorated cookies in an airtight container at room temperature for up to 5 days. Decorated cookies can be stored in a single layer (or between layers of parchment paper if stacked) for up to a week. Don’t refrigerate them—the fridge dries out sugar cookies and makes them taste stale.
Freezer instructions: You can freeze the unbaked handprint cookies for up to 3 months. Place them on a baking sheet in the freezer until solid, then transfer to a freezer bag. Bake directly from frozen, adding 2-3 minutes to the baking time. Baked, undecorated cookies also freeze well for up to 2 months.
I always make a double batch and freeze half the unbaked cookies. Then when a school event pops up unexpectedly, I’m ready. It feels like cheating, but I promise it works.
Flavors actually improve after a day or two. The butter and vanilla meld together, and the texture softens slightly. If you can resist eating them all on day one, they’re even better on day two.
Nutritional Information & Benefits
Let’s be honest—these are sugar cookies. They’re a treat, not a health food. But here’s the breakdown if you’re curious:
Per cookie (based on 24 cookies, undecorated): Approximately 140 calories, 7g fat, 18g carbohydrates, 2g protein, 9g sugar. These numbers will vary based on your decoration choices.
The butter provides a small amount of vitamin A and healthy fats, and the egg adds protein. But really, the benefit here isn’t nutritional—it’s emotional. Baking with kids builds confidence, teaches patience, and creates memories. That’s worth more than any vitamin.
For dietary considerations: these cookies contain gluten, dairy, and eggs. They are not suitable for vegans or those with celiac disease without the substitutions mentioned above. The sugar content is moderate for a cookie, but if you’re watching sugar intake, you can reduce the sugar in the dough to ¾ cup without significantly affecting the texture.
I’m not a nutritionist, and I don’t pretend to be one on this blog. But I do believe that food should be enjoyed. These cookies are for celebrations, for rainy afternoons, for making memories. That has its own kind of nutritional value.
FAQs
Can I use this dough for other shapes?
Absolutely. This is a great all-purpose sugar cookie dough. It holds its shape well for cut-out cookies too. Just roll, cut, and bake as usual.
My kid’s handprint didn’t show up clearly. What went wrong?
Most likely, the dough was too warm or too cold. Warm dough absorbs the impression, and cold dough cracks. Also, make sure your child presses firmly and evenly. If all else fails, use a fork to gently score the finger lines after pressing.
Can I make these ahead of time for a party?
Yes! Bake the cookies up to 3 days ahead and store them undecorated. Decorate the day of or the day before the party. The icing needs 2-4 hours to set fully.
My cookies spread too much in the oven. How do I fix this?
This usually means the dough wasn’t chilled long enough, or your butter was too soft. Make sure the dough is thoroughly chilled (30+ minutes in the fridge) and that your butter is softened, not melted. Also, check that your baking powder isn’t expired.
Can I use store-bought frosting instead of making royal icing?
Totally. Store-bought frosting is thicker and easier for little hands to spread. It won’t harden as firmly as royal icing, so the cookies won’t stack as neatly, but they’ll taste just as good.
Conclusion
These easy turkey hand sugar cookies are the kind of recipe that reminds you why baking with kids is worth the mess. They’re simple enough for a tired Tuesday night, fun enough to feel like an activity, and delicious enough that everyone actually eats them. That’s a rare combination.
I love that every batch is different—every handprint is unique, every turkey has its own personality. There’s something beautiful about that imperfection. It’s real. It’s honest. It’s exactly what cooking with kids should be.
So go ahead and make a mess. Trace those little hands, bake them up, and decorate them together. Take a picture before they get eaten (trust me, you’ll want to remember this). And when you do, come back and tell me about it in the comments—I’d love to hear how your turkeys turned out.
Happy baking, friends. You’ve got this.
Pin This Recipe!

Easy Turkey Hand Sugar Cookies: Best Kids’ Recipe

These adorable handprint sugar cookies are shaped like little hands and decorated as turkeys. They’re quick, easy, and perfect for making memories with kids in the kitchen.
- Prep Time: 30 minutes
- Cook Time: 10 minutes
- Total Time: 45 minutes
- Yield: 24 cookies 1x
- Category: Dessert
- Cuisine: American
Ingredients
- 1 cup (2 sticks, 226g) unsalted butter, softened
- 1 cup (200g) granulated sugar
- 1 large egg, at room temperature
- 2 teaspoons vanilla extract
- 2 ½ cups (312g) all-purpose flour
- 1 teaspoon baking powder
- ½ teaspoon salt
- Royal icing or store-bought frosting, for decorating
- Food coloring (red, orange, yellow, brown)
- Sprinkles, candy eyes, mini candy-coated chocolates, for decorating
Instructions
- Cream the butter and sugar together in a large bowl with a wooden spoon until light and fluffy, about 2 minutes.
- Add the egg and vanilla extract, mixing until fully combined.
- In a separate bowl, whisk together the flour, baking powder, and salt. Add to the wet mixture in two batches, stirring just until no streaks of flour remain.
- Shape the dough into a flat disc, wrap in plastic wrap, and refrigerate for at least 30 minutes.
- Preheat oven to 350°F (175°C). Line two baking sheets with parchment paper.
- On a lightly floured surface, roll the dough to about ¼-inch thickness.
- Have your child press their hand firmly into the dough. Use a sharp knife or pizza cutter to cut around the handprint, about ½ inch outside the impression.
- Place the handprint cookies on the prepared baking sheets, spacing them about 2 inches apart. Bake for 8-10 minutes, until edges are just barely golden.
- Let cookies rest on the baking sheet for 5 minutes, then transfer to a cooling rack to cool completely.
- Once cooled, decorate as turkeys: use colored frosting for feathers on the fingers, add candy eyes, a candy corn beak, and a red M&M wattle.
Notes
Chill the dough thoroughly for best results. Don’t overbake—pull cookies when edges are just golden. For gluten-free, use a 1:1 gluten-free flour blend. For vegan, use vegan butter and a flax egg. Store undecorated cookies in an airtight container at room temperature for up to 5 days. Freeze unbaked cookies for up to 3 months.
Nutrition
- Serving Size: 1 cookie
- Calories: 140
- Sugar: 9
- Sodium: 75
- Fat: 7
- Saturated Fat: 4
- Carbohydrates: 18
- Protein: 2
Keywords: handprint cookies, turkey cookies, sugar cookies, kids baking, Thanksgiving cookies, easy sugar cookies


