Love this? Save it for later!
Share the inspiration with your friends
The kindergarten Halloween party was in four hours and I had completely forgotten. Four hours. Every other parent was probably dropping off Pinterest-perfect themed treats with little handwritten tags, and I was staring at a half-empty fridge, a box of hot dogs, and a block of cheddar cheese that was about to expire. My son, Leo, was looking at me with that specific kind of disappointment that only a five-year-old can muster. “Mom, everyone is bringing mummy snacks,” he said, like it was the most obvious thing in the world.
Honestly, panic set in. I thought about running to the grocery store, but we were in the middle of a rainy Tuesday and the car was blocked in. I thought about making cupcakes from a box, but we had no frosting. I was that parent—the one who forgot and was about to show up with a bag of store-bought pretzels and a sad-looking apple. But then I saw the crescent roll dough in the back of the fridge, pushed behind a jar of pickles. A lightbulb went off. A frantic, slightly desperate lightbulb.
I grabbed the hot dogs, the cheese, and that tube of dough. My hands were shaking a little—not from fear, but from the sheer speed I was moving at. I cut the cheese into thin strips, wrapped each hot dog like a tiny little bandage, and stuck on little mustard eyes. I shoved them in the oven, praying they wouldn’t burn. You know that feeling when you are cooking against the clock and every second feels like a tiny eternity? That was me. The timer went off, I pulled them out, and honestly? They looked adorable. Like, genuinely cute. I threw them in a container and raced to the school.
I walked into that party feeling like a fraud. The table was covered in elaborate spider cupcakes and cookie monsters. I placed my mummy hot dogs next to a three-tiered cake. And then it happened. The kids swarmed. Not the cake, not the cookies. My little cheese-wrapped hot dogs. They were gone in ten minutes. Leo came up to me, cheese on his chin, and said, “Mom, yours were the best.” I didn’t win a prize. I didn’t get a ribbon. But I got that moment, and honestly, that is why I keep making these. They are the recipe that saved me from being the snack-fail mom, and they have been a staple ever since. Maybe you have been in that same panic—needing something fast, fun, and foolproof. This is it.
Why You’ll Love This Recipe
Let me tell you why these Mummy Hot Dogs with Cheese Wrap are not just another Halloween snack. They are a genuine lifesaver for busy families. I have tested this recipe about a dozen times now—tweaking the cheese thickness, trying different doughs, figuring out the perfect baking time so the crescent roll gets golden but the hot dog stays juicy. This is my absolute best version.
- Quick & Easy: From fridge to table in under 25 minutes. Seriously. You can make these on a school night, a party morning, or when you realize you forgot to sign up for the class snack. No stress, no fuss.
- Simple Ingredients: You likely have everything in your kitchen right now. Hot dogs, cheese, crescent roll dough, and a little mustard. No fancy grocery trips, no obscure spices. This is real, practical cooking.
- Perfect for Halloween & Beyond: Obviously, these are a hit at Halloween parties. But honestly? My kids request them for movie nights, birthday parties, and even “just because” dinners. They are fun without being a huge production.
- Crowd-Pleaser: I have brought these to three different school events and two neighborhood gatherings. Every single time, the kids go crazy. Adults love them too—they are nostalgic, cheesy, and just plain good. It is the kind of food that makes everyone happy, no questions asked.
- Unbelievably Delicious: The combination of salty hot dog, melted cheddar, and flaky, buttery crescent roll is comfort food at its finest. It is not fancy. It is better than fancy. It is the taste of a happy, chaotic, wonderful childhood.
What makes this recipe different from the rest? It is the cheese wrap. Most mummy hot dogs just use dough. By wrapping a thin slice of cheddar around the hot dog first, you get that gooey, melty cheese surprise in every bite. It is a small tweak that makes a huge difference. This isn’t just another version—it is the best version. It is comfort food reimagined: faster, cheesier, but with the same soul-soothing satisfaction. Perfect for impressing a room full of kids without stressing yourself out.
What Ingredients You Will Need
This recipe uses simple, budget-friendly ingredients to deliver big flavor and a fun presentation. Everything is easy to find and easy to swap if you need to. Here is what you need:
For the Mummy Hot Dogs
- 1 can (8 oz) refrigerated crescent roll dough – I prefer the Pillsbury brand for consistent flakiness, but any store brand works just fine. Look for the sheet-style crescent dough if you can find it; it makes cutting strips easier.
- 8 beef or turkey hot dogs – Go for a brand your family likes. I use Oscar Mayer beef hot dogs because they hold up well and have a classic taste. For a leaner option, turkey hot dogs work great.
- 4 slices cheddar cheese – Use a good melting cheese. I recommend sharp cheddar for more flavor, but mild works too. Cut each slice in half lengthwise so you have 8 thin strips. (Pro tip: if the cheese is too thick, it won’t wrap neatly)
- Mustard for eyes – Yellow mustard is traditional and gives that classic mummy look. You can also use ketchup dots or even tiny candy eyes if you want to go all out.
For Serving (Optional but Recommended)
- Ketchup or ranch dressing for dipping – Kids love dipping. It makes the whole experience more fun.
- Pretzel sticks or carrot sticks on the side – Adds a little crunch and makes it a more complete snack.
Ingredient Selection Tips: When buying hot dogs, check the sodium content if you are watching salt. Some brands are much saltier than others. For the cheese, pre-sliced sandwich cheese works perfectly because it is already the right thickness. If you buy a block, just slice it thin—about 1/8 inch thick. The crescent roll dough should be cold from the fridge; if it gets too warm, it becomes sticky and hard to cut into strips.
Substitution Guidance: Need a gluten-free option? Use gluten-free crescent roll dough or even gluten-free pizza dough rolled thin. Dairy-free? Swap the cheddar for a dairy-free cheese slice that melts well, like Violife or Daiya. You can also skip the cheese entirely and just use the dough—still delicious, just not as gooey. For a lower-fat version, use turkey hot dogs and reduced-fat cheese. Honestly, the recipe is forgiving. I have made it with leftover tortillas cut into strips when I ran out of crescent dough, and it worked surprisingly well.
Equipment Needed
You do not need any fancy equipment for this recipe. That is part of the beauty. Here is what you will need:
- Baking sheet – A standard half-sheet pan works perfectly. Line it with parchment paper for easy cleanup. I have a well-loved Nordic Ware sheet that has seen dozens of batches of these mummies.
- Sharp knife or pizza cutter – For cutting the crescent roll dough into thin strips. A pizza cutter makes quick work of this, but a sharp knife is fine. Do not use a dull knife; it will drag through the dough and make a mess.
- Cutting board – Any clean surface for cutting the hot dogs and cheese. I prefer a plastic board for raw meat prep.
- Small bowl – For the mustard, if you are using a toothpick to dot the eyes.
- Toothpick or skewer – Optional, but helpful for making precise mustard dots for the eyes. You can also just squeeze the mustard bottle directly, but a toothpick gives you better control.
- Oven mitts – Because hot pans are no joke.
- Cooling rack – Optional, but helps the mummies cool evenly so the cheese sets slightly before serving.
Budget-Friendly Tip: If you do not have a pizza cutter, a butter knife works in a pinch. The strips do not have to be perfect—they are supposed to look like mummy bandages, after all. Imperfect strips actually look more authentic.
Preparation Method
Let me walk you through this step by step. I have made these so many times I could do it in my sleep, but I will share every little detail so your first batch comes out perfect.
- Preheat your oven to 375°F (190°C). Line a baking sheet with parchment paper. This is important—the cheese can stick to the pan, and parchment makes cleanup a breeze. I learned this the hard way after scrubbing a pan for twenty minutes.
- Prepare the hot dogs. Pat each hot dog dry with a paper towel. This helps the cheese and dough stick better. If your hot dogs are wet, the dough gets soggy. Set them aside on a plate.
- Cut the cheese. Take your 4 slices of cheddar cheese and cut each one in half lengthwise. You should end up with 8 thin, long strips of cheese. Each strip should be about 2-3 inches long and 1 inch wide. If the cheese is too thick, it won’t wrap around the hot dog neatly. Too thin, and it will melt away. Aim for about 1/8 inch thickness.
- Wrap the cheese around the hot dogs. Take one strip of cheese and wrap it around the center of a hot dog. It should stick to itself. If it doesn’t, press gently. Do this for all 8 hot dogs. Place them on the prepared baking sheet, leaving about 2 inches between each one.
- Prepare the crescent roll dough. Open the can of crescent roll dough. If you are using the perforated triangle sheets, press the seams together to form a single rectangle. If you are using the sheet-style dough, you are already ahead. Unroll the dough onto a clean cutting board.
- Cut the dough into strips. Using a sharp knife or pizza cutter, cut the dough lengthwise into thin strips. Aim for strips that are about 1/4 to 1/2 inch wide. You want them thin enough to look like mummy bandages but thick enough to hold together. You should get about 12-16 strips total. Don’t worry if they are not perfectly even—mummies are supposed to look a little messy.
- Wrap the mummies. Take a strip of dough and wrap it around a cheese-covered hot dog. Start at one end and wrap diagonally, leaving a small gap for the eyes. The dough should overlap slightly. Repeat with a second strip if needed to cover the hot dog from top to bottom. Leave about 1/2 inch of the hot dog exposed at one end for the face. Press the ends of the dough gently to seal them against the hot dog.
- Repeat for all hot dogs. You will use about 2-3 strips of dough per mummy. Place each wrapped mummy on the parchment-lined baking sheet, seam-side down. This keeps the dough from unraveling while baking.
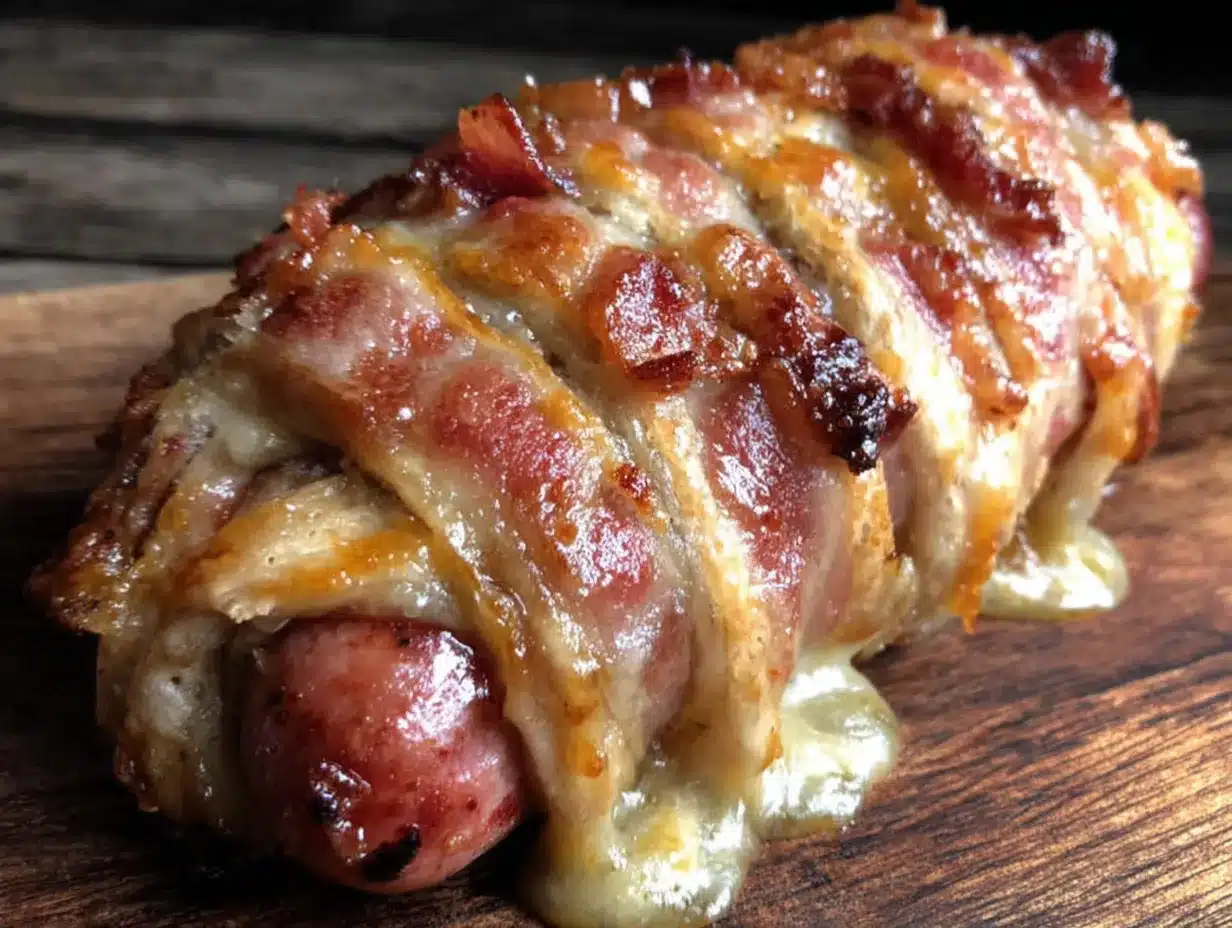
- Bake. Place the baking sheet in the preheated oven and bake for 12-15 minutes. You are looking for the dough to be golden brown and puffy, and the cheese should be melted and bubbly. The hot dogs will be hot and juicy. Do not overbake, or the dough will get too hard.
- Cool slightly. Remove the mummies from the oven and let them cool on the baking sheet for 2-3 minutes. This allows the cheese to set slightly so it doesn’t ooze out everywhere when you bite into it.
- Add the eyes. Using a toothpick or the tip of a squeeze bottle, dot two small eyes onto the exposed end of each hot dog with yellow mustard. You can also use ketchup or tiny dots of sriracha for a spicier version. Be gentle—you don’t want to poke through the hot dog.
- Serve warm. Transfer the mummies to a serving platter. Serve immediately with ketchup, ranch, or your favorite dipping sauce. They are best eaten within 30 minutes of baking, while the cheese is still gooey and the dough is flaky.
Sensory Cue: When the mummies are done, your kitchen will smell like buttery, baked dough and melted cheese. The dough should be a deep golden brown, and you might see a little cheese bubbling out from the edges. That is a good sign. The hot dogs will be plump and hot, and the mustard eyes will be bright yellow against the dark pink of the meat.
Troubleshooting Tip: If your dough strips are too long and keep breaking, they are too thin. Cut them a little wider next time. If the cheese melts out completely, you wrapped it too loosely. Press the cheese against the hot dog firmly before adding the dough. And if the mummies look a little lopsided? That is the charm. They are supposed to look like they just stumbled out of a tomb.
Cooking Tips & Techniques
I have made these mummies at least twenty times now, and I have collected a few tricks that make the process smoother and the results better. Let me share what I have learned.
Keep the dough cold. Crescent roll dough is much easier to work with when it is cold. If it gets too warm, it becomes sticky and stretchy, and your strips will be a mess. If your kitchen is hot, pop the dough in the fridge for 10 minutes before cutting. I learned this after a particularly disastrous batch on a humid August afternoon—the dough turned into a gloopy, unmanageable blob.
Don’t skip the cheese wrap. I know it seems like an extra step, but trust me, it is worth it. The cheese acts as a barrier between the hot dog and the dough, which keeps the dough from getting soggy. It also adds that gooey, melty texture that makes these mummies so satisfying. If you just wrap dough around a plain hot dog, it is fine. But it is not great. The cheese makes it great.
Use a pizza cutter for the dough. A pizza cutter glides through crescent roll dough without dragging or tearing. A knife can work, but it tends to pull the dough. If you have a pizza cutter, use it. If not, a very sharp chef’s knife is your next best option. Dull knives are the enemy of clean strips.
Leave the eyes for last. If you put the mustard eyes on before baking, they will bake into the hot dog and lose their bright color. They will also look a little sad and faded. Wait until the mummies come out of the oven, then add the eyes. The contrast between the golden dough, the dark hot dog, and the bright yellow mustard is what makes them look so cute.
Make ahead for parties. You can assemble these mummies up to 4 hours ahead of time. Just wrap the hot dogs with cheese and dough, place them on the baking sheet, cover with plastic wrap, and refrigerate. Bake them right before serving. Do not add the mustard eyes until after baking. This is a lifesaver for busy party days.
Common Mistake: Overcrowding the baking sheet. I did this once, and the mummies ended up touching each other. The dough stuck together, and when I tried to pull them apart, they ripped. Leave at least 2 inches between each mummy. They need room to puff up and get crispy.
Timing Strategy: While the mummies are baking, set out your dipping sauces and arrange the serving platter. This way, everything is ready when the timer goes off. The mummies are best served warm, so you want to minimize the time between oven and table.
Variations & Adaptations
One of the best things about this recipe is how easy it is to change up. I have tried several variations over the years, and here are my favorites.
Spicy Mummy Dogs: For adults or adventurous kids, swap the cheddar for pepper jack cheese. Add a thin slice of jalapeño under the cheese for an extra kick. The spicy cheese pairs beautifully with the salty hot dog. I made these for a Halloween party for grown-ups, and they were gone before the regular ones.
Vegetarian Mummies: Use vegetarian hot dogs or even cheese sticks as the base. I have used mozzarella string cheese wrapped in dough, and it makes a delicious, meatless version. Just skip the hot dog and wrap the cheese directly. Bake for 10-12 minutes, and you have a cheesy, gooey mummy that even vegetarians will love.
Gluten-Free Version: Gluten-free crescent roll dough exists, and it works well for this recipe. I have used the brand Schar, and the texture is slightly different—a little more crumbly—but the taste is excellent. You can also use gluten-free pizza dough rolled thin and cut into strips. Just adjust the baking time as needed, usually 2-3 minutes longer.
Breakfast Mummies: This is a fun twist. Use breakfast sausage links instead of hot dogs, and wrap them with cheese and crescent dough. Bake as directed. Serve with maple syrup for dipping. I made these for a Halloween morning breakfast, and my kids thought they were the coolest thing ever.
Pizza Mummies: Before wrapping the hot dog, brush a little pizza sauce on the dough strip. Add a sprinkle of Italian seasoning. Use mozzarella cheese instead of cheddar. Serve with marinara for dipping. It is like a hot dog and a pizza had a baby, and that baby is wrapped like a mummy.
Serving & Storage Suggestions
These mummies are best served warm, straight from the oven. The cheese is gooey, the dough is flaky, and the hot dog is juicy. That is the peak experience. But I have also served them at room temperature at parties, and they are still delicious.
Serving Temperature: Serve warm, but not piping hot. Let them cool for 2-3 minutes after baking so the cheese sets slightly. If you serve them too hot, the cheese can burn little mouths. For a party, you can keep them warm in a 200°F (93°C) oven for up to 30 minutes.
Complementary Dishes: These mummies pair beautifully with a simple veggie platter (carrot sticks, cucumber slices, cherry tomatoes) to balance out the richness. For a full Halloween meal, serve them alongside a bowl of tomato soup or a simple green salad. For drinks, apple cider or lemonade is perfect.
Presentation Ideas: Arrange the mummies on a platter lined with black or orange napkins. Add a few plastic spiders or fake cobwebs for effect. You can also stand them upright in a cup of guacamole or ranch dressing for a creepy “coming out of the grave” look. My kids love this.
Storage: Leftover mummies can be stored in an airtight container in the refrigerator for up to 3 days. The dough will soften slightly, but they are still good. To reheat, place them on a baking sheet in a 350°F (175°C) oven for 5-7 minutes, or until warmed through. Do not microwave them—the dough will become rubbery.
Freezing: You can freeze unbaked mummies. Assemble them completely (without the mustard eyes), place them on a baking sheet, and freeze until solid. Transfer to a freezer bag. When ready to bake, place them on a parchment-lined sheet and bake at 375°F (190°C) for 15-18 minutes, adding a few extra minutes since they start frozen. Add the mustard eyes after baking. They will keep in the freezer for up to 2 months.
Flavor Development: These mummies are best fresh, but I have noticed that the flavors meld together nicely after a day in the fridge. The cheese and dough sort of settle into each other. They are not as crispy, but they are still tasty. If you have leftovers, consider chopping them up and adding them to macaroni and cheese for a fun twist.
Nutritional Information & Benefits
Let me be honest—these are not health food. They are a fun, indulgent treat for special occasions. But here is the estimated nutritional breakdown per mummy (based on 8 servings):
- Calories: Approximately 280-320
- Protein: 12-15 grams
- Fat: 18-22 grams
- Carbohydrates: 18-22 grams
- Fiber: 0-1 gram
- Sugar: 3-5 grams
- Sodium: 600-800 mg
Health Benefits of Key Ingredients: Hot dogs are a source of protein, which is essential for growing kids. Cheddar cheese provides calcium for strong bones and teeth. Crescent roll dough offers carbohydrates for quick energy. While this is not a meal you would eat every day, it is a perfectly reasonable occasional treat.
Dietary Considerations: This recipe contains gluten (from the crescent dough) and dairy (from the cheese). It is not suitable for vegans or those with celiac disease without modifications. For a lower-sodium version, use low-sodium hot dogs and reduced-fat cheese. For a lower-fat version, use turkey hot dogs and skip the cheese—though you will lose that gooey texture.
My Wellness Perspective: I believe in balance. My kids eat vegetables and whole grains most of the time. But when Halloween rolls around, or when they have a school party, I want them to have something fun and delicious. These mummies are part of that balance. They are a celebration food, and there is nothing wrong with that. A happy childhood includes a few mummy hot dogs.
Conclusion
These Kid-Approved Mummy Hot Dogs with Cheese Wrap are more than just a recipe—they are a memory in the making. They are the snack that saves you when you forget the class party. They are the dinner that makes your kids laugh. They are the appetizer that disappears before the main course. I have made them in a panic, I have made them with joy, and I have made them just because it was a Tuesday. Every single time, they deliver.
I encourage you to make these your own. Use different cheese. Try different hot dogs. Add a little spice. Let your kids help wrap the dough—it will be messy, and it will be wonderful. That is the beauty of this recipe. It is forgiving. It is fun. And it is absolutely, unapologetically delicious.
If you make these mummies, I would love to hear about it. Drop a comment below and tell me how they turned out. Did your kids love them? Did you add a crazy twist? Share a photo on Pinterest and tag me. Let me know what works for your family. Because at the end of the day, that is what cooking is all about—sharing a little joy, one mummy hot dog at a time.
So go ahead. Open that can of crescent rolls. Wrap up some cheese. Make a mess. Make a memory. And enjoy every single bite.
Frequently Asked Questions
Can I make these mummy hot dogs ahead of time?
Yes, you can assemble them up to 4 hours ahead. Keep them covered in the fridge, and bake just before serving. Add the mustard eyes after baking for the best look.
Can I use a different type of dough?
Absolutely. Pizza dough, puff pastry, or even flour tortillas cut into strips work well. Just adjust the baking time as needed. Puff pastry will be flakier, and tortillas will be crispier.
How do I keep the cheese from oozing out completely?
Wrap the cheese tightly around the hot dog, and make sure the dough strips overlap slightly. Baking at the right temperature (375°F) and not overbaking also helps. A little ooze is normal and actually looks cool.
Can I use something other than mustard for the eyes?
Yes. Ketchup dots, sriracha, or even tiny candy eyes work great. For a non-spicy option, use a small dot of cream cheese or a slice of black olive. Get creative.
Are these mummy hot dogs freezer-friendly?
Yes. Assemble them without the mustard eyes, freeze on a baking sheet, then transfer to a freezer bag. Bake from frozen at 375°F for 15-18 minutes. They keep for up to 2 months.
Pin This Recipe!
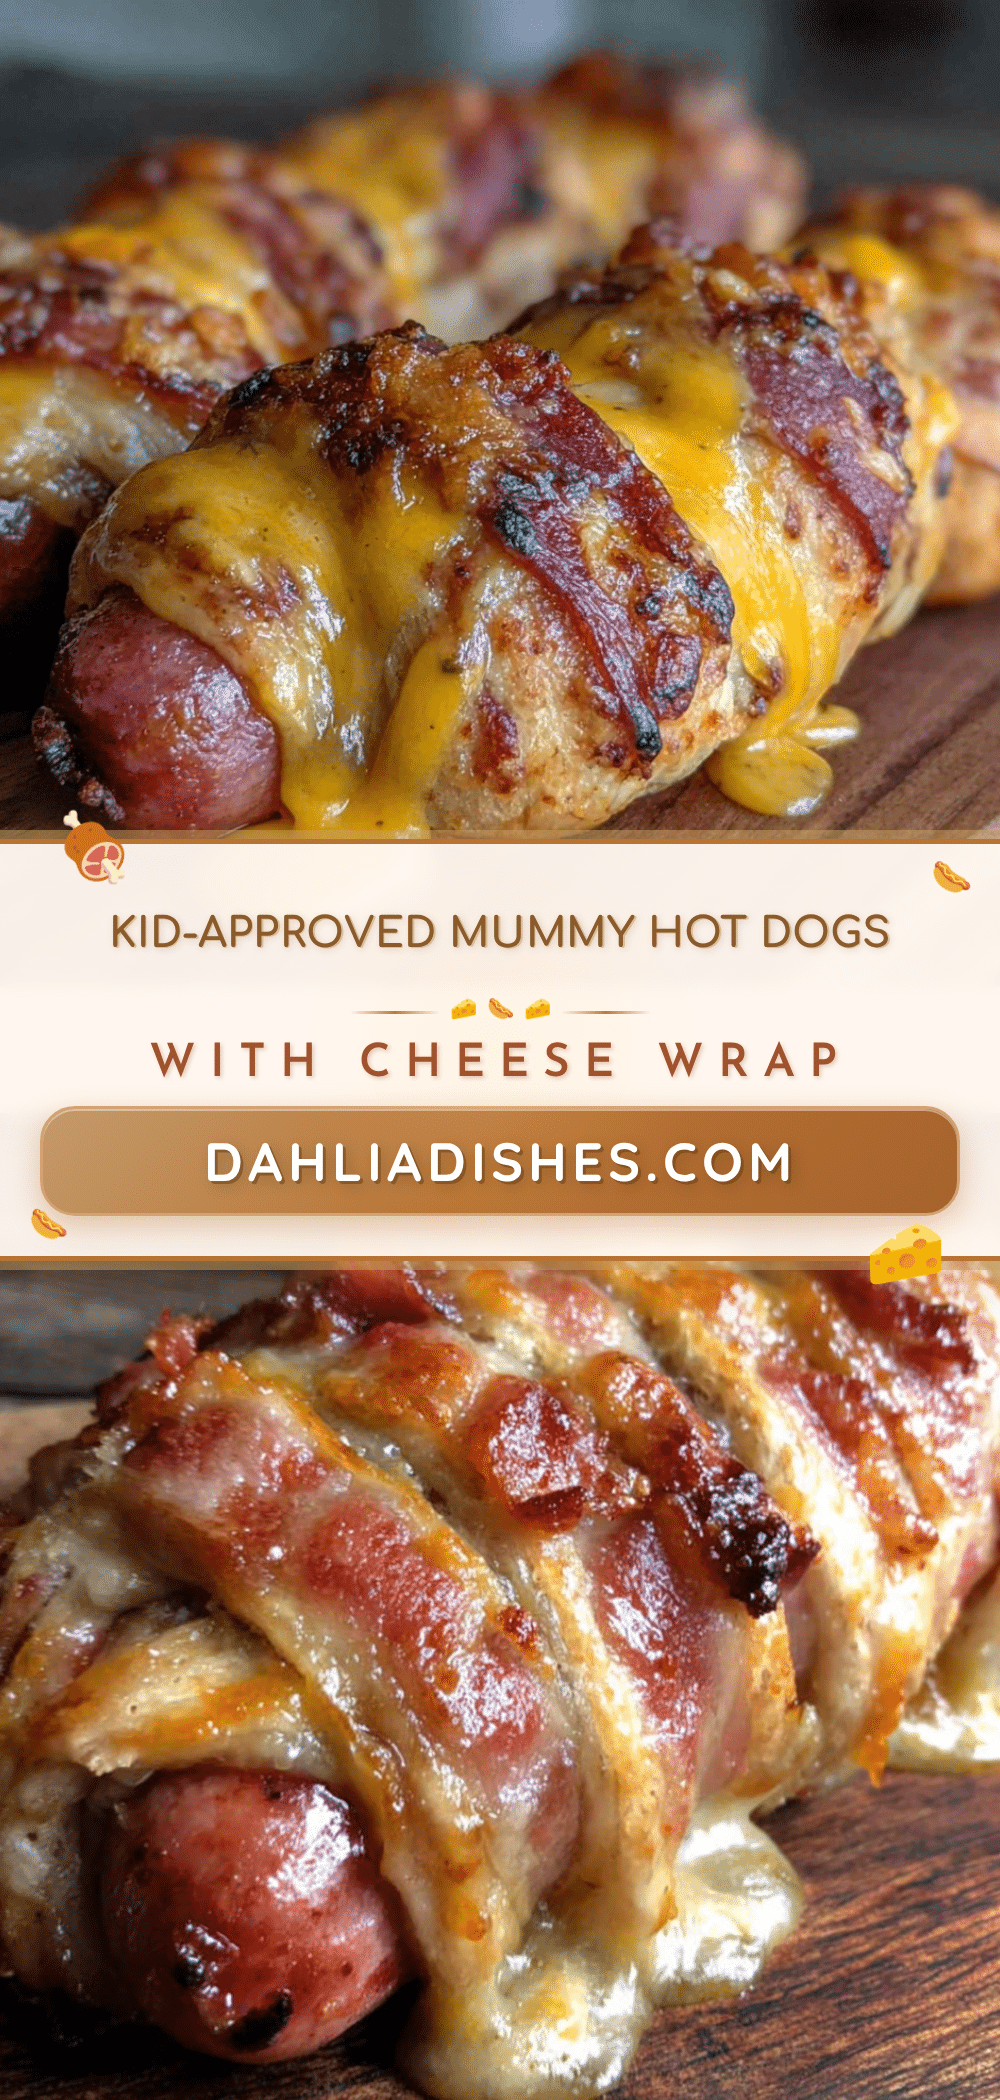
Easy Mummy Hot Dogs with Cheese Wrap Kids Love
These Kid-Approved Mummy Hot Dogs with Cheese Wrap are a lifesaver for busy families. Quick, easy, and made with simple ingredients, they are perfect for Halloween parties, school snacks, or fun weeknight dinners.
- Prep Time: 10 minutes
- Cook Time: 15 minutes
- Total Time: 25 minutes
- Yield: 8 servings 1x
- Category: Appetizer
- Cuisine: American
Ingredients
- 1 can (8 oz) refrigerated crescent roll dough
- 8 beef or turkey hot dogs
- 4 slices cheddar cheese
- Mustard for eyes
- Ketchup or ranch dressing for dipping (optional)
- Pretzel sticks or carrot sticks on the side (optional)
Instructions
- Preheat your oven to 375°F (190°C). Line a baking sheet with parchment paper.
- Pat each hot dog dry with a paper towel.
- Cut each slice of cheddar cheese in half lengthwise to make 8 thin strips.
- Wrap one strip of cheese around the center of each hot dog. Place on the prepared baking sheet, leaving about 2 inches between each.
- Open the can of crescent roll dough. If using perforated triangles, press seams together to form a rectangle. Unroll onto a cutting board.
- Using a sharp knife or pizza cutter, cut the dough lengthwise into thin strips, about 1/4 to 1/2 inch wide.
- Take a strip of dough and wrap it diagonally around a cheese-covered hot dog, leaving a small gap for the eyes. Use 2-3 strips per mummy. Press ends to seal.
- Place each wrapped mummy seam-side down on the baking sheet.
- Bake for 12-15 minutes, until dough is golden brown and cheese is melted.
- Let cool on the baking sheet for 2-3 minutes.
- Using a toothpick or squeeze bottle, dot two small eyes on the exposed end of each hot dog with yellow mustard.
- Serve warm with dipping sauces.
Notes
Keep the dough cold for easier handling. Don’t skip the cheese wrap—it prevents soggy dough and adds gooey texture. Add mustard eyes after baking for best color. Can be assembled up to 4 hours ahead and refrigerated. Freeze unbaked mummies for up to 2 months.
Nutrition
- Serving Size: 1 mummy
- Calories: 300
- Sugar: 4
- Sodium: 700
- Fat: 20
- Saturated Fat: 8
- Carbohydrates: 20
- Protein: 13
Keywords: mummy hot dogs, Halloween snacks, kid-friendly, easy appetizer, crescent roll hot dogs, cheese wrapped hot dogs


