Love this? Save it for later!
Share the inspiration with your friends
Introduction
“I wasn’t expecting dessert inspiration from a last-minute grocery run,” I admit. It was the Friday before Easter, and I realized I’d forgotten to plan a show-stopping treat for the family gathering the next day. The fluorescent lights buzzed softly as I wandered the aisles, trying to think fast. Then, tucked between the stacks of seasonal chocolate, I spotted a giant hollow chocolate egg. It was too perfect to pass up—but I had no idea how to fill it, and honestly, making a traditional cheesecake from scratch seemed like a marathon I couldn’t run with just 24 hours left.
That’s when the idea hit me: what if I stuffed that chocolate egg with a creamy, no-bake cheesecake filling? I grabbed a few simple ingredients, and despite a minor spill of cream cheese on the kitchen counter (you know how that goes), I whipped up something that felt fancy but was shockingly easy. The first bite the next day? Pure delight. Silky cheesecake hugging bittersweet chocolate, with a touch of springtime sweetness that felt like sunshine on a plate.
Maybe you’ve been there—scrambling for an impressive dessert that looks harder than it is. This Creamy No-Bake Cheesecake Stuffed Chocolate Easter Egg recipe became my go-to for Easter and beyond. It’s got that wow factor without the fuss, and honestly, it’s as fun to make as it is to eat.
Why You’ll Love This Recipe
Let me tell you, this recipe has earned its spot in my seasonal repertoire for good reasons. After testing it multiple times (including one hilarious attempt where I forgot to chill the filling before stuffing the egg — lesson learned!), I can say it’s a winner for both beginners and seasoned home cooks.
- Quick & Easy: Ready in under 30 minutes, perfect when you need a last-minute Easter dessert with minimal cleanup.
- Simple Ingredients: No exotic or hard-to-find stuff here—just basic pantry staples you probably have on hand.
- Perfect for Spring Celebrations: Its light, creamy texture and festive chocolate shell make it ideal for Easter brunch, family dinners, or potlucks.
- Crowd-Pleaser: Kids and adults alike can’t stop reaching for seconds, which honestly makes hosting a lot easier.
- Unbelievably Delicious: The smooth cheesecake contrasts beautifully with the crisp chocolate shell, giving you a delightful texture play.
What sets this recipe apart? It’s the balance—the cheesecake filling is whip-light but rich, with just the right tang from cream cheese and a hint of vanilla. Plus, stuffing it into a chocolate egg makes it festive and unexpected. It’s not just dessert; it’s a conversation starter. Once you try it, you might find yourself looking forward to Easter just for this treat!
What Ingredients You Will Need
This recipe uses simple, wholesome ingredients to deliver bold flavor and satisfying texture without the fuss. The components are pantry-friendly, with a few fresh items, and substitutions are easy if you need to adjust for dietary preferences.
- For the Cheesecake Filling:
- 8 oz (225 g) cream cheese, softened (I prefer Philadelphia for its creamy texture)
- 1 cup (240 ml) heavy whipping cream, cold (for that fluffy, stable whip)
- 1/2 cup (60 g) powdered sugar (adjust for sweetness)
- 1 teaspoon vanilla extract (pure vanilla makes a difference here)
- 1 tablespoon lemon juice (adds a subtle tang)
- For the Chocolate Egg Shell:
- 1 large hollow milk chocolate Easter egg (about 8-10 oz / 225-280 g; you can find these at most grocery stores around Easter)
- Optional Garnishes:
- Mini chocolate chips or shavings (for a bit of texture inside)
- Fresh berries (adds a pop of color and freshness)
- Edible flowers or sprinkles (for festive presentation)
If you want a dairy-free version, swap the cream cheese with a vegan alternative and use coconut cream instead of heavy cream. For a lower-sugar option, try using powdered erythritol or another sweetener you like. The key is to keep the filling light and airy, so feel free to experiment.
Equipment Needed
- Mixing bowls (one large for whipping cream, one medium for cream cheese)
- Electric mixer or stand mixer (handheld works fine, but a stand mixer saves your arms)
- Rubber spatula (for folding and scraping sides)
- Measuring cups and spoons (accuracy helps with texture)
- Large spoon or piping bag (for filling the chocolate egg neatly)
- Serving plate or cake stand (to showcase your masterpiece)
If you don’t have an electric mixer, you can whip the cream by hand with a whisk—just prepare for a little arm workout! Also, I’ve found that using a piping bag or a resealable plastic bag with the corner snipped off makes stuffing the egg much cleaner and easier. No one wants a mess on their Easter table.
Preparation Method
- Prepare the Chocolate Egg: Carefully unwrap the hollow chocolate egg and place it on a serving plate or in a shallow bowl to keep it steady while filling. If it’s too wobbly, you can nestle it in a small bowl or use crumpled parchment paper as a cushion. (5 minutes)
- Whip the Cream Cheese: In a medium bowl, beat the softened cream cheese on medium speed until smooth and creamy with no lumps. This usually takes around 2-3 minutes. Scrape down the sides occasionally to ensure even mixing.
- Add Flavorings: Mix in the powdered sugar, vanilla extract, and lemon juice to the cream cheese until fully incorporated. Taste and adjust sweetness or tang as you prefer. (2 minutes)
- Whip the Heavy Cream: In a separate chilled bowl, whip the cold heavy cream on high speed until stiff peaks form. You want it fluffy but stable, so don’t overwhip or it might turn grainy. (3-5 minutes)
- Fold Together: Gently fold the whipped cream into the cream cheese mixture using a rubber spatula. This step is crucial—fold slowly and carefully to keep the filling light and airy. Stop folding when no streaks remain. (3 minutes)
- Fill the Chocolate Egg: Using a spoon or piping bag, carefully fill the hollow chocolate egg with the cheesecake mixture. Don’t overfill—leave a little room at the top to avoid spillage. Smooth the surface with the back of a spoon or spatula. (5 minutes)
- Chill: Place the stuffed egg in the refrigerator for at least 2 hours to let the filling set properly. If you’re short on time, 1 hour will do, but the texture is better with longer chilling. (2 hours)
- Garnish and Serve: Before serving, decorate the top with mini chocolate chips, fresh berries, or edible flowers for that extra festive look. Slice gently with a sharp knife and enjoy the creamy, chocolaty goodness!
Pro tip: If your chocolate egg starts to soften during filling, pop it in the fridge for a few minutes to firm up before continuing. Also, to avoid cracking the shell, handle it gently and avoid sudden temperature changes.
Cooking Tips & Techniques
Working with a hollow chocolate egg can be a little tricky, but I’ve learned a few tricks that make the process smooth and keep your dessert looking great.
- Always use room-temperature cream cheese—it blends easier and avoids lumps in the filling.
- Chill your mixing bowl and beaters before whipping cream; cold tools help achieve better volume.
- Folding is key: overmixing the whipped cream into the cream cheese will deflate the mixture and make it dense.
- Be gentle when filling the egg. Using a piping bag keeps things neat and reduces mess.
- Don’t rush chilling. The filling needs time to set so your cheesecake stays firm when sliced.
- If your chocolate egg cracks during filling, patch it with a dab of melted chocolate and refrigerate to harden.
- Keep the stuffed egg refrigerated until serving. Leaving it out too long risks melting or softening.
Honestly, one time I was so excited I stuffed the egg right after whipping the cream, and it just oozed out. Now I always remind myself—patience with chilling pays off.
Variations & Adaptations
This recipe is a great base for customization, so feel free to tweak it based on your preferences or dietary needs.
- Flavor Twists: Add 2 tablespoons of cocoa powder to the filling for a chocolate cheesecake version. Or mix in 1/4 cup of crushed pistachios for a nutty surprise.
- Seasonal Fruits: Fold in chopped strawberries or raspberries into the filling before stuffing for a burst of freshness that pairs perfectly with chocolate.
- Dietary Adjustments: Use dairy-free cream cheese and coconut cream to make a vegan-friendly cheesecake. Swap powdered sugar for a low-glycemic sweetener if you’re watching sugar intake.
- Alternative Shells: If you can’t find a hollow chocolate egg, try using a hollowed-out chocolate bowl or even a large chocolate cupcake liner as a fun container.
- Personal Favorite Variation: Once, I added a layer of crushed Oreo cookies at the bottom inside the egg before filling it with cheesecake—talk about a crowd-pleaser!
Serving & Storage Suggestions
Serve this cheesecake egg chilled for the best texture and flavor contrast. A sharp knife warmed in hot water makes slicing smoother and less messy. Present it on a pretty platter with some fresh berries or edible flowers around for that springtime vibe.
If you have leftovers (unlikely, but it happens!), cover the egg with plastic wrap and store it in the refrigerator for up to 3 days. For longer storage, you can freeze the stuffed egg wrapped tightly in foil and plastic wrap for up to a month. To thaw, place it in the fridge overnight and serve chilled.
Flavors actually develop over time, so a rest in the fridge can deepen the tang of the cheesecake. Just don’t wait too long, or the chocolate shell might start to sweat and lose its crispness.
Nutritional Information & Benefits
Per serving (approximate, based on 8 servings):
| Calories | 320 |
|---|---|
| Fat | 22g (mostly from cream cheese and heavy cream) |
| Carbohydrates | 25g (includes sugars from chocolate and powdered sugar) |
| Protein | 5g |
The cream cheese provides calcium and protein, while the heavy cream adds richness. Using quality dark chocolate eggs increases antioxidants compared to milk chocolate. This dessert is gluten-free if you avoid cookie add-ins, making it accessible for many.
From my perspective, treating yourself to a dessert like this occasionally fits well in a balanced lifestyle—especially when it brings joy and creates memorable moments with loved ones.
Conclusion
This Creamy No-Bake Cheesecake Stuffed Chocolate Easter Egg recipe is the kind of dessert that feels both special and effortless. It’s perfect for when you want a show-stopping centerpiece that doesn’t require hours in the kitchen or complicated baking skills. Honestly, it’s become my signature springtime treat because it brings smiles and that satisfying creamy-chocolate combo everyone loves.
Feel free to make it your own—add your favorite flavors, try different garnishes, or even create mini versions for individual servings. I’d love to hear how your version turns out, so don’t hesitate to leave a comment or share your tweaks. Let me know if you’ve ever tried stuffing a dessert into a chocolate shell before—there’s something magical about combining textures and surprise elements in a recipe, right?
Here’s to creamy, dreamy desserts and sweet moments this spring!
FAQs
Can I make this recipe ahead of time?
Yes! You can prepare the cheesecake filling and stuff the egg up to a day in advance. Just keep it refrigerated and cover it well to prevent drying out.
What if I can’t find a hollow chocolate Easter egg?
You can use a large hollow chocolate bowl or even create chocolate shells by melting and molding chocolate in silicone molds. Alternatively, serve the filling in dessert cups with chocolate shavings on top.
How do I prevent the chocolate egg from cracking when filling?
Handle the egg gently and avoid sudden temperature changes. If it starts to soften, chill it briefly before continuing. Using a piping bag helps fill the egg evenly without applying too much pressure.
Is this recipe suitable for kids to help make?
Absolutely! Kids will enjoy helping whip the cream and filling the chocolate egg. Just supervise the handling of the fragile chocolate shell to avoid breakage.
Can I use flavored cream cheese or add mix-ins?
Yes, flavored cream cheese like strawberry or vanilla bean can add a fun twist. Mix-ins like crushed cookies, mini chocolate chips, or fruit pieces also work well—just fold them gently into the filling.
For a delightful twist on classic chocolate treats, try pairing this cheesecake egg with my crispy garlic chicken dinner or a light fruit salad for balance.
Pin This Recipe!

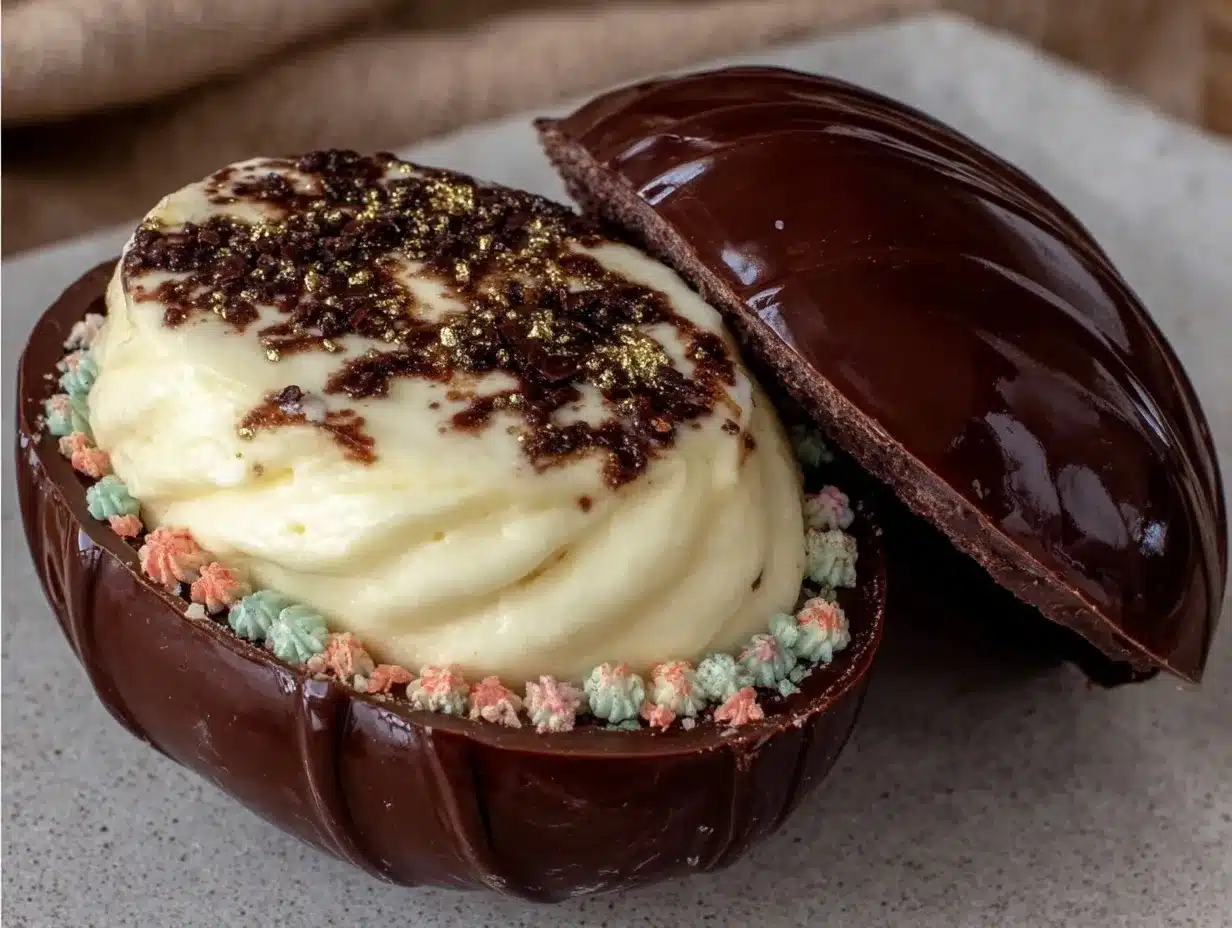
Creamy No-Bake Cheesecake Stuffed Chocolate Easter Egg

A quick and easy no-bake cheesecake filling stuffed inside a hollow chocolate Easter egg, perfect for spring celebrations and last-minute desserts.
- Prep Time: 15 minutes
- Cook Time: 0 minutes
- Total Time: 2 hours 15 minutes
- Yield: 8 servings 1x
- Category: Dessert
- Cuisine: American
Ingredients
- 8 oz (225 g) cream cheese, softened
- 1 cup (240 ml) heavy whipping cream, cold
- 1/2 cup (60 g) powdered sugar
- 1 teaspoon vanilla extract
- 1 tablespoon lemon juice
- 1 large hollow milk chocolate Easter egg (about 8–10 oz / 225–280 g)
- Optional garnishes: mini chocolate chips or shavings, fresh berries, edible flowers or sprinkles
Instructions
- Carefully unwrap the hollow chocolate egg and place it on a serving plate or in a shallow bowl to keep it steady while filling.
- In a medium bowl, beat the softened cream cheese on medium speed until smooth and creamy with no lumps.
- Mix in the powdered sugar, vanilla extract, and lemon juice to the cream cheese until fully incorporated.
- In a separate chilled bowl, whip the cold heavy cream on high speed until stiff peaks form.
- Gently fold the whipped cream into the cream cheese mixture using a rubber spatula until no streaks remain.
- Using a spoon or piping bag, carefully fill the hollow chocolate egg with the cheesecake mixture, leaving a little room at the top.
- Place the stuffed egg in the refrigerator for at least 2 hours to let the filling set properly.
- Before serving, decorate the top with mini chocolate chips, fresh berries, or edible flowers. Slice gently with a sharp knife and enjoy.
Notes
Use room-temperature cream cheese for smooth mixing. Chill mixing bowl and beaters before whipping cream. Fold whipped cream gently to keep filling light and airy. Chill filling before stuffing the egg to prevent oozing. Handle chocolate egg gently to avoid cracking. If cracks appear, patch with melted chocolate and refrigerate.
Nutrition
- Serving Size: 1 slice (1/8 of the
- Calories: 320
- Fat: 22
- Carbohydrates: 25
- Protein: 5
Keywords: no-bake cheesecake, chocolate Easter egg, spring dessert, easy cheesecake, Easter dessert, creamy cheesecake, no bake, holiday dessert