Love this? Save it for later!
Share the inspiration with your friends
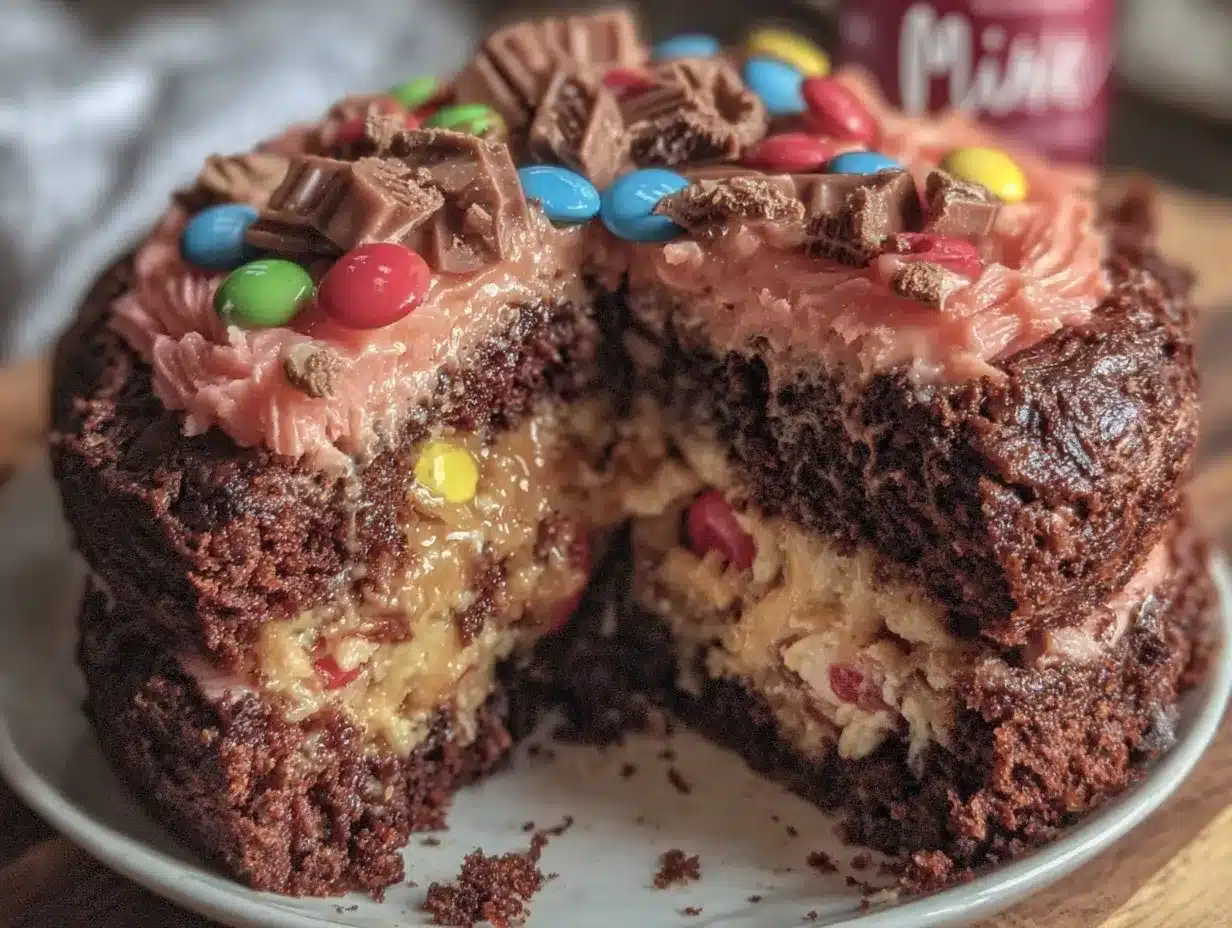
“You won’t believe what I accidentally dropped into the cake!” my friend Jenna exclaimed last summer, eyes twinkling with mischief. It was a lazy Saturday afternoon when she invited me over for what I thought would be a simple chocolate cake. Instead, I found myself surrounded by colorful wrappers and a shower of candies spilling from a deceptively ordinary-looking dessert. That’s how I first tasted the magic of the piñata chocolate cake with candy-filled surprise.
Honestly, I wasn’t expecting much when Jenna started mixing up the batter. She was juggling a million things — kids running around, a phone call from her boss, and a half-melted bag of assorted candies that were about to go stale. In a flurry of “why not,” she threw the candies right into the middle of the cake batter before baking. I thought it was a recipe disaster waiting to happen, but instead, it turned into the most fun and joyful birthday cake I’ve ever seen.
The way the cake cracked open to reveal a hidden burst of sweets was like a tiny party in every slice. Maybe you’ve been there — wanting to surprise someone with something extra special but not having hours to spare or a long list of odd ingredients. This Best Piñata Chocolate Cake with Candy-Filled Surprise is exactly that kind of recipe: playful, approachable, and downright irresistible. Let me tell you, it’s the kind of dessert that keeps you coming back for more, not just because of the chocolate but for that unexpected candy explosion that makes every bite a celebration.
Why You’ll Love This Recipe
From my many tests in the kitchen, this piñata chocolate cake quickly became a favorite for all the right reasons. Here’s why it might just become yours too:
- Quick & Easy: Ready in under 90 minutes, it’s perfect for last-minute parties or spontaneous sweet cravings.
- Simple Ingredients: No need for fancy or hard-to-find items — most of these are pantry staples or easy-to-grab candies.
- Perfect for Celebrations: Whether it’s a birthday, holiday, or just a weekend treat, this cake steals the show every time.
- Crowd-Pleaser: Kids and adults alike get excited by the candy surprise, making it a guaranteed hit for gatherings.
- Unbelievably Delicious: Moist, rich chocolate cake combined with a playful candy center that melts into every forkful.
What makes this recipe stand out is the foolproof method I developed to keep the candy perfectly nestled inside without sinking or melting completely into the batter. Trust me, I learned the hard way after a few messy attempts. Plus, the combination of a slightly fudgy crumb with bursts of candy texture is just… wow. It’s not your average chocolate cake—it’s chocolate cake with a joyful twist that lights up faces and ignites smiles.
What Ingredients You Will Need
This recipe relies on straightforward, wholesome ingredients to achieve a rich chocolate flavor with a fun surprise inside. Many of these are kitchen staples, making it a breeze to pull together without a special trip to the store.
- For the Cake Batter:
- All-purpose flour, 2 cups (240g) — use a trusted brand like King Arthur for best texture
- Granulated sugar, 1 ¾ cups (350g) — regular white sugar works great
- Unsweetened cocoa powder, ¾ cup (75g) — I recommend Dutch-processed for deeper flavor
- Baking powder, 1 ½ teaspoons
- Baking soda, 1 ½ teaspoons
- Salt, 1 teaspoon
- Large eggs, 2, at room temperature
- Whole milk, 1 cup (240ml) — or swap for almond milk if dairy-free
- Vegetable oil, ½ cup (120ml) — adds moisture and keeps cake tender
- Vanilla extract, 2 teaspoons
- Boiling water, 1 cup (240ml) — enhances chocolate intensity
- For the Candy Filling:
- Assorted small candies, about 1 ½ cups (e.g., mini M&Ms, Skittles, gummy bears, or chopped candy bars)
- Optional: Sprinkles for extra color and fun
- For the Frosting (Optional):
- Unsalted butter, 1 cup (227g), softened
- Powdered sugar, 3 cups (360g)
- Unsweetened cocoa powder, ½ cup (50g)
- Heavy cream or milk, 3-4 tablespoons
- Vanilla extract, 1 teaspoon
When picking candies, I like to use ones that hold their shape but still offer a chewy or crunchy contrast. Avoid overly sticky or melting candies to keep the surprise intact. And, if you want to switch things up, feel free to swap the cocoa powder for carob powder or add a pinch of espresso powder to deepen the chocolate flavor.
Equipment Needed
- Two 9-inch (23 cm) round cake pans — non-stick works well, but greased and parchment-lined pans prevent sticking best
- Mixing bowls — a large one for dry ingredients and another for wet
- Electric mixer or sturdy whisk — I usually use my handheld mixer for speed, but a whisk will do
- Measuring cups and spoons — accurate measurements make all the difference here
- Rubber spatula — perfect for folding ingredients and scraping bowls
- Cooling rack — to let the cakes rest evenly after baking
- An offset spatula or butter knife — helpful for frosting the cake smoothly
If you don’t have two cake pans, you can bake the batter in batches in one pan, but watch the baking time closely. Also, a stand mixer can make the process faster, but I’ve done this by hand plenty of times, so don’t stress if your kitchen gear is basic. Just keep a little patience and a sense of fun — that’s the real secret ingredient!
Preparation Method
- Preheat your oven to 350°F (175°C). Grease and line two 9-inch round cake pans with parchment paper. This little prep step saves a lot of frustration later!
- Mix the dry ingredients: In a large bowl, sift together 2 cups (240g) all-purpose flour, ¾ cup (75g) cocoa powder, 1 ½ teaspoons baking powder, 1 ½ teaspoons baking soda, 1 teaspoon salt, and 1 ¾ cups (350g) sugar. Give it a good stir to combine evenly.
- Combine wet ingredients: In a separate bowl, whisk 2 large eggs (room temp), 1 cup (240ml) whole milk, ½ cup (120ml) vegetable oil, and 2 teaspoons vanilla extract until smooth.
- Bring it together: Slowly add the wet mixture to the dry ingredients, mixing gently with a spatula or mixer on low. Once combined, carefully stir in 1 cup (240ml) boiling water — the batter will be thin, but that’s exactly how it should be for moist cake!
- Bake the base layer: Pour half the batter evenly into one prepared pan and bake for about 30-35 minutes. Use a toothpick to check doneness — it should come out mostly clean with a few moist crumbs.
- Prepare the candy surprise: While the first layer bakes, toss your candy pieces in a tablespoon of flour. This step helps prevent the candy from sinking in the batter later.
- Layer the piñata: Once the first layer is baked and slightly cooled (about 10 minutes), carefully remove it from the pan and place it on your cake stand or plate. Spread half the remaining batter over the first cake layer, leaving a small border around the edges.
- Add the candy: Sprinkle the floured candies evenly over this batter layer, then gently pour the remaining batter on top, covering the candies completely. This sandwich method keeps the candy hidden and prevents it from melting into the batter.
- Bake the second layer: Bake the assembled cake for another 30-35 minutes or until a toothpick inserted in the center comes out clean (watch carefully so the candies don’t burn).
- Cool completely: Let the cake cool in the pan for 15 minutes, then transfer it to a wire rack to cool fully before frosting or serving. This is key — cutting into a warm cake will cause the candy to melt too fast and get messy.
- Frost and decorate: If you want, whip up a simple chocolate buttercream frosting and spread it over the cooled cake. This adds sweetness and hides any imperfections from the candy center.
- Serve with a smile: Slice the cake to reveal the colorful candy core and watch your guests’ faces light up. Honestly, it never gets old!
Pro tip: If your candy pieces are a bit large, chop them into smaller bits before tossing with flour. Also, don’t skip the boiling water in the batter — it’s what makes this chocolate cake so moist and tender.
Cooking Tips & Techniques
Making the best piñata chocolate cake with candy-filled surprise isn’t rocket science, but a few tricks can save you from common pitfalls.
- Flour your candy: I can’t stress this enough. Without this step, your candies sink to the bottom or bleed color into the batter, turning your surprise into a sticky mess.
- Batter consistency matters: The batter should be thin — almost like a chocolate syrup. If it’s too thick, your cake might turn out dense instead of moist and fluffy.
- Don’t overmix: When combining wet and dry ingredients, mix just until combined. Overmixing develops gluten and can toughen the cake.
- Watch baking times: Because the cake has a candy core, the baking time can vary slightly. Use a toothpick to test doneness but avoid opening the oven door too often.
- Cool before slicing: Cutting the cake too soon will make the candy run all over the plate. Patience here results in a cleaner slice and a better surprise.
- Pick the right candies: Avoid chocolate-covered or caramel-filled candies that melt too much. Mini M&Ms, Skittles, or gummy bears work perfectly.
When I first made this cake, I forgot to flour the candies — and let me tell you, the resulting lava of melted sweets was a memorable kitchen disaster. But that’s how you learn, right? Now I never skip that step, and the candy-filled surprise stays intact every time.
Variations & Adaptations
This piñata chocolate cake is super versatile. Here are some fun ways to make it your own:
- Dietary twists: Use gluten-free flour blends to make it safe for gluten-sensitive guests. Swap dairy milk for coconut or almond milk to keep it dairy-free.
- Seasonal candy swaps: For holidays, fill the center with themed candies — peppermint drops at Christmas, pastel jellybeans for Easter, or mini candy pumpkins in the fall.
- Flavor upgrades: Add a teaspoon of instant espresso powder to the batter for a mocha twist, or swirl in peanut butter before baking for a rich combo.
- Alternative fillings: Instead of candy, try a surprise layer of fresh berries or chocolate chips for a different kind of burst.
- Personal favorite: I once swapped the vanilla extract for orange zest and used orange-flavored candies — the citrus-chocolate combo was a delightful change that wowed everyone at the party.
You can bake this cake in a bundt pan too. Just be sure to layer the candy in the middle carefully to maintain the piñata effect. And if you’re feeling adventurous, experiment with different frostings — cream cheese frosting adds a nice tang!
Serving & Storage Suggestions
Serve this cake at room temperature so the chocolate and candy center is just perfect — not too hard, not too melty. A dusting of powdered sugar or colorful sprinkles on top adds a festive touch if you’re skipping frosting.
This piñata chocolate cake pairs wonderfully with a scoop of vanilla ice cream or a glass of cold milk. For a grown-up twist, try it alongside a cup of strong coffee or a pour of sweet dessert wine.
To store, wrap the cake tightly in plastic wrap or keep it in an airtight container at room temperature for up to 2 days. For longer storage, refrigerate for up to 5 days or freeze individual slices wrapped well for up to 2 months.
When reheating, warm slices gently in the microwave for 10-15 seconds to soften the cake without melting the candy too much. Over time, the flavors meld beautifully, and the cake gets even more moist — if you can wait that long!
Nutritional Information & Benefits
This chocolate cake offers a comforting treat, but it also includes some nutritional perks thanks to quality ingredients. Each serving (assuming 12 slices) contains approximately:
| Calories | 320 kcal |
|---|---|
| Fat | 14g |
| Carbohydrates | 45g |
| Protein | 4g |
| Sugar | 30g |
Using whole milk and eggs adds valuable protein and calcium, while cocoa powder brings antioxidants and a rich chocolate flavor without excess fat. This recipe isn’t low in sugar, obviously — it is a celebration cake, after all! Just a heads-up for those managing sugar intake or allergies: check candy ingredients carefully if you have sensitivities or dietary restrictions.
Personally, I think the joy and memories this cake creates are just as nourishing as the ingredients. Sometimes, a well-made dessert is exactly what you need to lift your spirits and bring people together.
Conclusion
The Best Piñata Chocolate Cake with Candy-Filled Surprise is more than just a dessert — it’s an experience. From the rich, moist chocolate layers to the unexpected burst of colorful candies, it turns any occasion into a celebration. Whether you’re an experienced baker or just starting out, this recipe is approachable, fun, and guaranteed to bring smiles (and maybe a little sugar-fueled laughter) to your table.
Feel free to tweak the candy fillings, frostings, or flavors to match your style. That’s the beauty of this cake — it’s a canvas for your creativity and a party in every slice. I hope you love making it as much as I do, and I can’t wait to hear about your own candy-filled adventures!
If you try it, drop a comment below or share your favorite twist. And hey, why not pair it with a crispy garlic chicken dinner to balance sweet and savory? Happy baking!
FAQs
What type of candies work best inside the piñata cake?
Small, firm candies like mini M&Ms, Skittles, or gummy bears work best. Avoid chocolates that melt too easily or sticky candies that could ruin the texture.
Can I make this cake ahead of time?
Yes! Bake the cake a day in advance, store it wrapped tightly at room temperature or in the fridge, and frost just before serving for the freshest taste.
Is it possible to make this cake gluten-free?
Absolutely. Use a gluten-free all-purpose flour blend in place of regular flour, and ensure your candies are gluten-free.
How do I prevent the candy from sinking during baking?
Coating the candy pieces lightly in flour before adding them to the batter helps keep them suspended and evenly distributed inside the cake.
Can I make this cake without frosting?
Definitely. The cake is delicious on its own, especially with the candy surprise, but frosting adds extra moisture and sweetness if you like.
Pin This Recipe!
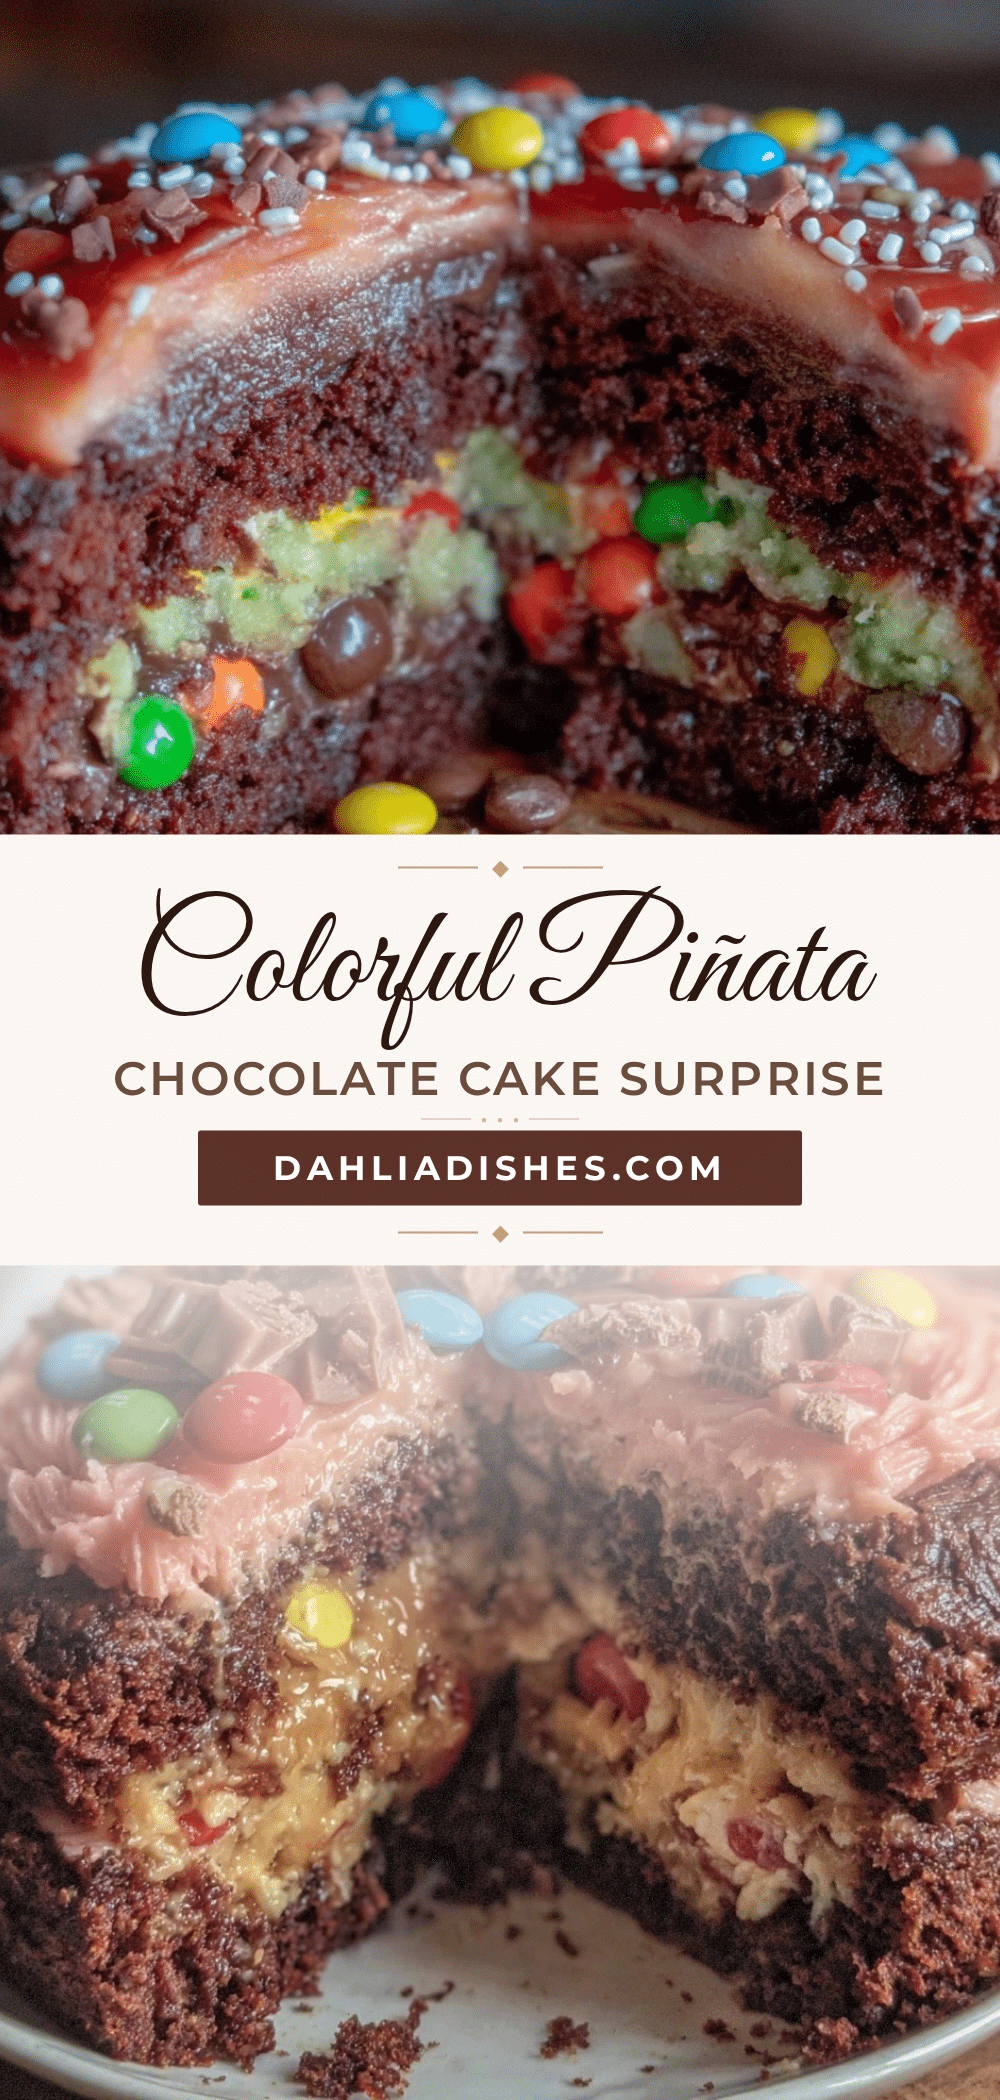
Best Piñata Chocolate Cake Recipe with Easy Candy-Filled Surprise
A playful and moist chocolate cake with a hidden candy surprise inside, perfect for celebrations and last-minute parties. This cake combines rich chocolate flavor with a joyful burst of colorful candies in every slice.
- Prep Time: 20 minutes
- Cook Time: 65 minutes
- Total Time: 85 minutes
- Yield: 12 servings 1x
- Category: Dessert
- Cuisine: American
Ingredients
- 2 cups (240g) all-purpose flour
- 1 ¾ cups (350g) granulated sugar
- ¾ cup (75g) unsweetened cocoa powder (Dutch-processed recommended)
- 1 ½ teaspoons baking powder
- 1 ½ teaspoons baking soda
- 1 teaspoon salt
- 2 large eggs, room temperature
- 1 cup (240ml) whole milk (or almond milk for dairy-free)
- ½ cup (120ml) vegetable oil
- 2 teaspoons vanilla extract
- 1 cup (240ml) boiling water
- 1 ½ cups assorted small candies (mini M&Ms, Skittles, gummy bears, chopped candy bars)
- Optional: sprinkles for decoration
- For frosting (optional):
- 1 cup (227g) unsalted butter, softened
- 3 cups (360g) powdered sugar
- ½ cup (50g) unsweetened cocoa powder
- 3–4 tablespoons heavy cream or milk
- 1 teaspoon vanilla extract
Instructions
- Preheat oven to 350°F (175°C). Grease and line two 9-inch round cake pans with parchment paper.
- In a large bowl, sift together flour, cocoa powder, baking powder, baking soda, salt, and sugar. Stir to combine.
- In a separate bowl, whisk eggs, milk, vegetable oil, and vanilla extract until smooth.
- Slowly add wet ingredients to dry ingredients, mixing gently until combined.
- Carefully stir in boiling water; batter will be thin.
- Pour half the batter into one prepared pan and bake for 30-35 minutes. Check doneness with a toothpick.
- Toss candy pieces with 1 tablespoon flour to prevent sinking.
- Once first layer is baked and cooled about 10 minutes, place it on a cake stand or plate.
- Spread half the remaining batter over the first layer, leaving a small border around edges.
- Sprinkle floured candies evenly over this batter layer.
- Pour remaining batter on top, covering candies completely.
- Bake assembled cake for another 30-35 minutes or until a toothpick comes out clean.
- Cool cake in pan for 15 minutes, then transfer to wire rack to cool completely.
- If desired, prepare frosting by beating butter, powdered sugar, cocoa powder, cream, and vanilla until smooth.
- Frost the cooled cake and decorate as desired.
- Slice to reveal the candy-filled surprise and serve.
Notes
Flour the candies before adding to the batter to prevent sinking and color bleeding. Use thin batter consistency for moist cake. Cool cake completely before slicing to avoid melted candy mess. Avoid chocolate-covered or caramel-filled candies that melt too much.
Nutrition
- Serving Size: 1 slice (1/12 of cak
- Calories: 320
- Sugar: 30
- Fat: 14
- Carbohydrates: 45
- Protein: 4
Keywords: piñata cake, chocolate cake, candy-filled cake, birthday cake, easy chocolate cake, celebration cake, fun dessert