Love this? Save it for later!
Share the inspiration with your friends
My neighbor Dave watched me fumbling with a massive, greasy sub roll one Tuesday afternoon, meat and cheese sliding out the sides like a culinary escape attempt. I was three bites in and already regretting my life choices. He didn’t say anything at first. Then he just shook his head, wiped his hands on his jeans, and said, “You’re overcomplicating it. Come here.”
Dave is this retired guy from South Philly who spends more time in his garage workshop than his kitchen, but apparently, cheesesteak wisdom is something you absorb through the air over there. He walked me through his approach while I stood there holding my sad, falling-apart sandwich. “Smaller is better,” he said. “Everything fits. Nothing falls out. You actually taste the meat and cheese together instead of chasing it around your plate.”
I went home that evening, grabbed some slider rolls I had sitting in the freezer, and gave it a shot. Honestly, it was like someone turned on a light bulb in my brain. The ratio of bread to filling made so much more sense. Every single bite had a bit of everything—the tender beef, the melty provolone, the soft sautéed onions and peppers. No more structural failures. No more cheese sliding off onto the plate. I mean, I’ve made a lot of sandwiches in my day, but these mini Philly cheesesteak sliders changed the game for me.
Maybe you’ve been there too. You want that Philly cheesesteak flavor, but you don’t want the mess or the massive calorie bomb that comes with a foot-long sub. Or maybe you’re feeding a crowd and need something that feels special but doesn’t require you to stand at the stove assembling individual sandwiches for twenty minutes. That’s where these come in. They’re compact, they’re packed with flavor, and they let everyone grab one (or three) without any fuss.
The thing that kept me coming back to this recipe is how forgiving it is. You don’t need a fancy cut of beef or a secret family recipe for the seasoning. You just need good ingredients, a hot skillet, and a little patience while the onions get soft and sweet. It’s the kind of recipe that makes you look like you tried really hard when really, you just followed a few simple steps. And honestly, that’s my favorite kind of cooking.
Why You’ll Love This Recipe
These mini Philly cheesesteak sliders aren’t just another appetizer—they’re the kind of thing that disappears before you can grab a second one. I’ve brought them to game day gatherings, casual dinners, and even a backyard birthday party, and every single time, people hover around the tray like they’re guarding a treasure. Here’s why they work so well.
- Quick & Easy: From start to finish, you’re looking at about 25 minutes. That’s faster than ordering delivery in most neighborhoods.
- Simple Ingredients: Nothing fancy here. Thinly sliced beef, slider rolls, provolone, onions, peppers, and a few pantry staples. You probably have most of it already.
- Perfect for Gatherings: Game day, potlucks, family movie night, or even a weeknight dinner that feels like a treat. These sliders fit every occasion.
- Crowd-Pleaser: I’ve watched picky eaters, kids, and self-proclaimed “not really into beef” people go back for thirds. The flavor is just that good.
- Unbelievably Delicious: The combination of tender beef, caramelized onions and peppers, and melty provolone on a soft, buttery roll is pure comfort food magic.
What makes these different from every other cheesesteak slider recipe out there? It’s the technique. Instead of cooking the beef in large pieces and chopping it, I slice it paper-thin while it’s still slightly frozen. This gives you those perfect, delicate shreds of beef that soak up all the flavor without getting tough. Plus, I finish the sliders under the broiler with a garlic butter brush on the rolls. That extra step makes the tops golden and crispy while the inside stays soft and steamy. It’s a small thing, but it makes a huge difference.
This recipe isn’t just good—it’s the kind that makes you close your eyes after the first bite. It’s comfort food reimagined: faster, easier, but with the same soul-soothing satisfaction. Perfect for impressing guests without stress, or turning a simple Tuesday night into something memorable.
What Ingredients You Will Need
This recipe uses simple, wholesome ingredients to deliver bold flavor and satisfying texture without the fuss. Most of these are pantry staples or easy to find at any grocery store.
- 1 ½ pounds beef sirloin steak or ribeye, thinly sliced (ribeye is more traditional and has better marbling for flavor; sirloin works great for a leaner option)
- 1 tablespoon olive oil (for cooking the beef; adds a light richness)
- 1 large yellow onion, thinly sliced (sweet and soft when caramelized)
- 1 green bell pepper, thinly sliced (adds a slight bitterness that balances the richness of the beef and cheese)
- 8 slices provolone cheese (I prefer deli-sliced provolone for better melt; avoid pre-shredded cheese here)
- 12 slider rolls (soft, slightly sweet rolls work best; King’s Hawaiian or similar are my go-to)
- 3 tablespoons unsalted butter, melted (for brushing the rolls)
- 1 teaspoon garlic powder (mixed into the butter for extra flavor)
- ½ teaspoon salt (for seasoning the beef)
- ¼ teaspoon black pepper (freshly ground is best)
- Optional: ½ teaspoon Worcestershire sauce (adds a subtle umami depth to the beef)
- Optional: ¼ cup beef broth (if you want extra moisture in the filling)
Ingredient Tips: For the best texture, look for beef that’s already thinly sliced at the butcher counter, or pop your steak in the freezer for about 30 minutes before slicing. This firms it up just enough to get those paper-thin pieces. I personally recommend asking your butcher for ribeye—it’s what makes authentic Philly cheesesteaks so good. The extra fat renders down and keeps the meat incredibly tender.
If you’re feeding a crowd that includes someone who doesn’t eat beef, you can substitute thinly sliced chicken breast or even portobello mushrooms. Just adjust the cooking time slightly—chicken takes a few minutes longer, mushrooms cook much faster.
For the cheese, provolone is classic, but you can use white American cheese for a creamier melt or even mozzarella if that’s what you have on hand. Just avoid anything pre-shredded, as it doesn’t melt as smoothly.
Equipment Needed
You don’t need a professional kitchen to make these sliders, but having the right tools makes the process smoother. Here’s what you’ll need.
- Large skillet or cast-iron pan (12-inch works best for cooking the beef and vegetables without overcrowding)
- Sharp chef’s knife (for slicing the beef, onions, and peppers thinly)
- Cutting board (preferably large enough to handle the beef and vegetables separately)
- Spatula (for stirring and flipping the beef)
- Small bowl (for mixing the garlic butter)
- Pastry brush (for brushing the butter onto the rolls; a spoon works in a pinch)
- Baking sheet (for assembling and broiling the sliders)
- Aluminum foil (to tent the sliders if they brown too quickly under the broiler)
- Tongs (helpful for handling the beef and assembling the sliders)
If you don’t have a cast-iron pan, a non-stick skillet works perfectly fine. Just make sure it’s large enough to cook the beef in a single layer. Overcrowding the pan steams the meat instead of searing it, and you lose that beautiful browned flavor.
I’ve made these sliders in a tiny apartment kitchen with just a basic skillet and a toaster oven for broiling. It worked great. Don’t let lack of fancy equipment stop you from trying this recipe.
Preparation Method
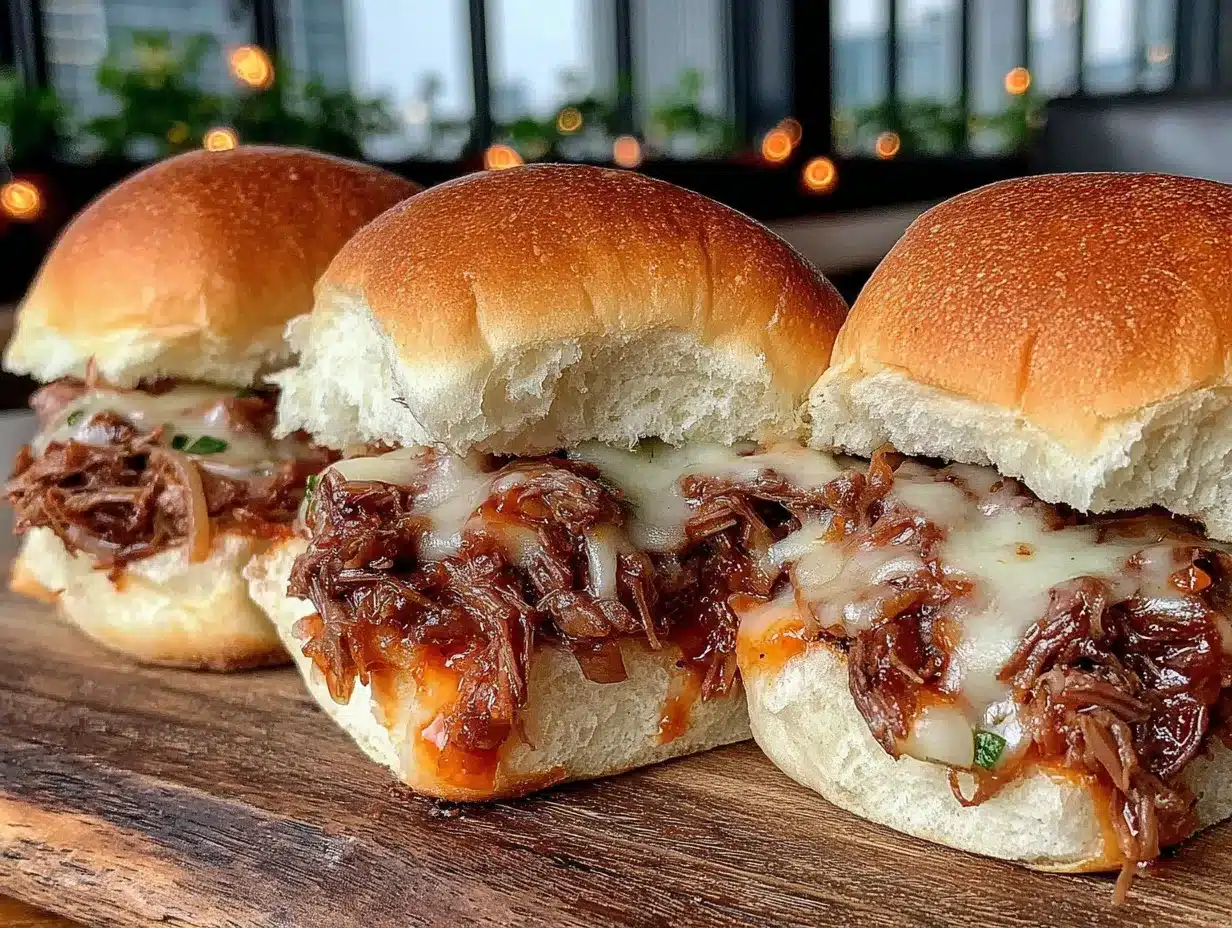
- Preheat your oven’s broiler to high. Position the oven rack about 6 inches from the heating element. This ensures the sliders get golden and bubbly without burning.
- Prepare the beef. If your steak isn’t pre-sliced, place it in the freezer for 20-30 minutes until firm but not frozen solid. Using a sharp knife, slice the beef as thinly as possible against the grain. Aim for slices about ⅛-inch thick. This is the most important step for tender sliders.
- Cook the vegetables. Heat 1 tablespoon of olive oil in your large skillet over medium heat. Add the sliced onion and green pepper. Cook for 5-7 minutes, stirring occasionally, until they’re soft and starting to brown at the edges. The onions should look translucent and slightly caramelized. Transfer the vegetables to a plate and set aside.
- Cook the beef. Increase the heat to medium-high. Add the remaining 1 tablespoon of olive oil to the same skillet. Once the oil is shimmering, add the thinly sliced beef in a single layer. Don’t overcrowd the pan—cook in batches if needed. Let the beef sit undisturbed for about 1 minute to develop a nice sear, then stir and continue cooking for another 2-3 minutes until no longer pink. Season with salt, pepper, and Worcestershire sauce if using. If you want extra moisture, add the beef broth and let it simmer for 30 seconds.
- Combine beef and vegetables. Return the cooked onions and peppers to the skillet with the beef. Stir everything together and let it cook for another minute so the flavors meld. Taste and adjust seasoning if needed.
- Prepare the rolls. While the beef mixture is cooking, slice the slider rolls in half horizontally. Place the bottom halves on a baking sheet, cut side up. Brush the cut sides lightly with some of the melted garlic butter.
- Assemble the sliders. Spoon the beef and vegetable mixture evenly over the bottom halves of the rolls. Make sure every roll gets a generous portion. Tear the provolone slices in half and layer them over the beef. You want complete coverage so every bite has melty cheese.
- Top and brush. Place the top halves of the rolls on the sliders. Brush the tops with the remaining garlic butter. This is what gives them that beautiful golden crust.
- Broil. Place the baking sheet under the broiler for 2-4 minutes. Watch closely—the rolls can go from golden to burnt very quickly. You’re looking for the cheese to be fully melted and the tops to be lightly toasted. If the tops are browning too fast, tent loosely with aluminum foil.
- Rest and serve. Remove from the oven and let the sliders rest for 2 minutes before serving. This allows the cheese to set slightly so it doesn’t all slide off when you pick one up. Serve warm.
Sensory Cue: When the beef hits the hot pan, you should hear a satisfying sizzle. If it doesn’t sizzle, your pan isn’t hot enough. The onions should smell sweet and almost jammy by the time they’re done. And when those sliders come out from under the broiler, the aroma of garlic butter, toasted bread, and melted cheese is absolutely intoxicating.
Cooking Tips & Techniques
I’ve made these mini Philly cheesesteak sliders more times than I can count, and I’ve definitely learned a few things the hard way. Here are the tips that make the biggest difference.
Freeze the beef before slicing. This is non-negotiable for me now. When the beef is partially frozen, you can slice it paper-thin without it squishing or tearing. Room temperature beef is too soft and you’ll end up with uneven chunks that cook at different rates. Trust me, I learned this after a few frustrating attempts.
Don’t skip the vegetable step. I know it’s tempting to just throw everything in the pan at once to save time, but cooking the onions and peppers first and removing them is crucial. They release moisture as they cook, and if you leave them in the pan with the beef, you’ll end up steaming the meat instead of searing it. That moisture kills the browning, and browning equals flavor.
Watch the broiler like a hawk. I once walked away for “just a second” to grab a drink, and came back to charcoal sliders. The broiler is powerful and unpredictable depending on your oven. Set a timer for 2 minutes, check, and go from there. You can always add more time, but you can’t un-burn bread.
Use a rimmed baking sheet. When the cheese melts and the butter drips, it can get messy. A rimmed sheet catches all that goodness and makes cleanup much easier. Plus, it gives you a stable surface for assembling everything.
Let the meat rest after cooking. I know it’s just a few minutes, but letting the beef mixture sit for a minute before spooning it onto the rolls allows the juices to redistribute. If you spoon it on immediately, you’ll get a soggy bottom roll. Nobody wants that.
One mistake I made early on was using too much filling. I thought more is better, right? Wrong. Overstuffed sliders fall apart and the bread-to-filling ratio gets thrown off. You want each slider to have a balanced amount of beef, vegetables, and cheese so every bite is perfect.
Variations & Adaptations
One of the best things about this recipe is how easy it is to tweak. Here are some variations I’ve tried and loved.
Spicy Jalapeño Version: Add thinly sliced fresh jalapeños to the skillet with the onions and peppers. For even more heat, drizzle some sriracha mayo over the beef before adding the cheese. The spicy kick cuts through the richness beautifully.
Mushroom & Swiss: Swap the provolone for Swiss cheese and add 8 ounces of sliced cremini mushrooms to the vegetable mixture. Sauté the mushrooms until they’re golden brown and have released their moisture. This version feels a bit more sophisticated and is great for a dinner party.
Low-Carb / Keto Option: Skip the slider rolls entirely and serve the beef and cheese mixture over a bed of lettuce or in large bell pepper halves. You can also use low-carb tortillas or lettuce wraps. The filling itself is naturally low-carb—it’s just the bread you’re swapping.
Chicken Cheesesteak Sliders: Substitute the beef with thinly sliced chicken breast. Cook the chicken the same way, but make sure it reaches an internal temperature of 165°F. This version is lighter but still incredibly satisfying.
Garlic Lover’s Twist: Add 3-4 minced garlic cloves to the skillet when you cook the onions and peppers. Also stir a teaspoon of garlic powder into the beef while it cooks. Then double the garlic in the butter mixture. It’s a lot of garlic, but if you love it, you’ll adore this version.
I once tried a version with caramelized onions only—no peppers—and added a layer of crispy bacon to each slider. It was ridiculous in the best possible way. My family still talks about it months later.
Serving & Storage Suggestions
These sliders are best served warm, straight from the broiler. I like to arrange them on a large platter with a small bowl of extra beef jus or au jus for dipping on the side. It adds that extra layer of flavor and keeps the rolls from drying out if they sit for a bit.
What to serve with them: A simple side salad with a tangy vinaigrette balances the richness of the sliders. For game day, pair them with crispy french fries, sweet potato wedges, or a classic coleslaw. If you’re serving them for dinner, roasted vegetables or a light tomato soup work beautifully.
Storage: Leftover sliders (if you have any) can be stored in an airtight container in the refrigerator for up to 3 days. The rolls will soften a bit, but the flavor is still fantastic.
Reheating: The best way to reheat these is in a skillet over medium-low heat. Place the sliders in the skillet, cover with a lid, and heat for 3-4 minutes until the cheese is melty and the beef is warm. You can also use the oven at 350°F for about 10 minutes, but the skillet method keeps the rolls from getting soggy. Avoid the microwave—it makes the bread rubbery and the beef tough.
Freezing: You can freeze the assembled but unbaked sliders. Wrap the baking sheet tightly with plastic wrap and then foil. Freeze for up to 2 months. When you’re ready to bake, thaw in the refrigerator overnight, then broil as directed. Add an extra minute or two to the broiling time since they’ll be cold.
One thing I’ve noticed is that the flavors actually get better after a day in the fridge. The beef absorbs the onion and pepper flavors, and everything melds together. So don’t be afraid to make these a day ahead for a party.
Nutritional Information & Benefits
These mini Philly cheesesteak sliders are indulgent, but they also offer some nutritional benefits worth noting. Here’s an approximate breakdown per slider (based on 12 sliders).
| Nutrient | Amount Per Slider |
|---|---|
| Calories | 280 |
| Protein | 18g |
| Fat | 14g |
| Saturated Fat | 7g |
| Carbohydrates | 20g |
| Fiber | 1g |
| Sugar | 4g |
| Sodium | 450mg |
Health Benefits: Beef is an excellent source of high-quality protein, iron, and B vitamins, particularly B12, which supports energy metabolism and nerve function. Onions and bell peppers add vitamin C, antioxidants, and fiber. Provolone cheese provides calcium for bone health. While these sliders are certainly a treat, they offer more nutritional value than many other appetizer options.
Dietary Considerations: This recipe is naturally gluten-free if you omit the rolls or use gluten-free slider buns. It’s also low-carb when served without bread. For a dairy-free version, use dairy-free cheese and a plant-based butter substitute. The beef can be replaced with chicken or mushrooms for different dietary needs.
From a personal perspective, I love that these sliders feel like a special occasion food but don’t leave me feeling overly stuffed or sluggish afterward. The portion control of the slider size helps with that. You get all the satisfaction without the heavy feeling you sometimes get from a full-sized cheesesteak.
Conclusion
These mini Philly cheesesteak sliders have become a staple in my kitchen for good reason. They’re quick enough for a weeknight dinner, impressive enough for company, and endlessly customizable to suit whatever you’re craving. The combination of tender beef, sweet caramelized onions and peppers, melty provolone, and buttery toasted rolls is pure comfort food perfection.
I hope you give this recipe a try and make it your own. Maybe you’ll add extra peppers, swap in a different cheese, or load them up with jalapeños. That’s the beauty of a recipe like this—it’s a starting point, not a rigid set of rules. The best version is the one that makes you happy.
If you make these, I’d love to hear about it. Drop a comment below and let me know how they turned out, what variations you tried, or if you have any questions. And if you’re looking for more crowd-pleasing appetizer ideas, be sure to check out my crispy garlic chicken or my loaded baked potato skins for another game day hit. Happy cooking, friend. You’ve got this.
Frequently Asked Questions
Can I use a different cut of beef for these sliders?
Absolutely. Ribeye is the classic choice for its marbling and tenderness, but sirloin, top round, or even flank steak work well. Just make sure to slice it very thin against the grain. If you’re using a leaner cut, consider adding a splash of beef broth while cooking to keep the meat moist.
How do I prevent the slider rolls from getting soggy?
The key is to let the beef mixture rest for a minute or two before spooning it onto the rolls. This allows excess moisture to settle. Also, brushing the cut sides of the rolls with butter creates a barrier that helps prevent sogginess. Broiling the assembled sliders quickly also helps the tops crisp up.
Can I make these sliders ahead of time for a party?
Yes! You can assemble the sliders completely (without broiling) up to 24 hours in advance. Cover and refrigerate. When you’re ready to serve, brush with garlic butter and broil as directed. You may need to add 1-2 minutes to the broiling time since they’ll be cold from the fridge.
What’s the best way to reheat leftover sliders?
The skillet method works best. Place the sliders in a covered skillet over medium-low heat for 3-4 minutes. This warms them through without making the bread soggy. You can also use a 350°F oven for about 10 minutes. Avoid the microwave, as it tends to make the rolls rubbery.
Can I freeze these sliders?
Definitely. Assemble the sliders on the baking sheet, wrap tightly in plastic wrap and then foil, and freeze for up to 2 months. Thaw overnight in the refrigerator before broiling. Add an extra minute or two to the broiling time to ensure everything is heated through. The texture remains excellent after freezing.
Pin This Recipe!
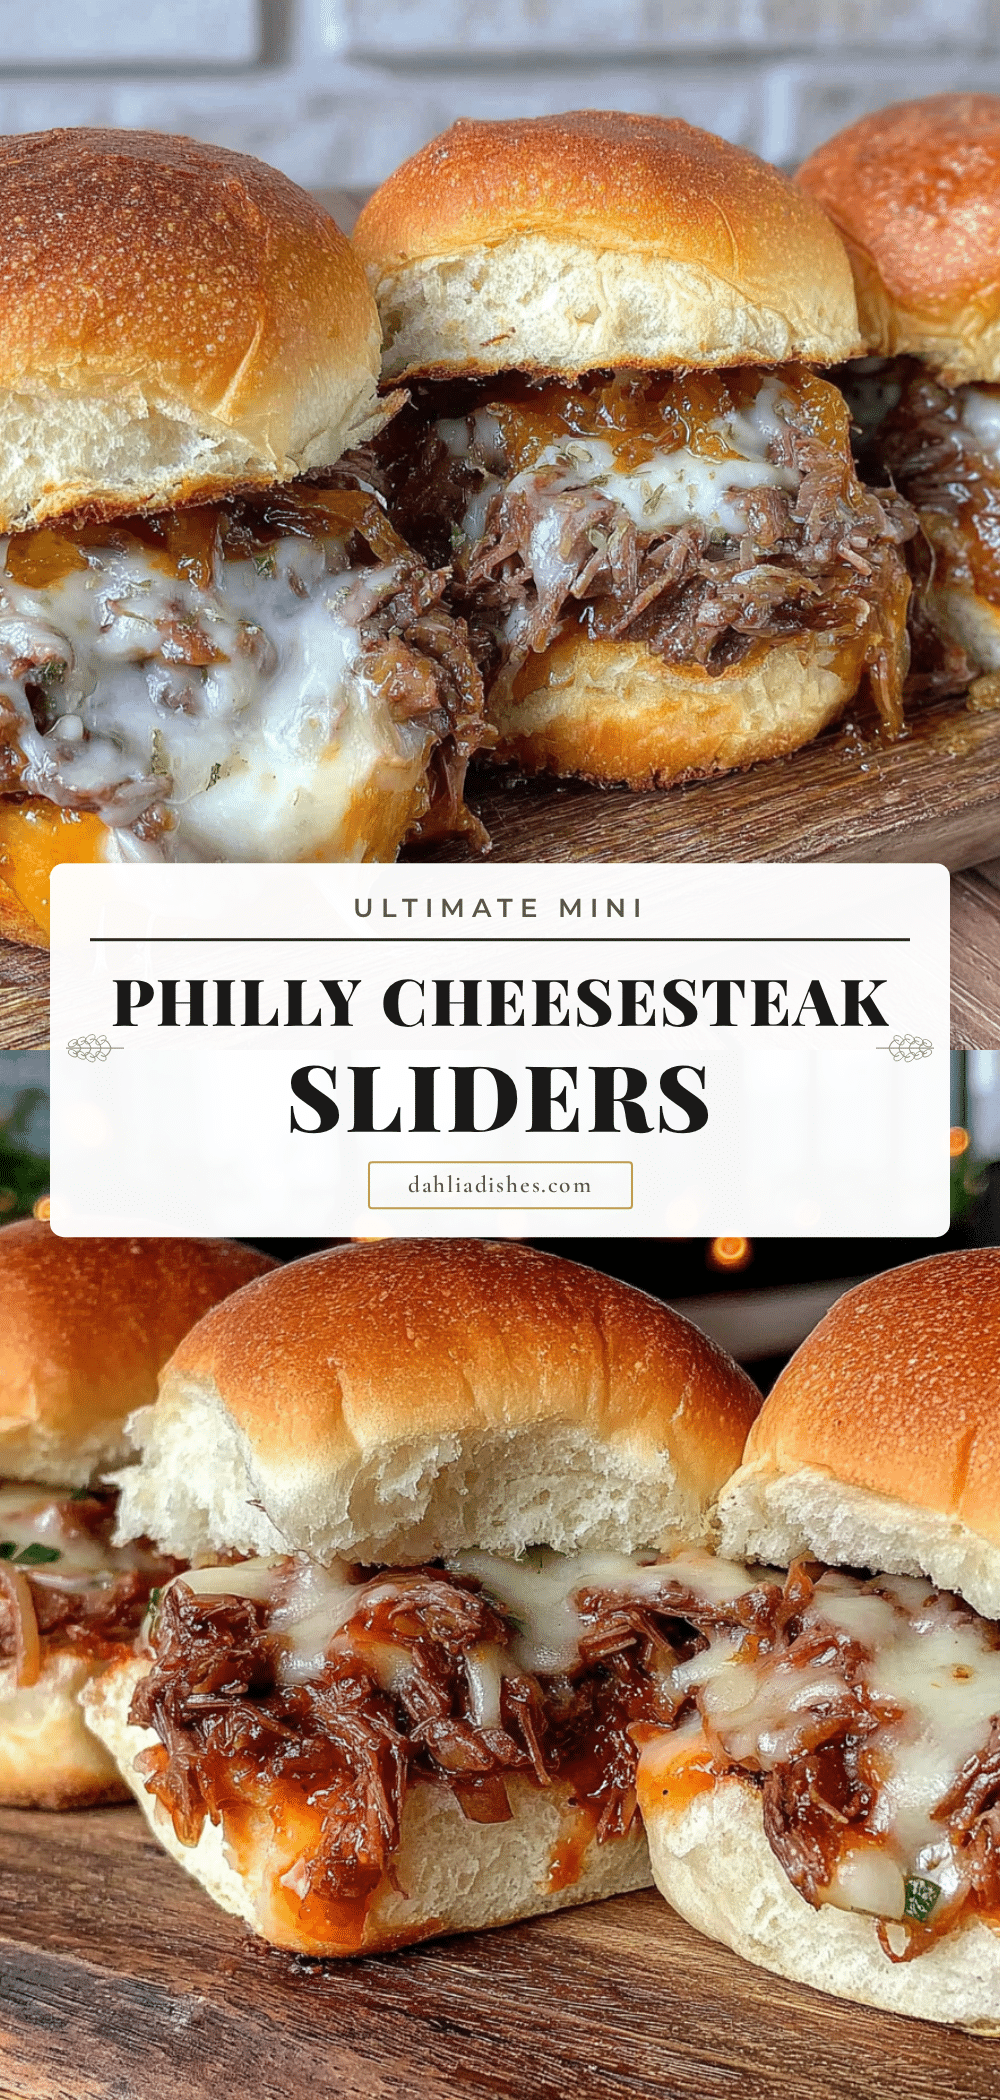
The Best Mini Philly Cheesesteak Sliders Recipe
These mini Philly cheesesteak sliders are quick, easy, and packed with flavor. Tender beef, caramelized onions and peppers, and melty provolone on buttery slider rolls make the perfect crowd-pleasing appetizer or weeknight dinner.
- Prep Time: 15 minutes
- Cook Time: 10 minutes
- Total Time: 25 minutes
- Yield: 12 sliders 1x
- Category: Appetizer
- Cuisine: American
Ingredients
- 1 ½ pounds beef sirloin steak or ribeye, thinly sliced
- 1 tablespoon olive oil
- 1 large yellow onion, thinly sliced
- 1 green bell pepper, thinly sliced
- 8 slices provolone cheese
- 12 slider rolls
- 3 tablespoons unsalted butter, melted
- 1 teaspoon garlic powder
- ½ teaspoon salt
- ¼ teaspoon black pepper
- ½ teaspoon Worcestershire sauce (optional)
- ¼ cup beef broth (optional)
Instructions
- Preheat your oven’s broiler to high. Position the oven rack about 6 inches from the heating element.
- If your steak isn’t pre-sliced, place it in the freezer for 20-30 minutes until firm but not frozen solid. Using a sharp knife, slice the beef as thinly as possible against the grain, about ⅛-inch thick.
- Heat 1 tablespoon of olive oil in a large skillet over medium heat. Add the sliced onion and green pepper. Cook for 5-7 minutes, stirring occasionally, until soft and starting to brown. Transfer to a plate and set aside.
- Increase heat to medium-high. Add the remaining 1 tablespoon of olive oil to the same skillet. Once shimmering, add the beef in a single layer (cook in batches if needed). Let sit undisturbed for 1 minute, then stir and cook for another 2-3 minutes until no longer pink. Season with salt, pepper, and Worcestershire sauce if using. Add beef broth if desired and simmer for 30 seconds.
- Return the cooked onions and peppers to the skillet with the beef. Stir together and cook for 1 minute. Adjust seasoning if needed.
- Slice the slider rolls in half horizontally. Place the bottom halves on a baking sheet, cut side up. Brush cut sides lightly with some of the melted garlic butter.
- Spoon the beef and vegetable mixture evenly over the bottom halves of the rolls. Tear provolone slices in half and layer over the beef.
- Place the top halves of the rolls on the sliders. Brush tops with remaining garlic butter.
- Broil for 2-4 minutes, watching closely, until cheese is melted and tops are lightly toasted. Tent with foil if browning too fast.
- Remove from oven and let rest for 2 minutes before serving. Serve warm.
Notes
Freeze the beef before slicing for paper-thin pieces. Don’t skip cooking vegetables separately to avoid steaming the beef. Watch the broiler closely to prevent burning. Let the meat rest before spooning onto rolls to avoid soggy bottoms. Use a rimmed baking sheet to catch drips.
Nutrition
- Serving Size: 1 slider
- Calories: 280
- Sugar: 4
- Sodium: 450
- Fat: 14
- Saturated Fat: 7
- Carbohydrates: 20
- Fiber: 1
- Protein: 18
Keywords: philly cheesesteak sliders, mini cheesesteak, slider recipe, game day appetizer, beef sliders


