Love this? Save it for later!
Share the inspiration with your friends
It was 11:17 PM on a frantic Tuesday in mid-December, and I was staring down a half-empty carton of eggnog that was about to expire. The usual cookie lineup was already planned—sugar cookies, gingerbread, the works—but a very specific, almost desperate craving hit for something soft, chewy, and spiced. I didn’t have the patience for another batch of chilled dough or royal icing, but I had that eggnog, a stick of butter, and a wild idea that arrived out of nowhere: what if I browned the butter first? Honestly, I wasn’t sure it would work. I mean, eggnog is already rich, and brown butter is a whole other level of nutty, toasty magic. I grabbed my trusty skillet, let the butter sizzle and foam, and the smell alone told me I was onto something. My kitchen looked like a flour bomb had gone off, and I may have licked the spatula twice (no regrets), but when those first cookies came out of the oven, golden at the edges and soft in the middle, I knew this was the kind of happy accident you keep making on purpose. Maybe you’ve been there—standing in a messy kitchen, questioning your life choices, only to bite into something that makes it all worth it. That’s this cookie. It’s the cozy holiday cookie you didn’t know you needed, and now I can’t imagine the season without it.
Why You’ll Love This Recipe
Let me tell you why these Brown Butter Eggnog Snickerdoodles are about to become your new holiday MVP. I’ve tested this recipe more times than I care to admit—burned the butter once, over-floured another batch, and even tried a vegan version that was, well, a learning experience. But this final version? It’s the one I bring to every cookie swap, and it never fails to get that “wait, what’s in these?” reaction.
- Quick & Easy: From start to finish, you’re looking at about 30 minutes. No chilling time needed, which is a game-changer when you’re in a holiday baking frenzy.
- Simple Ingredients: Butter, sugar, flour, eggs, eggnog, and spices. You probably have most of this in your pantry right now. No weird extracts or hard-to-find items.
- Perfect for Holiday Gatherings: These cookies are the life of the party—great for cookie exchanges, cozy family dinners, or just a quiet night by the fire with a mug of hot cocoa.
- Crowd-Pleaser: I’ve watched kids and adults alike go back for thirds. The combination of brown butter and eggnog is dangerously addictive.
- Unbelievably Delicious: The texture is absolutely perfect—crispy edges, soft and chewy centers, with that signature snickerdoodle crackle top. The brown butter adds a nutty depth that makes these taste way more complicated than they are.
What makes this recipe different from the rest? It’s the browned butter. That one extra step transforms the entire cookie from a simple sugar cookie into something rich, complex, and utterly irresistible. Plus, the eggnog adds a subtle creaminess and a hint of festive spice that pairs beautifully with the cinnamon-sugar coating. This isn’t just another snickerdoodle recipe—it’s the one you’ll pull out year after year.
What Ingredients You Will Need
This recipe uses simple, wholesome ingredients to deliver big flavor without the fuss. Most of these are pantry staples, especially during the holiday season.
- For the Cookies:
- 1 cup (2 sticks) unsalted butter (I prefer Kerrygold for its rich flavor, but any good quality butter works)
- 1 cup granulated sugar
- 1/2 cup packed light brown sugar (adds moisture and a hint of molasses)
- 1 large egg, room temperature
- 1/2 cup eggnog (use full-fat for best texture; I like Hood or Southern Comfort brands)
- 1 teaspoon vanilla extract
- 2 3/4 cups all-purpose flour (spooned and leveled)
- 1 teaspoon baking soda
- 1/2 teaspoon baking powder
- 1/2 teaspoon salt
- 1/2 teaspoon ground nutmeg (freshly grated is amazing if you have it)
- 1/4 teaspoon ground cinnamon
- 1/8 teaspoon ground cloves (optional, but adds warmth)
- For the Cinnamon-Sugar Coating:
- 1/4 cup granulated sugar
- 1 tablespoon ground cinnamon
- Pinch of nutmeg (optional, but I never skip it)
Ingredient Selection Tips: For the best flavor, use fresh spices. That jar of nutmeg from three years ago? Toss it. Freshly ground nutmeg makes a world of difference here. If you’re dairy-free, you can substitute the butter with a high-quality vegan butter (I like Miyoko’s) and use a dairy-free eggnog. The texture will be slightly different, but still delicious.
Substitution Guidance: No eggnog? You can use a mix of milk and a splash of heavy cream with an extra 1/4 teaspoon of nutmeg and a pinch of cinnamon. For a gluten-free version, swap the all-purpose flour with a 1:1 gluten-free baking flour blend. Just make sure it contains xanthan gum for structure.
Equipment Needed
You don’t need a fancy kitchen to make these cookies, but a few key tools will make your life easier.
- Large Skillet or Saucepan: For browning the butter. A light-colored pan helps you see the color change.
- Stand Mixer or Hand Mixer: A stand mixer with the paddle attachment is ideal, but a hand mixer works just fine. You could even do this by hand if you’re feeling strong.
- Mixing Bowls: At least two—one for dry ingredients, one for wet.
- Whisk and Spatula: A silicone spatula is great for scraping every last bit of that brown butter goodness.
- Cookie Scoop: A 1.5-tablespoon scoop ensures uniform cookies. I use my OXO scoop every single time.
- Baking Sheets: Two rimmed baking sheets lined with parchment paper or silicone baking mats.
- Cooling Rack: Essential for getting those cookies to the perfect texture.
- Small Bowl: For the cinnamon-sugar coating.
Budget-Friendly Options: If you don’t have a stand mixer, a hand mixer is a perfectly good alternative. No cookie scoop? Use two spoons to drop the dough. Parchment paper is cheap and prevents sticking without the need for expensive silicone mats.
Preparation Method
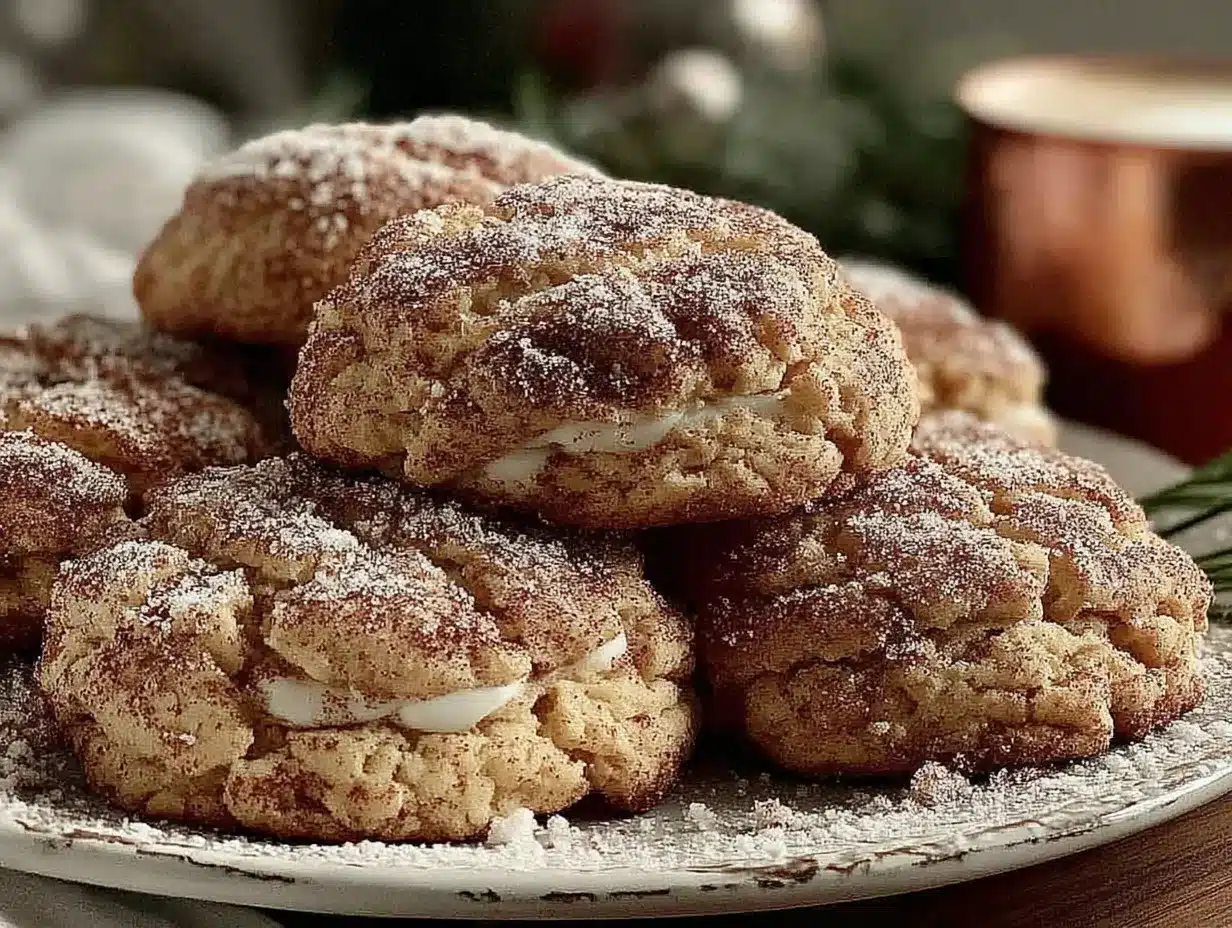
- Brown the Butter (5 minutes): Place the butter in a light-colored skillet or saucepan over medium heat. Stir constantly with a spatula or whisk. The butter will melt, then foam, then start to turn golden. Watch closely—you’re looking for a deep amber color and a nutty aroma. Once it reaches that color, immediately remove it from the heat and pour it into a heatproof bowl to stop the cooking. Let it cool for about 10 minutes. (Pro tip: Don’t walk away! Brown butter can go from perfect to burnt in seconds.)
- Preheat and Prep (5 minutes): Preheat your oven to 350°F (175°C). Line two baking sheets with parchment paper or silicone mats.
- Mix Wet Ingredients (5 minutes): In a large bowl, combine the cooled brown butter, granulated sugar, and brown sugar. Beat with a mixer on medium speed until well combined, about 2 minutes. Add the egg, eggnog, and vanilla extract. Beat until smooth and creamy. The mixture should look a bit like a thick, glossy sauce.
- Combine Dry Ingredients (3 minutes): In a separate bowl, whisk together the flour, baking soda, baking powder, salt, nutmeg, cinnamon, and cloves. This ensures the spices are evenly distributed.
- Make the Dough (2 minutes): Gradually add the dry ingredients to the wet ingredients, mixing on low speed until just combined. Do not overmix—stop as soon as you no longer see streaks of flour. The dough will be soft and slightly sticky, which is exactly what you want.
- Prepare the Coating (1 minute): In a small bowl, whisk together the granulated sugar, cinnamon, and nutmeg for the coating.
- Shape and Coat (5 minutes): Using a cookie scoop or spoon, portion out 1.5-tablespoon-sized balls of dough. Roll each ball between your palms to form a smooth sphere, then roll it in the cinnamon-sugar mixture until fully coated. Place the dough balls on the prepared baking sheets, spacing them about 2 inches apart. (They will spread, so give them room!)
- Bake (10-12 minutes): Bake one sheet at a time in the preheated oven. Bake for 10-12 minutes, or until the edges are set and lightly golden. The centers will still look soft and slightly puffy—that’s good! They will continue to set as they cool. (Sensory cue: Your kitchen should smell like a holiday candle factory.)
- Cool (10 minutes): Let the cookies cool on the baking sheet for 5 minutes before transferring them to a wire rack to cool completely. This resting time is crucial for achieving that perfect chewy texture.
Troubleshooting Tip: If your cookies spread too much, your butter might have been too warm, or you might need to chill the dough for 15 minutes before baking. If they’re too puffy, you might have over-measured your flour. Remember to spoon and level!
Cooking Tips & Techniques
I’ve made every mistake in the book with these cookies, so let me save you the trouble.
The Brown Butter Game: This is the most important step. Use a light-colored pan so you can actually see the color change. Stir constantly. The butter will go from melted to foamy to golden to amber very quickly. The moment you see those brown specks forming and smell that nutty aroma, pull it off the heat. I once got distracted by a phone call and ended up with burnt butter that tasted like ash. Not my finest moment.
Room Temperature Ingredients: Your egg and eggnog should be at room temperature. Cold ingredients can cause the brown butter to seize up, leaving you with a lumpy dough. If you forgot to take them out, place the egg in a bowl of warm water for 5 minutes and microwave the eggnog for 10 seconds.
Don’t Overmix: Once you add the flour, mix only until it disappears. Overmixing develops gluten, which makes cookies tough and cakey. We want soft and chewy here.
Chill If Needed: If your dough feels too soft or sticky to roll, pop it in the fridge for 15 minutes. This is especially helpful if your kitchen is warm.
Batch Baking: Always bake one sheet at a time on the middle rack. Baking two sheets at once can lead to uneven baking. While one sheet bakes, keep the other in the fridge.
Use a Cookie Scoop: It’s not just for convenience—it ensures all your cookies are the same size, which means they’ll bake evenly. No more tiny burnt ones and giant undercooked ones.
Variations & Adaptations
This recipe is super versatile, so feel free to make it your own.
- Spiked Eggnog Version: Add 1 tablespoon of dark rum or bourbon to the wet ingredients. It adds a lovely warmth that pairs perfectly with the brown butter. Just reduce the eggnog by 1 tablespoon to keep the consistency right.
- Gluten-Free Adaptation: Use a 1:1 gluten-free baking flour blend that contains xanthan gum. I’ve tried this with King Arthur’s Measure for Measure flour, and the texture was spot on. You might need to add an extra tablespoon of eggnog if the dough feels too dry.
- Vegan Version: Substitute the butter with vegan butter (like Miyoko’s), use a flax egg (1 tablespoon ground flaxseed + 3 tablespoons water), and use a dairy-free eggnog. The cookies will be slightly less tender, but still delicious.
- Extra Spiced: Add 1/4 teaspoon of ground ginger and a pinch of allspice to the dough. It gives the cookies a gingerbread-meets-snickerdoodle vibe that’s perfect for the holidays.
- White Chocolate Drizzle: Once the cookies are completely cool, drizzle them with melted white chocolate and a sprinkle of nutmeg. It’s over-the-top in the best way possible.
Personal Variation: I once added a handful of toasted pecans to the dough, and it was a game-changer. The crunch against that soft, chewy cookie was incredible. Just chop them finely so they don’t disrupt the texture too much.
Serving & Storage Suggestions
These cookies are best served slightly warm, when the edges are still a little crisp and the center is soft and gooey. I like to serve them with a cold glass of milk or a warm mug of spiced chai. For an adult twist, pair them with a glass of eggnog—spiked or not—or a cup of coffee with a splash of Irish cream.
Presentation Tip: Arrange them on a festive platter with a dusting of powdered sugar and a few cinnamon sticks for a beautiful holiday display. They also make fantastic gifts—just stack them in a tin or a mason jar with a ribbon.
Storage Instructions: Store the cookies in an airtight container at room temperature for up to 5 days. To keep them soft, add a slice of bread to the container—it absorbs excess moisture and keeps the cookies from drying out. (The bread will get hard, but that’s fine—just toss it.)
Freezer Instructions: You can freeze the baked cookies for up to 3 months. Place them in a single layer in a freezer-safe bag or container. To thaw, let them sit at room temperature for about 30 minutes. You can also freeze the unbaked dough balls—just roll them in the cinnamon-sugar coating, place them on a baking sheet, freeze until solid, then transfer to a freezer bag. Bake from frozen, adding an extra 2-3 minutes to the baking time.
Flavor Development: Honestly, these cookies taste even better the next day. The flavors meld together, and the brown butter notes become even more pronounced. So don’t be afraid to make them a day ahead!
Nutritional Information & Benefits
Let’s be real—these are holiday cookies, not health food. But I believe in knowing what you’re eating and making informed choices.
Estimated Nutritional Values (per cookie, based on 24 cookies):
- Calories: 185
- Fat: 9g
- Saturated Fat: 5.5g
- Carbohydrates: 24g
- Sugar: 14g
- Protein: 2g
- Sodium: 95mg
Health Highlights: The brown butter process actually reduces some of the water content, concentrating the flavor so you can use less butter overall. Eggnog provides a small amount of calcium and vitamin D, thanks to the dairy. The spices—cinnamon, nutmeg, and cloves—are rich in antioxidants and have anti-inflammatory properties. So while these aren’t a health food, they’re not completely devoid of redeeming qualities.
Dietary Considerations: This recipe contains dairy, eggs, and gluten. For a dairy-free version, see the variations section. For a gluten-free version, see the adaptations above. They are not suitable for a vegan diet unless modified.
Personal Perspective: I’m a firm believer in balance. Enjoy these cookies as part of a holiday celebration, and don’t stress about the numbers. One or two cookies with a cup of tea won’t derail your health goals—it’s part of what makes the season special.
Conclusion
These Brown Butter Eggnog Snickerdoodles are everything I want in a holiday cookie—warm, spiced, buttery, and full of cozy flavor. The browned butter adds a depth that elevates them from a simple snickerdoodle to something truly special, and the eggnog ties it all together with that unmistakable festive taste. I’ve made these for cookie swaps, family gatherings, and quiet nights by the fire, and they never disappoint. They’re the kind of cookie that makes you slow down and savor the moment, and honestly, isn’t that what the holidays are all about?
I’d love to hear how yours turn out! Did you add a twist? Did your family devour them before they even cooled? Drop a comment below and let me know. And if you loved this recipe, share it with a friend who needs a little extra holiday cheer. Happy baking, my friend—may your kitchen smell like nutmeg and your heart feel full.
Frequently Asked Questions
Can I use salted butter instead of unsalted?
Yes, you can. Just reduce the added salt in the recipe to 1/4 teaspoon to avoid overly salty cookies.
Why did my cookies turn out flat?
Flat cookies usually mean the butter was too warm or the dough wasn’t chilled enough. Next time, chill the dough for 15-20 minutes before baking.
Can I make the dough ahead of time?
Absolutely! You can refrigerate the dough for up to 48 hours. Just let it sit at room temperature for 10 minutes before rolling and baking.
My cookies are too dry. What went wrong?
Over-measuring the flour is usually the culprit. Make sure to spoon the flour into your measuring cup and level it off with a knife, rather than scooping directly from the bag.
Can I use light eggnog instead of full-fat?
You can, but the cookies will be slightly less tender and rich. Full-fat eggnog gives the best texture and flavor. If using light, consider adding an extra tablespoon of melted butter to compensate.
Pin This Recipe!
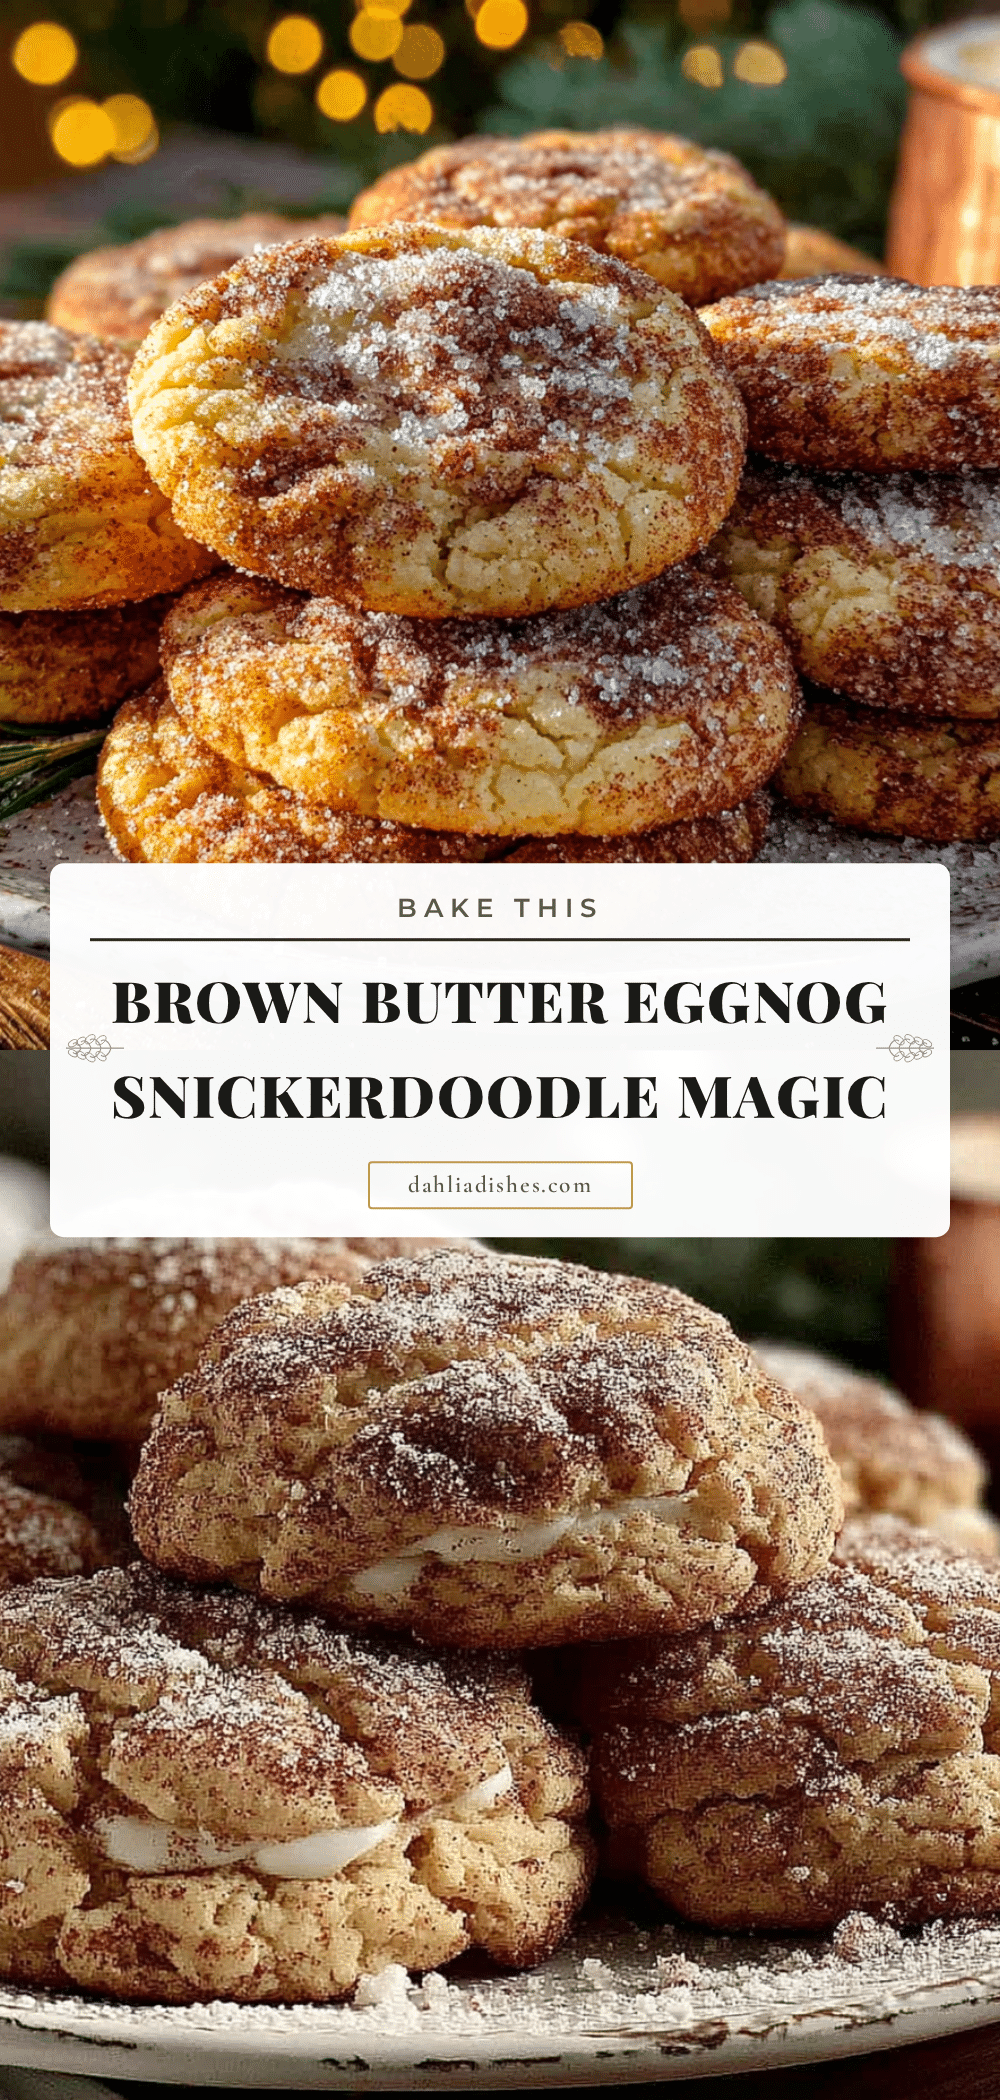
Best Brown Butter Eggnog Snickerdoodles – Easy Holiday Cookies

These Brown Butter Eggnog Snickerdoodles are soft, chewy, and spiced with a nutty depth from browned butter and a festive eggnog kick. Perfect for holiday cookie swaps or cozy nights by the fire, they come together in about 30 minutes with no chilling needed.
- Prep Time: 15 minutes
- Cook Time: 12 minutes
- Total Time: 27 minutes
- Yield: 24 servings 1x
- Category: Dessert
- Cuisine: American
Ingredients
- 1 cup (2 sticks) unsalted butter
- 1 cup granulated sugar
- 1/2 cup packed light brown sugar
- 1 large egg, room temperature
- 1/2 cup eggnog (full-fat)
- 1 teaspoon vanilla extract
- 2 3/4 cups all-purpose flour (spooned and leveled)
- 1 teaspoon baking soda
- 1/2 teaspoon baking powder
- 1/2 teaspoon salt
- 1/2 teaspoon ground nutmeg
- 1/4 teaspoon ground cinnamon
- 1/8 teaspoon ground cloves (optional)
- 1/4 cup granulated sugar (for coating)
- 1 tablespoon ground cinnamon (for coating)
- Pinch of nutmeg (for coating, optional)
Instructions
- Brown the Butter: Place the butter in a light-colored skillet or saucepan over medium heat. Stir constantly until the butter melts, foams, and turns a deep amber color with a nutty aroma. Immediately remove from heat and pour into a heatproof bowl. Let cool for about 10 minutes.
- Preheat and Prep: Preheat oven to 350°F (175°C). Line two baking sheets with parchment paper or silicone mats.
- Mix Wet Ingredients: In a large bowl, combine the cooled brown butter, granulated sugar, and brown sugar. Beat with a mixer on medium speed until well combined, about 2 minutes. Add the egg, eggnog, and vanilla extract. Beat until smooth and creamy.
- Combine Dry Ingredients: In a separate bowl, whisk together the flour, baking soda, baking powder, salt, nutmeg, cinnamon, and cloves.
- Make the Dough: Gradually add the dry ingredients to the wet ingredients, mixing on low speed until just combined. Do not overmix. The dough will be soft and slightly sticky.
- Prepare the Coating: In a small bowl, whisk together the granulated sugar, cinnamon, and nutmeg for the coating.
- Shape and Coat: Using a cookie scoop or spoon, portion out 1.5-tablespoon-sized balls of dough. Roll each ball between your palms to form a smooth sphere, then roll it in the cinnamon-sugar mixture until fully coated. Place on prepared baking sheets, spacing about 2 inches apart.
- Bake: Bake one sheet at a time for 10-12 minutes, or until the edges are set and lightly golden. The centers will still look soft and slightly puffy.
- Cool: Let the cookies cool on the baking sheet for 5 minutes, then transfer to a wire rack to cool completely.
Notes
For best results, use fresh spices and room temperature ingredients. If dough is too sticky, chill for 15 minutes before rolling. Cookies taste even better the next day. Store in an airtight container at room temperature for up to 5 days; add a slice of bread to keep them soft. Freeze baked cookies for up to 3 months or unbaked dough balls for up to 3 months (bake from frozen, adding 2-3 minutes).
Nutrition
- Serving Size: 1 cookie
- Calories: 185
- Sugar: 14
- Sodium: 95
- Fat: 9
- Saturated Fat: 5.5
- Carbohydrates: 24
- Protein: 2
Keywords: brown butter, eggnog, snickerdoodles, holiday cookies, easy cookies, chewy cookies, cinnamon sugar


