Love this? Save it for later!
Share the inspiration with your friends
There used to be this tiny bakery tucked behind a laundromat on the south side of town called “The Bread Box.” They made these buttermilk dinner rolls that were honestly life-changing—soft, pillowy, with that perfect golden crust that flaked just right. When they closed suddenly three summers ago, I felt like I’d lost a friend. I mean, I literally stood outside their locked door reading the “Closed for Business” sign, holding a bag of laundry I didn’t even need to wash.
After seventeen tries—seventeen!—I finally got it. The first batch that came out right, I actually teared up a little. My neighbor Karen came over because she smelled butter through the wall, and we ate three rolls standing over the counter while they were still too hot to handle. That moment, honestly, is what this recipe is all about.
These perfect buttermilk dinner rolls aren’t just bread—they’re the kind of thing that makes holiday dinners feel complete. Maybe you’ve been there, searching for that one recipe that brings everyone to the table a little faster. This is it. The texture is impossibly soft, the buttermilk gives them this subtle tang that pairs beautifully with gravy or honey butter, and they come together with ingredients you probably already have in your kitchen.
I keep making these because they remind me that some things are worth the effort. And honestly, nothing beats watching someone take their first bite and close their eyes for a second. That’s the good stuff right there.
Why You’ll Love This Recipe
Let me tell you why these buttermilk dinner rolls have become my go-to for every holiday gathering, potluck, and even random Tuesday dinners. I’ve tested this recipe more times than I care to admit, and every single time, the results are consistently amazing.
- Quick & Easy : These come together in about 2 hours from start to finish, which is surprisingly fast for homemade rolls. Most of that time is just waiting for the dough to rise—active prep is maybe 20 minutes.
- Simple Ingredients : No fancy grocery trips needed. You likely already have flour, butter, buttermilk, yeast, sugar, and salt in your kitchen. That’s it—six basic ingredients for bakery-quality rolls.
- Perfect for Holidays : Thanksgiving, Christmas, Easter, or Sunday dinner—these rolls fit right in. They’re elegant enough for special occasions but simple enough for everyday meals.
- Crowd-Pleaser : Kids devour them, adults fight over the last one, and everyone asks for the recipe. I’m not exaggerating—I’ve had people text me weeks later asking for it again.
- Unbelievably Delicious : The texture is what gets everyone. Soft, fluffy, with that slight buttermilk tang and a buttery finish that makes you reach for another one before you’ve finished the first.
What makes these different from every other dinner roll recipe out there is the technique. I use a slightly higher hydration dough with cold buttermilk, which creates a more tender crumb. Plus, I brush them with melted butter twice—once before baking and once immediately after—for that signature glossy finish and rich flavor.
This recipe isn’t just good—it’s the kind that makes you close your eyes after the first bite. It’s comfort food reimagined, faster and simpler than you’d expect, but with the same soul-soothing satisfaction that makes holidays feel special.
What Ingredients You Will Need
This recipe uses simple, wholesome ingredients to deliver those soft, fluffy dinner rolls with the perfect buttery finish. Most of these are pantry staples, which makes these rolls perfect for last-minute holiday prep or spontaneous baking sessions.
- All-purpose flour, 4 cups (500g) – I prefer King Arthur Flour for consistent results, but any good brand works. Spoon and level your flour for accuracy—don’t scoop directly from the bag.
- Buttermilk, 1 cup (240ml), lukewarm – This is the star ingredient. Real buttermilk gives the best tang and tenderness. If you don’t have it, you can make a quick substitute by adding 1 tablespoon of lemon juice or vinegar to regular milk and letting it sit for 5 minutes.
- Unsalted butter, 1/2 cup (113g), melted and slightly cooled – Use good quality butter here. I recommend Kerrygold or Plugrá for the richest flavor. You’ll use some in the dough and some for brushing.
- Active dry yeast, 2 1/4 teaspoons (1 packet) – Make sure your yeast is fresh. If you’re not sure, proof it in warm water with a pinch of sugar first—it should get foamy within 5-10 minutes.
- Granulated sugar, 3 tablespoons (38g) – Just enough to feed the yeast and add a touch of sweetness. Don’t skip it—it balances the tangy buttermilk perfectly.
- Salt, 1 1/2 teaspoons (9g) – Fine sea salt works best. Salt controls yeast activity and enhances flavor, so don’t reduce it.
- Egg, 1 large, room temperature – Adds richness and helps with structure. Let it sit out for 30 minutes before starting.
- Honey, 1 tablespoon (21g) – Optional but wonderful. It adds a subtle sweetness and helps with browning. You can substitute with maple syrup if you prefer.
For the butter wash, you’ll need an additional 2-3 tablespoons of melted butter. I sometimes add a pinch of flaky sea salt to the butter wash for a gorgeous finish—highly recommended if you’re feeling fancy.
Equipment Needed
You don’t need a lot of fancy equipment to make these buttermilk dinner rolls. Here’s what I use and what you can substitute if needed.
- Stand mixer with dough hook – This makes kneading effortless. I use my KitchenAid, and it handles this dough beautifully. If you don’t have one, you can absolutely knead by hand—it’ll take about 10-12 minutes of arm work.
- Large mixing bowl – For the initial mixing and first rise. Glass or ceramic works great because they hold warmth well.
- 9×13-inch baking dish – This is my go-to for 12 rolls arranged in a 3×4 pattern. You can also use a round cake pan or cast iron skillet for a different look.
- Kitchen thermometer – Not strictly necessary, but helpful for checking liquid temperatures. Buttermilk should be around 110°F (43°C) for activating yeast.
- Pastry brush – For that beautiful butter wash. A silicone brush works great and doesn’t shed bristles.
- Plastic wrap or clean kitchen towel – For covering the dough during rising. A damp towel works perfectly too.
- Cooling rack – Essential for letting rolls cool without getting soggy bottoms.
I’ve made these rolls in a cheap metal baking pan and a fancy ceramic dish—both work fine. The key is having a pan that allows the rolls to touch each other so they rise up instead of spreading out.
Preparation Method
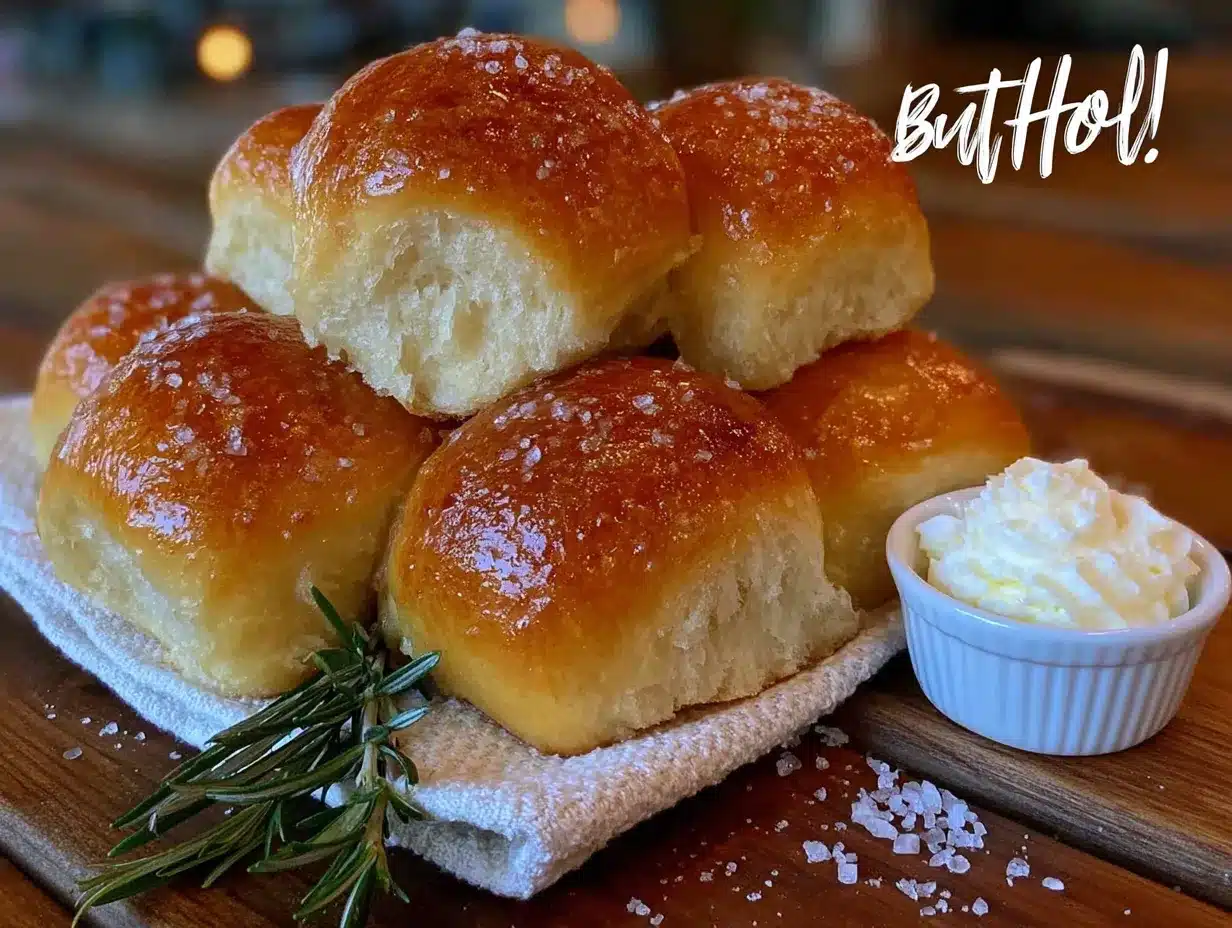
Let me walk you through this step by step. I’ve made these buttermilk dinner rolls more times than I can count, so I’ll share all the little tricks I’ve learned along the way.
- Activate the yeast – In a small bowl, combine the lukewarm buttermilk (about 110°F/43°C) with 1 tablespoon of the sugar and the yeast. Let it sit for 5-10 minutes until it becomes foamy. If it doesn’t foam, your yeast might be dead—start over with fresh yeast. I learned this the hard way on Thanksgiving morning, trust me.
- Mix the dry ingredients – In your stand mixer bowl, whisk together the flour, remaining 2 tablespoons sugar, and salt. Make a well in the center.
- Combine wet ingredients – In a separate bowl, whisk together the melted butter (cooled so it’s not hot), the egg, and honey if using. Add the yeast mixture and stir to combine.
- Form the dough – Pour the wet ingredients into the well of dry ingredients. Mix on low speed with the dough hook until a shaggy dough forms, about 2 minutes. The dough will look rough and sticky—that’s perfect.
- Knead the dough – Increase speed to medium and knead for 6-8 minutes (or 10-12 minutes by hand). The dough should become smooth, elastic, and slightly tacky but not sticky. It should pass the windowpane test—stretch a small piece thin enough to see light through without tearing.
- First rise – Place the dough in a lightly oiled bowl, turning to coat. Cover with plastic wrap or a damp towel and let rise in a warm spot for 1 to 1 1/2 hours, until doubled in size. I put mine in the microwave with a cup of hot water—works every time.
- Shape the rolls – Punch down the dough gently. Turn it onto a lightly floured surface. Divide into 12 equal pieces (about 75g each if you want to be precise). Shape each piece into a smooth ball by pulling the edges underneath and pinching the bottom. Place them in your greased 9×13-inch baking dish, spacing evenly.
- Second rise – Cover the rolls loosely with plastic wrap and let rise for 30-45 minutes, until they’ve puffed up and are touching each other. They should look pillowy and soft.
- Preheat and prepare – About 20 minutes before baking, preheat your oven to 375°F (190°C). Brush the risen rolls gently with melted butter—this gives them that gorgeous golden color.
- Bake – Place the dish in the center of the oven and bake for 18-22 minutes, until the tops are deep golden brown and the rolls sound hollow when tapped. Rotate the pan halfway through for even browning.
- Final butter bath – As soon as they come out of the oven, brush them with more melted butter. This is non-negotiable—it’s what makes these rolls absolutely irresistible. Let them cool in the pan for 5 minutes, then transfer to a cooling rack.
The smell in your kitchen right now is pure magic. Seriously, it’s better than any candle you could buy.
Cooking Tips & Techniques
After making these buttermilk dinner rolls probably fifty times, I’ve collected some hard-won wisdom. Here are my best tips for perfect results every time.
Temperature matters more than you think. Cold ingredients will slow down your yeast and make the dough difficult to work with. Make sure your buttermilk is lukewarm (around 110°F), your egg is room temperature, and your melted butter has cooled slightly. I once used cold buttermilk straight from the fridge, and the dough took forever to rise—it was a sad, dense mess.
Don’t skip the windowpane test. Under-kneaded dough won’t develop enough gluten, and your rolls will be dense instead of fluffy. When you think you’re done kneading, pinch off a small piece and stretch it gently. If it tears easily, keep kneading. If it stretches thin enough to see light through, you’re good.
Watch your flour amounts. Too much flour makes tough rolls. The dough should be slightly tacky to the touch but not sticking to your hands. If you’re kneading by hand, resist the urge to add more flour—a little oil on your hands works better.
Butter is your best friend. Brushing the rolls before baking gives them that beautiful golden crust. Brushing them after baking adds flavor and keeps the tops soft. Don’t skimp on either step—I learned this when I forgot the post-bake butter once, and everyone noticed.
Let them rest. I know it’s hard, but let the rolls cool for at least 5-10 minutes before serving. They continue cooking internally and the texture sets properly. Plus, you won’t burn your mouth on molten butter—been there, done that.
For consistent sizing, use a kitchen scale. Weighing each piece of dough to about 75g ensures all your rolls bake evenly. If you don’t have a scale, eyeball it and try to make them as uniform as possible.
Variations & Adaptations
These buttermilk dinner rolls are wonderfully versatile. Here are some of my favorite ways to change them up depending on the occasion or what I have on hand.
Herb and Garlic Rolls – Add 2 teaspoons of dried rosemary or thyme and 2 minced garlic cloves to the flour mixture. The herbs infuse the dough beautifully, and garlic gives them a savory depth that’s incredible with roasted meats. I make these for Thanksgiving and they disappear first.
Cheesy Pull-Apart Rolls – After shaping each roll, press a small cube of cheddar or mozzarella into the center before placing it in the pan. The cheese melts into gooey pockets that are absolutely addictive. My kids beg for these constantly.
Whole Wheat Version – Substitute 1 cup of all-purpose flour with whole wheat flour. You’ll need an extra 2-3 tablespoons of buttermilk since whole wheat absorbs more liquid. The rolls are heartier but still soft and delicious—perfect for a more rustic holiday table.
Cinnamon Sugar Rolls – For a sweet breakfast version, skip the salt and add 1 teaspoon of cinnamon to the flour. After shaping, roll each ball in melted butter then in a cinnamon-sugar mixture before the second rise. These are amazing for Christmas morning.
Gluten-Free Adaptation – Use a good 1:1 gluten-free flour blend that contains xanthan gum. Add an extra egg for structure and let the dough rest for 20 minutes after mixing to hydrate the flour properly. The texture is slightly different but still delicious.
Serving & Storage Suggestions
These buttermilk dinner rolls are best served warm, fresh from the oven, with a generous pat of butter melting into the soft center. But they’re also fantastic at room temperature, which makes them perfect for holiday buffets and potlucks.
Serving ideas – Pair them with honey butter, garlic butter, or a simple compound butter with fresh herbs. They’re incredible alongside roasted turkey, ham, prime rib, or even a simple soup or salad. For breakfast, try them split and toasted with jam or honey.
Storage – Keep leftover rolls in an airtight container at room temperature for up to 3 days. They’ll stay soft and delicious. Don’t refrigerate them—the cold air dries them out and makes them stale faster.
Freezing – These freeze beautifully. Let them cool completely, then wrap tightly in plastic wrap and foil, or place in a freezer-safe bag. They’ll keep for up to 3 months. To serve, thaw at room temperature and warm in a 300°F oven for 5-10 minutes.
Reheating – The best way to reheat rolls is in the oven. Wrap them in foil and warm at 300°F for 10 minutes. You can also microwave them for 15-20 seconds, but they won’t be as crispy on the outside. For that fresh-baked texture, I always go with the oven method.
Make-ahead tip – You can prepare the dough through the first rise, punch it down, and refrigerate it overnight. The next day, shape the rolls, let them rise, and bake as directed. The cold fermentation actually develops more flavor—a pro trick I use all the time.
Nutritional Information & Benefits
Here’s a rough estimate of what’s in each roll, based on 12 servings. Keep in mind these values can vary based on exact ingredients and portion sizes.
| Nutrient | Amount per roll |
|---|---|
| Calories | 220 |
| Total Fat | 9g |
| Saturated Fat | 5g |
| Carbohydrates | 30g |
| Protein | 5g |
| Fiber | 1g |
| Sugar | 4g |
| Sodium | 300mg |
While these rolls aren’t exactly health food, they do offer some benefits. Buttermilk provides probiotics and calcium, and the butter contains fat-soluble vitamins. Using whole wheat flour boosts fiber and nutrients. Plus, homemade rolls have no preservatives or artificial ingredients—just real, simple food.
For a lighter option, you can reduce the butter in the dough by half and use a butter spray for brushing. The texture won’t be as rich, but they’ll still be delicious. I personally believe that holidays are for indulging, so I make the full-fat version and enjoy every bite.
Conclusion
These perfect buttermilk dinner rolls have become a staple in my kitchen for good reason. They’re soft, fluffy, buttery, and absolutely irresistible—the kind of bread that makes every meal feel like a celebration. Whether you’re serving them for Thanksgiving, Christmas, Easter, or just a regular Sunday dinner, they’ll steal the show every single time.
I love this recipe because it’s forgiving enough for beginner bakers but impressive enough for experienced ones. It’s the recipe I turn to when I want to make someone feel special, when I want to fill my kitchen with that incredible baking smell, or when I just need a little comfort food in my life.
Now I want to hear from you! Have you tried making these buttermilk dinner rolls? Did you add any fun twists or variations? Drop a comment below and let me know how they turned out—I read every single one and I love seeing your creations. And if you loved this recipe, share it with a friend who needs some warm, buttery goodness in their life.
Happy baking, friends. May your rolls always be golden and your butter always melted.
Frequently Asked Questions
Can I make these buttermilk dinner rolls ahead of time?
Absolutely! You can prepare the dough through the first rise, punch it down, and refrigerate it overnight. The next day, shape the rolls, let them rise, and bake as directed. The cold fermentation actually develops more flavor and makes the rolls even better.
Can I use buttermilk powder instead of liquid buttermilk?
Yes, you can substitute buttermilk powder. Use about 4 tablespoons of powder mixed with 1 cup of water to replace the liquid buttermilk. Just follow the package instructions for the exact ratio. The rolls will have a slightly different texture but still turn out delicious.
Why didn’t my rolls rise properly?
There are a few common reasons. Your yeast might be expired or killed by liquid that was too hot (over 130°F). The room might be too cold for rising—try placing the dough in a warm spot like a microwave with a cup of hot water. Also, too much salt can inhibit yeast activity, so measure carefully.
Can I freeze the unbaked rolls?
Yes! After shaping the rolls and placing them in the pan, cover tightly and freeze before the second rise. When ready to bake, let them thaw and rise in the refrigerator overnight, then bring to room temperature and bake as directed. This is perfect for holiday prep.
How do I get that beautiful golden brown color on top?
The key is the butter wash before baking. Brush the risen rolls generously with melted butter, and if you want extra shine, you can add an egg wash (one egg beaten with a tablespoon of water) before the butter. Also, make sure your oven is fully preheated to 375°F for even browning.
Pin This Recipe!
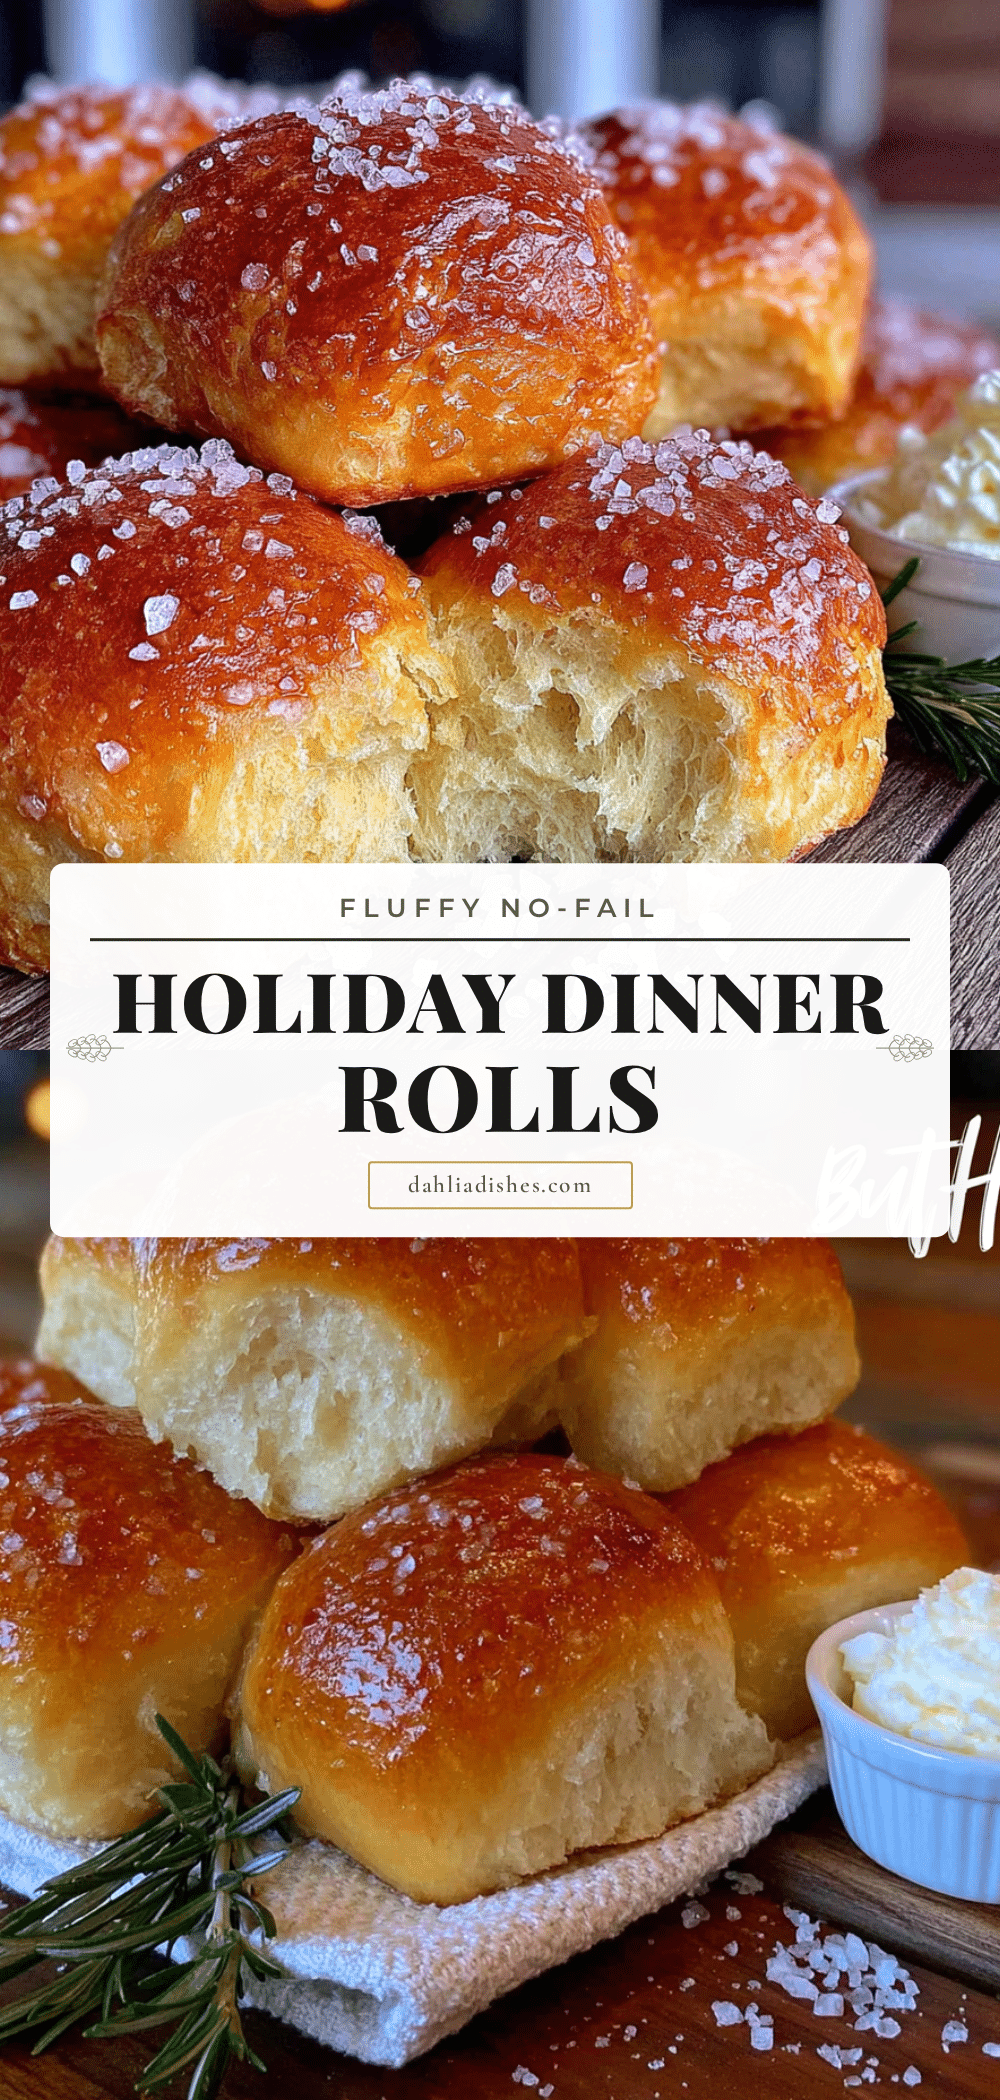
The Perfect Buttermilk Dinner Rolls Recipe
These soft, pillowy buttermilk dinner rolls have a perfect golden crust and a subtle tang from buttermilk. They’re easy to make with simple ingredients and are perfect for holidays or any dinner.
- Prep Time: 20 minutes
- Cook Time: 20 minutes
- Total Time: 2 hours
- Yield: 12 rolls 1x
- Category: Bread
- Cuisine: American
Ingredients
- 4 cups (500g) all-purpose flour
- 1 cup (240ml) buttermilk, lukewarm
- 1/2 cup (113g) unsalted butter, melted and slightly cooled
- 2 1/4 teaspoons (1 packet) active dry yeast
- 3 tablespoons (38g) granulated sugar
- 1 1/2 teaspoons (9g) fine sea salt
- 1 large egg, room temperature
- 1 tablespoon (21g) honey (optional)
- 2–3 tablespoons melted butter (for brushing)
Instructions
- Activate the yeast: In a small bowl, combine the lukewarm buttermilk (about 110°F/43°C) with 1 tablespoon of the sugar and the yeast. Let it sit for 5-10 minutes until foamy.
- Mix the dry ingredients: In your stand mixer bowl, whisk together the flour, remaining 2 tablespoons sugar, and salt. Make a well in the center.
- Combine wet ingredients: In a separate bowl, whisk together the melted butter (cooled), the egg, and honey if using. Add the yeast mixture and stir to combine.
- Form the dough: Pour the wet ingredients into the well of dry ingredients. Mix on low speed with the dough hook until a shaggy dough forms, about 2 minutes.
- Knead the dough: Increase speed to medium and knead for 6-8 minutes (or 10-12 minutes by hand) until smooth, elastic, and slightly tacky. It should pass the windowpane test.
- First rise: Place the dough in a lightly oiled bowl, turning to coat. Cover and let rise in a warm spot for 1 to 1 1/2 hours, until doubled in size.
- Shape the rolls: Punch down the dough. Turn onto a lightly floured surface. Divide into 12 equal pieces (about 75g each). Shape each into a smooth ball and place in a greased 9×13-inch baking dish.
- Second rise: Cover loosely and let rise for 30-45 minutes, until puffed up and touching each other.
- Preheat and prepare: About 20 minutes before baking, preheat oven to 375°F (190°C). Brush the risen rolls gently with melted butter.
- Bake: Place in the center of the oven and bake for 18-22 minutes, until deep golden brown and hollow when tapped. Rotate pan halfway through.
- Final butter bath: As soon as they come out, brush with more melted butter. Let cool in pan for 5 minutes, then transfer to a cooling rack.
Notes
For best results, use real buttermilk and good quality butter. Brush rolls with melted butter twice for a glossy finish. Dough can be refrigerated overnight after first rise for more flavor. Freeze baked rolls for up to 3 months.
Nutrition
- Serving Size: 1 roll
- Calories: 220
- Sugar: 4
- Sodium: 300
- Fat: 9
- Saturated Fat: 5
- Carbohydrates: 30
- Fiber: 1
- Protein: 5
Keywords: buttermilk dinner rolls, homemade rolls, soft dinner rolls, holiday rolls, easy bread recipe


