Love this? Save it for later!
Share the inspiration with your friends
My friend’s kid asked why I couldn’t just use candy eyeballs instead of trying to pipe little white circles on every single treat. I started to explain why that wouldn’t work — then stopped. She was seven, and she was holding a bag of those googly-eyed candy things she’d fished out of her Halloween bucket. Honestly, I had no good reason. I just assumed homemade meant from-scratch decorating, which is silly when you think about it. So I bought a bag, melted some marshmallows, and let her go to town.
The result was a kitchen counter covered in powdered sugar, a very sticky seven-year-old, and the best batch of Monster Eyeball Rice Krispie Treats I’d ever made. I mean, they looked ridiculous in the best possible way. Some eyeballs were sideways, some were stacked, and a few had clearly been licked before they hit the pan. But you know that feeling when something turns out better because you let go of control? That was this moment. The treats were gooey, perfectly crisp, and honestly more fun than anything I’d ever piped by hand.
These Easy Monster Eyeball Rice Krispie Treats have become our go-to Halloween dessert ever since. They take maybe fifteen minutes of active work, use ingredients you can grab at any grocery store, and let kids actually help without you hovering over every step. There’s something about seeing a pan full of those little candy eyes staring back at you that just makes everyone smile. And let me tell you — they taste exactly like the classic treat you remember, just with a creepy-cute twist that makes them perfect for spooky season.
Why You’ll Love This Recipe
I’ve tested this recipe about a dozen times across three different Halloween parties, and I can honestly say it’s the most forgiving dessert I’ve ever made. You don’t need a candy thermometer, a double boiler, or any special skills. If you can melt butter and stir, you’ve got this.
- Quick & Easy: These come together in about 15 minutes of active time. Total chill time is maybe 30 minutes if you’re impatient like me.
- Simple Ingredients: You need six ingredients max, and four of them are probably in your pantry right now. No fancy baking chocolate or obscure extracts.
- Perfect for Halloween Parties: These are the first thing to disappear at potlucks, classroom celebrations, or spooky movie nights. Kids go absolutely wild for them.
- Crowd-Pleaser: I’ve watched adults sneak three of these in a row. There’s something about the combination of crispy, marshmallow-y sweetness and those silly eyeballs that appeals to everyone.
- Unbelievably Delicious: The texture is spot-on — crispy on the outside, soft and chewy in the middle. No rock-hard treats here, I promise.
What makes this version different from other Halloween rice krispie treats is the ratio. I use a little extra butter and a splash of vanilla extract, which keeps them from getting that dense, cardboard texture some recipes have. The candy eyeballs also add a subtle sweetness that balances the marshmallow perfectly. This isn’t just another holiday dessert — it’s the one you’ll find yourself making for no reason in November because you bought too many candy eyes and can’t stand waste.
What Ingredients You Will Need
This recipe uses simple, everyday ingredients that come together to create something genuinely fun. Most of these are pantry staples, so you might not even need a grocery run.
- 3 tablespoons unsalted butter — I use salted in a pinch, but unsalted gives you better control over the flavor. Kerrygold is my go-to for the richest taste.
- 1 package (10 ounces) mini marshmallows — Jet-Puffed works beautifully. Don’t use the jumbo ones unless you’re patient enough to watch them melt unevenly.
- 6 cups crispy rice cereal — Kellogg’s Rice Krispies are the classic choice, but any generic brand works fine. I’ve used Malt-O-Meal in a pinch with great results.
- 1/2 teaspoon vanilla extract — Pure vanilla makes a difference here. The imitation stuff works, but the flavor is noticeably flat.
- 1/4 teaspoon salt — This is optional but highly recommended. It cuts the sweetness and makes the marshmallow flavor pop.
- 1/2 cup candy eyeballs — Wilton is my preferred brand because the eyeballs are consistent in size and the white part doesn’t bleed. You can find them at craft stores or online. Some grocery stores carry them in the baking aisle during Halloween.
For the marshmallow mixture, I recommend using a heavy-bottomed saucepan to prevent scorching. If you’re making these gluten-free, double-check your rice cereal label — most brands are naturally gluten-free, but some contain malt flavoring that isn’t. Also, if you want to add a few drops of orange or green food coloring to the marshmallow mixture, go for it. I’ve done green eyeballs floating in a purple base, and the kids lost their minds.
Equipment Needed
You don’t need a fully stocked kitchen for these. Here’s what you’ll need:
- Large saucepan — A 4-quart or larger pot works best. You need room to stir the marshmallows without them spilling over.
- 9×13-inch baking dish — Glass or metal both work. I prefer glass because it’s easier to see if the butter is evenly melted. If you want thicker treats, use an 8×8-inch pan.
- Parchment paper or non-stick spray — This is non-negotiable. Without it, your treats will stick to the pan and you’ll be scraping marshmallow off for an hour.
- Rubber spatula — A silicone spatula is ideal because it doesn’t scratch your pan and it’s easy to clean. I’ve used a wooden spoon in a pinch, but the marshmallow sticks to it terribly.
- Large mixing bowl — For combining the cereal and marshmallow mixture. Make sure it’s big enough to stir without flinging cereal everywhere.
- Butter knife or offset spatula — For pressing the mixture into the pan. Wet the knife slightly to prevent sticking.
- Measuring cups and spoons — Precision matters here, especially with the butter and vanilla.
If you don’t have a 9×13 pan, you can use a rimmed baking sheet. The treats will be thinner, but they’ll crisp up faster. I once made these in a disposable foil pan for a camping trip, and they turned out fine — just be careful not to poke holes in the bottom.
Preparation Method
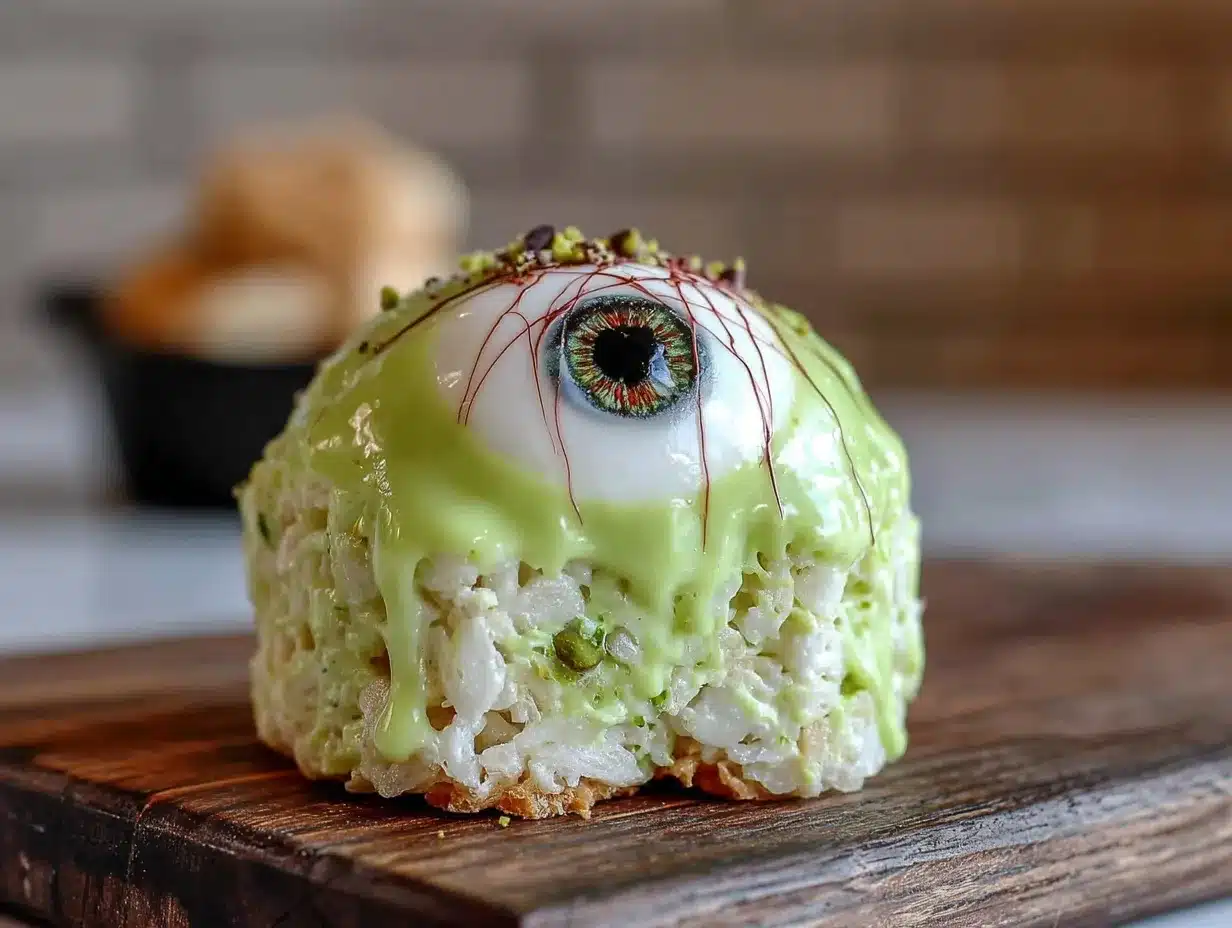
- Prep your pan. Line a 9×13-inch baking dish with parchment paper, leaving some overhang on two sides. This creates handles for lifting the treats out later. Spray the parchment lightly with non-stick spray. If you don’t have parchment, just spray the pan generously. Set aside.
- Melt the butter. Place the 3 tablespoons of unsalted butter in a large saucepan over medium-low heat. Let it melt slowly, swirling the pan occasionally. You want the butter fully melted but not bubbling aggressively — about 2 minutes. If it starts to brown, you’ve gone too far.
- Add the marshmallows. Pour the entire 10-ounce bag of mini marshmallows into the melted butter. Stir constantly with your rubber spatula. The marshmallows will start to puff up and then collapse into a smooth liquid. This takes about 3-4 minutes. Keep the heat on low — high heat will scorch the marshmallows and give them a burnt flavor.
- Season the mixture. Once the marshmallows are completely melted and smooth, remove the saucepan from the heat. Stir in the 1/2 teaspoon of vanilla extract and 1/4 teaspoon of salt. Stir until fully incorporated. The mixture should be glossy and stretchy when you lift the spatula.
- Combine with cereal. Pour the 6 cups of crispy rice cereal into a large mixing bowl. Pour the marshmallow mixture over the cereal. Fold gently with your spatula, scraping from the bottom, until all the cereal is coated. Don’t overmix — you want some marshmallow pockets for texture. This should take about 1 minute.
- Press into the pan. Scrape the mixture into your prepared pan. Lightly wet your hands or a butter knife with cold water (this prevents sticking), and press the mixture evenly into the pan. Don’t press too hard or the treats will be dense. Aim for an even layer about 3/4-inch thick.
- Add the eyeballs. While the mixture is still warm and sticky, press the candy eyeballs into the surface. Space them about an inch apart. You can push them in gently so they’re flush with the surface, or leave them slightly raised for a 3D effect. I like to scatter them randomly for that “monster” look.
- Cool and set. Let the treats cool at room temperature for at least 30 minutes. Don’t rush this step — warm treats will fall apart when you cut them. If you’re in a hurry, pop the pan in the fridge for 15 minutes.
- Cut and serve. Once completely cool, lift the treats out using the parchment overhang. Place on a cutting board. Use a sharp knife to cut into squares. I like 2-inch squares for portion control, but you can go bigger. Wipe the knife clean between cuts for neat edges.
A few notes: If the marshmallow mixture starts to stiffen before you’ve pressed it into the pan, microwave it for 10 seconds to soften it. Also, if your hands keep sticking while pressing, just re-wet them. I learned this the hard way after losing half a batch to my fingers.
Cooking Tips & Techniques
Here’s where experience really pays off. I’ve made these treats at least twenty times, and I’ve learned a few things the hard way.
Don’t overheat the marshmallows. This is the number one mistake people make. If you cook the marshmallows on high heat or for too long, the sugar crystallizes and your treats turn into hockey pucks. Low and slow is the way to go. I once left the pan unattended for two minutes, and the marshmallows turned brown and bitter. Lesson learned.
Use a wet spatula. Dip your rubber spatula in cold water before stirring the marshmallow mixture into the cereal. This prevents the marshmallow from sticking to the spatula and gives you better control. I keep a small bowl of water next to the stove for this exact purpose.
Press gently. When you’re pressing the mixture into the pan, use a light hand. If you press too hard, you’ll compress the cereal and end up with dense, hard treats. You want them to be light and airy with visible marshmallow pockets. My husband once pressed them so hard they were basically cereal bricks — still tasty, but not the right texture.
Timing is everything. Work quickly once the marshmallows are melted. The mixture starts to set within about 5 minutes, so have your pan prepped and your cereal measured before you start. I lay everything out on the counter like a cooking show host.
Color your marshmallows. If you want colored treats, add a few drops of gel food coloring after the marshmallows are melted. Liquid food coloring works too, but you need more of it, which can thin the mixture. I’ve made green treats with orange eyeballs for a Frankenstein vibe, and purple treats with yellow eyeballs for a space monster theme.
Variations & Adaptations
This recipe is incredibly flexible. Here are some variations I’ve tried and loved:
Chocolate Monster Eyeballs: Melt 1/2 cup of semi-sweet chocolate chips with the butter before adding the marshmallows. This gives you a chocolate base that pairs perfectly with the candy eyes. I made these for a Halloween party, and they disappeared faster than the regular ones.
Peanut Butter Monster Eyeballs: Stir in 2 tablespoons of creamy peanut butter after the marshmallows melt. The peanut butter adds a savory note that balances the sweetness. Use crunchy peanut butter if you want extra texture. Just make sure to stir until fully incorporated — I’ve had lumps before, and they’re not great.
Vegan Version: Use vegan butter and vegan marshmallows (Dandies is a reliable brand). The rest of the ingredients are already plant-based. The texture is slightly different — a bit chewier — but still delicious. I served these at a vegan potluck, and no one knew the difference.
Gluten-Free Version: Most rice cereal is naturally gluten-free, but double-check the label. Some brands use malt flavoring that contains gluten. I’ve used Nature’s Path Organic Crispy Rice Cereal with great results.
Extra Spooky Version: Add a few drops of black food coloring to the marshmallow mixture for a dark, eerie base. Then press in neon green or red candy eyeballs. The contrast is genuinely unsettling in the best way. I made these for a haunted house party, and they were a hit.
Mini Version: Press the mixture into a mini muffin tin instead of a baking dish. Spray the tin well with non-stick spray, then press a small amount of mixture into each cup. Top each with a candy eyeball. These are perfect for parties because they’re bite-sized and easy to grab.
Serving & Storage Suggestions
These treats are best served at room temperature. If they’ve been in the fridge, let them sit out for about 10 minutes before serving. The texture softens slightly, and the marshmallow becomes chewy again.
For presentation, arrange the treats on a platter with the eyeballs facing up. You can scatter extra candy eyes around the plate for a fun effect. I like to serve them alongside other Halloween treats like pumpkin-shaped cookies or ghost-shaped brownies. A bowl of popcorn and a scary movie completes the experience.
Storage: Store leftover treats in an airtight container at room temperature for up to 3 days. Layer them between sheets of parchment paper to prevent sticking. Do not refrigerate them — the cold dries them out and makes them hard. If you need to store them longer, freeze them.
Freezing: Wrap individual treats in plastic wrap, then place them in a freezer-safe bag. They’ll keep for up to 2 months. To thaw, leave them at room temperature for about 30 minutes. The texture won’t be quite as good as fresh, but they’re still delicious. I’ve pulled these out for unexpected Halloween guests and no one complained.
Reheating: If your treats have gone a bit stale, microwave them for 5-10 seconds. This softens the marshmallow and restores some of the original texture. Just don’t overdo it, or they’ll become a sticky mess.
The flavors actually develop over time. Day-old treats are often chewier and more cohesive, with the marshmallow flavor mellowing out. I actually prefer them on day two — they’re less sticky and easier to eat.
Nutritional Information & Benefits
Let’s be honest — these are a treat, not a health food. But here’s a rough breakdown per 2-inch square:
- Calories: Approximately 180-200
- Fat: 5 grams
- Carbohydrates: 35 grams
- Sugar: 20 grams
- Protein: 2 grams
- Sodium: 150 mg
The main ingredients — butter, marshmallows, and cereal — are high in sugar and fat, so these aren’t an everyday snack. However, the crispy rice cereal does provide some iron and B vitamins, especially if you use a fortified brand. The butter adds a small amount of vitamin A.
For dietary considerations, these treats contain dairy (butter) and are not vegan unless you make substitutions. They are naturally gluten-free if you use the right cereal, but always check labels for cross-contamination risks. The candy eyeballs are typically made from sugar, cornstarch, and gelatin, so they may not be suitable for vegetarians who avoid gelatin.
My personal perspective: I make these for special occasions, not everyday snacking. They’re a fun way to celebrate Halloween without spending hours in the kitchen. If you’re watching your sugar intake, you can reduce the marshmallows slightly or use a sugar-free cereal, but honestly, part of the joy is the indulgence.
Conclusion
These Easy Monster Eyeball Rice Krispie Treats are proof that sometimes the simplest ideas are the best. They take almost no time, use ingredients you probably already have, and deliver that perfect combination of crispy, chewy, and sweet that everyone loves. Plus, they’re genuinely fun to make — especially with kids, who will happily take over the eyeball-placing duty.
I love this recipe because it reminds me that cooking doesn’t have to be complicated to be special. My friend’s kid taught me that lesson with her simple question, and now these treats are a staple in our Halloween rotation. You can customize them however you like — different colors, different candies, different shapes. That’s the beauty of a forgiving recipe.
I’d love to hear how yours turn out. Did you add a twist? Did your kids go crazy for them? Drop a comment below and share your version. And if you’re looking for more Halloween inspiration, check out our spooky Halloween cupcakes and pumpkin-shaped cookies for a full spooky spread. Happy haunting, and happy snacking!
Frequently Asked Questions
Can I use homemade marshmallows?
Technically yes, but I wouldn’t recommend it. Homemade marshmallows have a different texture and don’t set as firmly. They also take much longer to melt. Stick with store-bought mini marshmallows for the best results.
How far in advance can I make these?
You can make them up to 3 days ahead. Store them in an airtight container at room temperature. If you need to make them further in advance, freeze them for up to 2 months.
Can I use different candy eyes?
Absolutely. You can use any brand of candy eyeballs, or even make your own with white chocolate and mini chocolate chips. I’ve also used black licorice wheels cut into small circles for a more natural look.
Why are my treats hard?
This usually happens when the marshmallows are overcooked or when you press the mixture too firmly into the pan. Cook the marshmallows on low heat and press gently. If they’re already hard, try microwaving them for 5-10 seconds to soften them.
Can I add other mix-ins?
Yes! You can stir in chocolate chips, sprinkles, crushed cookies, or even peanut butter chips after the marshmallows melt. Just be gentle when folding so you don’t crush the cereal.
Pin This Recipe!
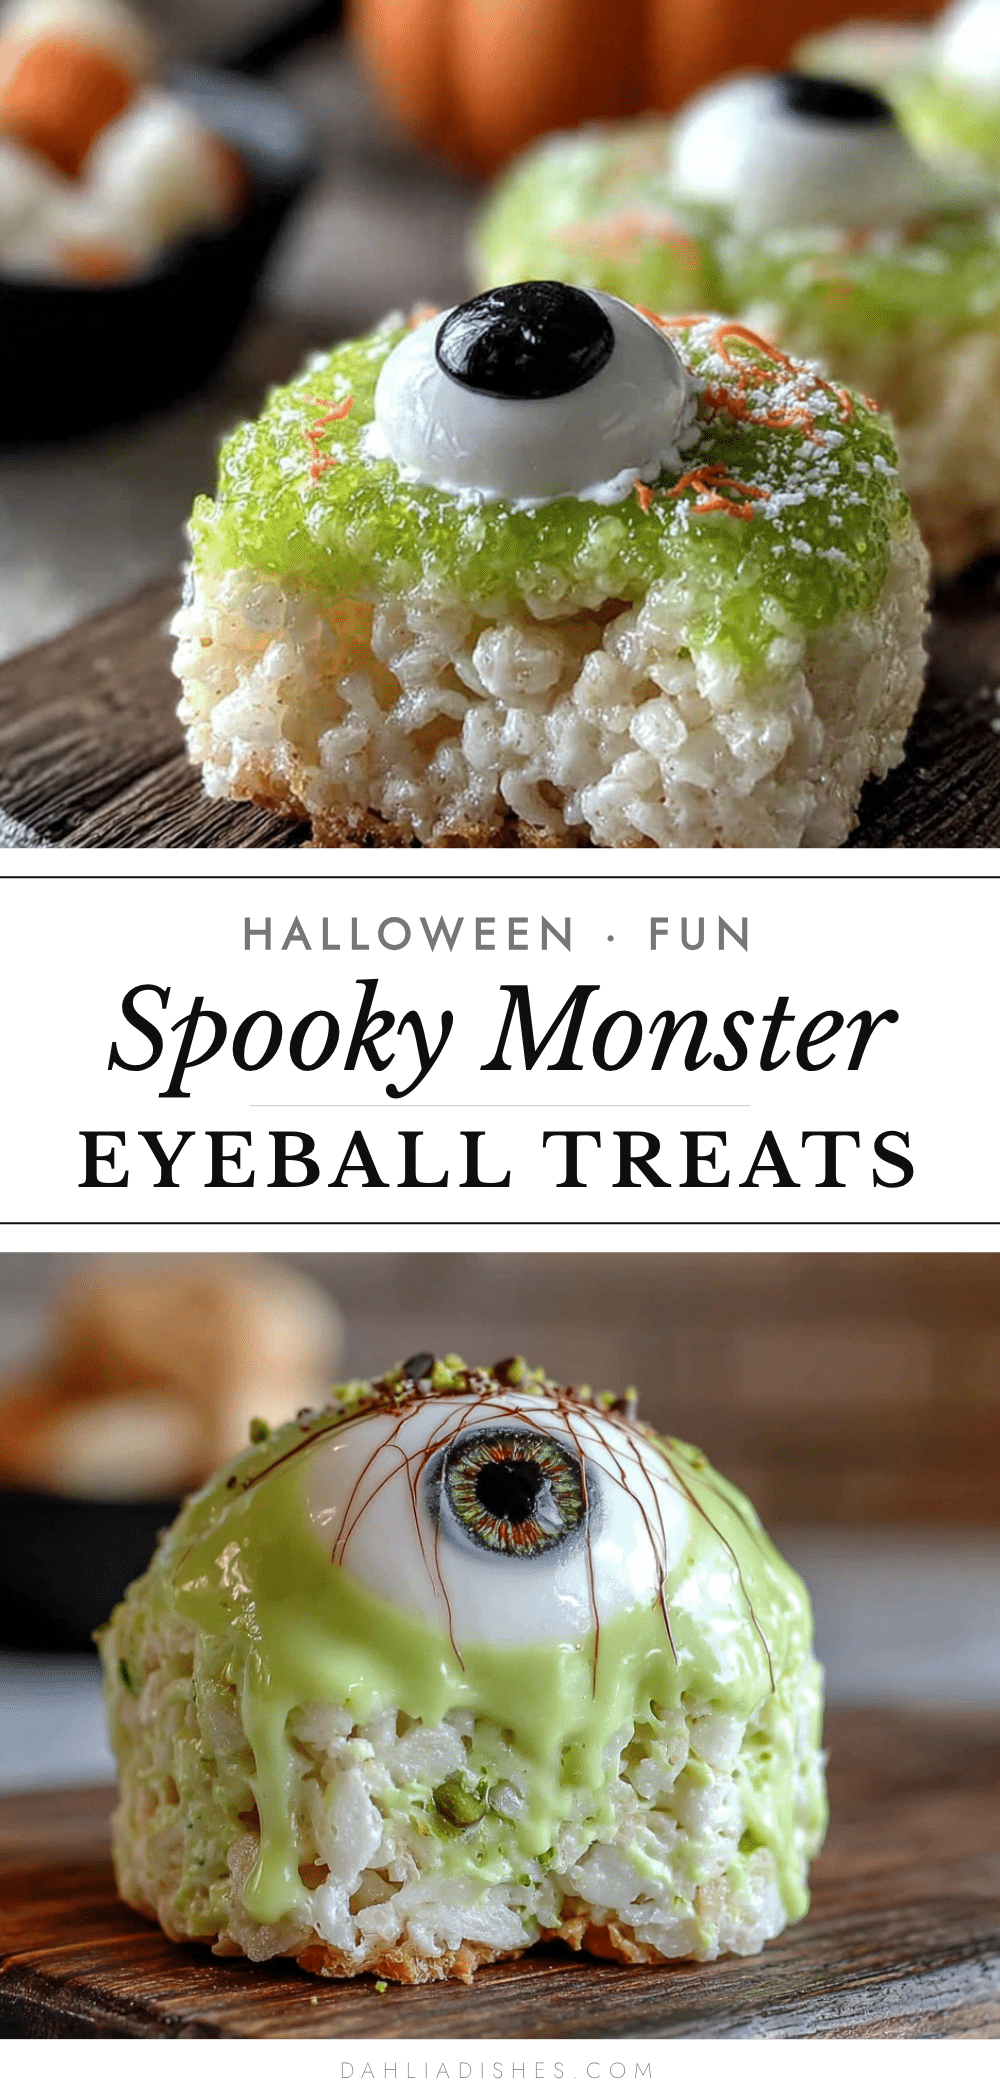
Easy Monster Eyeball Rice Krispie Treats: Best Halloween Dessert
These Easy Monster Eyeball Rice Krispie Treats are a quick and fun Halloween dessert that kids love to help make. With gooey marshmallows, crispy cereal, and silly candy eyeballs, they’re the perfect spooky treat for parties and movie nights.
- Prep Time: 15 minutes
- Cook Time: 5 minutes
- Total Time: 50 minutes
- Yield: 12 servings 1x
- Category: Dessert
- Cuisine: American
Ingredients
- 3 tablespoons unsalted butter
- 1 package (10 ounces) mini marshmallows
- 6 cups crispy rice cereal
- 1/2 teaspoon vanilla extract
- 1/4 teaspoon salt
- 1/2 cup candy eyeballs
Instructions
- Prep your pan. Line a 9×13-inch baking dish with parchment paper, leaving some overhang on two sides. Spray the parchment lightly with non-stick spray. Set aside.
- Melt the butter. Place the 3 tablespoons of unsalted butter in a large saucepan over medium-low heat. Let it melt slowly, swirling the pan occasionally, about 2 minutes.
- Add the marshmallows. Pour the entire 10-ounce bag of mini marshmallows into the melted butter. Stir constantly with a rubber spatula over low heat until the marshmallows are completely melted and smooth, about 3-4 minutes.
- Season the mixture. Remove the saucepan from the heat. Stir in the 1/2 teaspoon of vanilla extract and 1/4 teaspoon of salt until fully incorporated.
- Combine with cereal. Pour the 6 cups of crispy rice cereal into a large mixing bowl. Pour the marshmallow mixture over the cereal. Fold gently until all the cereal is coated, about 1 minute.
- Press into the pan. Scrape the mixture into the prepared pan. Lightly wet your hands or a butter knife with cold water, and press the mixture evenly into the pan. Aim for an even layer about 3/4-inch thick.
- Add the eyeballs. While the mixture is still warm and sticky, press the candy eyeballs into the surface, spacing them about an inch apart.
- Cool and set. Let the treats cool at room temperature for at least 30 minutes, or in the fridge for 15 minutes.
- Cut and serve. Once completely cool, lift the treats out using the parchment overhang. Place on a cutting board and cut into 2-inch squares with a sharp knife.
Notes
Don’t overheat the marshmallows or they will become hard. Use a wet spatula to prevent sticking. Press the mixture gently into the pan to keep treats light and airy. Work quickly once marshmallows are melted. For colored treats, add a few drops of gel food coloring after melting marshmallows.
Nutrition
- Serving Size: 1 square (2-inch)
- Calories: 190
- Sugar: 20
- Sodium: 150
- Fat: 5
- Saturated Fat: 3
- Carbohydrates: 35
- Protein: 2
Keywords: Halloween dessert, rice krispie treats, monster eyeball, easy dessert, kid-friendly, no-bake


