Love this? Save it for later!
Share the inspiration with your friends
The cashier at the hardware store—a woman named Carol with reading glasses on a beaded chain—handed me my change and then, completely unprompted, started talking about pumpkin cheesecake bars. I was holding a new garden hose and a bag of birdseed, so trust me, this was the last context I expected cooking advice to appear in. But Carol was insistent. “You look like someone who bakes in the fall,” she said, which honestly felt like a compliment I didn’t deserve. She told me her secret was a water bath and a tiny pinch of white pepper in the filling. I scribbled it on the back of my receipt right there by the register.
That was three autumns ago, and I’ve made these perfect small-batch pumpkin cheesecake bars every single year since. The recipe Carol described wasn’t some elaborate production—it was scaled down for a regular person with a regular appetite. No massive springform pan, no leftover cheesecake taking up fridge space for a week. Just eight perfect bars, each one with that creamy, spiced filling and a buttery crust that shatters just slightly when you bite into it. The white pepper thing? She was absolutely right. It doesn’t make the bars spicy; it just makes the pumpkin taste more like itself.
I’ve tweaked Carol’s original notes over the years—added a bit more vanilla, swapped the graham cracker crust for ginger snaps one time (good, but not better), and figured out the exact oven temperature that gives you that crack-free top. Maybe you’ve been there too, searching for that one fall dessert that feels special but doesn’t require a full day of work or a grocery list that looks like a Thanksgiving shopping spree. These bars are that recipe. They’re the ones I now make for book club, for Sunday night treats, and honestly, for no reason at all except that the air turned crisp and I smelled Carol’s advice still working its magic.
Why You’ll Love This Recipe
Let me tell you why these perfect small-batch pumpkin cheesecake bars have earned a permanent spot in my fall baking rotation. I’ve tested this recipe at least a dozen times, adjusting the bake time, the spice blend, and even the type of cream cheese until everything clicked into place. This version is the one I’d serve to anyone without hesitation.
- Perfectly Portioned: This is a true small-batch recipe. It makes eight bars in an 8×8 pan—enough to satisfy your craving without a massive dessert lingering on your counter for a week. No more throwing away half a cheesecake.
- Simple Ingredients: You likely have most of these in your pantry right now. No fancy extracts, no obscure spices. Just pumpkin puree, cream cheese, and a few pantry staples. The grocery list is refreshingly short.
- Ideal for Fall Gatherings: These bars are perfect for Friendsgiving, a cozy dinner party, or just a Tuesday night that needs a little seasonal magic. They travel well and slice cleanly, which makes them a host’s dream.
- Crowd-Pleasing Texture: The contrast is what gets everyone. That crisp, buttery shortbread-style crust against the silky, dense pumpkin cheesecake filling. It’s next-level comfort food in bar form.
- Surprisingly Easy: No water bath required—I know, Carol would be disappointed, but I found a better way. The filling sets up perfectly with a gentle oven cooling technique that prevents cracking without the fuss of a bain-marie.
This isn’t just another pumpkin dessert. The combination of a browned butter shortbread crust with a tangy, spiced cheesecake filling makes these bars stand out from every other fall recipe you’ll see. It’s the kind of dessert that makes people close their eyes after the first bite. Honestly, I’ve seen it happen at least five times now.
What Ingredients You Will Need
This recipe uses straightforward ingredients that work together to create something genuinely special. The quality of a few key items really matters here, so I’ll share what I’ve learned from making these bars over and over again.
For the Browned Butter Shortbread Crust
- Unsalted butter, ½ cup (1 stick / 113g) — You’ll brown this, so use a light-colored pan to see the color change clearly. I prefer Kerrygold for its richer flavor, but any good unsalted butter works.
- All-purpose flour, 1 cup (120g) — Spoon and level it. Scooping directly from the bag packs too much flour and makes the crust dense.
- Granulated sugar, ¼ cup (50g) — Just enough sweetness to balance the tangy filling.
- Salt, ¼ teaspoon — Use fine sea salt. It brightens the browned butter beautifully.
For the Pumpkin Cheesecake Filling
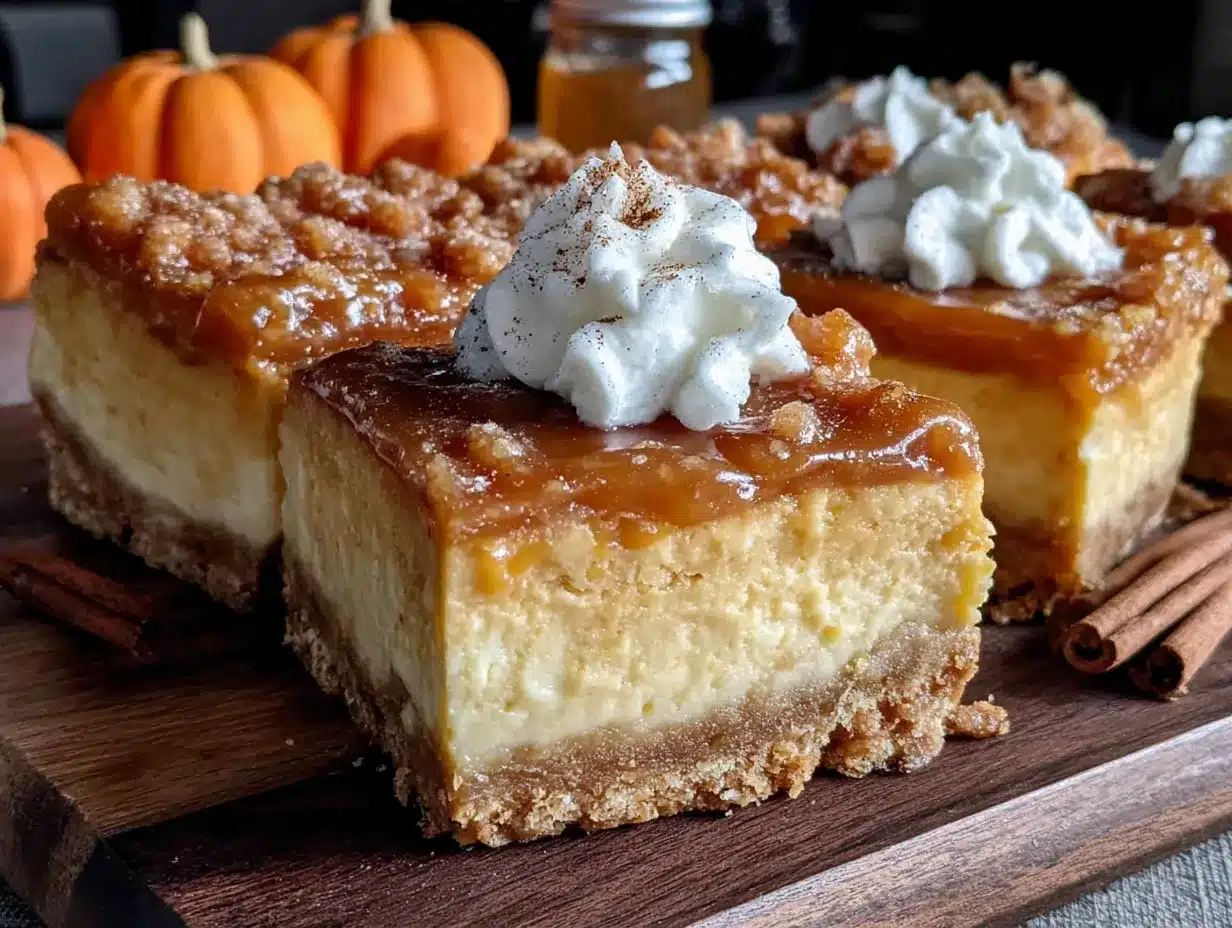
- Full-fat cream cheese, 8 ounces (226g), softened to room temperature — This is non-negotiable. Low-fat cream cheese contains too much water and will make the filling runny. Let it sit out for at least an hour before you start.
- Granulated sugar, ½ cup (100g) — Regular white sugar keeps the texture silky. Brown sugar would make it too heavy here.
- Pumpkin puree, ¾ cup (170g) — Not pumpkin pie filling. Make sure you grab 100% pure pumpkin puree. Libby’s is my go-to for consistent texture and moisture content.
- Large egg, 1, at room temperature — A room-temperature egg blends into the cream cheese more smoothly, reducing the risk of lumps.
- Vanilla extract, 1 teaspoon — Pure vanilla extract, not imitation. It adds a warmth that complements the spices.
- Pumpkin pie spice, 1 teaspoon — Store-bought is fine, but I sometimes make my own with ½ teaspoon cinnamon, ¼ teaspoon ginger, ⅛ teaspoon nutmeg, and ⅛ teaspoon cloves. The white pepper Carol recommended? I add a tiny pinch (⅛ teaspoon) to the spice mix—it’s subtle but makes the pumpkin flavor pop.
- Salt, ⅛ teaspoon — Just a pinch to balance the sweetness and deepen the flavor.
Equipment Needed
You don’t need a fancy kitchen to pull these off. Here’s what I use every time, plus a few alternatives I’ve tested.
- 8×8-inch square baking pan — Glass, ceramic, or metal all work. I prefer a metal pan for more even browning on the crust. If you only have a 9×9, the bars will be slightly thinner and bake a few minutes faster.
- Parchment paper — Line the pan with two overlapping strips, leaving overhang on all sides. This is the easiest way to lift the whole block of bars out cleanly for slicing.
- Light-colored saucepan — Essential for browning butter. A dark pan makes it nearly impossible to see when the milk solids turn golden. I use a stainless steel saucepan and it works perfectly.
- Electric hand mixer or stand mixer — You can mix the filling by hand with a wooden spoon, but an electric mixer gives you that silky, lump-free texture much more reliably. I’ve done both, and the mixer wins every time.
- Mixing bowls — One medium bowl for the crust, one large bowl for the filling. Glass or stainless steel is fine.
- Measuring cups and spoons — Accurate measuring matters more in cheesecake than in most bakes. Use dry measuring cups for flour and sugar, and a liquid measuring cup for the pumpkin puree.
- Spatula — A rubber spatula for scraping every last bit of that filling into the pan. Waste not, want not.
- Cooling rack — Essential for the gradual cooling process that prevents cracks.
Preparation Method
Let’s walk through this step by step. I’ve included all the little details I wish someone had told me the first time I made these bars.
Step 1: Prepare the Pan and Preheat
Preheat your oven to 350°F (175°C). Line your 8×8-inch baking pan with parchment paper, leaving about 2 inches of overhang on two opposite sides. This creates handles for lifting the bars out later. Lightly grease the parchment with a bit of butter or non-stick spray—just a thin coating.
Step 2: Brown the Butter for the Crust
Place the ½ cup of butter in your light-colored saucepan over medium heat. Swirl the pan occasionally as the butter melts. It will start to foam and sputter—this is the water evaporating. Keep watching. After about 4-5 minutes, the foam will subside and you’ll see tiny golden brown specks forming at the bottom of the pan. The butter will smell nutty and toasty. The moment it turns a warm amber color and releases that unmistakable aroma, pull it off the heat immediately. Pour it into a heatproof bowl to stop the cooking. Let it cool for 5 minutes. Don’t walk away during this process—browned butter goes from perfect to burnt in about 15 seconds.
Step 3: Make the Crust
In a medium bowl, whisk together the flour, ¼ cup sugar, and ¼ teaspoon salt. Pour the warm browned butter over the dry ingredients and stir with a fork until the mixture looks like wet sand and holds together when you squeeze it. It should be crumbly but cohesive. Dump the mixture into your prepared pan and press it down firmly and evenly. I use the bottom of a flat measuring cup to get it really compact. An even crust means every bar has the same perfect base. Bake the crust for 15 minutes at 350°F (175°C). It should look lightly golden around the edges. Remove from the oven and let it cool on a rack while you make the filling. Leave the oven on.
Step 4: Make the Cheesecake Filling
In a large bowl, beat the softened cream cheese with an electric mixer on medium speed until it’s completely smooth—about 2 minutes. Scrape down the sides and the bottom of the bowl with your spatula. Add the ½ cup sugar and beat for another minute until light and fluffy. Add the pumpkin puree, the room-temperature egg, vanilla extract, pumpkin pie spice, the tiny pinch of white pepper (trust me on this), and the ⅛ teaspoon salt. Mix on low speed just until everything is combined. Do not overmix at this stage—beating too much air into the batter can cause cracks during baking. Give the bowl a final scrape by hand to make sure the bottom is fully incorporated.
Step 5: Assemble and Bake
Pour the filling over the pre-baked crust. Spread it gently into an even layer with your spatula. Give the pan a few gentle taps on the counter to release any air bubbles. Bake at 350°F (175°C) for 30-35 minutes. The edges will look set and slightly puffed, but the center should still have a slight jiggle when you gently shake the pan—like firm Jell-O, not liquid. This jiggle is your signal that the center will set perfectly as it cools.
Step 6: The Cooling Method That Prevents Cracking
Turn the oven off and crack the oven door open. Let the cheesecake bars sit in the warm oven for 30 minutes. This gradual cooling is the secret to a smooth, crack-free top. After 30 minutes, remove the pan from the oven and place it on a cooling rack. Let it cool completely to room temperature—about 1 hour. Then cover the pan with plastic wrap and refrigerate for at least 4 hours, but overnight is truly best. The bars need this chill time to set up properly. Cutting them too early will give you a messy, gooey situation.
Step 7: Slice and Serve
Once fully chilled, lift the entire block out of the pan using the parchment paper overhang. Place it on a cutting board. Use a sharp chef’s knife to trim the edges if you want clean, professional-looking bars. Then slice into 8 equal rectangles (2 rows by 4 rows). Wipe the knife clean between cuts for the neatest slices. Let the bars sit at room temperature for about 10 minutes before serving—this takes the chill off and lets the flavor fully bloom.
Cooking Tips & Techniques
I’ve made mistakes so you don’t have to. Here’s what I’ve learned the hard way.
Room temperature ingredients are not optional. I once tried to rush this and used cold cream cheese straight from the fridge. The filling was lumpy no matter how long I mixed it, and those lumps never baked out. Set your cream cheese and egg out at least an hour before you start. Set a timer if you need to—I do.
Don’t skip the parchment paper. I thought I could just grease the pan well and call it a day. The first time I tried, half the crust stuck to the bottom. The parchment paper handles make lifting the bars out effortless. It’s a two-minute step that saves you twenty minutes of frustration.
Watch the crust bake time. The first time I made these, I overbaked the crust while I was distracted by a phone call. It was too dark and tasted slightly bitter. Pull it out when the edges are just starting to turn golden. The crust will continue to firm up as it cools.
The jiggle test is your friend. Don’t rely solely on the timer. Ovens vary wildly. My friend’s oven takes a full 38 minutes; mine is done at 32. Start checking at the 28-minute mark by gently shaking the pan. When the edges are set and the center wobbles like firm pudding, it’s done.
Patience with chilling pays off. I know it’s hard to wait, but cutting these bars before they’ve fully set is like trying to slice warm butter. The texture won’t be right, and the layers might separate. Four hours is the minimum; overnight gives you that perfect, clean slice every time.
Variations & Adaptations
One of the best things about this recipe is how easily it adapts. Here are a few variations I’ve tried and loved.
- Gluten-Free Version: Swap the all-purpose flour in the crust with a 1:1 gluten-free baking flour blend. I’ve used Bob’s Red Mill 1-to-1 with excellent results. The texture is slightly more tender but just as delicious. Make sure your pumpkin pie spice is also certified gluten-free if that’s a concern.
- Gingersnap Crust: Instead of the browned butter shortbread, use 1½ cups of crushed gingersnap cookies mixed with 4 tablespoons of melted butter. Press and bake the same way. The spicy ginger and molasses notes are incredible with the pumpkin filling. I did this for a holiday party and it disappeared first.
- Dairy-Free Adaptation: Use a high-quality dairy-free cream cheese alternative (I like Miyoko’s or Kite Hill) and a plant-based butter for the crust. The texture will be slightly less dense but still very good. Let the dairy-free cream cheese soften thoroughly—it can be more stubborn than the real thing.
- Maple Pecan Twist: Add 2 tablespoons of maple syrup to the filling (reduce the sugar by 1 tablespoon to balance) and sprinkle ¼ cup of chopped pecans over the top before baking. The maple-pecan-pumpkin combination tastes like autumn in a single bite.
- Chocolate Drizzle: Once the bars are fully chilled and sliced, melt ¼ cup of dark chocolate chips with 1 teaspoon of coconut oil and drizzle it over the top. The bitterness of dark chocolate cuts through the sweetness beautifully. I do this when I want to dress them up for company.
Serving & Storage Suggestions
These bars are versatile enough for any occasion, from a casual afternoon treat to a dinner party finale.
Serving: Serve the bars cold or at room temperature. I actually prefer them after they’ve sat out for 10-15 minutes—the texture softens just a bit and the flavors become more pronounced. A dollop of lightly sweetened whipped cream on top is never a bad idea. For a truly decadent presentation, add a drizzle of caramel sauce and a light dusting of cinnamon. They pair beautifully with a hot cup of coffee, a spiced chai latte, or even a glass of bourbon if you’re feeling festive.
Storage: Store the bars in an airtight container in the refrigerator for up to 5 days. Place a sheet of parchment paper between layers if you need to stack them. I’ve found they actually taste better on day two and three—the flavors have time to meld and deepen.
Freezing: These bars freeze exceptionally well. Place the fully chilled and sliced bars on a baking sheet and freeze until solid, about 2 hours. Then transfer them to a freezer-safe container or zip-top bag with parchment between layers. They’ll keep for up to 3 months. To serve, thaw overnight in the refrigerator or let them sit at room temperature for about 30 minutes. The texture remains remarkably creamy.
Reheating: I don’t recommend reheating these bars. They’re meant to be enjoyed cold or at room temperature. If you absolutely want a warm dessert, microwave a single bar for about 10 seconds—just enough to take the chill off without melting the structure.
Nutritional Information & Benefits
Here’s the estimated nutritional breakdown for one bar (based on 8 servings). These values are approximate and will vary based on specific brands and any substitutions you make.
| Nutrient | Amount Per Bar |
|---|---|
| Calories | ~320 |
| Total Fat | ~20g |
| Saturated Fat | ~12g |
| Cholesterol | ~75mg |
| Sodium | ~220mg |
| Total Carbohydrates | ~32g |
| Dietary Fiber | ~2g |
| Sugars | ~20g |
| Protein | ~5g |
| Vitamin A | ~80% DV |
Pumpkin is packed with vitamin A, which supports eye health and immune function. It’s also a good source of fiber and antioxidants. The cream cheese adds calcium and protein, making this a more balanced dessert than you might expect. While these bars are certainly a treat, they offer more nutritional value than a standard sugar-laden dessert. If you’re watching your sugar intake, you can reduce the sugar in the filling to ⅓ cup without significantly affecting the texture. For a lower-fat option, use Neufchâtel cheese (⅓ less fat cream cheese) in place of full-fat cream cheese—the texture will be slightly less rich but still excellent. This recipe contains gluten, dairy, and eggs, so it’s not suitable for those with related allergies without the substitutions mentioned above.
Conclusion
These perfect small-batch pumpkin cheesecake bars have become my go-to fall dessert for a reason. They deliver all the creamy, spiced, buttery satisfaction of a full-size cheesecake without the commitment of a massive dessert. The browned butter crust adds a nutty depth that you just don’t get from a standard graham cracker base, and the filling is silky, tangy, and perfectly balanced.
I love that this recipe feels special enough for Thanksgiving but simple enough for a random Wednesday night. It’s the kind of dessert that makes people ask for the recipe—and honestly, I love telling them the story about Carol at the hardware store. It always gets a laugh, and then they make the bars, and they get it.
I’d love to hear how these turn out for you. Did you try the gingersnap crust? Add the chocolate drizzle? Forget to set out your cream cheese and learn the hard way like I did? Drop a comment below and tell me about your experience. And if you’re looking for another small-batch fall treat to round out your baking list, try my small-batch apple crisp—it uses the same 8×8 pan and is just as satisfying. Happy baking, friends. Go make something delicious.
Frequently Asked Questions
Can I use a 9×9 pan instead of 8×8?
Yes, you can. The bars will be slightly thinner and will bake faster—start checking for doneness at around 25 minutes. The crust will also be thinner, so press it firmly and evenly. The yield will still be 8 bars, just a bit wider and shorter.
Why did my cheesecake filling crack?
Cracks usually happen from overbaking or sudden temperature changes. Make sure you pull the bars out when the center still has a slight jiggle. The gradual cooling in the turned-off oven is crucial—don’t skip that step. Also, avoid overmixing the filling once you add the egg, as too much air can cause cracks.
Can I make these bars ahead of time?
Absolutely. In fact, they’re better made a day ahead. The bars need at least 4 hours to set, but overnight chilling gives you the cleanest slices and the best flavor development. You can make them up to 3 days in advance and store them in the refrigerator.
Can I use fresh pumpkin puree instead of canned?
You can, but you’ll need to strain it first. Fresh pumpkin puree contains more water than canned. Place the puree in a cheesecloth-lined strainer over a bowl and let it drain for at least 2 hours. You want it to be as thick as canned puree. I’ve done this, and it works, but honestly, canned pumpkin is more consistent and saves a lot of effort.
How do I know when the crust is properly pressed?
The crust should feel like wet sand that holds together when you squeeze it. After pressing it into the pan with a flat-bottomed cup or glass, it should be compact and even. If you can see the bottom of the pan through any thin spots, press those areas a bit more. An uneven crust leads to uneven bars.
Pin This Recipe!
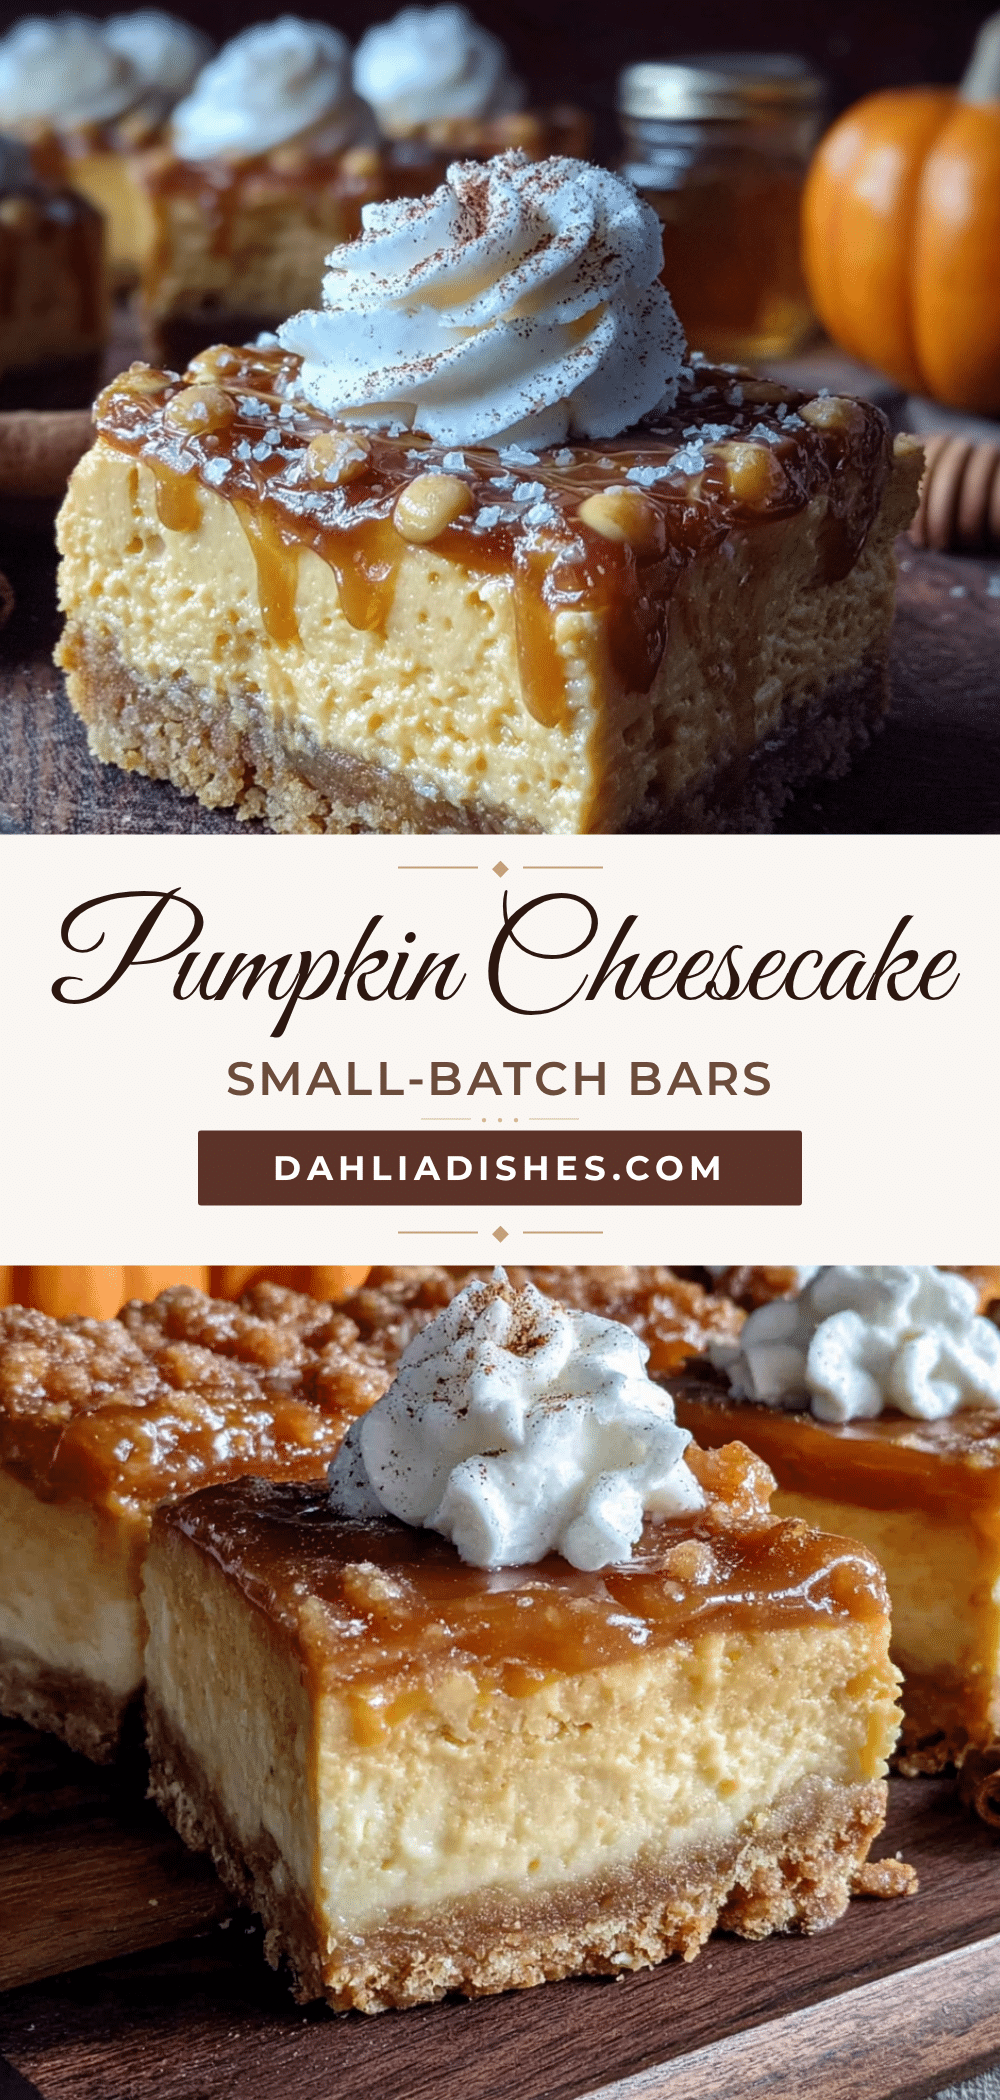
Perfect Small-Batch Pumpkin Cheesecake Bars: Easy Fall Dessert
These perfect small-batch pumpkin cheesecake bars feature a browned butter shortbread crust and a creamy, spiced pumpkin cheesecake filling. They’re easy to make, perfectly portioned for an 8×8 pan, and ideal for fall gatherings.
- Prep Time: 20 minutes
- Cook Time: 45 minutes
- Total Time: 5 hours 5 minutes (includes cooling and chilling)
- Yield: 8 bars
- Category: Dessert
- Cuisine: American
Ingredients
- Unsalted butter, ½ cup (1 stick / 113g)
- All-purpose flour, 1 cup (120g)
- Granulated sugar, ¼ cup (50g) for crust
- Salt, ¼ teaspoon for crust
- Full-fat cream cheese, 8 ounces (226g), softened to room temperature
- Granulated sugar, ½ cup (100g) for filling
- Pumpkin puree, ¾ cup (170g) (not pumpkin pie filling)
- Large egg, 1, at room temperature
- Vanilla extract, 1 teaspoon
- Pumpkin pie spice, 1 teaspoon
- White pepper, ⅛ teaspoon (optional, but recommended)
- Salt, ⅛ teaspoon for filling
Instructions
- Preheat oven to 350°F (175°C). Line an 8×8-inch baking pan with parchment paper, leaving overhang on two opposite sides. Lightly grease the parchment.
- Brown the butter: In a light-colored saucepan over medium heat, melt ½ cup butter, swirling occasionally. Cook until it foams, then subsides, and golden brown specks appear (about 4-5 minutes). Remove from heat immediately and pour into a heatproof bowl. Let cool for 5 minutes.
- Make the crust: In a medium bowl, whisk together flour, ¼ cup sugar, and ¼ teaspoon salt. Pour in warm browned butter and stir with a fork until mixture resembles wet sand and holds together when squeezed. Press firmly and evenly into the prepared pan. Bake for 15 minutes until edges are lightly golden. Remove and let cool on a rack. Keep oven on.
- Make the filling: In a large bowl, beat softened cream cheese with an electric mixer on medium speed until smooth (about 2 minutes). Scrape down sides. Add ½ cup sugar and beat for 1 minute until light and fluffy. Add pumpkin puree, egg, vanilla extract, pumpkin pie spice, white pepper (if using), and ⅛ teaspoon salt. Mix on low speed just until combined. Do not overmix.
- Assemble and bake: Pour filling over pre-baked crust and spread evenly. Tap pan gently on counter to release air bubbles. Bake at 350°F (175°C) for 30-35 minutes, until edges are set and center has a slight jiggle (like firm Jell-O).
- Cool gradually: Turn off oven and crack the door open. Let bars sit in warm oven for 30 minutes. Then remove and cool completely on a rack (about 1 hour). Cover with plastic wrap and refrigerate for at least 4 hours, preferably overnight.
- Slice and serve: Lift bars out using parchment overhang. Place on cutting board. Trim edges if desired, then slice into 8 equal rectangles (2 rows by 4 rows). Wipe knife clean between cuts. Let sit at room temperature for 10 minutes before serving.
Notes
Room temperature ingredients are essential for a smooth filling. Do not skip the parchment paper. Watch the crust bake time to avoid overbrowning. The jiggle test is key for doneness. Patience with chilling pays off for clean slices.
Nutrition
- Serving Size: 1 bar
- Calories: 320
- Sugar: 20
- Sodium: 220
- Fat: 20
- Saturated Fat: 12
- Carbohydrates: 32
- Fiber: 2
- Protein: 5
Keywords: pumpkin cheesecake bars, small batch, fall dessert, browned butter crust, easy cheesecake bars


