Love this? Save it for later!
Share the inspiration with your friends
The One Lunch That Actually Gets Eaten
I wasn’t trying to invent anything. Honestly, it was a Tuesday morning, the school bus was coming in forty-five minutes, and I was staring into the fridge like it owed me money. My kid had rejected every lunch idea I’d thrown out that week—sandwiches were “boring,” leftovers were “gross,” and don’t even mention the thermos situation. I was this close to just tossing a granola bar in a bag and calling it a day.
Then I saw the turkey slices. And the cream cheese. And those big flour tortillas sitting in the back, probably a week past their intended use. I remember thinking, “Well, this is either going to be brilliant or a disaster.” I spread that cream cheese like I had nothing to lose, layered on the turkey and cheese, rolled it tight, and sliced it into little pinwheels. My kid grabbed one on the way out the door, and I didn’t think twice about it.
That afternoon, the lunchbox came home empty. Not just the roll-ups—everything. The apple slices, the yogurt tube, even the baby carrots. I asked what happened, and my kid just shrugged and said, “The rollie things were good. Can you make them again?” And that, my friends, is how a desperate Tuesday morning turned into the lunchbox hero I never knew I needed. These easy make-ahead turkey and cheese lunchbox roll-ups are the kind of recipe you stumble into when you’re not trying to impress anyone—and somehow, that’s exactly why they work.
Why You’ll Love These Turkey and Cheese Roll-Ups
Let me tell you why these little guys have earned a permanent spot in my weekly rotation. I’ve tested this recipe about a dozen times, tweaking the spread, the ratio, and the rolling technique until it was just right. Here’s what makes them special:
- Quick & Easy: You can whip up a batch in under 10 minutes. No cooking, no complicated steps, just spread, layer, roll, and slice. Perfect for those chaotic mornings or Sunday meal prep sessions.
- Simple Ingredients: You probably have everything in your fridge right now. Turkey, cheese, tortillas, and a spread. That’s it. No fancy grocery store runs required.
- Perfect for Lunchboxes: These roll-ups are sturdy enough to survive a backpack toss and still look appetizing at lunchtime. They don’t get soggy, they don’t fall apart, and they’re easy for little hands to handle.
- Crowd-Pleaser: I’ve served these at playdates, picnics, and even a grown-up brunch. Kids devour them, and adults sneak extras when they think nobody’s looking. They’re just that good.
- Unbelievably Delicious: The combination of creamy spread, savory turkey, and melty cheese wrapped in a soft tortilla is simple comfort food at its finest. It’s the kind of lunch that makes you close your eyes after the first bite.
What makes this recipe different from all the other roll-up recipes out there? It’s the cream cheese base. Most recipes use mayo or mustard, but cream cheese gives you that perfect tangy creaminess that holds everything together without making the tortilla soggy. Plus, it acts as a barrier that keeps the turkey and cheese fresh for days. I’ve tested it with different spreads, and honestly, cream cheese wins every single time.
This isn’t just another lunch idea—it’s the lunch idea. The one that saves you on busy mornings, the one your kids actually eat, the one you’ll find yourself making on repeat because it just works. And let’s face it, we could all use a little more of that in our lives.
What Ingredients You Will Need
This recipe uses simple, everyday ingredients to create something that feels way more special than it should. Most of these are probably already in your kitchen, which is honestly half the magic.
For the Roll-Ups
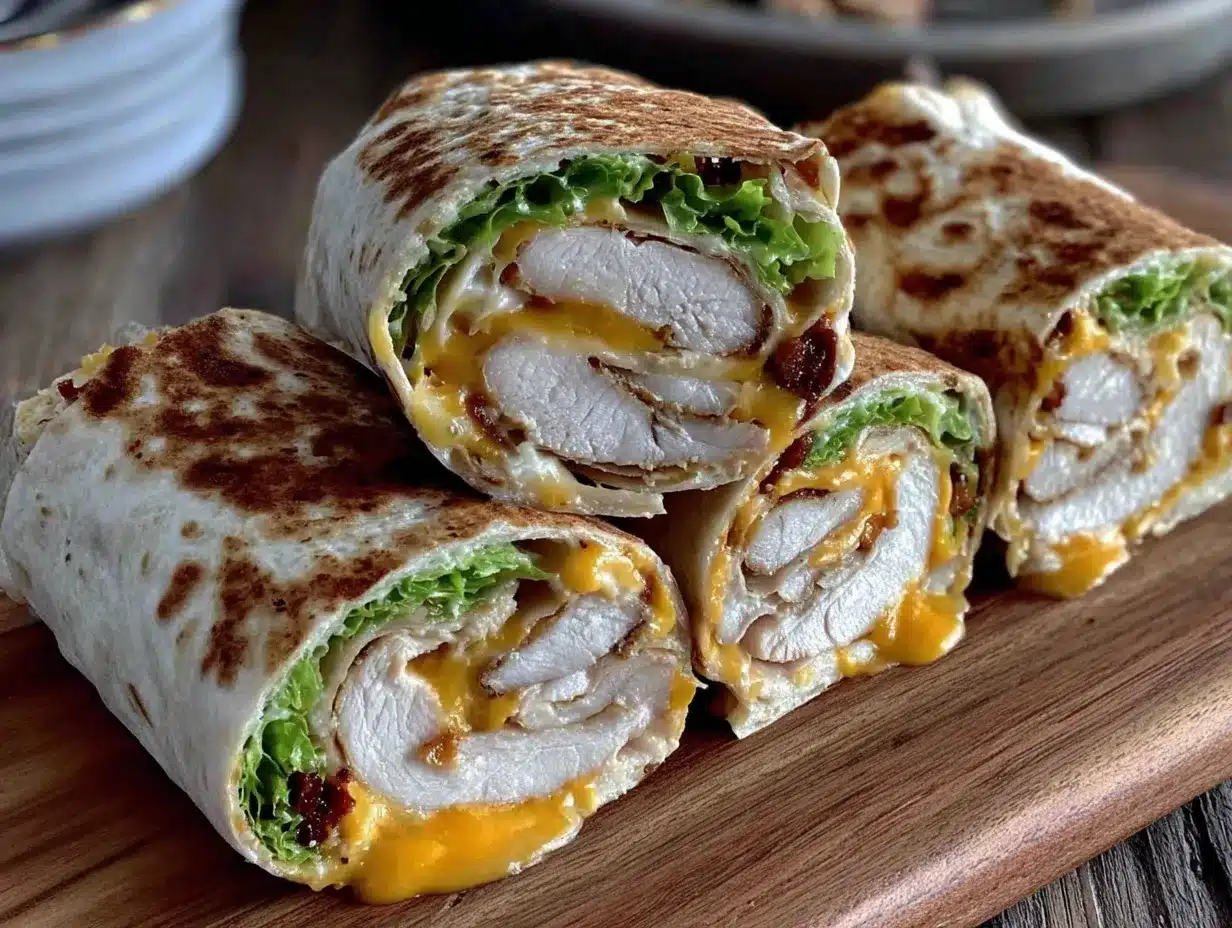
- Large flour tortillas (burrito size works best for rolling, about 8-10 inches) — I prefer Mission or Old El Paso for their flexibility and flavor
- 8 ounces cream cheese, softened to room temperature (this is important for smooth spreading)
- 1/2 pound deli turkey breast, thinly sliced (look for oven-roasted or honey roasted for best flavor)
- 8 slices provolone cheese (or your favorite melting cheese — Swiss, cheddar, or mozzarella all work great)
- Salt and black pepper to taste
Optional Add-Ins for Extra Flavor
- 1 tablespoon Dijon mustard mixed into the cream cheese for a tangy kick
- 1/4 cup finely chopped fresh spinach for a pop of color and nutrients
- 2 tablespoons chopped fresh dill or chives for herbal freshness
- 1/4 cup shredded cheddar cheese mixed into the cream cheese for extra cheesiness
A few notes on ingredient selection: I recommend using full-fat cream cheese for the best texture and flavor. Low-fat versions tend to be thinner and can make the roll-ups a bit watery. For the turkey, ask for freshly sliced at the deli counter rather than pre-packaged—it’s usually thicker and has better flavor. And don’t skimp on the tortillas; the big burrito-sized ones roll much easier than the small taco-sized ones.
If you’re looking for a gluten-free option, use gluten-free tortillas or large lettuce leaves. For a dairy-free version, swap the cream cheese for a plant-based alternative and use dairy-free cheese slices. I’ve tried both, and they work surprisingly well—just make sure the dairy-free cream cheese is thick and not too runny.
Equipment Needed
You don’t need much for this recipe, which is honestly my favorite part. Here’s what you’ll need:
- Cutting board — A large, sturdy one for rolling and slicing
- Sharp knife — A serrated bread knife works best for clean slices without squishing the roll-ups
- Butter knife or offset spatula — For spreading the cream cheese evenly
- Plastic wrap or parchment paper — To wrap the rolls tightly before refrigerating
- Baking sheet or large plate — For holding the wrapped rolls in the fridge
- Toothpicks (optional) — To secure the roll-ups if they’re being transported
- Lunchbox containers — For packing individual servings
I’ve made these without a few of these tools before—like using a butter knife to slice instead of a serrated knife—and they still turned out fine. The serrated knife just gives you prettier slices. If you don’t have an offset spatula, a regular butter knife works perfectly. Honestly, the only non-negotiable is the plastic wrap. Without it, the rolls won’t hold their shape as well during chilling.
For budget-friendly options, skip the fancy gadgets and just use what you have. A clean kitchen towel can work instead of plastic wrap in a pinch, though it’s less effective at keeping the rolls tight.
Preparation Method
Alright, let’s get rolling—pun absolutely intended. Here’s how to make these easy make-ahead turkey and cheese lunchbox roll-ups step by step.
Step 1: Soften the Cream Cheese
Take your cream cheese out of the fridge about 30 minutes before you start. You want it soft enough to spread easily without tearing the tortilla. If you’re in a hurry, microwave it for 10-15 seconds on low power, but watch it carefully—you don’t want it melted, just softened. I’ve made the mistake of nuking it too long, and let me tell you, melted cream cheese is a mess that doesn’t spread well at all.
Step 2: Mix the Spread
In a small bowl, combine the softened cream cheese with a pinch of salt and pepper. If you’re using any add-ins like Dijon mustard or fresh herbs, mix them in now. Stir until everything is smooth and well combined. Taste it—yes, taste it. You want the spread to be flavorful on its own because it’s going to carry the whole roll-up.
Step 3: Prepare the Tortillas
Lay one tortilla flat on your cutting board. If your tortillas are cold from the fridge, warm them in the microwave for about 10 seconds to make them more pliable. This step is crucial—cold tortillas crack when you roll them, and nobody wants a cracked roll-up. I learned this the hard way after ruining three tortillas in a row.
Step 4: Spread the Cream Cheese
Using your butter knife or offset spatula, spread about 2 tablespoons of the cream cheese mixture evenly over the entire surface of the tortilla. Go all the way to the edges—this helps seal the roll and prevents the fillings from falling out later. Don’t be stingy here; a thin, even layer is what you’re after.
Step 5: Layer the Turkey
Place 2-3 slices of turkey breast evenly over the cream cheese. Overlap them slightly to cover the tortilla completely. You want a nice, even layer of turkey—not too thick that it’s hard to roll, but not too thin that you can’t taste it. I usually use about 2 ounces of turkey per tortilla.
Step 6: Add the Cheese
Lay 2 slices of provolone cheese over the turkey. If you’re using a different cheese, make sure it’s sliced thin enough to roll easily. You can also tear the cheese slices into smaller pieces to distribute them evenly.
Step 7: Roll It Up Tight
Starting from one edge, tightly roll the tortilla into a log shape. Use your fingers to keep the filling tucked in as you roll. The key here is tension—you want it snug but not so tight that the fillings squish out the ends. Practice makes perfect here; my first few rolls were embarrassingly loose.
Step 8: Wrap and Chill
Place the rolled tortilla seam-side down on a piece of plastic wrap. Wrap it tightly, twisting the ends like a candy wrapper. This keeps the roll compact and helps it hold its shape. Repeat with remaining tortillas. Place all the wrapped rolls on a baking sheet or plate and refrigerate for at least 30 minutes. This chilling step is non-negotiable—it makes slicing so much easier and cleaner.
Step 9: Slice and Serve
After chilling, unwrap each roll and place it on your cutting board. Using a sharp serrated knife, slice the roll into 1-inch pinwheels. Use a gentle sawing motion rather than pressing down—this prevents squishing. You should get about 6-8 slices per tortilla, depending on the size.
And there you have it—perfect little roll-ups ready for lunchboxes, snack plates, or just eating straight off the cutting board (no judgment here, I do it every time).
Cooking Tips & Techniques
After making these roll-ups more times than I can count, I’ve picked up a few tricks that make a real difference. Here are my best tips for roll-up success:
Don’t Skip the Chilling Step
I know, I know—you’re busy and you want to eat these right now. But trust me on this one. Chilling the rolled tortillas for at least 30 minutes firms up the cream cheese and makes the tortilla slightly firmer, which means cleaner slices. If you try to slice them right away, you’ll end up with a squished, messy situation. I’ve done it, and it’s not pretty.
Use Room Temperature Ingredients
Cold cream cheese is a nightmare to spread. It tears the tortilla and leaves lumpy patches. Let everything come to room temperature before you start. Same goes for the tortillas—cold ones crack. A few minutes at room temperature makes all the difference.
Keep Your Knife Sharp
A dull knife will crush your beautiful roll-ups. Use a sharp serrated knife and a gentle sawing motion. I actually keep a separate bread knife just for slicing these because it makes such a difference. Clean the knife between slices if the cream cheese starts to build up.
Don’t Overfill
It’s tempting to pile on the turkey and cheese, but less is more here. An overstuffed roll-up is hard to roll, hard to slice, and falls apart easily. Stick to thin, even layers and you’ll get perfect pinwheels every time.
Make Ahead for Better Flavor
Here’s a secret: these roll-ups actually taste better the next day. The flavors meld together overnight, and the cream cheese soaks into the tortilla just enough to make everything cohesive. I often make a batch on Sunday for the whole week ahead.
One of my biggest failures happened when I tried to use low-fat cream cheese to save calories. It was a disaster—the spread was too thin, the roll-ups were soggy, and they fell apart in the lunchbox. Full-fat cream cheese is worth it for the texture and stability alone. Trust me on this one.
Variations & Adaptations
One of the best things about this recipe is how customizable it is. Here are some variations I’ve tried and loved:
Mediterranean Roll-Ups
Swap the turkey for roasted red peppers, add some crumbled feta cheese, and mix a tablespoon of sun-dried tomato pesto into the cream cheese. These are perfect for a grown-up lunch or picnic. I made these for a friend’s baby shower and they disappeared in minutes.
Spicy Southwest Roll-Ups
Use pepper jack cheese instead of provolone, add some sliced jalapeños, and mix a pinch of cumin and chili powder into the cream cheese. These have a nice kick without being overwhelming. My husband loves these with a side of salsa for dipping.
Breakfast Roll-Ups
Swap the turkey for crispy bacon or breakfast sausage, use cheddar cheese, and add a thin layer of scrambled eggs. These are great for on-the-go mornings when you need breakfast in your hand. I’ve made these for road trips and they hold up beautifully.
Vegetarian Roll-Ups
Skip the turkey and load up on veggies instead. Thinly sliced cucumber, bell peppers, shredded carrots, and fresh spinach work great. Add some hummus to the cream cheese for extra flavor and protein. My vegetarian friend requests these every time she comes over.
Low-Carb/Keto Roll-Ups
Use large lettuce leaves instead of tortillas. Romaine or butter lettuce work best because they’re sturdy and flexible. Fill with turkey, cheese, and cream cheese as usual. These are surprisingly satisfying and perfect for those watching their carbs.
I’ve also tried these with different spreads—pesto, hummus, even guacamole. They all work, but cream cheese remains my favorite for its neutral flavor and perfect texture. Feel free to experiment and find your own favorite combination!
Serving & Storage Suggestions
These roll-ups are incredibly versatile when it comes to serving and storing. Here’s everything you need to know:
Serving Temperature
These are best served cold or at room temperature. If you’re packing them for lunch, they’ll be perfect by the time lunch rolls around. For parties or snacks, arrange them on a platter and serve immediately after slicing.
Presentation Ideas
Arrange the pinwheels on a platter in concentric circles for a beautiful presentation. Garnish with fresh herbs like parsley or dill for a pop of color. For lunchboxes, pack them in a container with a small ice pack to keep them fresh. Add some cherry tomatoes, cucumber slices, or grapes on the side for a complete meal.
Complementary Dishes
These roll-ups pair wonderfully with a simple side salad, fresh fruit, or veggie sticks with ranch dip. For a heartier meal, serve them alongside a cup of tomato soup or a bowl of chicken noodle soup. They’re also great as part of a larger lunch spread with other finger foods.
Storage Instructions
Store the uncut rolls or sliced pinwheels in an airtight container in the refrigerator for up to 4 days. I recommend keeping them whole until you’re ready to serve, as sliced roll-ups can dry out faster. If you’ve already sliced them, place a damp paper towel over the top before sealing the container to maintain moisture.
Freezer Tips
These roll-ups freeze surprisingly well! Wrap each whole roll tightly in plastic wrap, then place them in a freezer bag. They’ll keep for up to 2 months. To thaw, transfer to the refrigerator overnight. Slice them while they’re still cold for the cleanest cuts. I’ve done this for busy weeks, and they taste just as fresh as the day I made them.
Reheating (If You Want)
While these are best served cold, you can warm them up if you prefer. Microwave a few pinwheels for about 10-15 seconds, just until the cheese starts to soften. Don’t overheat them, or the tortilla will become tough. Honestly, I prefer them cold—the flavors are cleaner and more distinct.
One thing I love about these roll-ups is that the flavors actually develop over time. Day two is better than day one, and day three is even better. The cream cheese melds with the turkey and cheese, creating a cohesive flavor that’s somehow more than the sum of its parts.
Nutritional Information & Benefits
Let’s talk about what’s actually in these little guys. While I’m not a nutritionist, I’ve done my research and here’s what I can tell you:
Per serving (about 6 pinwheels):
- Calories: 320-380
- Protein: 18-22g
- Fat: 16-20g
- Carbohydrates: 24-28g
- Fiber: 1-2g
- Sugar: 2-3g
- Sodium: 600-800mg
Health Benefits: Turkey breast is an excellent source of lean protein, which helps keep you full and satisfied. Cream cheese provides calcium and a small amount of vitamin A. The tortillas offer carbohydrates for energy, making these roll-ups a balanced lunch option. If you add spinach or other veggies, you’ll boost the fiber and vitamin content even more.
Dietary Considerations: These roll-ups are naturally nut-free and egg-free, making them safe for school lunchboxes with allergy restrictions. For gluten-free diets, use corn or gluten-free tortillas. For dairy-free, use plant-based cream cheese and cheese alternatives. For low-carb, use lettuce wraps instead of tortillas.
Potential Allergens: This recipe contains dairy (cream cheese, provolone) and gluten (tortillas). Always check your specific ingredient labels if you have allergies.
Personally, I love that these roll-ups offer a good balance of protein, carbs, and fat without being heavy. They keep my kid full through the afternoon without the post-lunch crash that comes with sugary snacks. It’s comfort food that actually works for your body.
Frequently Asked Questions
Can I make these roll-ups the night before?
Absolutely! In fact, I recommend it. Making them the night before gives the flavors time to meld together, and the roll-ups actually taste better the next day. Just keep them wrapped tightly in plastic wrap in the refrigerator until you’re ready to slice and serve.
How do I prevent the tortillas from getting soggy?
The key is the cream cheese barrier. Spreading a thin, even layer of cream cheese over the entire tortilla creates a seal that prevents moisture from the turkey and any add-ins from soaking into the tortilla. Also, make sure your turkey isn’t too wet—pat it dry with a paper towel if necessary.
Can I use different types of cheese?
Yes, absolutely! Provolone is my go-to because it melts well and has a mild flavor that doesn’t overpower the turkey. But Swiss, cheddar, mozzarella, pepper jack, or even gouda all work beautifully. Just make sure the cheese is sliced thin enough to roll easily.
How long do these roll-ups last in the fridge?
Stored properly in an airtight container, these roll-ups will stay fresh for up to 4 days. I’ve pushed it to 5 days a few times, and they were still good, though the tortillas started to get a bit soft. For best quality, enjoy them within 3-4 days.
Can I freeze these roll-ups?
Yes! Freeze the whole rolls (not sliced) wrapped tightly in plastic wrap and placed in a freezer bag. They’ll keep for up to 2 months. Thaw overnight in the refrigerator before slicing. The texture is slightly softer after freezing, but the flavor is still excellent.
Conclusion
These easy make-ahead turkey and cheese lunchbox roll-ups have become a staple in my kitchen for good reason. They’re simple enough to throw together on a busy morning, versatile enough to customize with whatever you have on hand, and delicious enough that everyone actually eats them. No more sad, half-eaten lunches coming back home.
What I love most about this recipe is how it started—not with a grand plan or a fancy cooking class, but with a desperate Tuesday morning and a fridge full of odds and ends. It’s proof that the best recipes often come from the most unassuming moments. And now, every time I make these roll-ups, I think of that morning and smile.
I’d love to hear how these turn out for you! Have you tried any fun variations? Do your kids love them as much as mine do? Drop a comment below and let me know. And if you’re looking for more lunchbox inspiration, check out our healthy lunchbox ideas for more recipes that actually get eaten. Happy rolling, friends!
Pin This Recipe!

Easy Make-Ahead Turkey and Cheese Roll-Ups

These easy make-ahead turkey and cheese lunchbox roll-ups are the perfect solution for busy mornings. Made with simple ingredients like cream cheese, turkey, and tortillas, they’re quick to assemble, kid-approved, and stay fresh for days.
- Prep Time: 10 minutes
- Cook Time: 0 minutes
- Total Time: 40 minutes (includes 30 minutes chilling)
- Yield: 4 servings 1x
- Category: Lunch
- Cuisine: American
Ingredients
- 4 large flour tortillas (burrito size, 8–10 inches)
- 8 ounces cream cheese, softened
- 1/2 pound deli turkey breast, thinly sliced
- 8 slices provolone cheese
- Salt and black pepper to taste
- 1 tablespoon Dijon mustard (optional)
- 1/4 cup finely chopped fresh spinach (optional)
- 2 tablespoons chopped fresh dill or chives (optional)
- 1/4 cup shredded cheddar cheese (optional)
Instructions
- Soften the cream cheese: Take cream cheese out of fridge 30 minutes before starting, or microwave for 10-15 seconds on low power until softened but not melted.
- Mix the spread: In a small bowl, combine softened cream cheese with a pinch of salt and pepper. If using add-ins like Dijon mustard or fresh herbs, mix them in now. Stir until smooth.
- Prepare the tortillas: Lay one tortilla flat on a cutting board. If cold, warm in microwave for about 10 seconds to make pliable.
- Spread the cream cheese: Using a butter knife or offset spatula, spread about 2 tablespoons of cream cheese mixture evenly over the entire surface of the tortilla, going all the way to the edges.
- Layer the turkey: Place 2-3 slices of turkey breast evenly over the cream cheese, overlapping slightly to cover the tortilla completely.
- Add the cheese: Lay 2 slices of provolone cheese over the turkey.
- Roll it up tight: Starting from one edge, tightly roll the tortilla into a log shape, keeping the filling tucked in as you roll.
- Wrap and chill: Place the rolled tortilla seam-side down on a piece of plastic wrap. Wrap tightly, twisting the ends like a candy wrapper. Repeat with remaining tortillas. Refrigerate for at least 30 minutes.
- Slice and serve: After chilling, unwrap each roll and place on a cutting board. Using a sharp serrated knife, slice into 1-inch pinwheels using a gentle sawing motion. Serve cold or at room temperature.
Notes
For best results, use full-fat cream cheese and let ingredients come to room temperature. Chilling the rolls for at least 30 minutes is essential for clean slicing. These roll-ups taste even better the next day as flavors meld. For gluten-free, use gluten-free tortillas or large lettuce leaves. For dairy-free, use plant-based cream cheese and cheese alternatives.
Nutrition
- Serving Size: 6 pinwheels
- Calories: 350
- Sugar: 2
- Sodium: 700
- Fat: 18
- Saturated Fat: 10
- Carbohydrates: 26
- Fiber: 1
- Protein: 20
Keywords: turkey roll-ups, lunchbox ideas, make-ahead lunch, kid-friendly lunch, easy lunch recipe, pinwheel sandwiches


