Love this? Save it for later!
Share the inspiration with your friends
There used to be a tiny campground diner off Highway 101 in Oregon that made a s’mores icebox cake that ruined me for all other desserts. When they closed—just a handwritten sign taped to the door one rainy October morning—I honestly felt a little lost. That cake was the reason we drove six hours every summer. After twelve tries—including one where the graham crackers turned into complete mush and another where the chocolate seized into weird, gritty clumps—I finally got it. Let me tell you, the day I nailed it, I sat on my kitchen floor eating straight from the pan.
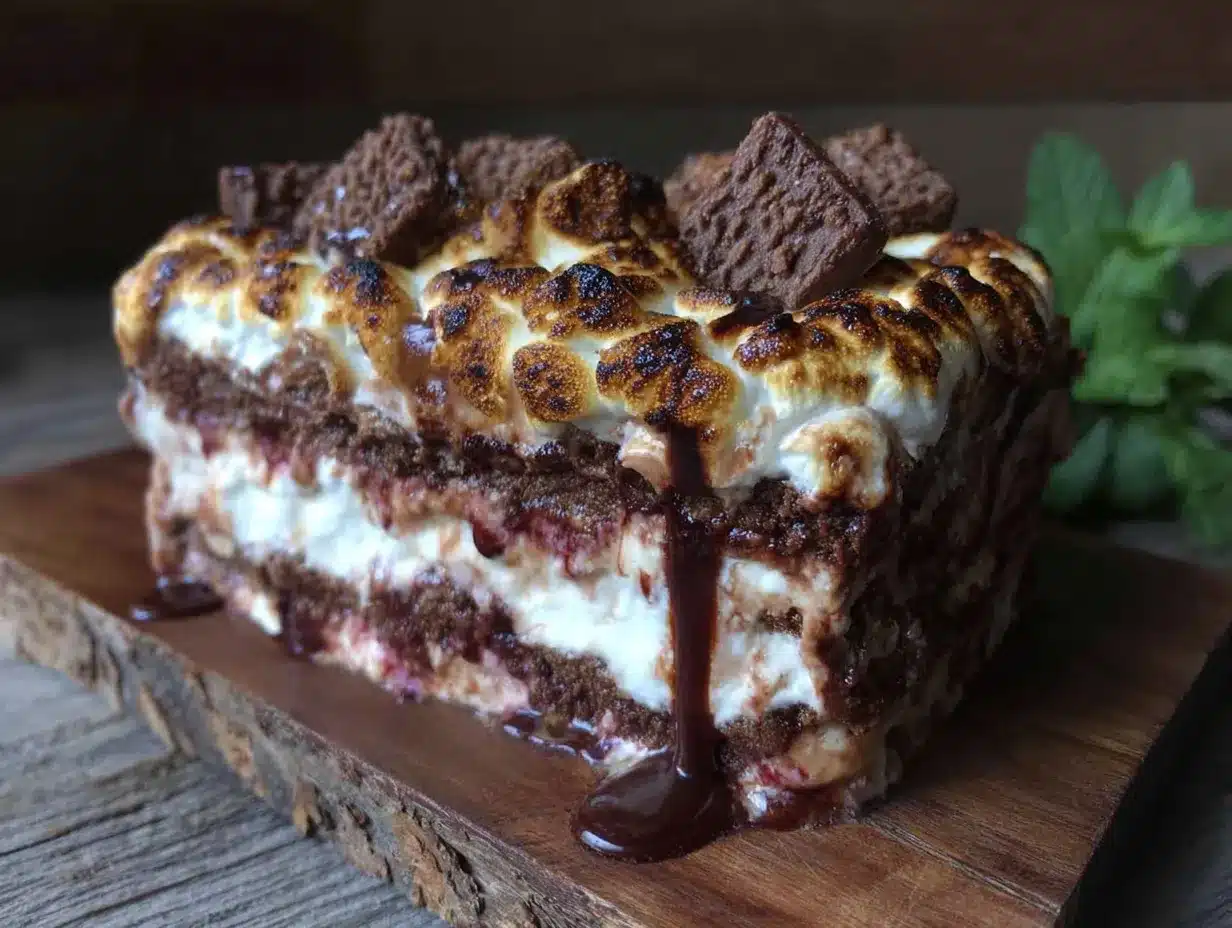
This Easy No-Bake S’mores Icebox Cake for a Crowd is that exact memory, captured in layers. You know that feeling when you take a bite and taste a specific summer? That’s what I was chasing. I wanted the crunch of a campfire s’more without the smoke smell in my hair, and I wanted to feed a crowd without standing over a grill for an hour. My first attempt used cheap chocolate pudding, and it was a disaster—watery and sad. But after some trial and error (and a very patient neighbor named Deb who ate every failed version), I landed on a combination that works. It’s rich, it’s creamy, and it has that perfect graham cracker bite that doesn’t turn to paste. Honestly, I think the original diner would approve.
This cake has become my summer party secret weapon. I bring it to barbecues, potlucks, and family reunions, and it disappears faster than anything else on the table. People always ask for the recipe, and I love watching their faces when I say it’s no-bake. There’s something about that first slice—seeing the clean layers, the toasted marshmallow top—that makes everyone smile. And isn’t that what we’re all after? A dessert that brings people together without making you sweat in the kitchen.
Why You’ll Love This Recipe
This isn’t just another icebox cake recipe. After testing this thing more times than I care to admit, I can tell you exactly why it works and why you’ll keep coming back to it.
- No-Bake & Stress-Free: No oven needed, even in the middle of summer. This comes together in about 20 minutes of active time, then the fridge does the rest of the work.
- Feeds a Crowd Easily: This makes a generous 9×13 pan that serves 12 to 16 people. Perfect for parties, holidays, or just a week where you want dessert for days.
- Simple, Pantry-Friendly Ingredients: Graham crackers, chocolate pudding, marshmallows, and butter—you probably already have most of these in your kitchen right now.
- Make-Ahead Magic: This cake actually gets better after a day in the fridge. You can assemble it up to 48 hours ahead, which is a lifesaver when you’re hosting.
- That Classic S’mores Flavor: The combination of creamy chocolate, crunchy graham, and toasted marshmallow is pure comfort. It tastes exactly like summer around a campfire, minus the bug bites.
- Completely Customizable: Swap in different pudding flavors, add peanut butter, or use gluten-free graham crackers. This recipe is forgiving and adaptable.
What makes this different from other icebox cakes? It’s the texture. Most versions turn the graham crackers into soggy mush by the second day. My method—slightly toasting the crackers and layering them just right—keeps that satisfying snap even after 48 hours. I tested this with my cousin’s picky kids, and they asked for seconds before they finished their first slice. That’s when I knew I had something special.
This cake is the kind of dessert that makes people close their eyes after the first bite. It’s nostalgic without being complicated, and it gives you that warm, happy feeling without any oven heat. Perfect for impressing a crowd with zero stress.
What Ingredients You Will Need
This recipe uses simple, honest ingredients that work together to create something truly special. Most of these are pantry staples, which makes this cake perfect for those moments when you need a dessert fast.
For the Chocolate Pudding Layer
- 2 boxes (3.9 oz each) instant chocolate pudding mix (I prefer Jell-O brand for consistent results, but store brands work fine too)
- 4 cups whole milk (cold—this is important for the pudding to set properly. You can use 2% but the texture won’t be as rich)
- 1 teaspoon vanilla extract (pure vanilla adds a warmth that complements the chocolate beautifully)
For the Graham Cracker Layers
- 2 boxes (about 14 oz each) honey graham crackers (you’ll need roughly 40-48 full sheets. I recommend Nabisco or Honey Maid for the best snap)
- 4 tablespoons unsalted butter, melted (for brushing the crackers. This is my secret for keeping them from getting too soggy)
For the Whipped Topping
- 2 cups heavy whipping cream (cold, straight from the fridge)
- 3 tablespoons powdered sugar
- 1 teaspoon vanilla extract
For the Marshmallow Layer & Topping
- 1 jar (7 oz) marshmallow creme or fluff (I use Jet-Puffed—it spreads easier than homemade marshmallows)
- 1 bag (10 oz) mini marshmallows (for the top layer and for toasting)
- 1/2 cup chocolate chips or chopped chocolate bar (optional, but I love adding extra chocolate chunks between layers for texture)
Ingredient Tips: For the best texture, use full-fat milk and real cream. The pudding needs the fat to set up properly, and low-fat versions can turn runny. I learned this the hard way when I tried to make it “healthier” and ended up with soup. Also, look for graham crackers that are firm and not already crumbled—you want whole sheets for clean layers. If you’re feeding someone with gluten sensitivity, use gluten-free graham crackers (Kinnikinnick makes a good one). The rest of the ingredients are naturally gluten-free.
For the chocolate, I like using a mix of semi-sweet and milk chocolate chips. The semi-sweet balances the sweetness of the marshmallow beautifully. If you’re feeling fancy, chop up a good-quality chocolate bar like Ghirardelli or Lindt. The extra chunks of chocolate in the layers are a happy surprise when you bite into them.
Equipment Needed
You don’t need fancy equipment for this cake, which is part of its charm. Here’s what you’ll need:
- 9×13 inch baking dish (glass or ceramic works best—metal can sometimes react with the pudding)
- Large mixing bowls (one for the pudding, one for the whipped cream)
- Electric hand mixer or stand mixer (you can whisk the cream by hand, but your arm will thank you for using a mixer)
- Rubber spatula (for spreading the marshmallow creme and scraping every bit of pudding)
- Pastry brush (for brushing melted butter onto the graham crackers)
- Kitchen torch (for toasting the marshmallows on top—this is optional but highly recommended. You can also use your oven’s broiler)
- Plastic wrap or aluminum foil (for covering the cake while it chills)
If you don’t have a kitchen torch, don’t worry. I’ve used my oven’s broiler many times with great results. Just watch it closely—marshmallows go from golden to burnt in about 30 seconds. I learned this when I torched my first cake and ended up with a smoky kitchen and slightly black marshmallows. Still tasted good, honestly, but not as pretty.
For a budget-friendly option, skip the stand mixer and use a hand mixer. I bought mine for $15 at a discount store, and it’s been going strong for years. Also, a regular butter knife works fine for spreading the marshmallow creme if you don’t have a spatula. No need to buy special equipment for this recipe.
Preparation Method
Let’s build this beauty step by step. The process is simple, but a few key details make all the difference.
- Make the chocolate pudding: In a large bowl, whisk together the instant pudding mix and cold milk. Whisk for about 2 minutes until it starts to thicken. Add the vanilla extract and stir. Let it sit for 5 minutes to set up completely. It should be thick and creamy, not runny. If it’s too thin, let it sit another 2-3 minutes.
- Whip the cream: In a separate large bowl, beat the heavy cream with an electric mixer on medium-high speed. Add the powdered sugar and vanilla gradually. Whip until soft peaks form—about 3-4 minutes. Be careful not to overwhip, or you’ll end up with butter. You want the cream to be fluffy and hold its shape but still smooth.
- Fold the cream into the pudding: Gently fold the whipped cream into the chocolate pudding using a rubber spatula. Do this in three additions, folding gently each time. You want to keep as much air in the mixture as possible. The result should be a light, mousse-like texture. Set this aside.
- Prepare the graham crackers: Melt the butter in a small bowl. Take each graham cracker sheet and lightly brush one side with melted butter. This step is crucial—it creates a barrier that prevents the crackers from getting too soggy. Don’t soak them, just a light brush. Set the buttered crackers aside on a plate.
- Layer the bottom of the dish: Arrange a single layer of buttered graham crackers in the bottom of your 9×13 dish, breaking them to fit as needed. You want them to cover the entire bottom without large gaps. Press them down gently so they sit flat.
- Add the first pudding layer: Spread half of the chocolate pudding mixture evenly over the graham crackers. Use your spatula to smooth it out to the edges. Sprinkle about half of the chocolate chips (if using) over the pudding.
- Add the marshmallow layer: Warm the marshmallow creme slightly in the microwave (about 15 seconds) to make it easier to spread. Dollop it over the pudding layer and gently spread it with a spatula or butter knife. Don’t press too hard—you want to keep the marshmallow layer light and airy.
- Repeat the layers: Add another layer of buttered graham crackers on top of the marshmallow. Press down gently. Spread the remaining chocolate pudding mixture over the crackers. Sprinkle the rest of the chocolate chips.
- Top with graham crackers and marshmallows: Add a final layer of buttered graham crackers. Now, spread the mini marshmallows evenly over the top. Don’t press them down—let them sit in a fluffy layer. This is what will get toasted.
- Chill the cake: Cover the dish tightly with plastic wrap and refrigerate for at least 6 hours, but preferably overnight. The longer it sits, the better the flavors meld together. I’ve left it for up to 48 hours, and it was perfect.
- Toast the marshmallows: Just before serving, remove the plastic wrap. Use a kitchen torch to toast the marshmallow top until golden brown. If using the broiler, place the dish on the top rack and broil for 30-60 seconds, watching constantly. Let it cool for 5 minutes before slicing.
- Slice and serve: Use a sharp knife dipped in hot water for clean slices. Wipe the knife between cuts for the prettiest presentation. Serve cold or at room temperature—both are delicious.
Sensory Cues: When you fold the cream into the pudding, you’re looking for a uniform, pale brown color with no white streaks. The graham crackers should feel slightly firm when you press on them after chilling—not mushy. When you toast the marshmallows, listen for a gentle sizzle and watch for golden spots. The smell will be incredible, like a campfire in your kitchen.
Cooking Tips & Techniques
After making this cake more times than I can count, I’ve collected a few tricks that make a real difference. Here’s what I’ve learned:
The graham cracker trick: Brushing the crackers with melted butter is non-negotiable. I learned this after my first attempt turned into a graham cracker soup. The butter creates a waterproof barrier that keeps the crackers crisp even after two days in the fridge. Don’t skip this step, and don’t over-butter—just a light coat.
Pudding consistency matters: Let the pudding set for the full 5 minutes before folding in the cream. If you rush this, the layers will be too loose and the cake won’t hold its shape when sliced. I once tried to speed things up and ended up with a delicious but messy puddle. Still tasty, just not pretty.
Room temperature ingredients: Take the cream and milk out of the fridge right before you start. Cold ingredients whip better and set faster. If your kitchen is warm, pop the mixing bowl in the freezer for 5 minutes before whipping the cream.
Layer evenness: Use an offset spatula to spread the pudding layers evenly. Uneven layers mean some bites are all marshmallow and others are all chocolate. We want every bite to have a bit of everything. Take your time with this step.
Toasting without burning: If using a kitchen torch, keep it moving in a circular motion about 2 inches from the marshmallows. Don’t hold it still, or you’ll get black spots. If using the broiler, stay right in front of the oven and watch like a hawk. I burned my first batch because I turned around to grab a plate. Lesson learned.
Make it ahead: This cake actually improves with time. Make it a day ahead, and the flavors meld beautifully. The graham crackers soften slightly but still have that satisfying bite. It’s the perfect make-ahead dessert for stress-free entertaining.
Variations & Adaptations
One of the best things about this recipe is how easy it is to customize. Here are some of my favorite variations:
Peanut Butter S’mores Cake
Add 1/2 cup of creamy peanut butter to the chocolate pudding mixture before folding in the cream. Swirl in an extra 1/4 cup of peanut butter between the layers. The salty peanut butter with the sweet chocolate is a match made in heaven. I made this for a Super Bowl party, and it disappeared in 20 minutes.
Mint Chocolate S’mores Cake
Use chocolate mint pudding mix instead of regular chocolate. Add 1/2 teaspoon of peppermint extract to the pudding. Crush a few peppermint candies and sprinkle them between the layers. This version is fantastic for holiday parties or when you want something refreshingly different.
Gluten-Free Version
Swap the regular graham crackers for gluten-free graham crackers. Kinnikinnick makes a great option that doesn’t crumble apart. Everything else in the recipe is naturally gluten-free. I’ve served this to friends with celiac disease, and they couldn’t tell the difference.
Vegan Adaptation
Use coconut cream or a plant-based heavy cream alternative (like Silk Dairy-Free Heavy Whipping Cream). Replace the milk with oat milk or almond milk. Use vegan graham crackers and vegan marshmallows (Dandies makes excellent ones). The texture will be slightly different, but still delicious.
Berry S’mores Cake
Add a layer of fresh raspberries or sliced strawberries between the pudding and marshmallow layers. The tartness of the berries cuts through the sweetness beautifully. I tried this with blackberries once, and it was incredible. The berries add a fresh, juicy element that feels lighter.
Personally, my favorite variation is the peanut butter version. I made it for a camping trip (we just pretended we were by a campfire), and it was the highlight of the weekend. The saltiness of the peanut butter balances the sweetness perfectly. Give it a try if you’re feeling adventurous.
Serving & Storage Suggestions
This cake is versatile when it comes to serving. Here’s how to make the most of it:
Serving Temperature: I prefer this cake cold, straight from the fridge. The layers hold together better, and the texture is firmer. But if you like a softer, almost pudding-like consistency, let it sit at room temperature for 15-20 minutes before serving. Both ways are delicious—it just depends on your mood.
Presentation Ideas: For a pretty presentation, garnish with extra chocolate shavings, a drizzle of chocolate syrup, or a few whole graham crackers stuck in the top like flags. Fresh mint leaves add a nice pop of green. If you’re serving at a party, cut the cake into squares and place each on a small plate with a dollop of whipped cream.
Complementary Dishes: This cake pairs beautifully with fresh fruit—berries, sliced peaches, or even a simple fruit salad. The tartness of the fruit cuts through the richness. For drinks, cold milk, coffee, or a nice stout beer are all excellent choices. I love serving this with a cup of hot coffee on a cool evening.
Storage Instructions: Cover the dish tightly with plastic wrap or aluminum foil and store in the refrigerator for up to 5 days. The cake actually gets better after the first day as the flavors meld. Do not freeze this cake—the texture of the pudding and cream will become grainy and unpleasant when thawed.
Reheating Tips: If you want to re-toast the marshmallow top after storing, simply pop the dish under the broiler for 20-30 seconds. Watch closely! The marshmallows will brown quickly. Alternatively, use a kitchen torch for more control. The rest of the cake should stay cold while the top gets toasty.
The flavors develop beautifully over time. On day two, the graham crackers have softened just enough to meld with the pudding, creating a texture similar to a traditional icebox cake. It’s a different experience from the first day, but equally delicious. I actually prefer it on day two—the flavors are more integrated.
Nutritional Information & Benefits
Let’s be honest—this is a dessert, not a health food. But here’s what you need to know:
Estimated Nutritional Values (per serving, based on 16 servings):
- Calories: 380-420
- Total Fat: 22g
- Saturated Fat: 13g
- Cholesterol: 55mg
- Sodium: 320mg
- Total Carbohydrates: 45g
- Dietary Fiber: 1g
- Sugars: 32g
- Protein: 5g
Health Benefits of Key Ingredients: The milk and cream provide calcium and vitamin D for bone health. Dark chocolate (if you use it) contains antioxidants called flavonoids that can support heart health. Graham crackers offer a small amount of whole grains. The marshmallows? Well, they make you smile, and that counts for something.
Dietary Considerations: This recipe contains dairy and gluten (unless modified). It is not suitable for vegans or those with dairy allergies without adaptations. For a lower-sugar version, use sugar-free pudding mix and reduce the powdered sugar in the whipped cream. The marshmallows will still add sweetness, so it won’t be sugar-free, but it will be lower.
Potential Allergens: Dairy (milk, cream), gluten (graham crackers), and possibly soy (in some pudding mixes). Check labels if you’re serving someone with allergies.
From a wellness perspective, I believe in balance. This cake is a treat, not an everyday food. I make it for special occasions and celebrations, and I don’t feel guilty about it. Food is about joy and connection, and this cake delivers both. Enjoy it mindfully, savor every bite, and share it with people you love.
Conclusion
This Easy No-Bake S’mores Icebox Cake for a Crowd is the dessert you’ve been looking for. It’s simple enough for a weekday treat but impressive enough for a party. The layers of creamy chocolate, crunchy graham crackers, and toasted marshmallows come together in a way that feels both nostalgic and fresh. I’ve made this for birthdays, barbecues, and random Tuesdays, and it never fails to bring smiles.
I encourage you to make this recipe your own. Swap in your favorite chocolate, add some berries, or go wild with the peanut butter version. The beauty of this cake is its flexibility. Don’t be afraid to experiment and find your perfect combination. And when you do, come back and tell me about it.
For me, this cake is more than just a recipe. It’s a memory of that little diner in Oregon, of summer road trips, and of the joy of sharing something delicious with people I love. I hope it becomes a memory for you too. So go ahead—make the cake, toast those marshmallows, and watch everyone’s faces light up. That’s what cooking is all about.
Happy baking (or rather, happy not-baking)! Let me know in the comments how yours turns out. I’d love to hear about your variations and your own s’mores memories. And if you share it on social media, tag me—I want to see your beautiful creation!
Frequently Asked Questions
Can I use homemade chocolate pudding instead of instant?
Yes, you can use homemade chocolate pudding. Just make sure it’s completely cooled and thickened before layering. Instant pudding is easier and more consistent, but homemade works beautifully if you have the time. Let it cool to room temperature, then chill it for an hour before using.
How far in advance can I make this cake?
You can make this cake up to 48 hours in advance. In fact, it tastes better on day two. Just wait to toast the marshmallows until right before serving. If you toast them ahead of time, they’ll get sticky and lose that nice crunch.
Can I use a different size pan?
Absolutely. You can use an 8×8 pan for a thicker cake, but you’ll need to adjust the layers. A 9×13 pan is ideal for a crowd. If using a smaller pan, you might have leftover pudding mixture. You can also make individual servings in small jars or ramekins for a cute presentation.
My graham crackers got soggy. What went wrong?
This usually happens if you didn’t brush them with melted butter, or if the pudding was too thin. Make sure you let the pudding set fully before layering. Also, don’t press down too hard when adding the next layer. The butter barrier is crucial—don’t skip it!
Can I freeze leftovers?
I don’t recommend freezing this cake. The texture of the whipped cream and pudding becomes grainy when thawed. It’s best enjoyed fresh or within 5 days of refrigeration. If you have leftovers, just keep them covered in the fridge and enjoy within the week.
Pin This Recipe!
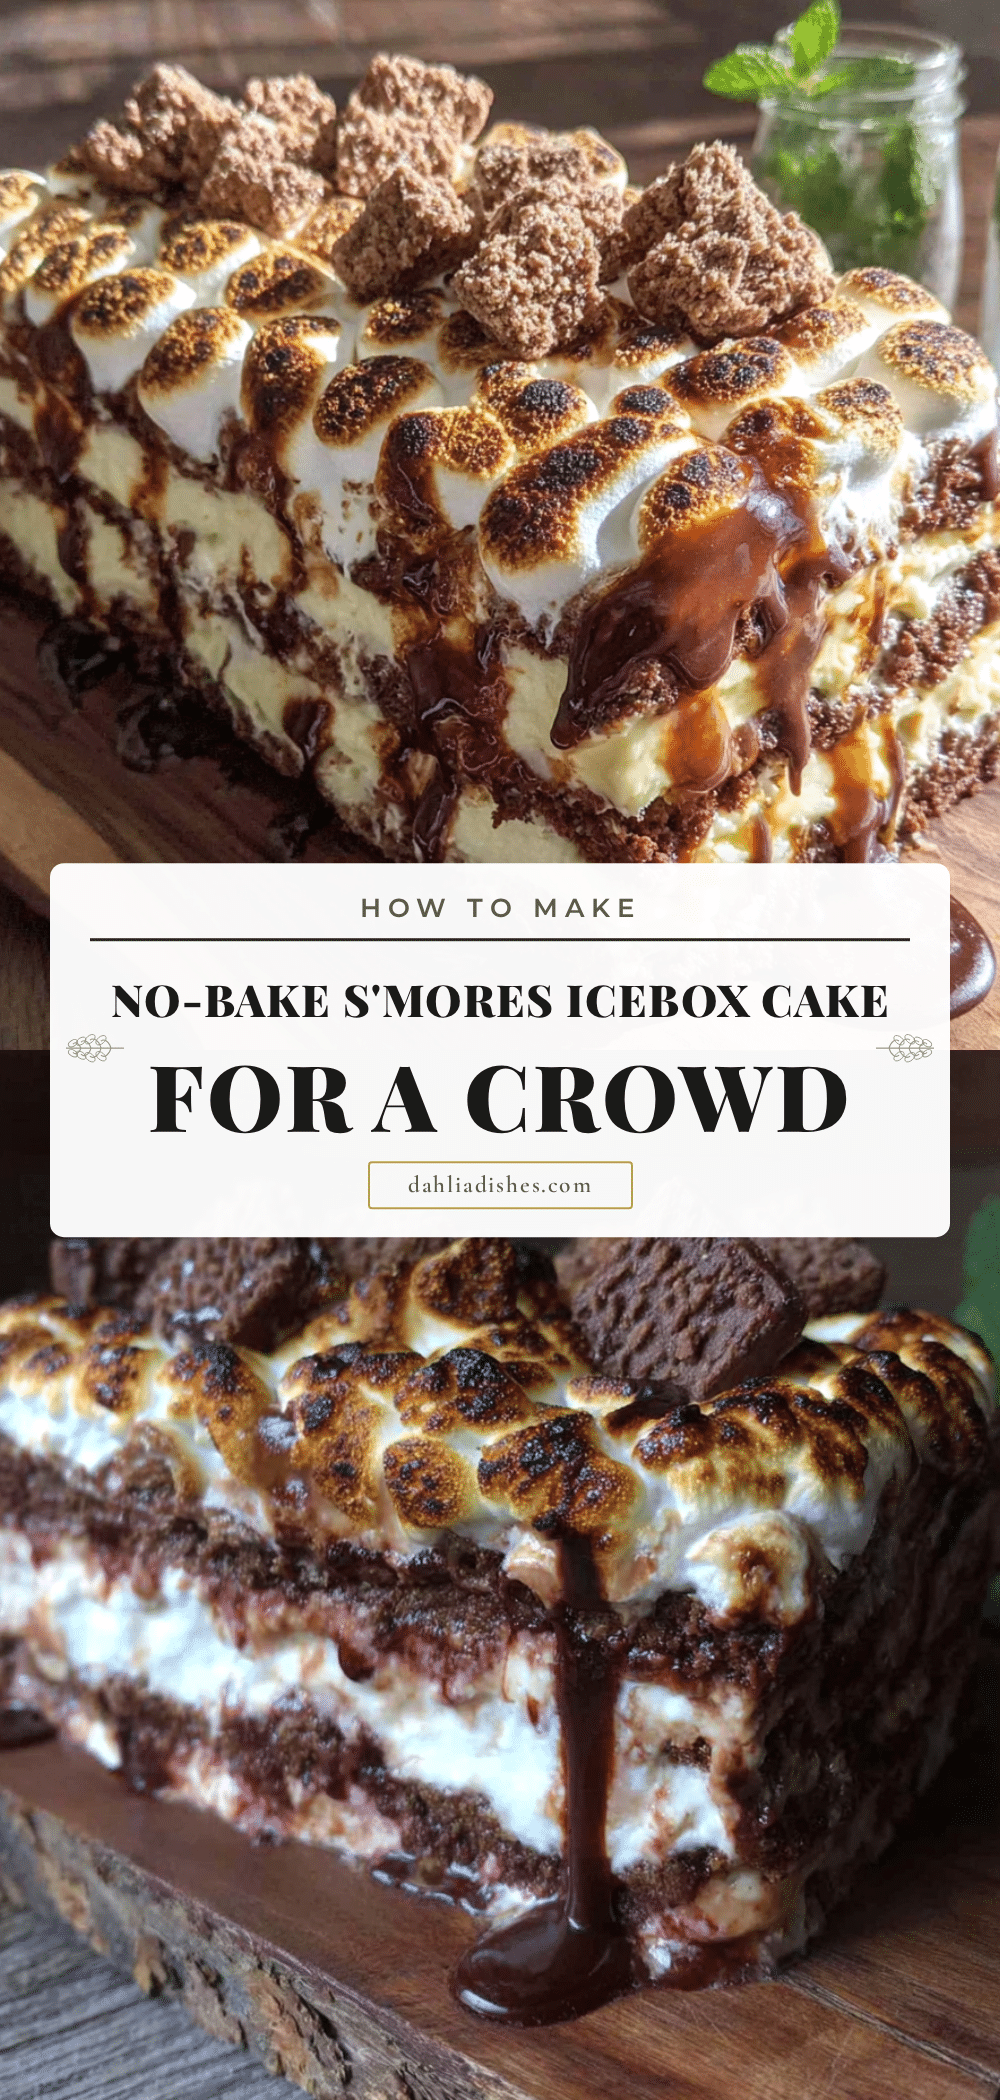
Easy No-Bake Smores Icebox Cake for a Crowd
A rich, creamy no-bake dessert with layers of chocolate pudding, graham crackers, and toasted marshmallows, perfect for feeding a crowd at summer parties and gatherings.
- Prep Time: 20 minutes
- Cook Time: 0 minutes
- Total Time: 6 hours 20 minutes (includes chilling)
- Yield: 12-16 servings 1x
- Category: Dessert
- Cuisine: American
Ingredients
- 2 boxes (3.9 oz each) instant chocolate pudding mix
- 4 cups whole milk, cold
- 1 teaspoon vanilla extract
- 2 boxes (about 14 oz each) honey graham crackers (40–48 full sheets)
- 4 tablespoons unsalted butter, melted
- 2 cups heavy whipping cream, cold
- 3 tablespoons powdered sugar
- 1 teaspoon vanilla extract
- 1 jar (7 oz) marshmallow creme or fluff
- 1 bag (10 oz) mini marshmallows
- 1/2 cup chocolate chips or chopped chocolate bar (optional)
Instructions
- Make the chocolate pudding: In a large bowl, whisk together the instant pudding mix and cold milk for about 2 minutes until it starts to thicken. Add the vanilla extract and stir. Let it sit for 5 minutes to set up completely.
- Whip the cream: In a separate large bowl, beat the heavy cream with an electric mixer on medium-high speed. Add the powdered sugar and vanilla gradually. Whip until soft peaks form, about 3-4 minutes.
- Fold the cream into the pudding: Gently fold the whipped cream into the chocolate pudding using a rubber spatula in three additions, folding gently each time until uniform and mousse-like.
- Prepare the graham crackers: Melt the butter in a small bowl. Lightly brush one side of each graham cracker sheet with melted butter.
- Layer the bottom of the dish: Arrange a single layer of buttered graham crackers in the bottom of a 9×13 inch dish, breaking to fit as needed. Press down gently.
- Add the first pudding layer: Spread half of the chocolate pudding mixture evenly over the graham crackers. Sprinkle about half of the chocolate chips (if using) over the pudding.
- Add the marshmallow layer: Warm the marshmallow creme slightly in the microwave (about 15 seconds). Dollop it over the pudding layer and gently spread it evenly.
- Repeat the layers: Add another layer of buttered graham crackers on top of the marshmallow. Press down gently. Spread the remaining chocolate pudding mixture over the crackers. Sprinkle the rest of the chocolate chips.
- Top with graham crackers and marshmallows: Add a final layer of buttered graham crackers. Spread the mini marshmallows evenly over the top without pressing down.
- Chill the cake: Cover the dish tightly with plastic wrap and refrigerate for at least 6 hours, preferably overnight or up to 48 hours.
- Toast the marshmallows: Just before serving, remove the plastic wrap. Use a kitchen torch to toast the marshmallow top until golden brown, or broil in the oven for 30-60 seconds, watching constantly. Let cool for 5 minutes before slicing.
- Slice and serve: Use a sharp knife dipped in hot water for clean slices. Wipe the knife between cuts. Serve cold or at room temperature.
Notes
Brushing graham crackers with melted butter prevents sogginess. Let pudding set fully before layering. Cake improves after a day in the fridge. Toast marshmallows just before serving. Do not freeze.
Nutrition
- Serving Size: 1 slice (1/16 of cak
- Calories: 400
- Sugar: 32
- Sodium: 320
- Fat: 22
- Saturated Fat: 13
- Carbohydrates: 45
- Fiber: 1
- Protein: 5
Keywords: no-bake, s'mores, icebox cake, crowd, summer, chocolate, marshmallow, graham cracker


