Love this? Save it for later!
Share the inspiration with your friends
My father-in-law had sworn off bagels for the better part of a decade. Not because he didn’t like them, but because he believed the ones from the store were nothing more than dense, flavorless bread shaped like a tire. Then, last Thanksgiving morning, I caught him standing over the kitchen counter, pulling apart a warm, seed-crusted bagel with his bare hands. He didn’t say a word. He just looked at me, took another bite, and nodded. That was it. The man who had been bagel-free for ten years was now on his third one, and I hadn’t even told him they were made with pumpkin seeds yet. That little secret, honestly, is what made the whole thing so satisfying.
I had been messing around with different flour blends for weeks. My kitchen counter looked like a flour bomb had gone off, and my husband was getting tired of being a taste-tester for what he called “bread hockey pucks.” But this batch, the one with the pumpkin seeds mixed into the everything topping, was different. The dough felt right in my hands, soft but with a bit of resistance. I boiled them, watched them puff up in the water, and when they came out of the oven, the whole house smelled like a bakery. Maybe you’ve been there, where a recipe just clicks, and you know you’ve got something worth keeping. It was that morning, with my father-in-law quietly demolishing his third bagel, that I knew I had to write this down.
Why You’ll Love This Recipe
These homemade everything bagel pumpkin seed bagels are not just another bread recipe. They are the result of a few happy accidents and some stubborn testing. I have made them for brunches, for busy weekday breakfasts, and even for a neighbor who was feeling under the weather. Every single time, they disappear faster than I expect. Here is why they work so well:
- Simple, Real Ingredients: You do not need a specialty grocery store. Flour, yeast, water, and a bag of pumpkin seeds are the backbone of this recipe. No weird additives or hard-to-find flours.
- That Perfect Chew: The boiling step is non-negotiable, and it gives you that authentic, chewy bagel texture that store-bought versions just cannot replicate. It is the kind of chew that makes you close your eyes for a second.
- A Nutty Twist: The pumpkin seeds add a subtle, earthy crunch that plays beautifully with the classic everything seasoning. It is not a gimmick; it genuinely makes the flavor more interesting.
- Weekend-Friendly: While the dough needs a little time to rise, the active work is only about 20 minutes. You can start them in the morning and have fresh bagels by lunchtime.
- Crowd-Pleasing: I have served these to kids who usually only eat cereal and to adults who claim to be gluten-sensitive (oops). They are universally loved.
What makes this recipe different from the dozens of bagel recipes out there is the texture. By adding a small amount of pumpkin seed flour (just blitz some seeds in your food processor) to the dough, you get a slightly more tender crumb without losing that signature chew. It is a tiny adjustment that makes a huge difference. This is the kind of recipe that makes you feel like a rockstar in the kitchen without needing to be a professional baker.
What Ingredients You Will Need
This recipe relies on a handful of pantry staples, plus the star ingredient: pumpkin seeds. The combination is simple, but each component plays a specific role in creating that perfect bagel texture and flavor. Here is what you will need to gather:
For the Bagel Dough:
- 4 cups (500g) bread flour – Bread flour has a higher protein content than all-purpose flour, which is crucial for developing that chewy, bagel-like structure. I prefer King Arthur Flour for its consistent results.
- 1 ½ cups (360ml) warm water – The water should be around 110°F (43°C). Too hot, and you will kill the yeast. Too cold, and the dough will take forever to rise.
- 2 ¼ teaspoons (7g) active dry yeast – One standard packet. Make sure it is not expired. I learned that lesson the hard way with a flat batch of bagels last winter.
- 1 tablespoon (15g) granulated sugar – This feeds the yeast and adds a tiny bit of sweetness to balance the savory topping.
- 1 ½ teaspoons (9g) salt – Fine sea salt works best. Do not skip it, or your bagels will taste flat.
- ¼ cup (30g) pumpkin seed flour – To make this, simply blitz raw, unsalted pumpkin seeds in a clean coffee grinder or food processor until they form a fine powder. Do not over-process, or you will get pumpkin seed butter.
For the Everything Topping:
- 2 tablespoons (18g) white sesame seeds
- 2 tablespoons (18g) black sesame seeds
- 2 tablespoons (18g) dried minced garlic
- 2 tablespoons (18g) dried minced onion
- 2 tablespoons (18g) poppy seeds
- ¼ cup (30g) raw pumpkin seeds – These are coarsely chopped for texture. Do not use salted or roasted seeds, as they can burn in the oven.
- 1 teaspoon (5g) flaky sea salt – Maldon salt is my go-to here for its light, crunchy texture.
For the Water Bath:
- 8 cups (1.9L) water
- 2 tablespoons (30g) baking soda – This is what gives the bagels their glossy, chewy crust. Do not substitute with baking powder.
- 1 tablespoon (15g) honey or barley malt syrup – This adds a subtle sweetness and helps with browning. Honey works perfectly if you do not have barley malt.
A quick note on the pumpkin seeds: I buy a big bag of raw, shelled pumpkin seeds from the bulk section at my local co-op. They are much cheaper than the pre-packaged ones, and I use them in everything from this recipe to granola. If you only have salted seeds, give them a quick rinse and pat them dry before using.
Equipment Needed
You do not need a professional bakery setup for these homemade everything bagel pumpkin seed bagels. A few basic tools will do the job just fine. Here is what you will need:
- Stand mixer with a dough hook – This makes kneading much easier, but you can absolutely knead by hand. It will just take about 10 minutes of arm work.
- Large mixing bowl – For rising the dough. A glass or ceramic bowl works best.
- Baking sheet – Lined with parchment paper or a silicone baking mat. The mat is a lifesaver for preventing sticking.
- Large pot – For boiling the bagels. It needs to be wide enough to hold a few bagels at a time without crowding.
- Slotted spoon – For gently lowering and removing the bagels from the boiling water.
- Kitchen scale – I highly recommend this for accuracy, especially with the flour. A cup of flour can vary by 20-30 grams depending on how you scoop it.
- Cooling rack – This is essential for letting the bagels cool properly so the bottoms do not get soggy.
If you do not have a stand mixer, do not worry. I have made these bagels by hand many times, and they turn out just as good. It is a great arm workout, honestly. Just be patient and knead until the dough is smooth and elastic.
Preparation Method
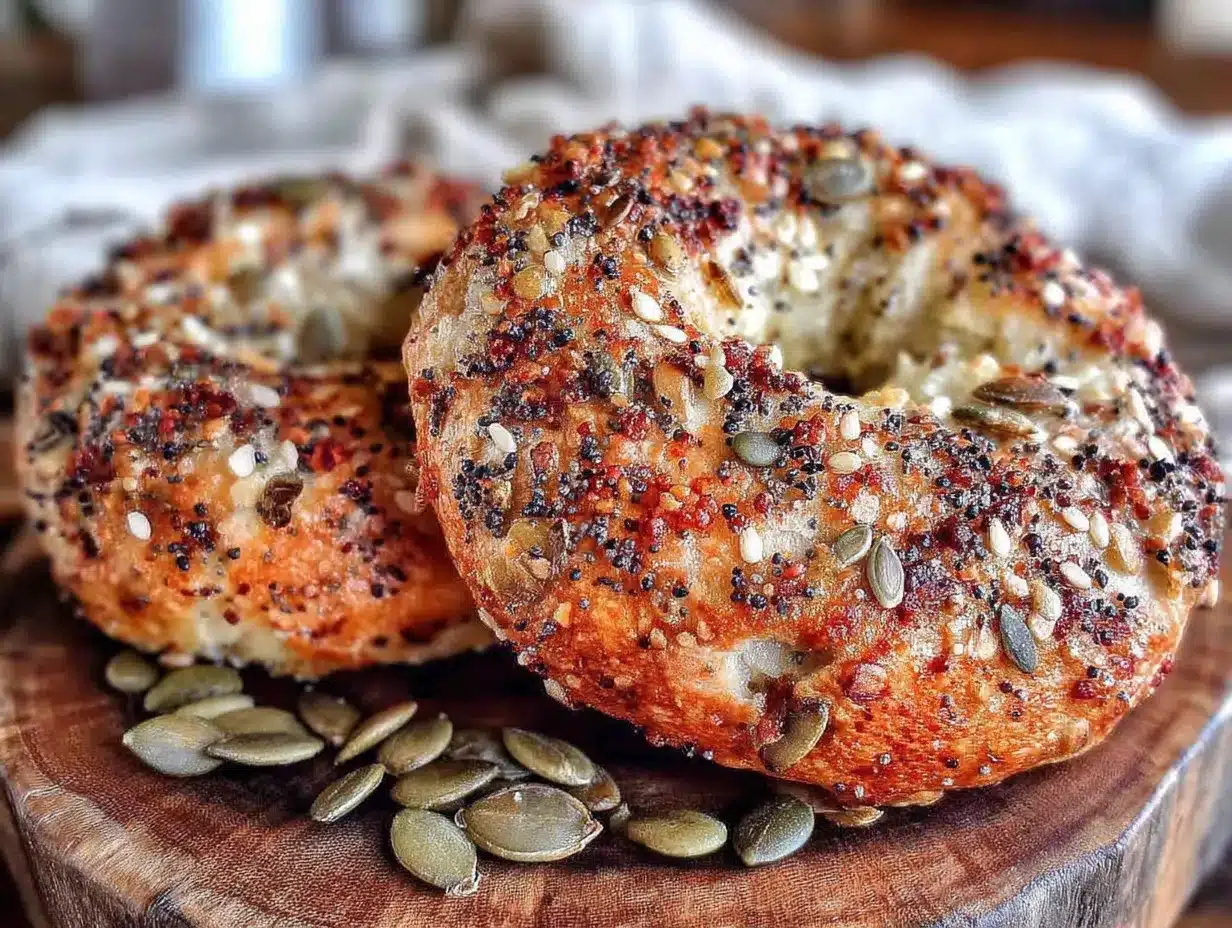
Making bagels from scratch is a two-day process if you want the best flavor, but I am going to give you the one-day method that still delivers incredible results. Let us break it down step by step so you can follow along without any confusion.
- Activate the yeast (5 minutes): In the bowl of your stand mixer, combine the warm water, sugar, and active dry yeast. Give it a gentle stir and let it sit for about 5 minutes until it becomes frothy and bubbly. If it does not foam up, your yeast might be dead. Start over with fresh yeast.
- Mix the dough (10 minutes): Add the bread flour, salt, and pumpkin seed flour to the yeast mixture. Using the dough hook attachment, mix on low speed until a shaggy dough forms. Increase the speed to medium and knead for 6-8 minutes. The dough should be smooth, elastic, and slightly tacky to the touch. If it is too sticky, add a tablespoon of flour at a time. If it is too dry, add a teaspoon of water.
- First rise (1 hour): Shape the dough into a ball and place it in a lightly oiled bowl. Cover it with plastic wrap or a damp kitchen towel. Let it rise in a warm, draft-free place for about 1 hour, or until it has doubled in size. I usually put it in my oven with the light on. It is the perfect cozy spot.
- Shape the bagels (15 minutes): Punch the dough down to release the air. Turn it out onto a lightly floured surface. Divide the dough into 8 equal pieces (about 110-120 grams each). Roll each piece into a ball, then poke your thumb through the center to create a hole. Gently stretch the hole to about 1 ½ inches wide. Place the shaped bagels on a parchment-lined baking sheet. Do not worry if they look a little lumpy; they will smooth out during the boil.
- Second rise (30 minutes): Cover the shaped bagels loosely with plastic wrap and let them rest at room temperature for 30 minutes. This is called the “bench rest,” and it helps relax the gluten so the bagels do not shrink when you boil them.
- Prepare the water bath (10 minutes): While the bagels are resting, bring 8 cups of water to a boil in your large pot. Add the baking soda and honey. The water will foam up a bit, so do not fill the pot too high. Reduce the heat to a gentle simmer.
- Boil the bagels (2 minutes total): Carefully lower 2-3 bagels into the simmering water. Let them boil for 30 seconds on one side, then flip them with the slotted spoon and boil for another 30 seconds. For a chewier crust, you can boil them for up to 1 minute per side. Use a timer, because it is easy to forget them. I have definitely made that mistake before.
- Add the topping (2 minutes): Using the slotted spoon, transfer the boiled bagels back to the parchment-lined baking sheet. While they are still wet, generously sprinkle the everything topping mixture over the top and sides. Press the seeds in gently so they stick. Do this immediately, because once the bagels dry, the seeds will just fall off.
- Bake (20-25 minutes): Preheat your oven to 425°F (220°C). Bake the bagels for 20-25 minutes, rotating the baking sheet halfway through. They are done when the tops are deep golden brown and the bottoms sound hollow when tapped. Let them cool on a wire rack for at least 15 minutes before slicing. I know it is hard to wait, but cutting them too early will make the inside gummy.
A quick note on timing: The total active time is about 30 minutes of hands-on work, plus about 1.5 hours of rising and resting time. It is a weekend project, but a very rewarding one.
Cooking Tips & Techniques
After making these homemade everything bagel pumpkin seed bagels more times than I can count, I have picked up a few tricks that make the process smoother and the results more consistent. Here are the most important ones:
Do not skip the pumpkin seed flour. I know it sounds like an extra step, but it is the secret to the tender crumb. If you try to just add whole pumpkin seeds to the dough, they will get lost in the texture. Grinding them into a flour distributes the flavor and fat evenly throughout the bagel.
Watch your water temperature. I use a simple instant-read thermometer for this. Water that is too hot (above 130°F) will kill the yeast instantly. Water that is too cold (below 100°F) will make the rise painfully slow. Aim for that sweet spot around 110°F. If you do not have a thermometer, the water should feel like a warm bath, not hot.
The boiling step is not optional. I have tried skipping it to save time, and the result was a dense, bread-like roll that was nothing like a bagel. The boiling water gelatinizes the starch on the outside of the dough, creating that signature chewy crust. It is the most important step in the whole process.
Use a light hand with the flour. When shaping the bagels, try to use as little flour as possible on your work surface. Too much extra flour will dry out the dough and make the bagels tough. A light dusting is all you need.
Make the topping in advance. I usually make a double batch of the everything seasoning and store it in a jar in my pantry. It lasts for months and is great on avocado toast, eggs, or even roasted vegetables. Having it ready makes the bagel process much faster.
One mistake I made early on: I used roasted, salted pumpkin seeds in the topping once, and they burned in the oven. The little black specks looked awful, and the bagels tasted bitter. Stick with raw, unsalted seeds for the topping, and save the roasted ones for snacking.
Variations & Adaptations
One of the best things about this recipe is how flexible it is. You can change the flavor profile, adjust it for dietary needs, or just use what you have on hand. Here are some variations I have tried and loved:
Gluten-Free Version: Substitute the bread flour with a high-quality gluten-free bread flour blend. I have had good luck with the Cup4Cup brand. Add an extra teaspoon of xanthan gum if your blend does not already include it. The dough will be stickier, so wet your hands when shaping. The texture will be slightly more delicate, but still delicious.
Sweet Cinnamon Pumpkin Seed Bagels: Omit the everything topping and the garlic and onion from the dough. Instead, add 1 teaspoon of cinnamon and 2 tablespoons of brown sugar to the dry ingredients. For the topping, mix ¼ cup of pumpkin seeds with 2 tablespoons of cinnamon sugar. These are amazing with cream cheese and a drizzle of honey.
Cheesy Everything Bagels: Add ½ cup of finely shredded sharp cheddar cheese to the dough during the last minute of kneading. The cheese melts into the crumb and creates little pockets of savory goodness. Top with the everything seasoning as usual. I made these for a football party, and they were gone in 20 minutes.
Spicy Everything Bagels: Add 1 teaspoon of red pepper flakes and ½ teaspoon of cayenne pepper to the everything topping mixture. The heat pairs surprisingly well with the nutty pumpkin seeds. Serve them with a schmear of plain cream cheese to balance the spice.
No-Knead Method: If you do not have a stand mixer or do not feel like kneading, you can use the no-knead method. Mix the dough together until it just comes together (it will be shaggy and wet), cover it, and let it rest in the refrigerator for 12-24 hours. The long, slow fermentation develops the gluten naturally. Shape and boil as directed. The flavor is even better with this method.
Serving & Storage Suggestions
These homemade everything bagel pumpkin seed bagels are best enjoyed fresh on the same day, but they also store beautifully. Here is how I like to serve and store them:
Serving Temperature: I always let them cool completely on a wire rack before slicing. A warm bagel is tempting, but it will be gummy inside if you cut it too soon. Once cooled, toast them lightly to revive the crust. A split-second in the toaster is all they need.
Classic Pairings: A generous schmear of plain cream cheese is the classic choice, but do not stop there. Try them with whipped butter and a sprinkle of flaky salt, or with smoked salmon, capers, and red onion for a proper lox bagel. I also love them with a simple avocado mash and a squeeze of lemon.
Storage: Store leftover bagels in a paper bag at room temperature for up to 2 days. Do not use plastic bags, as they will make the crust soft and soggy. For longer storage, slice the bagels in half and place them in a freezer-safe zip-top bag. They will keep in the freezer for up to 3 months.
Reheating: To reheat a frozen bagel, do not thaw it first. Pop the frozen half directly into the toaster or toaster oven. It will come out perfectly crispy on the outside and soft on the inside. I keep a stash in the freezer for busy mornings, and it is a game-changer.
Flavor Development: Interestingly, the flavor of these bagels actually improves after a day. The pumpkin seed flavor becomes more pronounced, and the everything seasoning melds together. Day-old bagels are perfect for making bagel chips or croutons if you have any left over.
Nutritional Information & Benefits
These bagels are a treat, but they also have some surprising nutritional benefits thanks to the pumpkin seeds. Here is a rough estimate per bagel (based on 8 servings):
- Calories: Approximately 320
- Protein: 11g
- Fat: 8g
- Carbohydrates: 52g
- Fiber: 3g
- Iron: 15% of the Daily Value
- Magnesium: 20% of the Daily Value
Pumpkin seeds are a great source of magnesium, which is important for muscle function and sleep quality. They also contain zinc, which supports the immune system. By adding them to the dough and the topping, you are getting a little extra nutrition in every bite. These bagels are not low-carb, but they are made with real, whole ingredients that provide sustained energy. I personally feel much better eating one of these for breakfast than a store-bought bagel that is full of preservatives.
Dietary Considerations: This recipe is vegetarian and nut-free (pumpkin seeds are seeds, not tree nuts). It is not gluten-free in its standard form, but the gluten-free variation works well. It contains wheat, sesame, and poppy seeds, so be mindful of allergies.
Conclusion
These homemade everything bagel pumpkin seed bagels are more than just a recipe. They are a weekend project that fills your kitchen with the best smell in the world and gives you something truly special to enjoy all week long. The combination of the classic everything seasoning with the nutty, earthy crunch of pumpkin seeds is not something you find in a bakery, and that is exactly what makes them so memorable.
I hope you give these a try, even if you have never made bagels before. The process is forgiving, and the result is so much better than anything you can buy. Feel free to play around with the toppings or the add-ins. Maybe throw in some dried rosemary or a handful of sunflower seeds. That is the beauty of homemade food, you can make it your own.
If you make these bagels, I would love to hear about it. Drop a comment below and let me know how they turned out, or share a photo on social media and tag me. Honestly, seeing your creations is the best part of this whole blogging thing. Happy baking, and do not forget to save one for your father-in-law.
Frequently Asked Questions
Can I use all-purpose flour instead of bread flour?
Yes, you can, but the bagels will be less chewy and more bread-like. Bread flour has a higher protein content, which creates that signature bagel texture. If you only have all-purpose flour, add an extra tablespoon of vital wheat gluten to boost the protein.
Why did my bagels turn out flat?
Flat bagels usually happen for one of two reasons: the dough was too wet, or the bagels were over-proofed. Make sure you are measuring your flour correctly (use a kitchen scale for best results). Also, do not let the shaped bagels rest for more than 30 minutes before boiling. If they puff up too much, they will collapse in the oven.
Can I make the dough the night before?
Absolutely. After the first rise, punch the dough down, cover it tightly, and place it in the refrigerator overnight. The next morning, let it sit at room temperature for 30 minutes before shaping and continuing with the recipe. The cold fermentation actually improves the flavor.
How do I store the everything topping mixture?
Store the leftover topping in an airtight jar at room temperature for up to 3 months. Keep it in a cool, dark place like your pantry. The garlic and onion can lose potency over time, so try to use it within a few weeks for the best flavor.
Can I freeze the unbaked shaped bagels?
Yes, you can. After shaping the bagels, place them on a baking sheet and freeze them until solid. Transfer them to a freezer bag. When you are ready to bake, let them thaw in the refrigerator overnight, then proceed with the boiling and baking steps. You can also boil them directly from frozen, just add an extra 30 seconds to the boiling time.
Pin This Recipe!
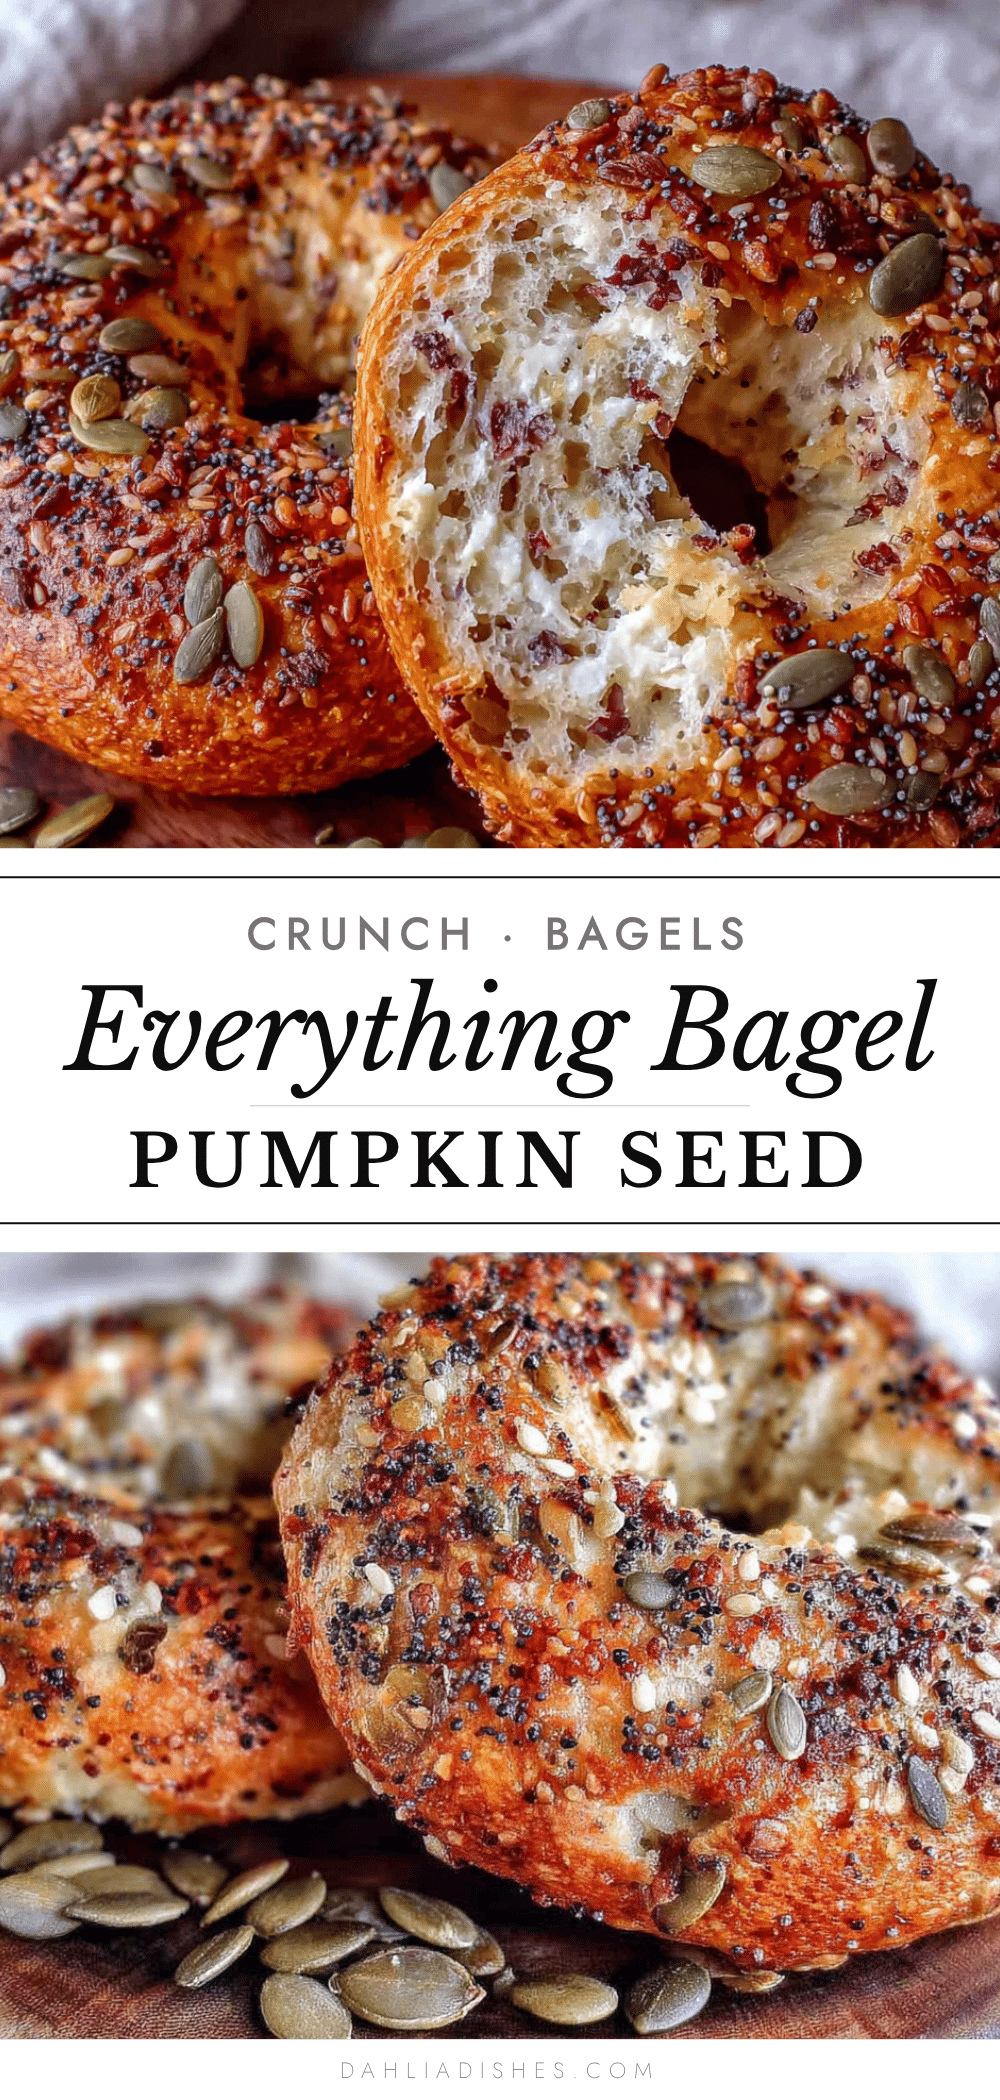
Homemade Everything Bagel Pumpkin Seed Bagels: Best Easy Recipe

These homemade everything bagel pumpkin seed bagels are a weekend project that fills your kitchen with the best smell in the world and gives you something truly special to enjoy all week long. The combination of the classic everything seasoning with the nutty, earthy crunch of pumpkin seeds is not something you find in a bakery, and that is exactly what makes them so memorable.
- Prep Time: 30 minutes
- Cook Time: 25 minutes
- Total Time: 1 hour 55 minutes
- Yield: 8 servings 1x
- Category: Bread
- Cuisine: American
Ingredients
- 4 cups (500g) bread flour
- 1 ½ cups (360ml) warm water (110°F/43°C)
- 2 ¼ teaspoons (7g) active dry yeast
- 1 tablespoon (15g) granulated sugar
- 1 ½ teaspoons (9g) fine sea salt
- ¼ cup (30g) pumpkin seed flour (blitz raw pumpkin seeds to a powder)
- 2 tablespoons (18g) white sesame seeds
- 2 tablespoons (18g) black sesame seeds
- 2 tablespoons (18g) dried minced garlic
- 2 tablespoons (18g) dried minced onion
- 2 tablespoons (18g) poppy seeds
- ¼ cup (30g) raw pumpkin seeds, coarsely chopped
- 1 teaspoon (5g) flaky sea salt (e.g., Maldon)
- 8 cups (1.9L) water
- 2 tablespoons (30g) baking soda
- 1 tablespoon (15g) honey or barley malt syrup
Instructions
- Activate the yeast: In the bowl of a stand mixer, combine warm water, sugar, and active dry yeast. Let sit for 5 minutes until frothy.
- Mix the dough: Add bread flour, salt, and pumpkin seed flour to the yeast mixture. Using the dough hook, mix on low until a shaggy dough forms, then knead on medium for 6-8 minutes until smooth and elastic.
- First rise: Shape dough into a ball, place in a lightly oiled bowl, cover, and let rise in a warm place for 1 hour until doubled.
- Shape the bagels: Punch down dough, divide into 8 equal pieces (110-120g each). Roll each into a ball, poke a hole through the center, and stretch to 1 ½ inches wide. Place on a parchment-lined baking sheet.
- Second rise: Cover shaped bagels loosely with plastic wrap and let rest at room temperature for 30 minutes.
- Prepare water bath: Bring 8 cups water to a boil in a large pot. Add baking soda and honey. Reduce heat to a gentle simmer.
- Boil the bagels: Carefully lower 2-3 bagels into simmering water. Boil for 30 seconds per side (up to 1 minute per side for chewier crust). Use a slotted spoon to flip.
- Add topping: Transfer boiled bagels back to the baking sheet. While still wet, generously sprinkle everything topping mixture over the top and sides, pressing gently to adhere.
- Bake: Preheat oven to 425°F (220°C). Bake for 20-25 minutes, rotating the sheet halfway through, until deep golden brown and bottoms sound hollow when tapped. Cool on a wire rack for at least 15 minutes before slicing.
Notes
Do not skip the pumpkin seed flour; it creates a tender crumb. Water temperature should be around 110°F (43°C). The boiling step is essential for chewy crust. Use raw, unsalted pumpkin seeds for the topping to avoid burning. Make the everything topping in advance and store in an airtight jar for up to 3 months. For best flavor, let bagels cool completely before slicing.
Nutrition
- Serving Size: 1 bagel
- Calories: 320
- Sugar: 4
- Sodium: 480
- Fat: 8
- Saturated Fat: 1
- Carbohydrates: 52
- Fiber: 3
- Protein: 11
Keywords: everything bagel, pumpkin seed bagel, homemade bagel, bagel recipe, everything seasoning, pumpkin seeds, breakfast, brunch


