Love this? Save it for later!
Share the inspiration with your friends
There used to be a tiny sandwich shop two blocks from my high school that made the best chicken wrap I have ever tasted. When they suddenly closed midway through my sophomore year, I genuinely went through a weird little mourning period. I mean, I actually stood outside the locked door one afternoon like a fool, peering through the window at the empty counter. After nine tries — and some truly sad, soggy experiments — I finally got it.
This Easy High School Protein Wrap is the direct result of that obsession. I wanted something that tasted like that beloved shop version but also kept me full through sixth-period chemistry and track practice afterward. The first successful batch I made, I literally texted my mom a photo with the caption “I did it.” She didn’t get it, but the neighbor’s kid who tried one absolutely did.
Honestly, this wrap became my lunchtime savior. It packs easily, stays fresh for hours, and has that perfect balance of creamy, crunchy, and savory that makes you actually look forward to lunch. Maybe you have been there — that desperate search for a lunch that doesn’t get sad and limp by 11 AM. This is the one. I keep making it because it solves that problem every single time, and it reminds me of those afternoons standing outside that little shop, determined to figure it out myself.
Why You’ll Love This Recipe
Let me tell you why this wrap has earned a permanent spot in my weekly rotation. I have tested this thing more times than I care to admit, and it delivers every single time.
- Quick & Easy: Comes together in under 15 minutes. Perfect for busy school mornings or last-minute lunch packing when you hit snooze one too many times.
- Simple Ingredients: No fancy grocery trips needed. You likely already have everything in your kitchen right now.
- Perfect for Busy Schedules: Great for high school lunches, college cram sessions, work desk lunches, or even post-practice refueling.
- Crowd-Pleaser: Always gets rave reviews from teens and adults alike. My friend’s picky eater actually asked for seconds.
- Unbelievably Delicious: The texture and flavor combo is next-level comfort food. Creamy filling meets crunchy veggies in a soft wrap that just works.
What makes this different from every other wrap recipe out there is the technique. I blend part of the cottage cheese for an ultra-smooth, creamy base that holds everything together without making the wrap soggy. It is not just another version — it is my best version after all those failed attempts.
This recipe isnt just good — it is the kind that makes you close your eyes after the first bite because it actually tastes like something you would pay for. It is comfort food reimagined — faster, simpler, but with the same soul-soothing satisfaction. Perfect for impressing your lunch table without stress, or turning a simple meal into something memorable.
What Ingredients You Will Need
This recipe uses simple, wholesome ingredients to deliver bold flavor and satisfying texture without the fuss. Most of these are pantry staples or easy to find at any grocery store.
For the Wrap Filling
- 1 can (12.5 oz) chunk chicken breast, drained (I recommend Kirkland or Bumble Bee for best texture — they flake nicely without being mushy)
- 1/2 cup cottage cheese, divided (use small-curd for best texture; you will blend half of this)
- 1/4 cup plain Greek yogurt (adds creaminess and extra protein)
- 1/4 cup shredded cheddar cheese (adds richness and binds the filling)
- 1/4 cup finely diced celery (adds that essential crunch)
- 2 tablespoons finely diced red onion (for a mild bite — soak in cold water for 5 minutes if you want it milder)
- 1 tablespoon fresh chopped parsley (or 1 teaspoon dried parsley)
- 1/2 teaspoon garlic powder
- 1/4 teaspoon black pepper
- Salt to taste (go easy — the chicken and cheese already have salt)
For Assembly
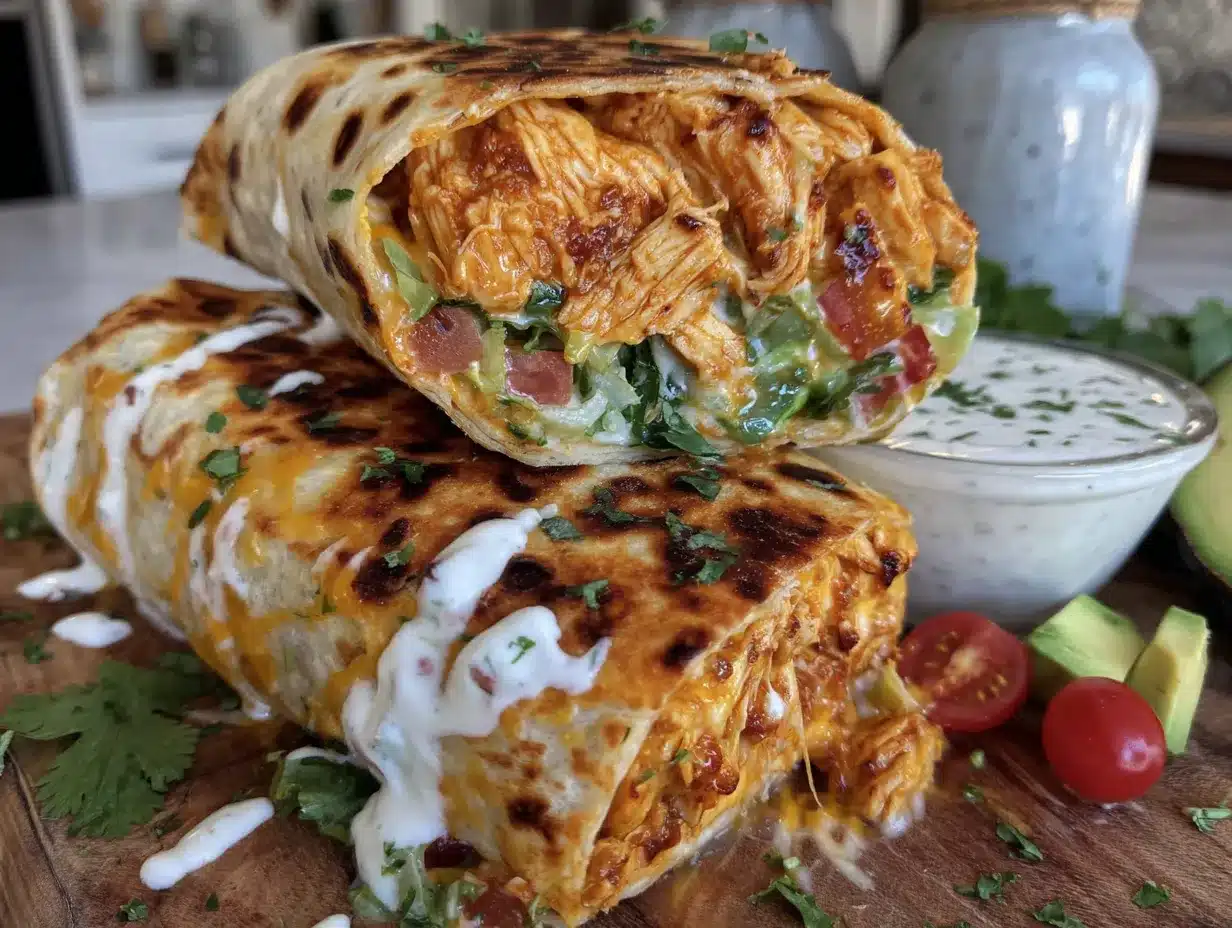
- 2 large flour tortillas (burrito-sized, about 10 inches — I use Mission brand for flexibility)
- 1 cup fresh spinach leaves (adds color and nutrients without overpowering flavor)
- 1/2 cup shredded carrots (for extra crunch and sweetness)
- Optional: 1/4 cup diced cucumber (adds freshness if you have it on hand)
Substitution Guidance: Use almond flour tortillas for a gluten-free option. Swap Greek yogurt with dairy-free coconut yogurt if needed. For a vegetarian version, substitute the chicken with mashed chickpeas or crumbled firm tofu. Look for firm, small-curd cottage cheese for best texture — the large-curd versions can be too watery. In summer, I sometimes swap in fresh diced bell peppers instead of celery for a different crunch profile.
Equipment Needed
You do not need a fancy kitchen for this one. Here is what you will need:
- Mixing bowl (medium-sized, any material works)
- Fork or potato masher (for flaking the chicken)
- Small blender or food processor (for blending half the cottage cheese — I use a NutriBullet and it works perfectly)
- Cutting board and sharp knife (for dicing veggies)
- Measuring cups and spoons
- Spatula or spoon (for mixing)
- Plastic wrap or parchment paper (for wrapping the finished wraps)
If you do not have a blender, no worries. You can mash the cottage cheese with a fork until it is mostly smooth, though it will not be quite as creamy. I actually did that for my first few attempts and it still worked great. Just takes a little more elbow grease.
Preparation Method
Follow these steps carefully, and you will have perfect lunch wraps ready to go. I have included all the little details I wish someone had told me.
- Prep the cottage cheese (2 minutes): Scoop out 1/4 cup of the cottage cheese and place it in a small blender or food processor. Blend until completely smooth — about 20 seconds. Set aside. This is the secret to a creamy filling that does not get watery.
- Flake the chicken (2 minutes): Open the can of chunk chicken breast and drain it well. I mean really drain it — press it with the back of a spoon to get excess liquid out. Place it in a medium mixing bowl and use a fork to break it into small, even pieces. You want it flaky, not pasty.
- Mix the filling (3 minutes): To the bowl with the chicken, add the blended cottage cheese, the remaining 1/4 cup unblended cottage cheese, Greek yogurt, shredded cheddar, diced celery, red onion, parsley, garlic powder, and black pepper. Stir everything together until well combined. Taste it and add salt if needed — I usually add about 1/8 teaspoon. The filling should look creamy but not wet.
- Chill the filling (10 minutes minimum): This step is non-negotiable. Cover the bowl and pop it in the fridge for at least 10 minutes. This lets the flavors meld and firms up the filling so it does not make your wrap soggy. I have skipped this before and regretted it — trust me.
- Warm the tortillas (30 seconds): About 2 minutes before you are ready to assemble, warm the tortillas one at a time in a dry skillet over medium heat for about 15 seconds per side, or microwave them between damp paper towels for 20 seconds. Warm tortillas are much more flexible and less likely to tear.
- Layer the ingredients (2 minutes per wrap): Lay a warm tortilla flat on your cutting board. Spread half the spinach leaves in a line down the center of the tortilla, leaving about 2 inches of space at the top and bottom. Spoon half the chicken filling on top of the spinach and spread it into an even layer. Top with half the shredded carrots and cucumber if using.
- Fold the wrap (1 minute per wrap): Fold the bottom edge of the tortilla up over the filling. Fold the sides in toward the center. Then tightly roll the wrap away from you, keeping the sides tucked in. The filling should be snug but not bulging out. Place seam-side down on a plate.
- Wrap and chill (optional but recommended): Wrap each finished wrap tightly in plastic wrap or parchment paper. Refrigerate for at least 30 minutes if you have time — this helps the wrap hold its shape and makes it easier to slice in half later. I often make these the night before.
Pro tip on timing: The filling takes about 7 minutes to make, then 10 minutes to chill. Assembly takes another 5 minutes. Total active time is about 12 minutes, plus the chilling. Make the filling while you pack your backpack in the morning, then assemble right before you head out.
Cooking Tips & Techniques
I have made this wrap probably fifty times by now, and I have learned some things the hard way. Here is what I wish I had known from the start:
Don’t overfill the wrap. I know it is tempting to pile on the filling, but less is genuinely more here. Overstuffed wraps are impossible to roll tightly and fall apart in your lunch bag. Stick to the amounts listed — they look small in the bowl but spread out perfectly inside the tortilla.
Drain everything well. Wet ingredients are the enemy of a good wrap. Drain your chicken thoroughly, and if your cottage cheese seems watery, give it a gentle press through a fine-mesh strainer before blending. I learned this lesson after my third attempt ended up with a soggy mess at the bottom of my lunch bag.
Warm tortillas are non-negotiable. Cold tortillas crack and tear when you try to roll them. Thirty seconds in the microwave or a quick warm-up in a dry pan makes them pliable and easy to work with. I forgot to do this once and ended up with a wrap that looked like a failed art project.
Use the right size tortilla. Burrito-sized (10-inch) tortillas are perfect for this. Taco-sized ones are too small and will not hold all the filling. I learned this when I grabbed the wrong package at the store and ended up with tiny, sad little wraps.
Let the flavors rest. The filling tastes better after it has sat in the fridge for a while. The flavors meld and mellow out. I actually prefer the wraps on day two — the filling gets even creamier and more cohesive.
Variations & Adaptations
One of the best things about this recipe is how flexible it is. Here are some variations I have tried and loved:
Mediterranean Version: Swap the cheddar for crumbled feta cheese, add 2 tablespoons of chopped sun-dried tomatoes, and replace the celery with diced cucumber. Use a spinach or herb tortilla for extra flavor. This version is amazing in summer.
Spicy Southwest Wrap: Add 1 tablespoon of diced pickled jalapeños, swap the cheddar for pepper jack cheese, and add a squeeze of lime juice to the filling. Throw in some black beans if you want extra fiber. My teenager absolutely loves this version.
Vegetarian Chickpea Version: Replace the chicken with one can of drained and mashed chickpeas. Add 1/4 cup of finely chopped walnuts for crunch and extra healthy fats. This version holds up really well and tastes completely different but equally delicious.
Low-Carb Option: Use large lettuce leaves or low-carb tortillas instead of flour tortillas. The filling itself is already relatively low in carbs, so this works perfectly for anyone watching their carb intake.
Dairy-Free Adaptation: Use dairy-free yogurt and vegan cheddar shreds. Replace the cottage cheese with mashed avocado for creaminess. The flavor profile changes a bit, but it is still delicious and satisfying.
Serving & Storage Suggestions
These wraps are designed to be grab-and-go, so serving and storage are pretty straightforward. Here is what works best:
Serve cold or at room temperature. These wraps taste best when they are chilled or at room temperature. I do not recommend microwaving them — the tortilla gets chewy and the filling can get weirdly warm. Pull them out of the fridge about 10 minutes before eating if you prefer room temperature.
Slice in half for easier eating. If you are packing for lunch, slice the wrap diagonally in half right before serving. It makes it much easier to eat and looks prettier too. Wrap each half separately if you are meal-prepping for the week.
Storage instructions: Wrapped tightly in plastic wrap or parchment paper, these will keep in the refrigerator for up to 4 days. I do not recommend freezing them — the texture of the dairy and veggies gets weird after thawing. Make a batch on Sunday and you are set for Monday through Thursday lunches.
How flavors develop over time: Honestly, the wraps taste even better on day two or three. The flavors meld together, the filling firms up nicely, and everything just comes together. Day one is good. Day two is great.
Packing tip for school: If you are packing these for a school lunch, wrap them in parchment paper and secure with a rubber band or piece of tape. They stay fresh and do not get crushed in a backpack. Toss in a small ice pack if your kid has a late lunch period.
Nutritional Information & Benefits
Here is the approximate nutritional breakdown for one wrap (using the standard recipe):
| Nutrient | Amount per Wrap |
|---|---|
| Calories | 385 |
| Protein | 32g |
| Carbohydrates | 28g |
| Fat | 14g |
| Fiber | 4g |
| Sodium | 680mg |
Health highlights: This wrap packs a serious protein punch — 32 grams per serving, which is excellent for keeping high schoolers full through afternoon classes and after-school activities. The cottage cheese and Greek yogurt provide calcium and probiotics for gut health. The spinach and carrots add vitamins A and C, plus fiber for steady energy. The celery provides hydration and crunch without extra calories.
Dietary considerations: This recipe is naturally low in added sugars and can be made gluten-free with appropriate tortillas. It contains dairy and gluten in the standard version. The sodium content is moderate — you can reduce it by using low-sodium chicken and unsalted cheese.
I love that this wrap gives my kid a balanced lunch without me having to think too hard about it. Protein, veggies, healthy fats — it is all there in one portable package. As a parent, that peace of mind is worth everything.
Conclusion
This Easy High School Protein Wrap is the lunch solution I spent way too long searching for. It is quick, satisfying, and actually tastes like something you would look forward to eating. After all those failed attempts with soggy tortillas and bland fillings, this version finally nails it.
I genuinely love how customizable this recipe is. You can tweak it based on what is in your fridge, what your family likes, or what is on sale at the store. It is forgiving and flexible — my favorite kind of recipe. Whether you are packing lunches for a picky teenager, meal-prepping for your own work week, or just looking for a better lunch option, this wrap delivers.
I would love to hear how yours turn out! Drop a comment below and let me know what variations you tried. Did you go spicy? Mediterranean? Did your kid actually eat it without complaining? Share your wins and your questions — I read every single comment and answer as many as I can. Happy wrapping, friends!
Frequently Asked Questions
Can I make these wraps the night before?
Absolutely! In fact, I recommend it. Making them the night before gives the flavors time to meld and the filling time to firm up. Just wrap them tightly in plastic wrap and store in the refrigerator. They will be perfect by lunchtime the next day.
How long do these wraps stay fresh in the fridge?
These wraps will stay fresh for up to 4 days when stored properly in the refrigerator. Wrap them tightly in plastic wrap or parchment paper to prevent them from drying out. I would not recommend going beyond day 4 — the texture of the veggies starts to decline.
Can I use rotisserie chicken instead of canned chicken?
Yes, absolutely! Use about 1.5 cups of chopped rotisserie chicken breast. Just make sure to remove the skin and chop it into small, even pieces. Rotisserie chicken actually adds a nice depth of flavor from the seasoning on the skin. It is a great way to use up leftover chicken.
What if I do not have a blender for the cottage cheese?
No problem at all. You can mash the cottage cheese with a fork until it is mostly smooth. It will not be quite as creamy as blended cottage cheese, but it will still work perfectly. Alternatively, you can skip the blending step entirely and just use all unblended cottage cheese — the texture will be a little more chunky but still delicious.
Can I freeze these wraps for later?
I do not recommend freezing these wraps. The dairy-based filling can get watery and grainy after thawing, and the vegetables lose their crunch. These are best made fresh and stored in the refrigerator for up to 4 days. If you need longer storage, I recommend freezing just the filling (without the tortilla and veggies) for up to 1 month, then assembling fresh when you are ready.
Pin This Recipe!
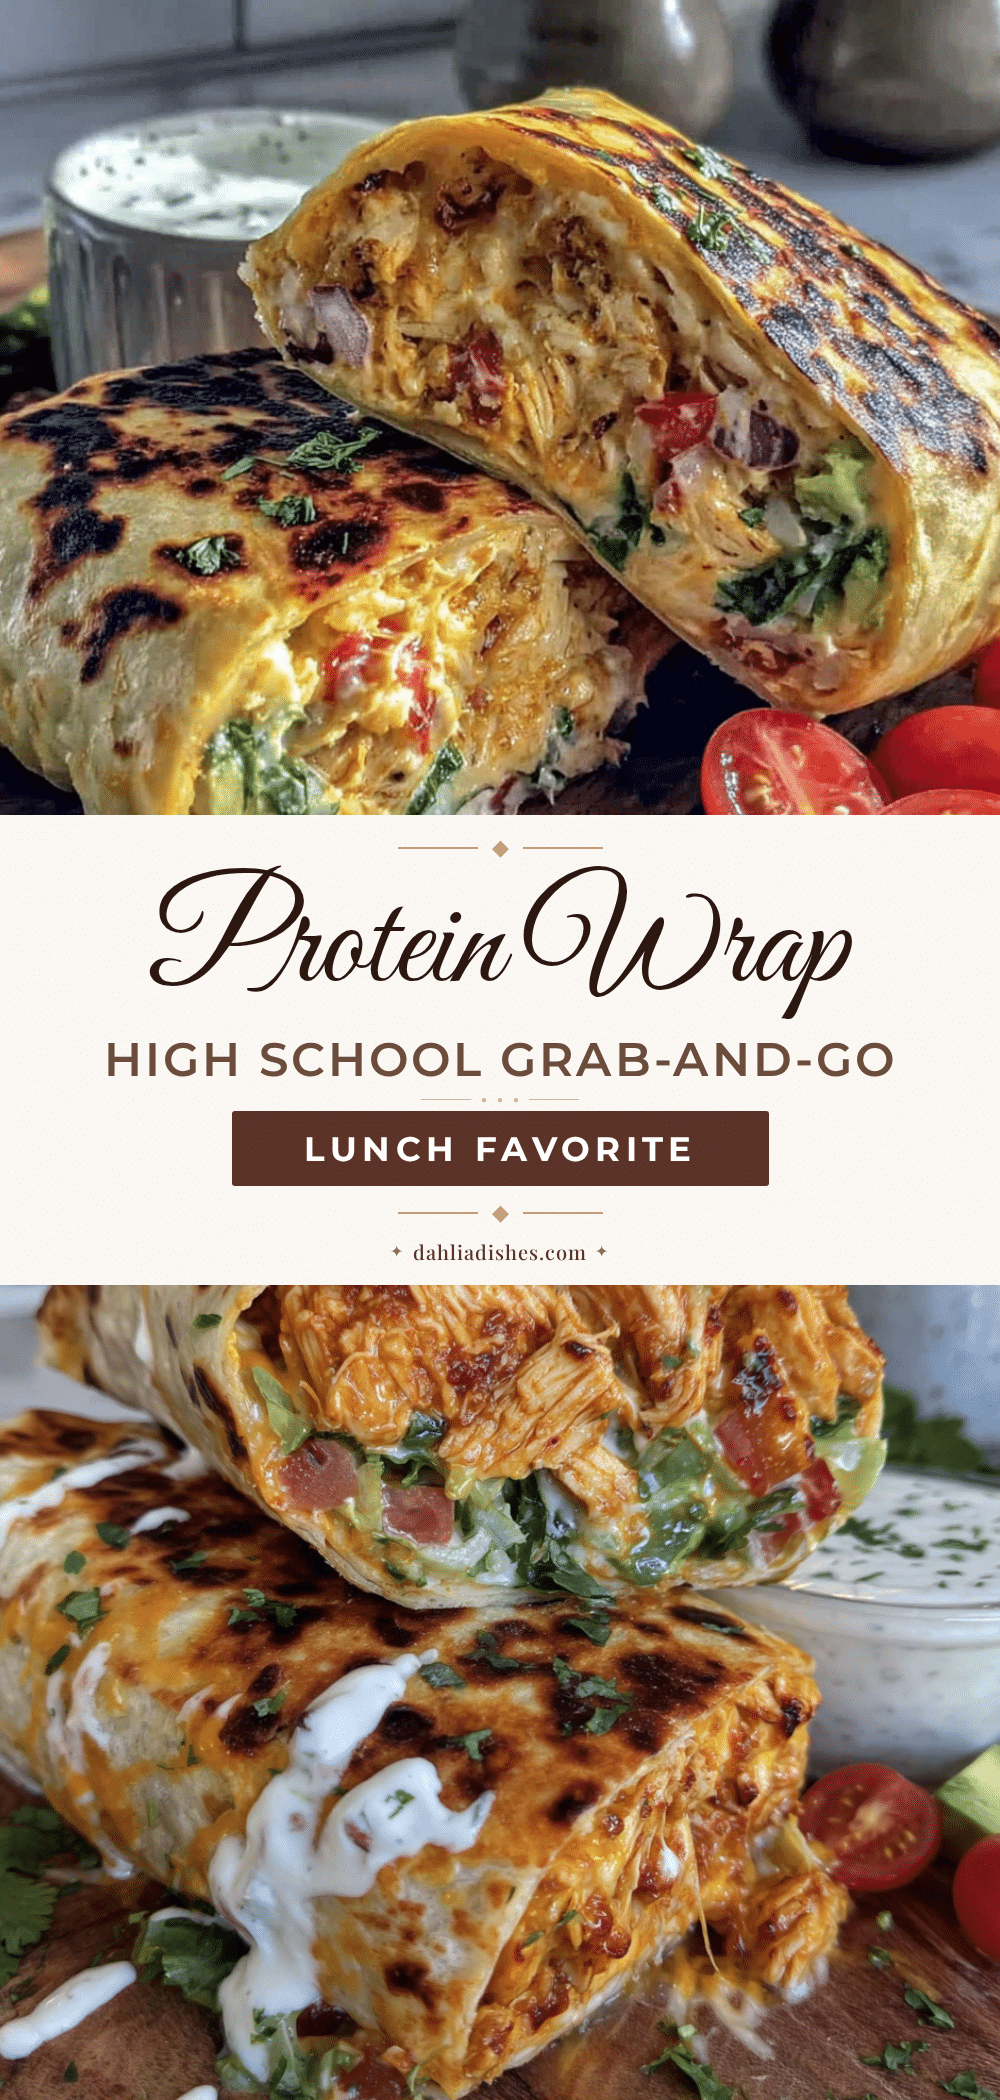
Easy High School Protein Wrap – Best Grab-and-Go Lunch

This Easy High School Protein Wrap is the ultimate grab-and-go lunch solution. It packs easily, stays fresh for hours, and has that perfect balance of creamy, crunchy, and savory that makes you actually look forward to lunch.
- Prep Time: 15 minutes
- Cook Time: 0 minutes
- Total Time: 15 minutes (plus chilling time)
- Yield: 2 servings 1x
- Category: Main Course
- Cuisine: American
Ingredients
- 1 can (12.5 oz) chunk chicken breast, drained
- 1/2 cup cottage cheese, divided
- 1/4 cup plain Greek yogurt
- 1/4 cup shredded cheddar cheese
- 1/4 cup finely diced celery
- 2 tablespoons finely diced red onion
- 1 tablespoon fresh chopped parsley (or 1 teaspoon dried parsley)
- 1/2 teaspoon garlic powder
- 1/4 teaspoon black pepper
- Salt to taste
- 2 large flour tortillas (burrito-sized, about 10 inches)
- 1 cup fresh spinach leaves
- 1/2 cup shredded carrots
- Optional: 1/4 cup diced cucumber
Instructions
- Prep the cottage cheese: Scoop out 1/4 cup of the cottage cheese and place it in a small blender or food processor. Blend until completely smooth — about 20 seconds. Set aside.
- Flake the chicken: Open the can of chunk chicken breast and drain it well. Press it with the back of a spoon to get excess liquid out. Place it in a medium mixing bowl and use a fork to break it into small, even pieces.
- Mix the filling: To the bowl with the chicken, add the blended cottage cheese, the remaining 1/4 cup unblended cottage cheese, Greek yogurt, shredded cheddar, diced celery, red onion, parsley, garlic powder, and black pepper. Stir everything together until well combined. Taste and add salt if needed.
- Chill the filling: Cover the bowl and refrigerate for at least 10 minutes to let the flavors meld and firm up the filling.
- Warm the tortillas: About 2 minutes before assembling, warm the tortillas one at a time in a dry skillet over medium heat for about 15 seconds per side, or microwave them between damp paper towels for 20 seconds.
- Layer the ingredients: Lay a warm tortilla flat on your cutting board. Spread half the spinach leaves in a line down the center, leaving about 2 inches of space at the top and bottom. Spoon half the chicken filling on top and spread evenly. Top with half the shredded carrots and cucumber if using.
- Fold the wrap: Fold the bottom edge of the tortilla up over the filling. Fold the sides in toward the center. Then tightly roll the wrap away from you, keeping the sides tucked in. Place seam-side down on a plate.
- Wrap and chill (optional but recommended): Wrap each finished wrap tightly in plastic wrap or parchment paper. Refrigerate for at least 30 minutes if time allows to help the wrap hold its shape.
Notes
Don’t overfill the wrap. Drain all wet ingredients well to prevent sogginess. Warm tortillas are essential to prevent cracking. The filling tastes even better on day two or three. For best results, make the night before.
Nutrition
- Serving Size: 1 wrap
- Calories: 385
- Sodium: 680
- Fat: 14
- Carbohydrates: 28
- Fiber: 4
- Protein: 32
Keywords: high school lunch, protein wrap, grab-and-go lunch, easy lunch recipe, chicken wrap, meal prep, healthy lunch


