Love this? Save it for later!
Share the inspiration with your friends
I was folding laundry last Tuesday—just a normal, boring Tuesday—when the smell hit me. It wasn’t even a real smell, not really. It was more like a memory of a smell, the ghost of toasted sesame oil and scorched pork fat, hanging in the air of my own living room. And suddenly I was seven years old, standing on a rickety wooden stool in my neighbor Mrs. Chen’s kitchen, watching her crimp dumplings with a speed that seemed like magic. Her fingers were a blur of flour and dough, and the whole room smelled like that—like the promise of something crispy and wonderful.
Mrs. Chen moved away when I was twelve, and I never got her recipe. I mean, I don’t think she had one written down. It was all in her hands, in the way she’d slap a wrapper against her palm and fill it without measuring. For years, I tried to chase that feeling. I bought frozen bags from the Asian market, and they were fine—good, even—but they never made the kitchen smell like *that*. They never made me feel like I was seven again, waiting for the first batch to come out of the pan.
So I started making my own. And honestly, the first few batches were a disaster. The filling was dry, the wrappers tore, and I once set off the smoke detector so badly my neighbor knocked on the door to check if I was okay. But I kept at it, because maybe you’ve been there—chasing a flavor you can almost, but not quite, hold onto. This recipe is the closest I’ve ever gotten to that memory. It’s the one I make now when I want to impress people, when I want the kitchen to smell like a party, when I want to feel like Mrs. Chen is in the room with me, just for a second.
Why You’ll Love This Recipe
Let me tell you why these dumplings are going to become your new go-to for hosting. I’ve tested this recipe more times than I care to admit, tweaking the filling ratio, the cooking time, the water-to-flour mix for the pan. This version is the winner—the one that gets devoured before I can even get the dipping sauce on the table.
- Quick & Easy: From start to table, these come together in about 45 minutes. That’s fast for homemade dumplings, and most of that time is just letting them get perfectly crispy.
- Simple Ingredients: You probably have most of this stuff in your fridge and pantry right now. Ground pork, cabbage, garlic, ginger, soy sauce—nothing fancy, I promise.
- Perfect for Guests: These are the ultimate party appetizer. They look impressive, they’re easy to eat standing up, and people go absolutely nuts for them. I’ve never made a batch that didn’t disappear.
- Crowd-Pleaser: Kids love them. Adults love them. Your picky-eating cousin who “doesn’t like dumplings” will eat six of them.
- Unbelievably Delicious: The contrast between the crispy, golden-brown bottom and the juicy, savory filling is just… chef’s kiss. It’s the texture combo that keeps people coming back.
What makes these different from every other dumpling recipe out there? It’s the technique. I learned the hard way that you can’t just dump water in the pan and hope for the best. The ratio has to be just right to create that lacy, crackly crust without making the wrapper soggy. I’ve perfected that balance, and I’m sharing every detail so you can nail it on your first try.
This isn’t just another dumpling recipe. It’s the one that makes you close your eyes after the first bite. It’s comfort food that feels special enough for a celebration, but easy enough for a random Tuesday. And honestly, isn’t that the best kind of recipe to have in your back pocket?
What Ingredients You Will Need
This recipe uses simple, mostly pantry-staple ingredients to create something that tastes way more complex than it is. The magic is in the balance—salty soy sauce, aromatic ginger, rich pork, and the slight crunch of fresh cabbage.
For the Filling
- 1 pound (450g) ground pork – I prefer 80/20 for the juiciest filling. Too lean and the dumplings can get dry.
- 2 cups (about 150g) finely chopped napa cabbage – You’ll want to salt this and squeeze out the excess water first. Trust me on this one.
- 3 green onions, finely chopped – Both white and green parts.
- 3 cloves garlic, minced – Fresh is non-negotiable here. The jarred stuff just doesn’t hit the same.
- 1 tablespoon (15g) fresh ginger, grated – I use a microplane for this. It makes a difference in texture.
- 2 tablespoons (30ml) soy sauce – I like Kikkoman for its consistent flavor.
- 1 tablespoon (15ml) toasted sesame oil – This is the smell that started it all. Get the good stuff.
- 1 tablespoon (15ml) Shaoxing wine or dry sherry – Adds depth. If you don’t have it, you can skip it.
- 1 teaspoon (5g) sugar – Just a pinch to balance the savory flavors.
- ½ teaspoon (2g) white pepper – Black pepper works in a pinch, but white pepper has a more floral, less sharp heat.
For the Dumplings
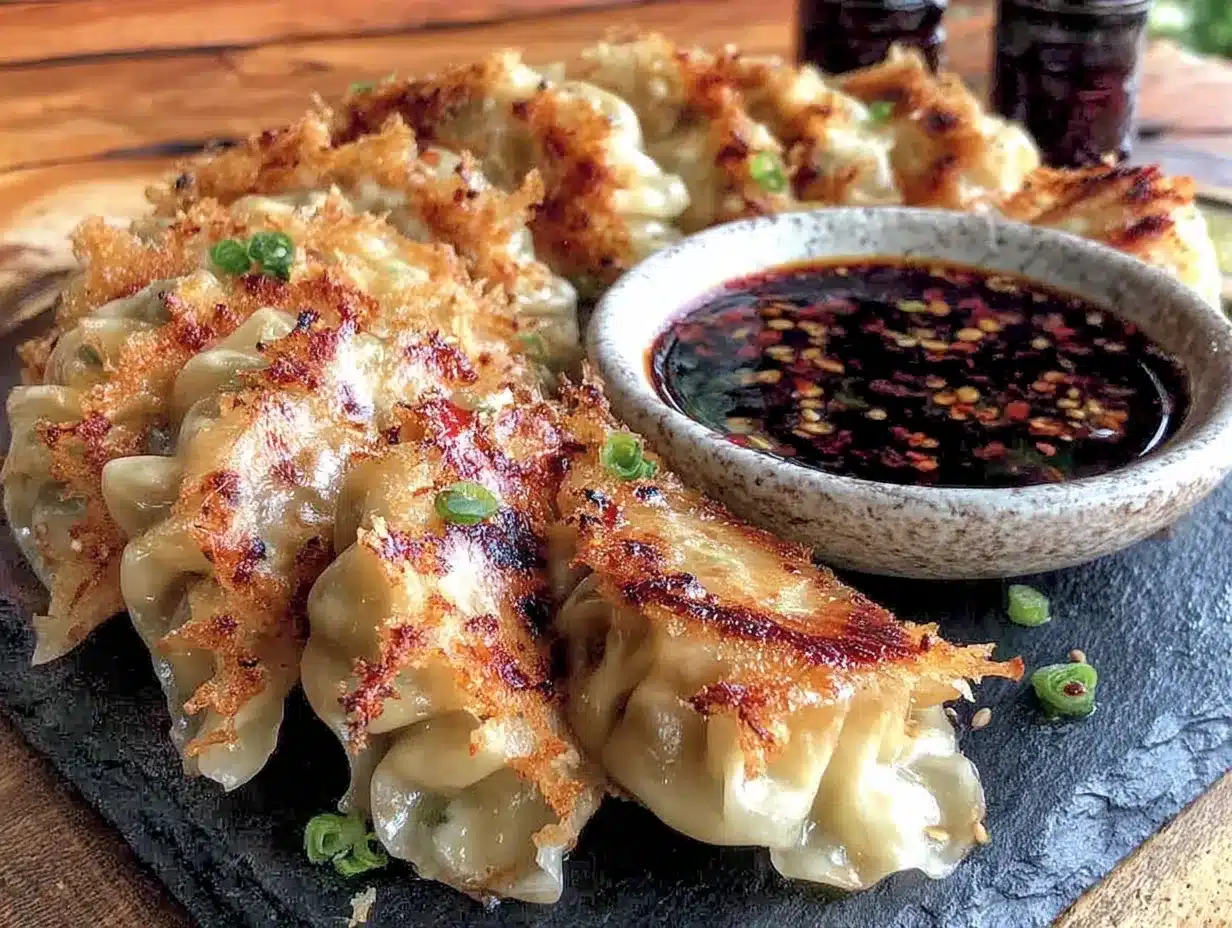
- 1 package (about 50-60) round dumpling wrappers – Look for the ones in the refrigerated section of the grocery store. I prefer Twin Marquis brand for their thickness.
- 2 tablespoons (30ml) vegetable oil – For frying. Use something with a high smoke point, like canola or avocado oil.
- ⅓ cup (80ml) water – For steaming. This is the key to the crispy bottom.
For the Dipping Sauce
- 3 tablespoons (45ml) soy sauce
- 2 tablespoons (30ml) rice vinegar
- 1 teaspoon (5ml) chili oil or sriracha – Adjust to your spice tolerance.
- 1 teaspoon (5g) sesame seeds, toasted
- 1 teaspoon (5g) sugar
Substitution Guidance: For a gluten-free option, use tamari instead of soy sauce and look for gluten-free dumpling wrappers (they exist, I’ve used them). You can swap the pork for ground chicken or turkey, but add a tablespoon of oil to the filling to keep it moist. If you don’t eat meat, finely chopped mushrooms and extra cabbage make a surprisingly good vegetarian filling.
Equipment Needed
You don’t need a lot of fancy gear for these dumplings, which is part of their charm. Here’s what you’ll need:
- Large mixing bowl – For the filling.
- Cutting board and sharp knife – For chopping the cabbage and aromatics.
- Microplane or fine grater – For the ginger. A regular grater works, but the microplane gives you a paste that blends into the filling better.
- Large non-stick skillet with a lid – This is important. Non-stick makes the crispy bottom release easily, and the lid traps steam for cooking the tops. I use a 12-inch skillet.
- Spatula – A thin, flexible one works best for getting under those crispy dumplings without breaking them.
- Small bowl – For the dipping sauce.
- Baking sheet lined with parchment paper – For holding the assembled dumplings before cooking. This saves your counter from getting floury.
Budget-Friendly Tip: If you don’t have a non-stick skillet, a well-seasoned cast iron pan works too. Just be extra careful when releasing the dumplings, and add a little more oil to prevent sticking. I learned this the hard way after losing a whole batch to a stainless steel pan.
Preparation Method
Alright, let’s get to the good part. Here’s how to make these dumplings step by step. I’ve included all the little details I wish someone had told me the first time.
Step 1: Prepare the Cabbage
Finely chop your napa cabbage and place it in a bowl. Sprinkle with about ½ teaspoon of salt and let it sit for 10 minutes. This draws out the excess water. After 10 minutes, grab handfuls of the cabbage and squeeze firmly over the sink to remove as much liquid as possible. You’ll be shocked at how much comes out. This step is crucial—wet cabbage makes sad, soggy dumplings.
Step 2: Make the Filling
In your large mixing bowl, combine the ground pork, squeezed cabbage, green onions, garlic, ginger, soy sauce, sesame oil, Shaoxing wine, sugar, and white pepper. Mix everything together with your hands (yes, your hands—it’s the best way to incorporate everything evenly) until the mixture is well combined and slightly sticky. Don’t overmix, or the filling can get tough. About 2 minutes of gentle but thorough mixing is perfect.
Step 3: Assemble the Dumplings
Set up your assembly station: a bowl of water, your dumpling wrappers (keep them covered with a damp paper towel so they don’t dry out), and your baking sheet lined with parchment paper. Take one wrapper and place about 1 tablespoon of filling in the center. Dip your finger in the water and moisten the edges of the wrapper. Fold it in half to create a half-moon shape, pressing out any air pockets as you seal. Crimp the edges with your fingers—I do a simple pleated fold, but even a straight pinch works. Place the finished dumpling on the baking sheet and repeat. This makes about 45-50 dumplings, depending on how generous you are with the filling.
Pro tip: Don’t overfill the wrappers. I know it’s tempting, but too much filling makes them impossible to seal properly, and they’ll burst open in the pan. A heaping tablespoon is the sweet spot.
Step 4: Pan-Fry the Dumplings
Heat your non-stick skillet over medium-high heat and add 2 tablespoons of vegetable oil. Once the oil is shimmering (but not smoking), arrange the dumplings in the pan, flat side down, in a single layer. Don’t crowd them—leave about ½ inch between each one. Cook for 2-3 minutes, until the bottoms are golden brown. You should hear a nice sizzle.
Step 5: Steam the Dumplings
Carefully pour ⅓ cup of water into the pan. It will splatter and steam dramatically—that’s normal. Immediately cover the pan with the lid and reduce the heat to medium. Let the dumplings steam for 6-7 minutes. The water will evaporate and cook the tops of the dumplings through the steam.
Step 6: Crisp the Bottoms
After 6-7 minutes, remove the lid. The water should be mostly gone. Increase the heat back to medium-high and let the dumplings cook for another 1-2 minutes, uncovered, until the bottoms are extra crispy and the remaining oil has re-crisped them. Use your spatula to gently lift one and check—it should be deeply golden and crackly.
Step 7: Serve Immediately
Slide the dumplings onto a serving plate, crispy side up. They’re best eaten fresh out of the pan, while the bottoms are still shatteringly crisp. Serve with the dipping sauce on the side.
Cooking Tips & Techniques
I’ve made a lot of mistakes with dumplings, and I’m sharing them so you don’t have to. Here’s what I’ve learned:
The water-to-oil ratio matters. Too much water and the dumplings get soggy. Too little and they don’t cook through. The ⅓ cup measurement is perfect for a 12-inch skillet. If you’re using a smaller pan, reduce the water slightly.
Don’t peek too early. When you’re steaming the dumplings, resist the urge to lift the lid and check on them. The steam is what cooks the tops, and letting it escape means unevenly cooked dumplings. Set a timer and trust the process.
Keep the wrappers covered. Dumpling wrappers dry out fast, especially if your kitchen is air-conditioned or dry. Keep the stack under a damp paper towel while you’re assembling, and only take out a few at a time.
Make extra and freeze them. These freeze beautifully. Place the assembled dumplings on the baking sheet and freeze until solid, then transfer to a freezer bag. To cook from frozen, just add an extra 2 minutes to the steaming time. This is a game-changer for hosting—you can make them weeks ahead.
My biggest failure: I once tried to cook frozen dumplings without thawing them first, and the bottoms burned before the insides were done. Don’t do that. Either thaw them in the fridge overnight or cook them straight from frozen with the adjusted timing.
Variations & Adaptations
One of the best things about this recipe is how adaptable it is. Here are some of my favorite variations:
Spicy Pork Dumplings: Add 1-2 tablespoons of gochujang (Korean chili paste) to the filling for a spicy, slightly sweet kick. I tried this on a whim one night and now it’s my husband’s favorite version.
Vegetarian Dumplings: Replace the pork with an extra 2 cups of finely chopped mushrooms (shiitake or cremini work great) and add a block of firm tofu, crumbled. The mushrooms add that umami depth you’d miss from the meat.
Shrimp and Pork Dumplings: Replace half the pork with finely chopped raw shrimp. The texture becomes lighter and more delicate, and it feels extra fancy for a dinner party.
Baked Version: If you want to avoid pan-frying entirely, you can bake the dumplings at 400°F (200°C) for 12-15 minutes, flipping halfway through. They won’t have that signature crispy bottom, but they’re still delicious and much lower in oil.
Different Dipping Sauces: Beyond the classic soy-vinegar combo, try a peanut dipping sauce (peanut butter, soy sauce, rice vinegar, and a little honey) or a simple chili-garlic oil for heat.
Serving & Storage Suggestions
These dumplings are at their absolute best fresh out of the pan, when the bottoms are still crackly and the filling is piping hot. Serve them on a large platter, crispy side up, with the dipping sauce in a small bowl in the center. For a dinner party, I like to serve them as a first course or appetizer alongside a simple cucumber salad or some edamame.
What to serve with them: A bowl of miso soup, a simple green salad with ginger dressing, or some steamed rice with a drizzle of soy sauce. For drinks, a cold beer or a crisp white wine like Sauvignon Blanc pairs beautifully.
Storage: Leftover dumplings (if you have any) can be stored in an airtight container in the fridge for up to 3 days. They will lose their crispiness, unfortunately. To reheat, the best method is to pan-fry them again with a little oil until the bottoms crisp up. Microwaving makes them sad and rubbery—don’t do it.
Freezing: As I mentioned, these freeze beautifully. Assemble the dumplings, freeze them on a baking sheet, then transfer to a freezer bag. They’ll keep for up to 3 months. Cook from frozen, adding 2 minutes to the steaming time.
Flavor development: The filling actually tastes even better the next day, once the flavors have had time to meld. If you’re making these for a party, you can prepare the filling a day ahead and assemble the dumplings the morning of. This makes hosting so much less stressful.
Nutritional Information & Benefits
Here’s the approximate nutritional breakdown for a serving of 6 dumplings (without dipping sauce):
| Nutrient | Amount |
|---|---|
| Calories | 380 |
| Protein | 22g |
| Fat | 18g |
| Carbohydrates | 32g |
| Fiber | 2g |
| Sugar | 2g |
| Sodium | 680mg |
Health Benefits: Pork is a good source of B vitamins, particularly thiamine and B12, which support energy metabolism. Cabbage is packed with vitamin C and fiber, and ginger has anti-inflammatory properties. While these aren’t exactly health food, they’re a more balanced option than many fried appetizers.
Dietary Considerations: This recipe contains gluten (from the wrappers and soy sauce) and is not suitable for vegans or vegetarians in its original form. For gluten-free, use tamari and gluten-free wrappers. For dairy-free, you’re already good—there’s no dairy in this recipe.
Potential Allergens: Soy, wheat/gluten, sesame. If you’re serving guests with allergies, make sure to label the dipping sauce clearly.
Conclusion
These crispy pan-fried pork and chive dumplings are more than just a recipe to me. They’re a connection to a memory, a way of bringing people together around a table, and honestly, the best party trick I have in my kitchen. They look impressive, they taste incredible, and they’re way easier to make than people think.
I hope you give them a try—and I hope they become a staple in your hosting rotation like they have in mine. Don’t be afraid to make them your own. Add extra garlic if that’s your thing. Double the ginger. Experiment with the filling. That’s the beauty of cooking: you get to chase your own flavors, your own memories.
If you make these, I’d love to hear about it. Drop a comment below and let me know how they turned out, or share your own twist on the recipe. And if you’re looking for another crowd-pleasing appetizer, check out my crispy pork belly bites—they’re equally addictive. Happy cooking, and here’s to making your kitchen smell like the best kind of memory.
Frequently Asked Questions
Can I use store-bought dumpling wrappers?
Absolutely. In fact, I recommend them for this recipe. Homemade wrappers are wonderful, but they’re time-consuming and take practice to get right. Store-bought wrappers from the refrigerated section are consistent, easy to work with, and save you a ton of time.
Why did my dumplings stick to the pan?
This usually happens for one of two reasons: your pan wasn’t hot enough when you added the dumplings, or you didn’t use enough oil. Make sure the oil is shimmering before you add the dumplings, and use a good non-stick skillet. If you’re using stainless steel, you’ll need more oil and a watchful eye.
Can I make these ahead of time for a party?
Yes! You can assemble the dumplings up to 24 hours in advance and keep them covered in the fridge. Or freeze them for up to 3 months. When you’re ready to cook, just follow the instructions—add 2 minutes to the steaming time if cooking from frozen.
How do I get the bottom extra crispy?
The key is the final step after steaming. Once the water has evaporated, let the dumplings cook uncovered for an extra minute or two on medium-high heat. This re-crisps the bottoms that may have softened during steaming. Don’t skip this step!
What if I don’t have napa cabbage?
You can use regular green cabbage, but it’s a bit tougher. Just chop it very finely and salt it the same way. You can also use shredded coleslaw mix in a pinch—just make sure to squeeze out the excess water well.
Pin This Recipe!
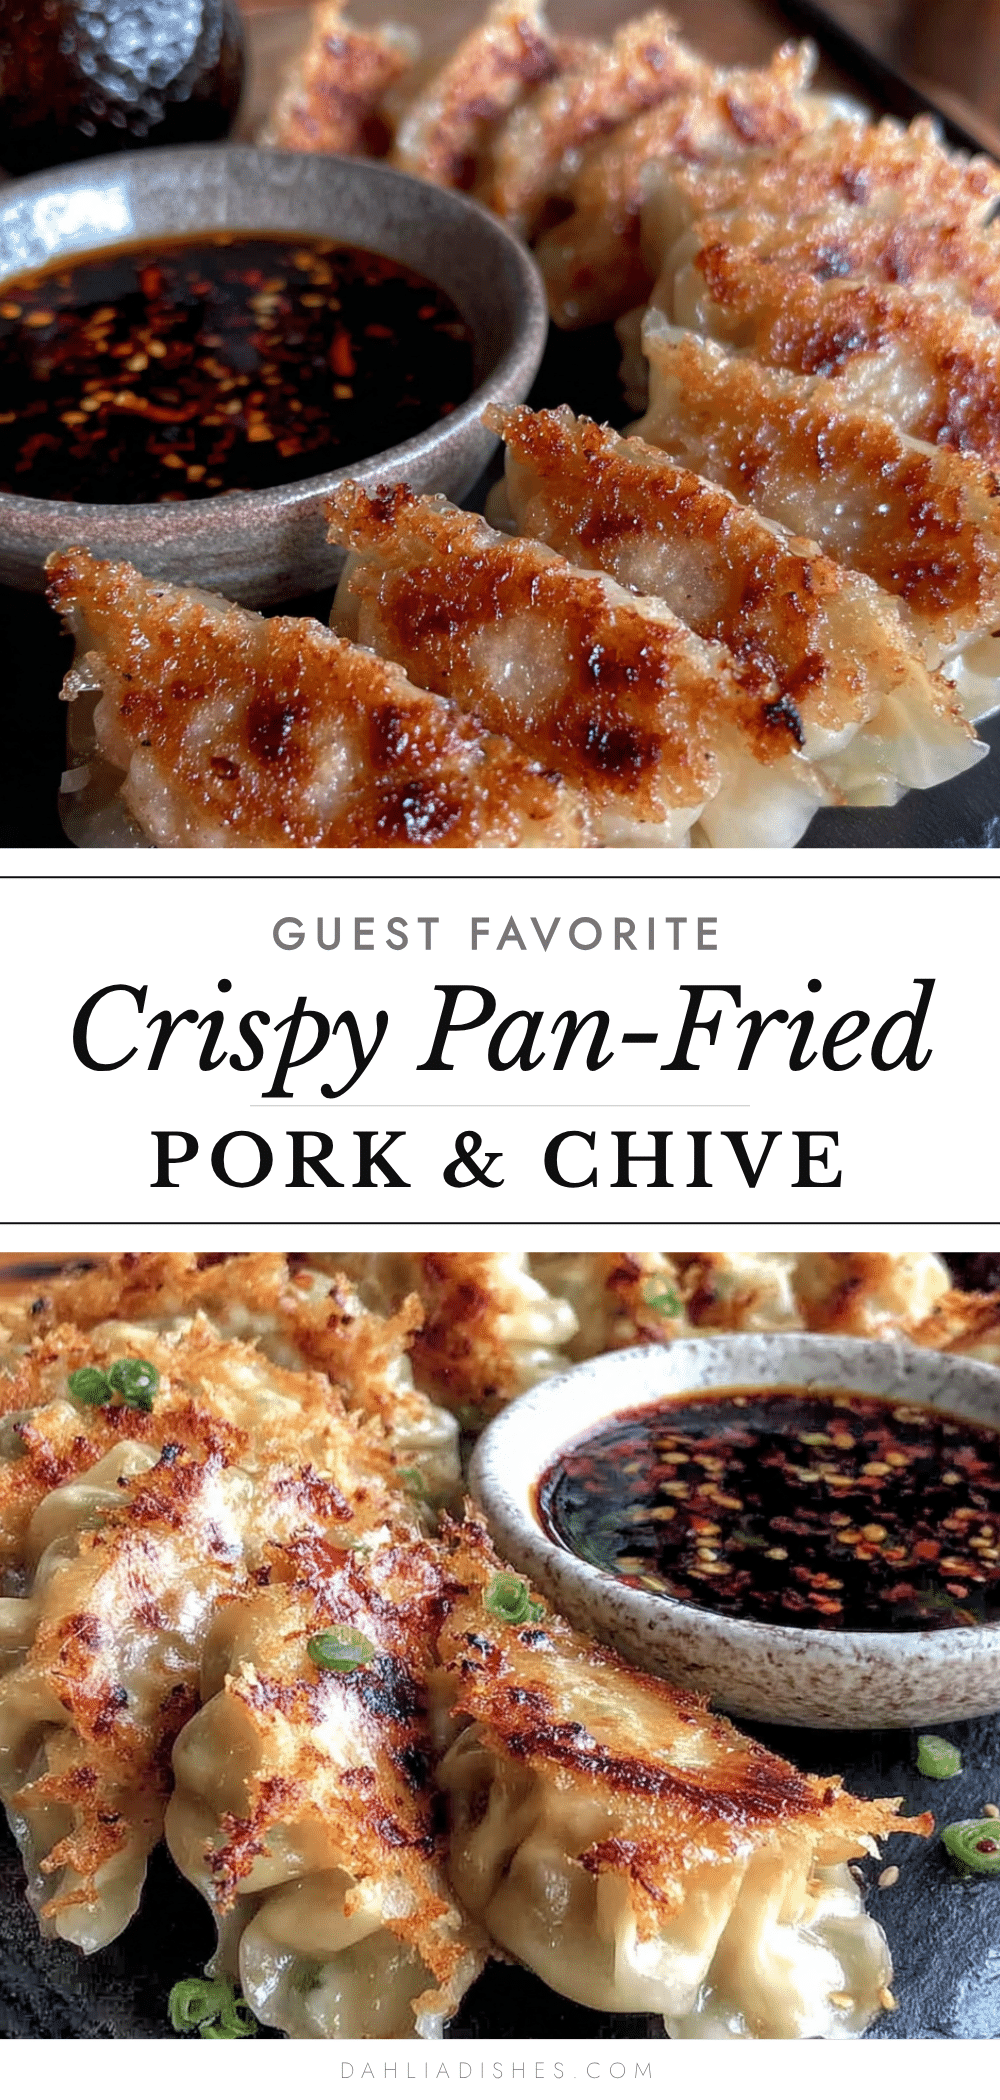
Best Crispy Pork and Chive Dumplings Recipe for Guests
These crispy pan-fried pork and chive dumplings are the ultimate party appetizer, with a perfectly golden, crackly bottom and a juicy, savory filling. They’re surprisingly easy to make and always disappear fast.
- Prep Time: 30 minutes
- Cook Time: 15 minutes
- Total Time: 45 minutes
- Yield: 6 servings (about 45-50 dumplings) 1x
- Category: Appetizer
- Cuisine: Chinese
Ingredients
- 1 pound (450g) ground pork (80/20)
- 2 cups (about 150g) finely chopped napa cabbage
- 3 green onions, finely chopped
- 3 cloves garlic, minced
- 1 tablespoon (15g) fresh ginger, grated
- 2 tablespoons (30ml) soy sauce
- 1 tablespoon (15ml) toasted sesame oil
- 1 tablespoon (15ml) Shaoxing wine or dry sherry
- 1 teaspoon (5g) sugar
- ½ teaspoon (2g) white pepper
- 1 package (about 50–60) round dumpling wrappers
- 2 tablespoons (30ml) vegetable oil (for frying)
- ⅓ cup (80ml) water (for steaming)
- 3 tablespoons (45ml) soy sauce (for dipping sauce)
- 2 tablespoons (30ml) rice vinegar (for dipping sauce)
- 1 teaspoon (5ml) chili oil or sriracha (for dipping sauce)
- 1 teaspoon (5g) sesame seeds, toasted (for dipping sauce)
- 1 teaspoon (5g) sugar (for dipping sauce)
Instructions
- Finely chop napa cabbage, sprinkle with ½ teaspoon salt, let sit 10 minutes, then squeeze out excess water.
- In a large bowl, combine ground pork, squeezed cabbage, green onions, garlic, ginger, soy sauce, sesame oil, Shaoxing wine, sugar, and white pepper. Mix with hands until well combined and slightly sticky (about 2 minutes).
- Set up assembly station: bowl of water, dumpling wrappers (covered with damp paper towel), and parchment-lined baking sheet. Place 1 tablespoon filling in center of wrapper, moisten edges with water, fold into half-moon, press out air, and crimp edges. Repeat for all dumplings.
- Heat non-stick skillet over medium-high heat with 2 tablespoons vegetable oil. Arrange dumplings flat side down in a single layer, leaving ½ inch space. Cook 2-3 minutes until bottoms are golden brown.
- Carefully pour ⅓ cup water into pan (it will splatter), immediately cover with lid, reduce heat to medium, and steam for 6-7 minutes.
- Remove lid, increase heat to medium-high, and cook uncovered 1-2 minutes until bottoms are extra crispy.
- Slide dumplings onto serving plate, crispy side up. Serve immediately with dipping sauce (mix soy sauce, rice vinegar, chili oil, sesame seeds, and sugar).
Notes
For gluten-free, use tamari and gluten-free wrappers. For vegetarian, replace pork with finely chopped mushrooms and crumbled tofu. Freeze assembled dumplings for up to 3 months; cook from frozen adding 2 minutes to steaming time. The filling tastes even better the next day.
Nutrition
- Serving Size: 6 dumplings
- Calories: 380
- Sugar: 2
- Sodium: 680
- Fat: 18
- Saturated Fat: 5
- Carbohydrates: 32
- Fiber: 2
- Protein: 22
Keywords: crispy dumplings, pork dumplings, chive dumplings, pan-fried dumplings, potstickers, party appetizer, homemade dumplings


