Love this? Save it for later!
Share the inspiration with your friends
My daughter had sworn off gingerbread cookies for three years. Three years. Ever since the gingerbread house incident of 2021—where she bit into a store-bought cookie and declared it “spicy cardboard”—she’d refused to even look at a gingerbread man. Then last December I made this version “just for the Christmas party” and found her standing in front of the cooling rack at 11 PM, crumbs on her pajama shirt, holding a cookie shaped like a star. She didn’t say a word. Just pointed at the plate and gave me that look. You know the one—the “I was wrong and I’m not saying it but please don’t rub it in” look.
Honestly, I didn’t blame her. Most gluten-free gingerbread cookies are either hockey pucks or crumbly disasters that fall apart the second you try to ice them. I’d tried maybe six different recipes before this one, and each time I pulled a tray of sad, cracked cookies out of the oven, I’d think, “There has to be a better way.” The problem was always the same—gluten-free flours just don’t behave like regular flour, and gingerbread needs that perfect balance of softness and structure.
So I went back to the drawing board. I spent a whole Sunday testing ratios, mixing batches, and annoying my family with endless samples. The breakthrough came when I added a little applesauce—my mom’s trick for keeping gluten-free baked goods moist—and swapped the standard flour blend for one with almond flour. The texture finally worked. Soft in the middle, slightly crisp on the edges, and sturdy enough to hold icing without crumbling into a million pieces. Let me tell you, when my daughter asked for seconds without being prompted, I knew I had something special. This recipe stayed with me because it proved you don’t have to sacrifice flavor or texture just because you’re baking gluten-free. And honestly, watching a picky kid devour a cookie she’d sworn to hate? That’s the kind of kitchen victory that keeps you coming back.
Why You’ll Love This Recipe
I’m not going to pretend these cookies are complicated or fancy—they’re not. But they are the kind of recipe that makes you look like a hero without breaking a sweat. Here’s why they work so well for real families:
- Quick & Easy: From start to finish, these take about 35 minutes. The dough comes together in one bowl, and there’s no chilling required (I know, right? Total game changer for impatient little helpers).
- Simple Ingredients: You probably already have most of this stuff in your pantry. No weird flours you’ll never use again, no expensive specialty items. Just honest ingredients that work together beautifully.
- Perfect for Holiday Baking: Whether you’re making cookies for Santa, a classroom party, or just a cozy afternoon activity, these hold up beautifully. They travel well, they freeze even better, and they actually taste good the next day.
- Crowd-Pleaser: Here’s the thing—nobody will guess these are gluten-free. I’ve served them to skeptical relatives, picky neighbors, and my daughter’s entire third-grade class. The cookies disappear every single time.
- Unbelievably Delicious: The vanilla bean icing takes these from “good” to “wait, can I have another one?” good. It’s not too sweet, it sets up nicely, and it adds that little something special that makes store-bought cookies jealous.
What makes this recipe different from all the others? It’s the combination of almond flour and tapioca starch that gives these cookies their soft, chewy texture without any weird aftertaste. Plus, the applesauce trick keeps them moist for days—something most gluten-free cookies just can’t do. I’ve tested this recipe with four different gluten-free flour blends, and I’ll share exactly which one works best (spoiler: it’s not the most expensive one).
This isn’t just another gingerbread cookie recipe. It’s the one that made my daughter change her mind. It’s the one that makes holiday baking feel fun again, even when you’re juggling dietary restrictions and a kitchen full of excited kids. And honestly, that first bite—soft, spiced, perfectly sweet—is the kind of comfort food moment that makes all the testing worth it.
What Ingredients You Will Need
This recipe uses simple, wholesome ingredients that come together to create cookies with real depth of flavor. Most of these are pantry staples, and I’ll walk you through each one so you know exactly what to look for.
For the Cookies
- Gluten-free all-purpose flour blend (1 ½ cups / 180g) — I recommend Bob’s Red Mill 1-to-1 Baking Flour (blue bag) for the most reliable results. It already has xanthan gum, which gives the cookies structure. If your blend doesn’t include xanthan gum, add ½ teaspoon.
- Almond flour (¾ cup / 75g) — This is the secret to soft, tender cookies. Look for finely ground blanched almond flour, not almond meal (which has skins and makes cookies gritty). I use King Arthur’s brand, but any fine almond flour works.
- Tapioca starch (¼ cup / 30g) — This helps with chewiness and prevents that sandy texture gluten-free baked goods sometimes have. You can substitute cornstarch in a pinch, but the texture won’t be quite as good.
- Unsalted butter (½ cup / 113g, softened) — Make sure it’s really at room temperature. Cold butter won’t cream properly, and melted butter changes the texture. If you forgot to take it out, microwave it in 5-second bursts until it’s soft but not melted.
- Brown sugar (½ cup / 100g, packed) — Light or dark works fine. Dark brown sugar gives a deeper molasses flavor, which I personally love. Pack it firmly into the measuring cup for accuracy.
- Molasses (¼ cup / 60ml) — Use unsulfured molasses, not blackstrap. Blackstrap is too bitter and will overpower the cookies. Grandma’s Original is my go-to brand—it’s widely available and has the right balance of sweetness and depth.
- Large egg (1, at room temperature) — Cold eggs can seize the butter mixture. If you’re in a hurry, put the egg in a bowl of warm water for 5 minutes before using.
- Applesauce (2 tablespoons / 30g) — Unsweetened is best. This adds moisture without making the cookies cakey. I’ve used both store-bought and homemade, and both work great.
- Vanilla extract (1 teaspoon) — Pure vanilla is better, but imitation works fine in a pinch.
- Ground ginger (2 teaspoons) — Freshly opened spices make a huge difference here. If your ginger has been sitting in the cabinet for two years, please buy new. I learned this the hard way.
- Ground cinnamon (1 ½ teaspoons)
- Ground cloves (¼ teaspoon)
- Ground nutmeg (¼ teaspoon, freshly grated if you have it)
- Salt (¼ teaspoon) — I use fine sea salt. It balances the sweetness and brings out the spices.
- Baking soda (½ teaspoon) — Make sure it’s fresh. Test it by dropping a little in vinegar—if it fizzes, it’s good.
For the Vanilla Bean Icing
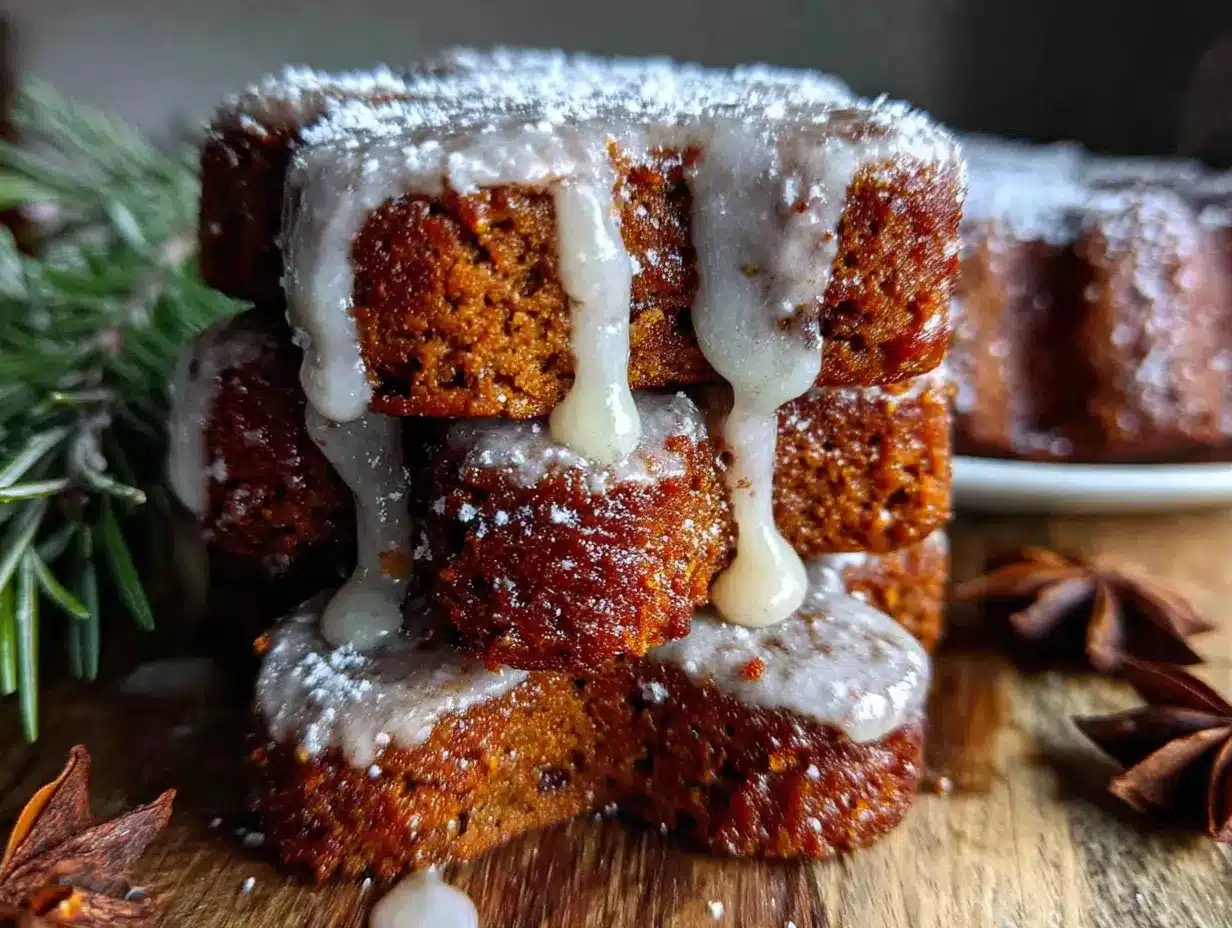
- Powdered sugar (1 ½ cups / 180g) — Sift it if it’s lumpy. Nobody wants lumpy icing.
- Vanilla bean paste (1 tablespoon) — This is what gives the icing those beautiful little vanilla specks. You can use vanilla extract instead, but you’ll miss that visual pop. Nielsen-Massey makes a great one that’s available at most grocery stores.
- Milk (2-3 tablespoons, any kind) — Whole milk gives the creamiest texture, but almond or oat milk work fine. Add it slowly—you might need less than you think.
- Butter (1 tablespoon, melted) — This helps the icing set up with a slight shine instead of looking matte.
Equipment Needed
You don’t need a fancy kitchen to make these cookies. Here’s what you’ll actually use:
- Large mixing bowl — Any big bowl works. I use a glass one because I can see when everything’s combined.
- Hand mixer or stand mixer — You can cream the butter and sugar by hand, but your arm will thank you for using a mixer. I’ve done it both ways, and honestly, the mixer makes a fluffier texture.
- Measuring cups and spoons — For dry ingredients, spoon them into the cup and level off with a knife. Don’t scoop directly from the bag—you’ll pack too much flour.
- Kitchen scale (optional but helpful) — Weighing ingredients gives the most consistent results, especially with gluten-free flours. I resisted getting one for years, and now I use it for everything.
- Rolling pin — Any rolling pin works. If you don’t have one, a wine bottle works in a pinch (I’ve done it).
- Cookie cutters — Traditional gingerbread men are fun, but stars, trees, and circles work great too. My kids love the mini cutters—they make bite-sized cookies that are perfect for little hands.
- Baking sheets — I recommend light-colored ones. Dark sheets absorb more heat and can over-brown the bottoms. If that’s all you have, reduce the oven temperature by 25°F.
- Parchment paper — Non-negotiable for gluten-free cookies. Silicone mats work too, but parchment makes cleanup easier.
- Wire cooling rack — Cookies need airflow to cool properly. If you don’t have one, you can transfer them to a plate after 5 minutes, but the bottoms might get a little soft.
- Piping bag or zip-top bag — For the icing. A zip-top bag with the corner snipped off works perfectly and costs nothing.
Preparation Method
Alright, let’s make some cookies. I’ll walk you through every step, including the little tricks I’ve learned from making these probably fifty times.
- Preheat your oven to 350°F (175°C) and line two baking sheets with parchment paper. Don’t skip the parchment—these cookies are tender, and they’ll stick to an unlined pan.
- Whisk the dry ingredients together. In a medium bowl, combine the gluten-free flour blend, almond flour, tapioca starch, ginger, cinnamon, cloves, nutmeg, salt, and baking soda. Whisk until everything is evenly distributed. I usually do this while the butter is softening to save time.
- Cream the butter and sugar. In a large bowl, beat the softened butter and brown sugar together until light and fluffy—about 2-3 minutes with a hand mixer on medium speed. Scrape down the sides of the bowl halfway through. You’re looking for a pale, creamy mixture that’s increased in volume.
- Add the wet ingredients. Beat in the molasses, egg, applesauce, and vanilla extract until well combined. The mixture might look a little separated at this point—that’s normal. Don’t panic. It will come together when you add the dry ingredients.
- Mix in the dry ingredients. Add the flour mixture to the wet ingredients in two additions, mixing on low speed until just combined. Be careful not to overmix—gluten-free dough can get tough if you work it too much. Scrape down the sides and bottom of the bowl to make sure everything’s incorporated.
- Check the dough consistency. It should be soft but not sticky—similar to play-dough. If it feels too sticky to handle, add a tablespoon more gluten-free flour. If it seems dry, add a teaspoon of milk. I’ve made this recipe in different climates, and humidity really affects gluten-free dough, so trust your hands more than the recipe.
- Roll out the dough. Place the dough between two sheets of parchment paper and roll it to about ¼-inch thickness. The parchment trick is my favorite—it keeps the dough from sticking without adding extra flour, which can dry out the cookies. If you don’t have parchment, lightly dust your work surface and rolling pin with gluten-free flour.
- Cut out the cookies. Use your cookie cutters to press shapes into the dough. Dip the cutters in a little gluten-free flour between cuts to prevent sticking. Try to cut them as close together as possible—you want to minimize re-rolling, which can make the dough tough.
- Transfer to baking sheets. Use a thin spatula to lift the cut-out cookies onto your prepared baking sheets, leaving about 1 inch between them. They don’t spread much, so you can fit quite a few on each sheet.
- Bake for 8-10 minutes. The cookies are done when the edges are just barely set and the centers look slightly underdone. They’ll continue to cook on the hot pan after you take them out. For softer cookies, aim for 8 minutes. For crisper cookies, go to 10. My family likes them at 9 minutes exactly.
- Cool on the pan for 5 minutes. This is crucial—the cookies are fragile when hot. Let them rest on the baking sheet until they’re firm enough to move. Then transfer them to a wire cooling rack to cool completely before icing.
- Make the icing. While the cookies cool, whisk together the powdered sugar, vanilla bean paste, melted butter, and 2 tablespoons of milk. Add more milk one teaspoon at a time until you reach a consistency that’s thick but pipeable. You want it to hold its shape when piped but still spread slightly. If it’s too thin, add more powdered sugar. Too thick? More milk. Easy fix.
- Decorate the cookies. Transfer the icing to a piping bag or a zip-top bag with a tiny corner snipped off. Pipe designs onto the cooled cookies—outlines, dots, stripes, whatever makes you happy. Let the icing set for about 30 minutes before stacking or serving. If you’re impatient like me, you can pop them in the fridge for 10 minutes.
Cooking Tips & Techniques
Let me save you from the mistakes I made so you don’t have to learn them the hard way.
Don’t overbake. I cannot stress this enough. Gluten-free cookies go from perfect to dry in about 60 seconds. Pull them out when the edges are set but the centers still look slightly soft. They’ll firm up as they cool. The first time I made these, I left them in for 12 minutes because that’s what regular gingerbread cookies need. Big mistake. They were edible but not great.
Use room temperature ingredients. I know it’s tempting to use cold butter straight from the fridge, but it won’t cream properly with the sugar. Same goes for the egg—cold egg can cause the butter mixture to seize up and look curdled. Take everything out 30 minutes before you start baking. Set a timer if you’re forgetful like me.
Chill the dough if you have time. I said this recipe doesn’t require chilling, and it doesn’t. But if you have an extra 30 minutes, chilling the rolled-out dough before cutting makes cleaner edges and slightly thicker cookies. I do this when I’m making cookies for a special occasion or when I want them to look really polished.
Reroll scraps gently. Gather the dough scraps, press them together, and reroll. Don’t knead them like bread—that overworks the dough and makes tough cookies. Just press them into a disc and roll again. You’ll get about one good reroll before the dough gets too dry. After that, I just bake the scraps as “cook’s treats” (aka the ones I eat while decorating).
Test your flour blend first. Different gluten-free flour blends absorb liquid differently. If you’re using a blend I haven’t tested, make a test cookie first. Bake one cookie for 9 minutes and see how it turns out. Adjust from there. This sounds like a hassle, but it saves you from wasting a whole batch.
Let the icing set completely. I once stacked iced cookies too early and ended up with a beautiful blob of icing smeared across half the batch. Patience, my friend. Give the icing a full 30 minutes to set, or use the fridge trick if you’re in a hurry.
Variations & Adaptations
One of the best things about this recipe is how flexible it is. Here are some ways to make it your own:
Dairy-Free Version: Swap the butter for vegan butter (I like Miyoko’s) and use oat milk in the icing. The cookies turn out slightly less tender, but still delicious. My neighbor’s daughter has a dairy allergy, and I’ve made this version for her birthday party twice now—it’s a hit.
Egg-Free Version: Replace the egg with a flax egg (1 tablespoon ground flaxseed mixed with 3 tablespoons water, let sit for 5 minutes). The cookies will be a little more delicate, so handle them gently. This works great for vegan baking too.
Spice It Up: Add ¼ teaspoon black pepper or cardamom for a more complex flavor profile. I tried this on a whim last Christmas, and my husband said they tasted “fancy.” I’ll take that as a win.
Chocolate-Dipped: After icing, dip half of each cookie in melted dark chocolate. Let set on parchment paper. This turns a simple cookie into something that looks like it came from a bakery. I did this for a cookie exchange and got asked for the recipe four times.
Lemon Ginger Twist: Add 1 tablespoon lemon zest to the dough and replace the vanilla bean paste with lemon extract in the icing. The bright citrus cuts through the warm spices beautifully. This is my go-to spring version.
Mini Cookies: Use small cookie cutters (1-2 inches) and reduce baking time to 6-7 minutes. These are perfect for lunchboxes or for little hands to decorate. My kids love making tiny stars and snowflakes.
Gluten-Free Gingerbread House: If you want to make a gingerbread house, increase the baking time to 12-14 minutes and roll the dough slightly thicker (⅜ inch). The cookies will be sturdy enough to hold together. Just don’t use this version for structural walls—it’s too tender. Trust me, I tried.
Serving & Storage Suggestions
These cookies are best served at room temperature with a cold glass of milk or a warm cup of tea. The vanilla bean icing adds a touch of elegance that makes them perfect for holiday cookie platters, classroom parties, or afternoon snacks.
At Room Temperature: Store in an airtight container with parchment paper between layers. They’ll stay fresh for up to 5 days. The texture actually improves after day one—the flavors meld together and the cookies get even softer. I always make these a day ahead for that reason.
In the Freezer: These freeze beautifully. Place un-iced cookies in a single layer on a baking sheet and freeze until solid (about 1 hour). Transfer to a freezer-safe bag or container. They’ll keep for up to 3 months. When you’re ready to serve, thaw at room temperature for 30 minutes, then ice and decorate. I usually double the batch and freeze half for last-minute holiday visitors.
Iced Cookies in the Freezer: You can freeze iced cookies too, but let the icing set completely first. Place them in a single layer in a freezer-safe container with parchment between layers. Thaw in the container to prevent condensation from ruining the icing. They’ll keep for about 1 month this way.
Reheating: These are meant to be eaten at room temperature, but if you want a warm cookie, pop one in the microwave for 8-10 seconds. The icing will get a little melty, which honestly is kind of amazing.
Flavor Development: Here’s something I discovered by accident—these cookies taste even better the next day. The spices mellow out and meld together, and the texture becomes perfectly soft. So don’t stress if you’re making them ahead. They’re actually better for it.
Nutritional Information & Benefits
These cookies are a treat, so I’m not going to pretend they’re health food. But they do have some redeeming qualities compared to traditional gingerbread cookies.
| Per Cookie (1 medium, with icing) | Value |
|---|---|
| Calories | 145 |
| Total Fat | 7g |
| Saturated Fat | 3g |
| Carbohydrates | 20g |
| Sugar | 12g |
| Fiber | 2g |
| Protein | 3g |
The almond flour adds healthy fats and a little protein, which helps balance out the sugar. Ginger is known for its anti-inflammatory properties and can help with digestion. Plus, these cookies have less sugar than most store-bought versions because the molasses adds sweetness without needing as much refined sugar.
Dietary Considerations: These cookies are naturally gluten-free. With the substitutions mentioned above, they can be made dairy-free and egg-free. They are not low-carb or keto-friendly due to the brown sugar and molasses. If you have nut allergies, substitute the almond flour with an equal amount of gluten-free all-purpose flour, but expect a slightly less tender texture.
Conclusion
These gluten-free gingerbread cookies with vanilla bean icing have become a December tradition in our house, and I honestly can’t imagine the holidays without them anymore. They’re the cookies that proved my daughter wrong—and proved to me that gluten-free baking doesn’t have to be a compromise. They’re soft, they’re spiced just right, and that vanilla bean icing? Pure magic.
I hope you’ll give them a try, whether you’re baking for a family with dietary restrictions, a holiday party, or just because you deserve a good cookie. Play around with the spices, try different cookie cutters, and let your kids go wild with the icing. That’s the whole point of baking, isn’t it? Making something that brings people together and puts smiles on their faces.
When you make these—and I really hope you do—come back and let me know how they turned out. Did your kids love them? Did you try a fun variation? Did you eat three before the icing even set? (No judgment here. I’ve been there.) Drop a comment below or tag me in your photos. I love seeing your kitchen victories.
Happy baking, friends. May your cookies be soft, your icing be smooth, and your kitchen smell like the holidays.
Frequently Asked Questions
Can I use a different gluten-free flour blend?
Yes, but results may vary. I’ve tested this recipe with Bob’s Red Mill 1-to-1, King Arthur Measure for Measure, and Cup4Cup. Bob’s Red Mill gave the best texture. If your blend doesn’t contain xanthan gum, add ½ teaspoon to the dry ingredients. Avoid coconut flour—it absorbs too much liquid and will make the cookies dry and crumbly.
Why did my cookies spread too much?
This usually happens when the butter is too soft or the dough is too warm. If your kitchen is hot, chill the rolled-out dough for 15 minutes before cutting. Also, make sure your butter is softened but not melted—it should still hold its shape when you press it. If your cookies still spread, add 2 tablespoons more almond flour next time.
Can I make the dough ahead of time?
Absolutely. Wrap the dough tightly in plastic wrap and refrigerate for up to 3 days. Let it sit at room temperature for 10-15 minutes before rolling—it will be too firm straight from the fridge. You can also freeze the dough for up to 2 months. Thaw overnight in the refrigerator before using.
My icing is too runny. What did I do wrong?
You probably added too much milk. Fix it by whisking in more powdered sugar, one tablespoon at a time, until it thickens. The icing should be thick enough to hold a ribbon when you lift the whisk. If it drips off in a steady stream, it’s too thin. Don’t worry—this is an easy fix, and we’ve all been there.
Can I use this recipe for gingerbread houses?
I don’t recommend it. This recipe makes tender, soft cookies that are perfect for eating but not sturdy enough for structural walls. For a gingerbread house, you need a much drier, denser dough that can support weight without sagging. I learned this the hard way when our “gingerbread cottage” collapsed halfway through decorating. Use a dedicated gingerbread house recipe for construction projects and save this one for snacking.
Pin This Recipe!
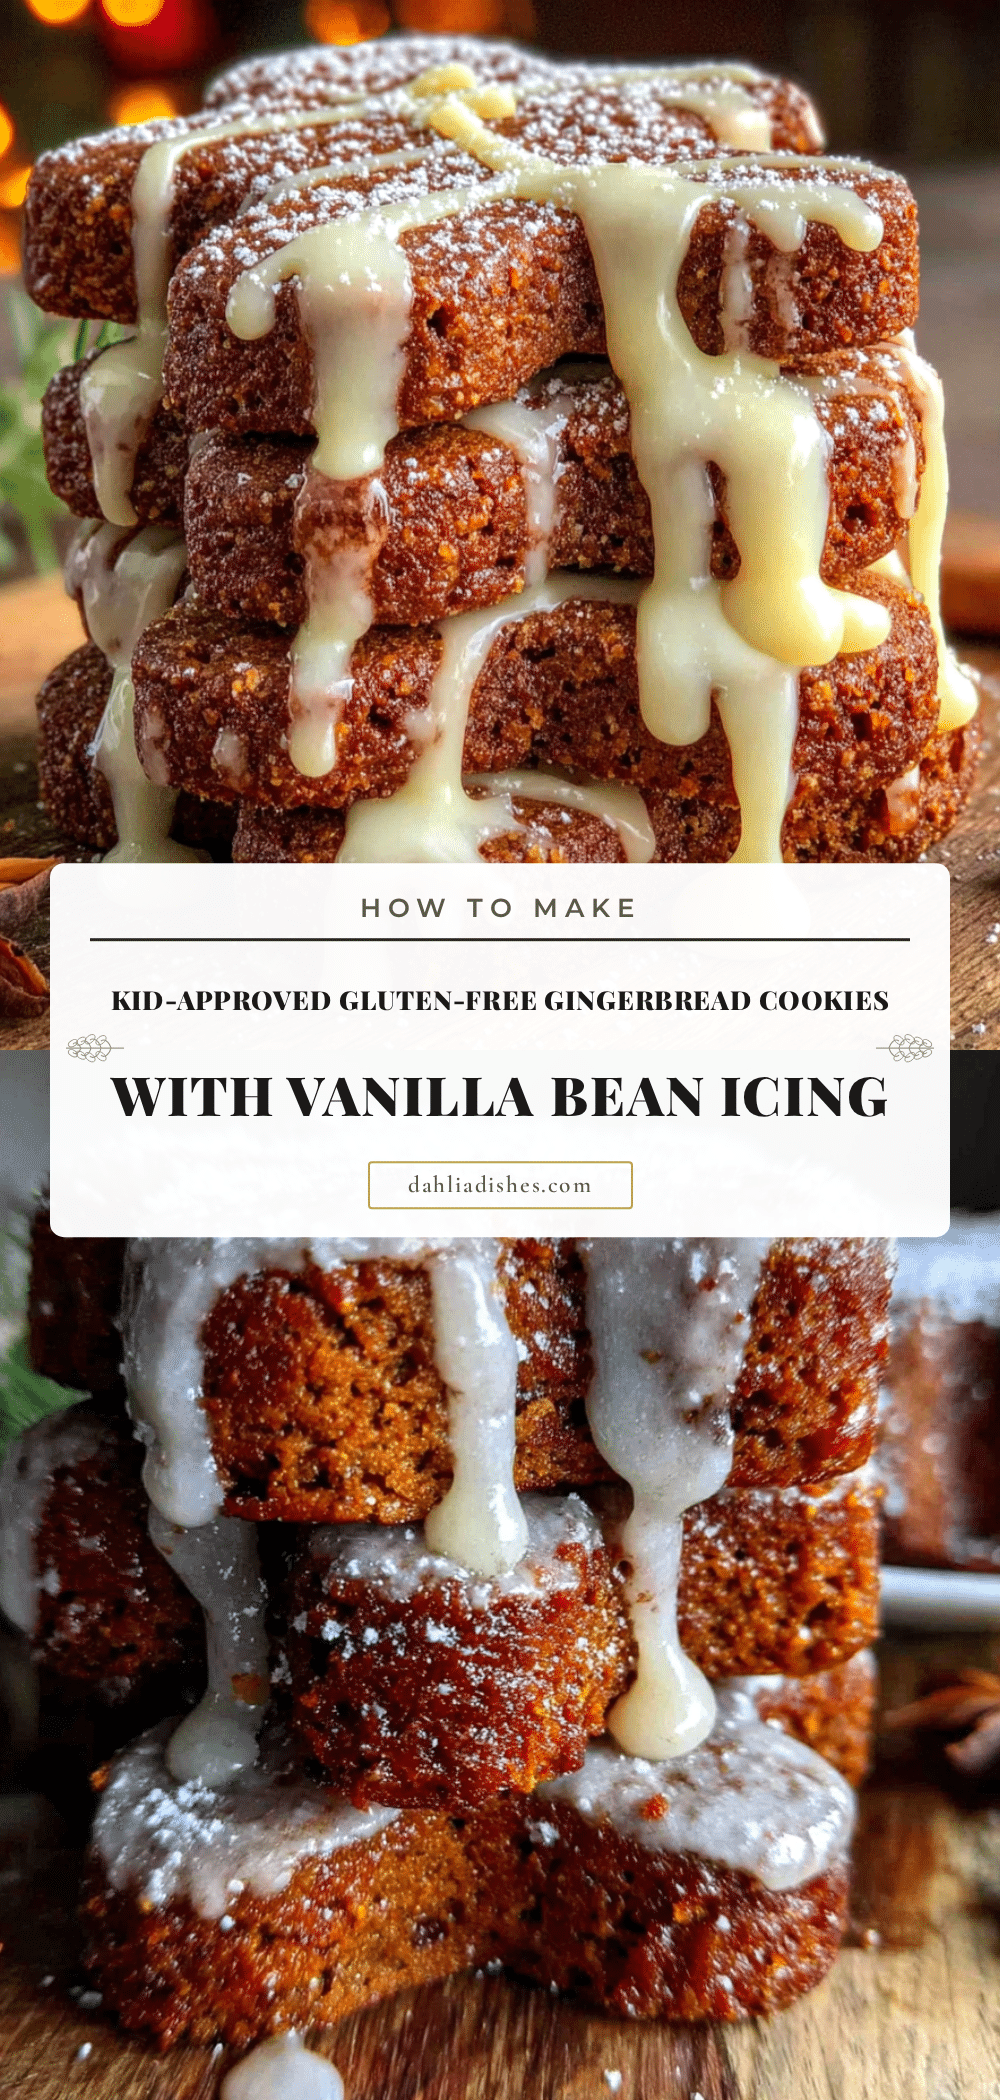
Best Easy Gluten-Free Gingerbread Cookies with Vanilla Icing
Soft, spiced gluten-free gingerbread cookies with a tender crumb and a beautiful vanilla bean icing. This easy recipe uses almond flour and applesauce for moisture, and requires no chilling—perfect for holiday baking with kids.
- Prep Time: 15 minutes
- Cook Time: 9 minutes
- Total Time: 35 minutes
- Yield: 24 cookies 1x
- Category: Dessert
- Cuisine: American
Ingredients
- 1 ½ cups (180g) gluten-free all-purpose flour blend (e.g., Bob’s Red Mill 1-to-1 Baking Flour)
- ¾ cup (75g) almond flour (finely ground, blanched)
- ¼ cup (30g) tapioca starch
- ½ cup (113g) unsalted butter, softened
- ½ cup (100g) brown sugar, packed
- ¼ cup (60ml) unsulfured molasses (not blackstrap)
- 1 large egg, at room temperature
- 2 tablespoons (30g) unsweetened applesauce
- 1 teaspoon vanilla extract
- 2 teaspoons ground ginger
- 1 ½ teaspoons ground cinnamon
- ¼ teaspoon ground cloves
- ¼ teaspoon ground nutmeg
- ¼ teaspoon fine sea salt
- ½ teaspoon baking soda
- For the Vanilla Bean Icing:
- 1 ½ cups (180g) powdered sugar, sifted if lumpy
- 1 tablespoon vanilla bean paste
- 2–3 tablespoons milk (any kind)
- 1 tablespoon butter, melted
Instructions
- Preheat oven to 350°F (175°C). Line two baking sheets with parchment paper.
- In a medium bowl, whisk together gluten-free flour blend, almond flour, tapioca starch, ginger, cinnamon, cloves, nutmeg, salt, and baking soda.
- In a large bowl, beat softened butter and brown sugar with a hand mixer on medium speed until light and fluffy, about 2-3 minutes. Scrape down sides.
- Beat in molasses, egg, applesauce, and vanilla extract until well combined (mixture may look slightly separated).
- Add dry ingredients in two additions, mixing on low speed until just combined. Do not overmix. Scrape bowl to incorporate fully.
- Dough should be soft but not sticky (like play-dough). If too sticky, add 1 tablespoon more gluten-free flour; if too dry, add 1 teaspoon milk.
- Place dough between two sheets of parchment paper and roll to ¼-inch thickness.
- Cut out shapes with cookie cutters, dipping cutters in gluten-free flour between cuts. Transfer cutouts to prepared baking sheets, spacing about 1 inch apart.
- Bake for 8-10 minutes, until edges are set and centers look slightly underdone. For softer cookies, bake 8 minutes; for crisper, 10 minutes.
- Cool on baking sheet for 5 minutes, then transfer to a wire rack to cool completely.
- For icing: Whisk together powdered sugar, vanilla bean paste, melted butter, and 2 tablespoons milk. Add more milk 1 teaspoon at a time until thick but pipeable.
- Transfer icing to a piping bag or zip-top bag with a tiny corner snipped off. Decorate cooled cookies. Let icing set for 30 minutes (or 10 minutes in the fridge) before stacking or serving.
Notes
For best results, use room temperature ingredients. Do not overbake—cookies go from perfect to dry quickly. If you have time, chill the rolled-out dough for 30 minutes for cleaner edges. Reroll scraps gently; avoid overworking the dough. Let icing set completely before stacking. Cookies taste even better the next day as flavors meld.
Nutrition
- Serving Size: 1 cookie with icing
- Calories: 145
- Sugar: 12
- Sodium: 95
- Fat: 7
- Saturated Fat: 3
- Carbohydrates: 20
- Fiber: 2
- Protein: 3
Keywords: gluten-free gingerbread cookies, gluten-free Christmas cookies, soft gingerbread cookies, vanilla bean icing, easy gluten-free cookies, holiday baking, gingerbread cookies with icing


