Love this? Save it for later!
Share the inspiration with your friends
My aunt wasn’t trying to impress anyone. I’d stopped by to return her cake pan—the one I’d borrowed three weeks prior and kept forgetting to bring back—and the smell hit me before I even got through the screen door. It was sweet, buttery, and undeniably chocolatey, the kind of smell that makes you forget why you came in the first place. She was standing at the stove, stirring something thick and glossy in a battered old saucepan, looking like she’d done it a thousand times before. Which, as it turns out, she had.
“Oh, this old thing?” she said when I asked what she was making. She waved her free hand like it was nothing, like she wasn’t creating pure magic in a pot. “It’s just fudge. My mother’s recipe.” She said it the way someone might say “it’s just toast.” But I knew better. I stood there watching her pour that molten chocolate mixture into a pan, and I honestly felt like I was witnessing something special. She didn’t use a candy thermometer. She didn’t fuss or stress. She just knew. And that—that casual confidence—is what made me beg her for the recipe right then and there.
Maybe you’ve been there, watching someone cook with that effortless ease and thinking, I could never do that. But here’s the thing: you absolutely can. This homemade fantasy fudge with marshmallow creme is the recipe that made me feel like a real candy maker, and I’m not even kidding. No thermometer. No complicated steps. Just rich, creamy, melt-in-your-mouth fudge that sets up perfect every single time. I’ve made it for Christmas gifts, bake sales, and those random Tuesday nights when you just need something sweet. It never fails. Honestly, it’s become my secret weapon in the kitchen, and now it can be yours too.
Why You’ll Love This Recipe
Let me tell you why this particular fudge recipe has earned a permanent spot in my recipe box. I’ve tested a lot of fudge recipes over the years—some that required careful temperature monitoring, others that turned out grainy or too soft. This one? It’s the real deal, and it’s practically foolproof.
- No Candy Thermometer Needed : This is the biggest win right here. Traditional fudge recipes require you to watch the temperature like a hawk, but this method uses marshmallow creme to stabilize the sugar mixture. You just bring the sugar and butter to a rolling boil, and you’re good to go.
- Simple Pantry Ingredients : Sugar, butter, evaporated milk, chocolate chips, marshmallow creme, vanilla, and nuts if you like them. That’s it. Nothing fancy, nothing hard to find.
- Perfect for Gift Giving : This fudge travels beautifully, stays fresh for weeks, and looks gorgeous wrapped up in a little tin. I’ve sent care packages to college kids and holiday boxes to relatives across the country, and it always arrives in perfect shape.
- Crowd-Pleaser Guaranteed : I’ve brought this to potlucks, family reunions, and office parties, and I’ve never brought a single piece home. Kids love it, adults love it, and people who swear they don’t have a sweet tooth somehow find room for a second piece.
- Unbelievably Creamy Texture : The marshmallow creme gives this fudge a smooth, velvety texture that you just can’t get with other methods. It’s not grainy or crumbly—it’s the kind of fudge that melts on your tongue.
This isn’t just another fudge recipe you’ll find online. What makes it different is the combination of marshmallow creme and the no-thermometer method. It takes all the stress out of candy making and leaves you with a result that tastes like you spent hours fussing over it. And honestly? It’s the kind of fudge that makes people close their eyes after the first bite. You know that feeling—when something is so good you just have to pause and appreciate it. That’s this fudge.
What Ingredients You Will Need
This recipe uses simple, everyday ingredients that come together to create something truly special. Most of these are probably already in your pantry, which makes this perfect for those moments when a fudge craving strikes unexpectedly.
For the Fudge Base
- 3 cups granulated sugar (white sugar works best here; don’t substitute brown sugar as it changes the texture)
- 3/4 cup unsalted butter (I use Land O Lakes—it’s consistently good and gives the fudge a rich flavor)
- 2/3 cup evaporated milk (not sweetened condensed milk—they’re different! Evaporated milk adds creaminess without extra sweetness)
- 1 package (12 ounces) semi-sweet chocolate chips (I prefer Ghirardelli for the best chocolate flavor, but Nestle works great too)
- 1 jar (7 ounces) marshmallow creme (like Marshmallow Fluff or Jet-Puffed—both work equally well)
- 1 teaspoon vanilla extract (pure vanilla extract makes a difference, but imitation works in a pinch)
- 1 cup chopped walnuts or pecans (optional, but highly recommended for that classic fudge texture contrast)
Ingredient Selection Tips
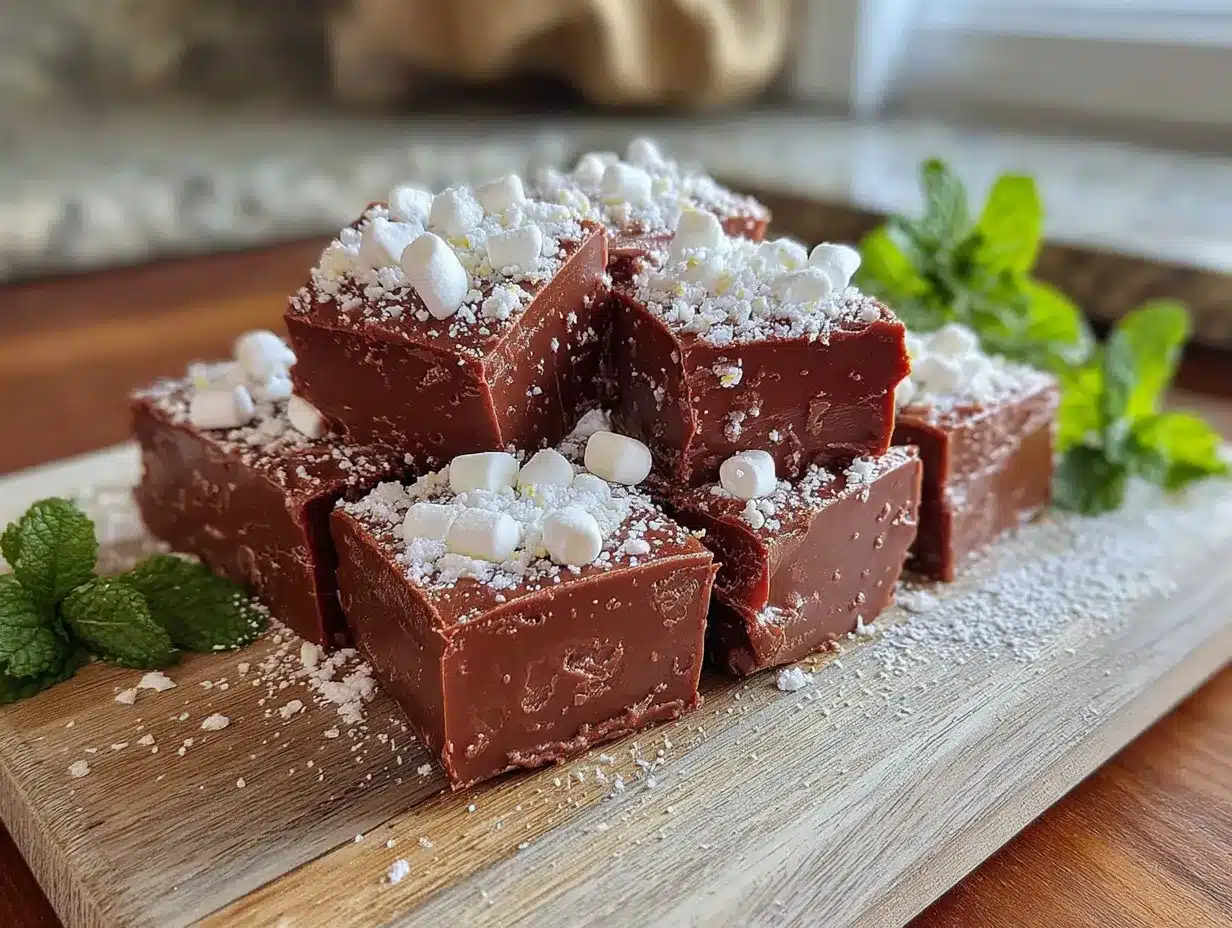
When choosing your chocolate chips, look for semi-sweet rather than milk chocolate. Semi-sweet provides a nice balance of sweetness against all that sugar, and it gives the fudge a deeper, more sophisticated chocolate flavor. If you’re a dark chocolate fan, you can use dark chocolate chips, but the fudge will be less sweet and slightly firmer.
For the marshmallow creme, make sure you get the jarred kind, not mini marshmallows. The creme melts smoothly into the hot sugar mixture and creates that signature silky texture. Mini marshmallows don’t break down the same way and can leave you with a lumpy fudge.
Substitution Guidance
If you need to make this nut-free, simply leave out the walnuts or pecans. The fudge will still be absolutely delicious. For a dairy-free version, you can use a high-quality vegan butter substitute and full-fat coconut milk in place of the evaporated milk. I’ve tested this with Miyoko’s vegan butter and it worked surprisingly well, though the texture was slightly softer.
Equipment Needed
You don’t need a lot of fancy equipment to make this fudge, which is part of its beauty. Here’s what you’ll need:
- Large heavy-bottomed saucepan (a 3-quart pot works perfectly; the heavy bottom helps distribute heat evenly and prevents scorching)
- Wooden spoon or heat-resistant silicone spatula (for stirring the hot sugar mixture)
- 8×8-inch baking pan (for setting the fudge; line it with parchment paper or aluminum foil for easy removal)
- Measuring cups and spoons (accuracy matters in candy making)
- Sharp knife (for cutting the fudge into neat squares)
I’ve made this fudge in a cheap saucepan I bought at a discount store, and it turned out just fine. You don’t need to invest in expensive cookware for this recipe. However, if you have a heavy-bottomed pot, use it—it really does help prevent the sugar from burning.
One tip I learned the hard way: line your pan with parchment paper, leaving some overhang on two sides. This creates little handles that let you lift the entire block of fudge out once it’s set. Trying to pry fudge out of an unlined pan is a frustrating experience you don’t need in your life.
Preparation Method
Alright, let’s make some fudge! This process takes about 15 minutes of active cooking time, plus a few hours for the fudge to set. The key is to stay at the stove and keep stirring—don’t walk away.
- Prepare your pan. Line an 8×8-inch baking pan with parchment paper or aluminum foil, leaving some overhang on two opposite sides. Lightly butter the parchment or foil. Set the pan aside.
- Combine the base ingredients. In your large heavy-bottomed saucepan, combine 3 cups granulated sugar, 3/4 cup unsalted butter, and 2/3 cup evaporated milk. Place the pan over medium heat and stir constantly with your wooden spoon until the butter is completely melted and the sugar is dissolved. The mixture should look smooth and slightly bubbly around the edges.
- Bring to a rolling boil. Once the sugar mixture is smooth, increase the heat to medium-high and bring it to a full rolling boil. You’ll see big, vigorous bubbles breaking across the entire surface. This is where you start timing. Let it boil for exactly 4 minutes, stirring constantly. Do not reduce the heat. Do not stop stirring. I set a timer on my phone and just keep that spoon moving.
- Remove from heat and add chocolate. After 4 minutes of boiling, remove the pan from the heat immediately. Add the entire 12-ounce bag of semi-sweet chocolate chips. Stir gently until the chips are completely melted and the mixture is smooth. This takes about 2 minutes of steady stirring.
- Add marshmallow creme and vanilla. Add the entire 7-ounce jar of marshmallow creme and 1 teaspoon vanilla extract. Stir until the marshmallow creme is fully incorporated and the fudge is thick, glossy, and uniform in color. The mixture will look beautiful and smell incredible at this point.
- Fold in nuts (if using). If you’re adding walnuts or pecans, stir them in now. Fold gently until they’re evenly distributed throughout the fudge.
- Pour into prepared pan. Working quickly but carefully, pour the fudge mixture into your prepared pan. Use your spatula to spread it evenly into the corners. Don’t fuss with it too much—just get it level and let it be.
- Let it set. Allow the fudge to cool at room temperature for about 2-3 hours, or until it’s completely set and firm to the touch. You can speed this up by placing it in the refrigerator for about 1 hour, but I prefer room temperature setting for the best texture.
- Cut and serve. Once the fudge is fully set, use the parchment overhang to lift the entire block out of the pan. Place it on a cutting board and use a sharp knife to cut it into 1-inch squares. A warm knife cuts more cleanly, so run it under hot water and dry it between cuts.
Sensory cues to watch for: When the mixture reaches a rolling boil, you’ll see large bubbles that don’t stop when you stir. The color will be a pale golden. After adding the chocolate and marshmallow creme, the fudge should be thick enough that it holds its shape when you drop a spoonful back into the pot. If it looks too runny, give it another minute of stirring—it will thicken as it cools slightly.
Cooking Tips & Techniques
I’ve made this fudge more times than I can count, and I’ve learned a few things along the way. Here are my best tips for perfect fudge every time.
Don’t skip the constant stirring. I know it’s tempting to walk away for just a second, but don’t. The sugar mixture can scorch quickly, and scorched sugar has a bitter, burnt taste that ruins the whole batch. Stand there, stir constantly, and think of it as a meditative moment. I usually put on a podcast or call my sister while I stir.
Use a timer, not your memory. I once tried to eyeball the 4-minute boiling time and ended up with fudge that was too hard and crumbly. Set a timer. The difference between 3 minutes and 4 minutes can be the difference between creamy fudge and sugary fudge.
Humidity matters. This is something I didn’t learn until I moved to a humid climate. Fudge can be finicky on rainy days because sugar absorbs moisture from the air. If you’re making fudge on a humid day, you might need to boil it for an extra 30 seconds to 1 minute. If the fudge doesn’t set properly, that’s often why.
Don’t over-stir after adding the chocolate. Once the chocolate is melted and incorporated, stop stirring. Over-stirring can cause the fudge to become grainy as the sugar crystals start to form too early. Gentle, minimal stirring is the way to go.
Let it cool completely before cutting. I know it’s tempting to cut into that warm fudge, but patience pays off. Warm fudge is soft and will squish rather than cut cleanly. Let it set fully at room temperature for the cleanest cuts and the best texture.
Variations & Adaptations
One of the best things about this fudge recipe is how easily it adapts to different tastes and occasions. Here are some variations I’ve tried and loved.
Peppermint Fudge
Add 1/2 teaspoon peppermint extract along with the vanilla, and fold in 1/2 cup crushed candy canes or peppermint candies just before pouring into the pan. This is my go-to for Christmas cookie plates, and it always disappears first.
Rocky Road Fudge
After pouring the fudge into the pan, press 1 cup mini marshmallows and 1/2 cup chopped almonds into the top. The marshmallows stay soft and create that classic rocky road texture. This version is especially popular with kids.
White Chocolate Fantasy Fudge
Substitute the semi-sweet chocolate chips with 12 ounces of high-quality white chocolate chips. Add 1/2 cup dried cranberries and 1/2 cup chopped pistachios for a festive twist. The white chocolate version is sweeter and has a completely different flavor profile, but it’s equally delicious.
Vegan Adaptation
Use vegan butter (I like Miyoko’s) and full-fat coconut milk in place of the evaporated milk. Use dairy-free chocolate chips and ensure your marshmallow creme is vegan-friendly (most are, but check the label). The texture will be slightly softer, but the flavor is still fantastic.
Serving & Storage Suggestions
This fudge is best served at room temperature, when it’s soft and creamy. If you’ve refrigerated it, let it sit out for about 15-20 minutes before serving so it softens up slightly.
For gift giving: Cut the fudge into neat squares and layer them in a decorative tin or box, separated by wax paper or parchment. Add a little tag with the recipe name and the date—people always ask for the recipe, and it’s nice to have it ready.
Storage: Store fudge in an airtight container at room temperature for up to 2 weeks. If your kitchen is warm, you can refrigerate it, but bring it to room temperature before serving for the best texture. You can also freeze fudge for up to 3 months. Wrap it tightly in plastic wrap, then in aluminum foil, and place it in a freezer bag. Thaw in the refrigerator overnight.
Flavor development: Here’s something interesting—fudge actually gets better after a day or two. The flavors meld together and the texture becomes even creamier. So if you can resist eating it all immediately, you’ll be rewarded with even better fudge on day two.
Nutritional Information & Benefits
Let’s be real—fudge is a treat, not a health food. But knowing what’s in it helps you enjoy it mindfully. Here’s the estimated nutritional breakdown for one 1-inch square of this fudge (assuming 64 pieces per batch):
- Calories: Approximately 110-120
- Total Fat: 5-6g
- Saturated Fat: 3g
- Carbohydrates: 17-18g
- Sugar: 15-16g
- Protein: 1g
Dietary considerations: This recipe contains dairy, soy (in the chocolate chips), and nuts (if you add them). It can be made vegan with the substitutions mentioned above. It is not gluten-free in its standard form due to potential cross-contamination in chocolate chips, so check labels if that’s a concern.
Here’s my personal take: I believe in enjoying treats in moderation. A piece of homemade fudge after dinner feels like a small celebration. It’s made with real ingredients, by your own hands, and that makes it special. One or two pieces is plenty to satisfy a sweet craving without overdoing it.
Conclusion
This homemade fantasy fudge with marshmallow creme is the recipe that turned me into someone who actually makes candy at home. It’s that easy, that reliable, and that good. No special equipment, no complicated techniques, just simple ingredients and a little bit of patience.
I love this recipe because it reminds me of my aunt’s kitchen—that moment when she made something extraordinary look so ordinary. It taught me that you don’t need to be a professional pastry chef to create something that makes people’s eyes light up. You just need a good recipe and the willingness to stir for a few minutes.
Now I want to hear from you! Have you tried making fudge before? What’s your favorite add-in? Drop a comment below and let me know how this recipe turned out for you. And if you share it on social media, tag me—I love seeing your creations. Happy fudge making, friends!
Frequently Asked Questions
Can I use mini marshmallows instead of marshmallow creme?
I wouldn’t recommend it. Mini marshmallows don’t melt as smoothly as marshmallow creme, and they can leave you with a lumpy texture. The creme is specifically formulated to dissolve completely into the hot sugar mixture, creating that signature silky fudge.
Why did my fudge turn out grainy?
Grainy fudge usually happens when sugar crystals form too early. This can be caused by not stirring constantly during the boiling phase, or by stirring too vigorously after adding the chocolate. To avoid this, stir gently once the chocolate is added, and make sure you’re keeping that mixture moving during the boil.
Can I double this recipe?
Absolutely! I double this recipe all the time for holiday gift giving. Just use a larger pot (at least 5-quart) and a 9×13-inch pan. The boiling time stays the same at 4 minutes. Just be careful not to overflow the pot when the mixture is boiling vigorously.
How do I know when the fudge is done boiling?
Look for a full rolling boil—that means big, active bubbles across the entire surface that don’t stop when you stir. Once you see that, start your timer for exactly 4 minutes. Don’t start the timer from when you first see small bubbles; wait for that vigorous, rolling boil.
Can I use milk chocolate chips instead of semi-sweet?
You can, but the fudge will be significantly sweeter and may be softer in texture. Semi-sweet chocolate provides a better balance against all that sugar. If you only have milk chocolate on hand, consider reducing the sugar by 1/4 cup to compensate.
Pin This Recipe!
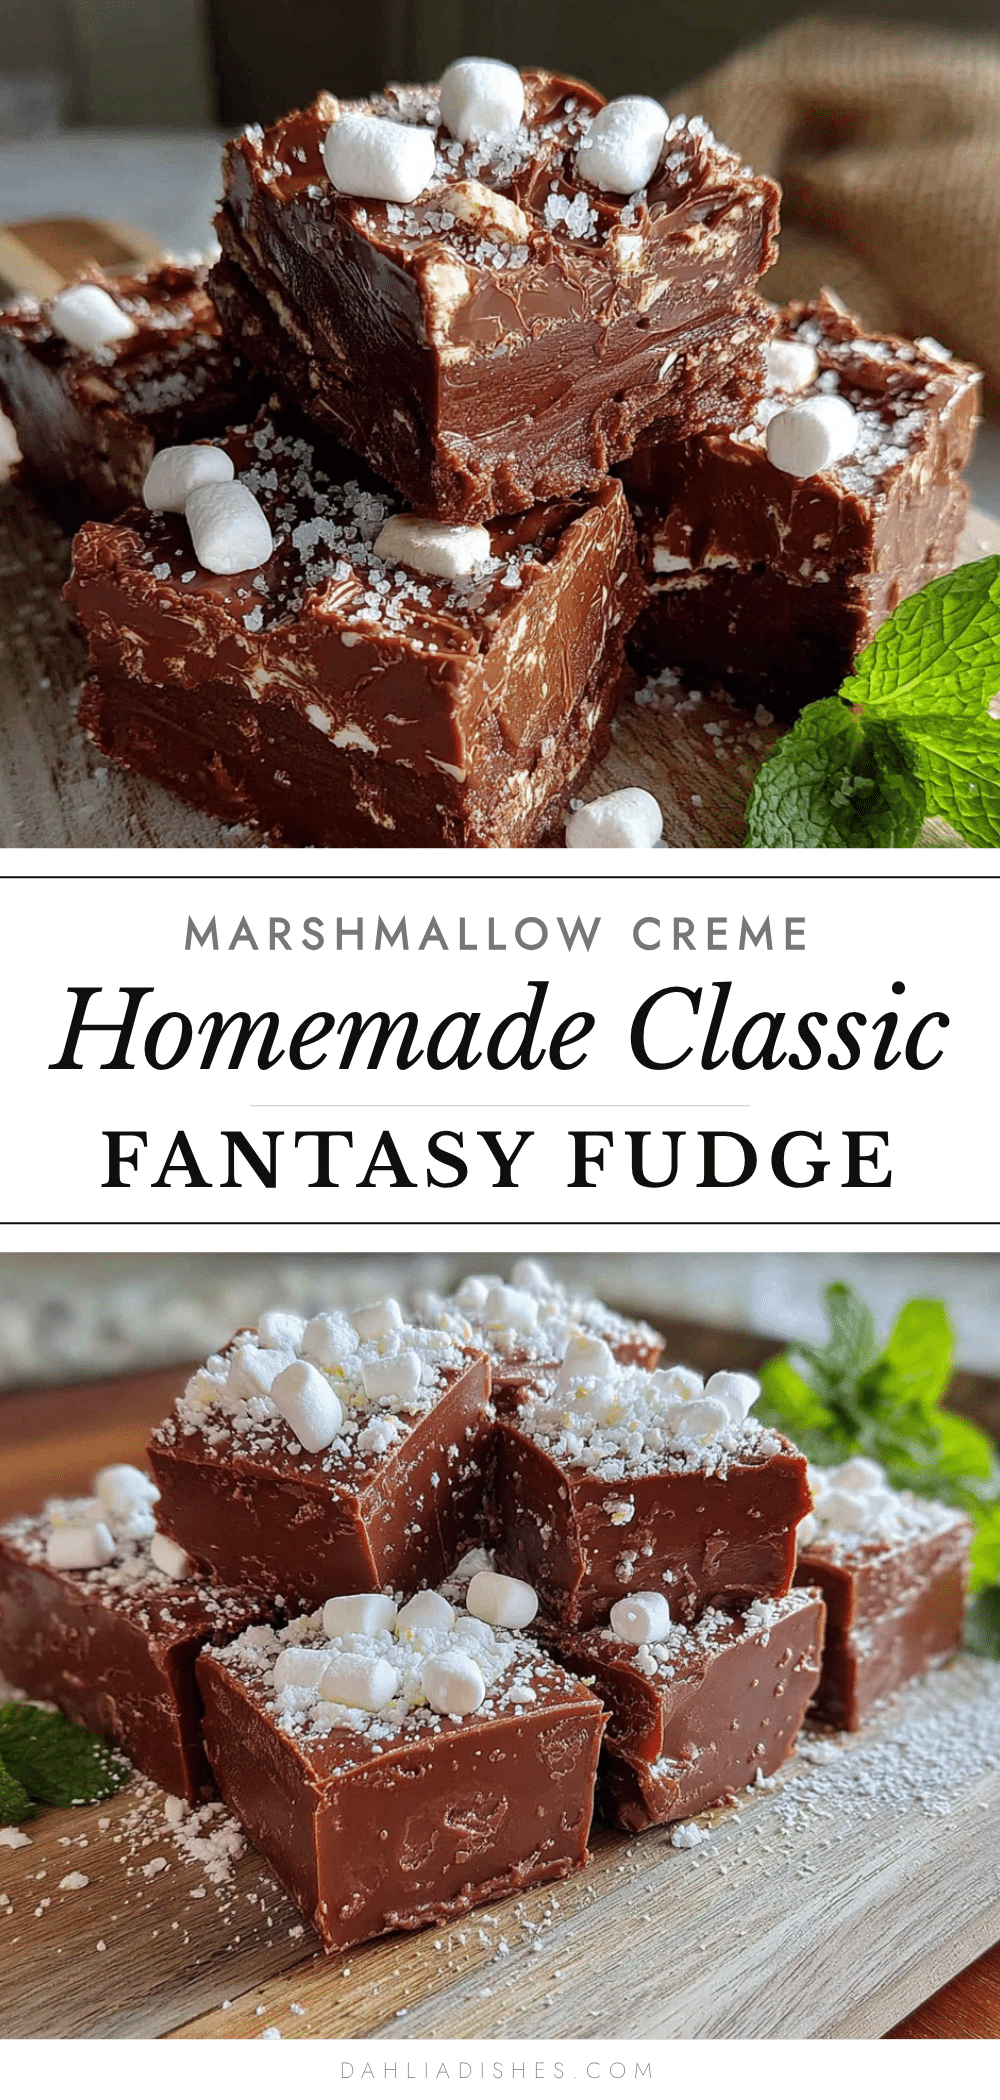
Homemade Fantasy Fudge with Marshmallow Creme (Easy No Thermometer)
This easy, no-thermometer fudge recipe uses marshmallow creme for a foolproof, creamy texture. Perfect for gift giving and guaranteed to be a crowd-pleaser.
- Prep Time: 15 minutes
- Cook Time: 4 minutes
- Total Time: 2 hours 19 minutes (including setting time)
- Yield: 64 servings 1x
- Category: Dessert
- Cuisine: American
Ingredients
- 3 cups granulated sugar
- 3/4 cup unsalted butter
- 2/3 cup evaporated milk
- 1 package (12 ounces) semi-sweet chocolate chips
- 1 jar (7 ounces) marshmallow creme
- 1 teaspoon vanilla extract
- 1 cup chopped walnuts or pecans (optional)
Instructions
- Line an 8×8-inch baking pan with parchment paper or aluminum foil, leaving overhang on two opposite sides. Lightly butter the parchment or foil. Set aside.
- In a large heavy-bottomed saucepan, combine sugar, butter, and evaporated milk. Place over medium heat and stir constantly until butter is melted and sugar is dissolved. Mixture should be smooth and slightly bubbly around edges.
- Increase heat to medium-high and bring to a full rolling boil (big, vigorous bubbles across entire surface). Boil for exactly 4 minutes, stirring constantly. Do not reduce heat or stop stirring.
- Remove from heat immediately. Add chocolate chips and stir gently until completely melted and smooth, about 2 minutes.
- Add marshmallow creme and vanilla extract. Stir until fully incorporated and fudge is thick, glossy, and uniform in color.
- If using nuts, fold them in gently until evenly distributed.
- Pour fudge into prepared pan and spread evenly. Let cool at room temperature for 2-3 hours until completely set and firm. (Can refrigerate for 1 hour to speed up.)
- Once set, lift fudge out using parchment overhang. Place on cutting board and cut into 1-inch squares using a sharp knife (warm knife under hot water and dry between cuts for cleaner cuts).
Notes
Don’t skip constant stirring during boiling to prevent scorching. Use a timer for the 4-minute boil. On humid days, boil for an extra 30 seconds to 1 minute. Let fudge cool completely before cutting for clean squares. Fudge gets better after a day or two as flavors meld.
Nutrition
- Serving Size: 1 piece (1-inch squa
- Calories: 115
- Sugar: 15.5
- Fat: 5.5
- Saturated Fat: 3
- Carbohydrates: 17.5
- Protein: 1
Keywords: fudge, marshmallow creme, no thermometer, easy fudge, homemade fudge, chocolate fudge, fantasy fudge


