Love this? Save it for later!
Share the inspiration with your friends
The woman at the winter farmers market had a peppermint plant growing in a pot next to her honey stand. I was buying my third jar of the season—I have a problem, honestly—when she pointed to the wilting leaves and said, “You know, those are better in cookies than in tea.” She didn’t give me a recipe that day. She just handed me a crumpled paper bag of leaves and told me to crush them into my favorite chocolate cookie dough. That was three winters ago, and I’ve been chasing that exact combination of cool mint and dark chocolate ever since.
I messed up the first batch, let me tell you. I used too many crushed leaves and ended up with cookies that tasted like toothpaste. But that’s the thing about a good idea—it sticks with you. I kept tweaking, kept testing, and eventually landed on these perfect chewy peppermint crinkle cookies with dark chocolate. They’re the kind of cookie that makes people stop mid-conversation and just look at the plate. Maybe you’ve been there, trying to find that one dessert that feels special without requiring a pastry degree.
These cookies have become my go-to for holiday parties and casual get-togethers alike. They look impressive with their crackled tops and dark chocolate chunks, but they come together in a way that feels almost too easy. The peppermint isn’t overwhelming—it’s that cool, subtle note that makes you take another bite just to figure out what’s different. And the dark chocolate? It’s the anchor that keeps everything grounded. I keep making them because they remind me that the best recipes come from unexpected conversations, not from perfect planning.
Why You’ll Love This Recipe
I’ve tested this recipe more times than I care to count, and every single batch has disappeared faster than I expected. That’s not me bragging—that’s me telling you these cookies work. Here’s what makes them stand out from every other peppermint cookie recipe out there:
- Perfectly Chewy Texture : These cookies stay soft and chewy for days, thanks to a careful balance of brown sugar and butter. No dry, crumbly disappointments here.
- Real Peppermint Flavor : No artificial extracts that taste like mouthwash. We’re using crushed peppermint candies and a touch of pure peppermint oil for that clean, cool finish.
- Dark Chocolate That Matters : I use good-quality dark chocolate bars chopped into chunks, not chips. The difference in texture and flavor is honestly night and day.
- Impressive Without Stress : The crinkle tops happen naturally as the cookies bake. You don’t need any special techniques—just a little powdered sugar and a hot oven.
- Host’s Best Friend : These cookies look stunning on a dessert table, they travel well, and you can prep the dough days ahead. Perfect for when you’re hosting and need one less thing to worry about.
I’ve brought these to cookie exchanges, dinner parties, and even a casual Sunday brunch. Every time, someone asks for the recipe. That’s the kind of cookie you want in your back pocket—especially during the holiday season when everyone’s looking for that one thing that feels a little special.
What Ingredients You Will Need
This recipe uses simple, pantry-friendly ingredients, but a few specific choices make all the difference. I’ve tested substitutions so you don’t have to guess.
- Unsalted butter, softened (1 cup / 226g) – I use Kerrygold for the richness, but any good European-style butter works. Let it sit out for an hour before starting.
- Granulated sugar (1 ½ cups / 300g) – Regular white sugar gives these cookies their structure and that signature crinkle.
- Light brown sugar, packed (½ cup / 100g) – This is the secret to chewiness. Don’t skip it or substitute dark brown sugar, which can make the cookies too dense.
- Large eggs (2, room temperature) – Cold eggs can seize the butter mixture. Let them sit on the counter for 20 minutes.
- Pure vanilla extract (2 teaspoons) – I prefer Nielsen-Massey, but any pure vanilla works. Avoid imitation vanilla here—it makes a difference.
- Peppermint oil (½ teaspoon, not extract) – This is non-negotiable. Peppermint extract is water-based and can make the dough weird. Oil gives you clean, strong mint flavor without altering the texture. Find it in the baking aisle or online.
- All-purpose flour (2 ½ cups / 312g) – Spoon and level your flour. Scooping directly from the bag packs in too much and makes cookies dry.
- Unsweetened cocoa powder (¾ cup / 75g) – I use Dutch-process for a darker, smoother chocolate flavor. Natural cocoa works too, but the color won’t be as deep.
- Baking powder (2 teaspoons) – This gives the cookies their lift and helps create those beautiful cracks.
- Salt (½ teaspoon) – Fine sea salt is best. It balances the sweetness and enhances the chocolate.
- Dark chocolate, chopped (8 oz / 225g) – Buy a good-quality bar (70% cacao is my sweet spot) and chop it into uneven chunks. Ghirardelli and Guittard are reliable choices.
- Crushed peppermint candies (½ cup / 60g) – You can crush candy canes or buy pre-crushed peppermint. I like the texture of uneven pieces—some fine, some chunky.
- Powdered sugar (½ cup / 60g, for rolling) – This creates the crinkle effect. Sift it first to avoid clumps.
Equipment Needed
You don’t need a fancy kitchen to make these cookies, but a few tools make the process smoother:
- Stand mixer or hand mixer – A stand mixer with the paddle attachment is easiest, but a hand mixer works perfectly fine. You could even do this by hand with a wooden spoon if you’re feeling ambitious.
- Large mixing bowls – I use glass or stainless steel. Plastic can absorb odors, and you really don’t want your cookies tasting like last week’s garlic.
- Baking sheets – Two half-sheet pans (18×13 inches) are ideal. Avoid dark non-stick pans—they can cause the bottoms to burn before the centers set.
- Parchment paper or silicone baking mats – Parchment is cheaper and gives you crisper edges. Silicone mats work too, but the cookies might spread a little more.
- Cooling rack – Essential for getting that chewy texture. If cookies sit on the hot pan, they continue cooking and can become dry.
- Cookie scoop (1.5-tablespoon size) – Not required, but it gives you uniform cookies that bake evenly. I bought mine for $8 and it’s one of my best kitchen investments.
- Ziploc bag and rolling pin – For crushing peppermint candies. You can also use a food processor, but the bag method is more satisfying and gives you better control over the texture.
Preparation Method
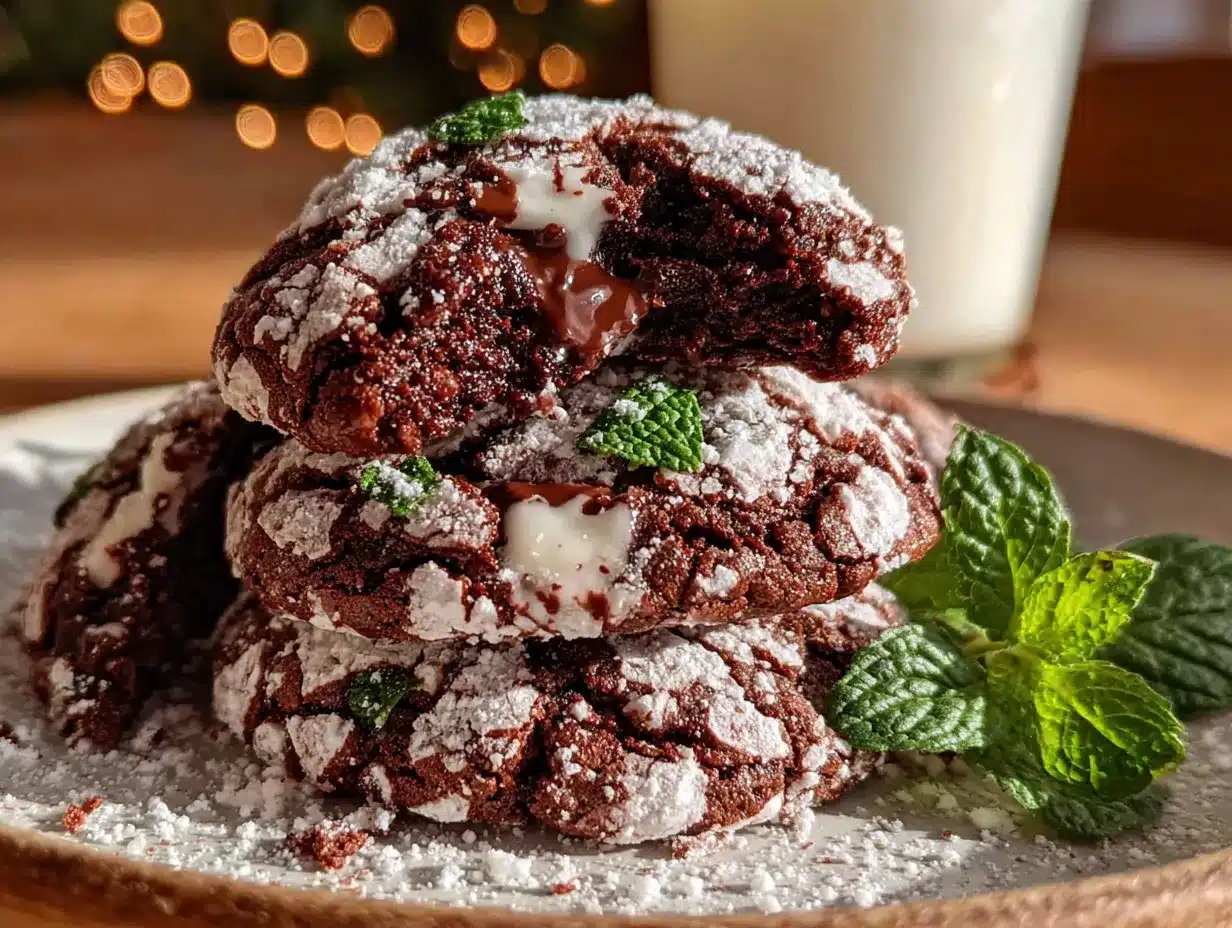
This recipe takes about 20 minutes of active prep, plus at least 2 hours of chilling. Don’t skip the chill time—it’s what gives these cookies their chewy texture and prevents them from spreading into flat discs.
- Cream the butter and sugars. In a large mixing bowl, beat the softened butter, granulated sugar, and brown sugar together on medium speed until light and fluffy, about 3-4 minutes. Scrape down the sides halfway through. The mixture should look pale and almost doubled in volume. If it looks greasy or separated, your butter was too soft.
- Add the wet ingredients. Beat in the eggs one at a time, mixing well after each addition. Add the vanilla extract and peppermint oil, then mix until just combined. The batter should look smooth and glossy at this point. If it looks curdled, your eggs were too cold—don’t worry, it’ll come together once you add the dry ingredients.
- Combine the dry ingredients. In a separate bowl, whisk together the flour, cocoa powder, baking powder, and salt. Make sure there are no lumps in the cocoa powder—I’ve learned this the hard way. Sift it if you’re feeling cautious.
- Mix the dough. Gradually add the dry ingredients to the wet mixture, mixing on low speed until just combined. Stop as soon as the flour disappears—overmixing develops gluten and makes cookies tough. Fold in the chopped dark chocolate and crushed peppermint candies with a spatula. The dough will be thick and slightly sticky.
- Chill the dough. Cover the bowl with plastic wrap and refrigerate for at least 2 hours, or up to 48 hours. Chilling firms up the butter, which prevents excessive spreading and deepens the flavor. I’ve baked cookies after 4 hours and after 24 hours—the longer chill gives a noticeably richer taste.
- Preheat and prepare. When you’re ready to bake, preheat your oven to 350°F (175°C). Line two baking sheets with parchment paper. Place the powdered sugar in a shallow bowl.
- Shape and coat. Using a cookie scoop or tablespoon, portion the dough into 1.5-tablespoon balls (about 25g each). Roll each ball between your palms until smooth. Drop the ball into the powdered sugar and roll to coat completely. The sugar layer should be thick and even—this is what creates the crinkle effect. Place the coated balls on the prepared baking sheets, spacing them 2 inches apart.
- Bake. Bake one sheet at a time for 10-12 minutes. The cookies should look puffed and crackled on top, with the edges set but the centers still slightly soft. They will look underdone in the middle—that’s what you want. Overbaking gives you dry, crunchy cookies instead of chewy ones.
- Cool properly. Let the cookies cool on the baking sheet for 5 minutes. This allows them to set without overcooking. Then transfer them to a wire rack to cool completely. The crinkle pattern will become more pronounced as they cool.
Cooking Tips & Techniques
I’ve made these cookies at least a dozen times, and I’ve learned a few things the hard way. Here’s what I wish someone had told me:
Don’t skip the peppermint oil. I tried using peppermint extract once because I ran out of oil. The cookies tasted faintly minty and had a weird, almost soapy aftertaste. The oil gives you that clean, cool finish without any bitterness. A little goes a long way—½ teaspoon is plenty for a strong mint presence.
Chill the dough overnight if you can. I know it’s tempting to rush, but the flavor really develops over time. The peppermint and chocolate meld together, and the cookies become more complex. I’ve done side-by-side taste tests with 2-hour chill vs. 24-hour chill, and the difference is noticeable. The longer-chilled cookies are also less likely to spread.
Watch your oven temperature. Every oven runs differently. My first batch burned on the bottom because I didn’t realize my oven runs 25 degrees hot. Use an oven thermometer if you have one. If the cookies are browning too quickly on the bottom, slide another baking sheet underneath to insulate them.
Crush peppermint candies strategically. Put them in a ziploc bag and pound with a rolling pin until you have a mix of fine powder and small chunks. The fine pieces melt into the dough, while the chunks give you those little bursts of mint. If you crush them too fine, you lose the texture. Too chunky, and the cookies become hard to bite into.
Work in batches. Don’t crowd the oven. Bake one sheet at a time and keep the remaining dough in the fridge between batches. If the dough gets too warm, the cookies will spread and lose their crinkle pattern.
Variations & Adaptations
These cookies are forgiving, and I’ve tried several twists over the years. Here are a few that actually worked:
- Gluten-Free Version : Substitute the all-purpose flour with a 1:1 gluten-free baking flour blend (I use Bob’s Red Mill). Add ¼ teaspoon xanthan gum if your blend doesn’t already include it. The texture will be slightly more delicate, but the flavor is spot-on.
- White Chocolate Peppermint : Swap the dark chocolate for white chocolate chunks. The sweetness pairs beautifully with the mint, and the cookies look extra festive. Just be careful—white chocolate can scorch easily, so chop it into larger pieces.
- Double Chocolate Mint : Add ½ cup mini chocolate chips to the dough along with the dark chocolate chunks. This gives you chocolate in every single bite. I did this for a cookie exchange last year and came home with an empty plate.
- Vegan Adaptation : Use vegan butter (I like Miyoko’s) and replace each egg with a flax egg (1 tablespoon ground flaxseed + 3 tablespoons water, let sit for 5 minutes). The cookies will be slightly less chewy but still delicious. Make sure your dark chocolate is dairy-free.
- Spiced Peppermint : Add ½ teaspoon cinnamon and ¼ teaspoon cayenne pepper to the dry ingredients. The warmth of the spices plays off the cool mint in a way that’s honestly addictive. I made this version for a winter party and people kept asking what the “secret ingredient” was.
Serving & Storage Suggestions
These cookies are best served at room temperature, ideally within a day or two of baking. The edges stay slightly crisp while the centers remain soft and chewy—that contrast is what makes them so satisfying.
For hosting : Arrange them on a large platter with a dusting of extra powdered sugar and a few whole candy canes for decoration. They pair beautifully with hot cocoa, spiced chai, or a strong cup of coffee. If you’re serving them after a meal, a small glass of cold milk is always a hit.
Storage : Keep the cookies in an airtight container at room temperature for up to 5 days. Place a slice of bread in the container to maintain softness—the cookies absorb the moisture from the bread. Replace the bread slice every other day.
Freezing : These cookies freeze beautifully. You can freeze the baked cookies for up to 3 months—just layer them between sheets of parchment paper in a freezer-safe container. Thaw at room temperature for about 30 minutes before serving. Alternatively, freeze the unbaked dough balls on a baking sheet, then transfer them to a ziploc bag. Bake directly from frozen, adding 2-3 minutes to the baking time.
Flavor development : Honestly, these cookies taste even better on day two. The peppermint flavor mellows and melds with the chocolate, creating a more balanced profile. If you can resist eating them all immediately, you’ll be rewarded.
Nutritional Information & Benefits
These are cookies, so let’s not pretend they’re health food. But a few of the ingredients do offer some redeeming qualities:
- Dark chocolate (70% cacao or higher) contains antioxidants called flavonoids, which can support heart health. It also has less sugar than milk chocolate.
- Peppermint has natural digestive properties and can help soothe an upset stomach—not that you’ll need it after one cookie.
- Cocoa powder provides magnesium and iron, though the amounts are small.
Estimated per cookie (based on 36 cookies) : 165 calories, 8g fat, 22g carbohydrates, 2g protein, 1g fiber, 14g sugar. These numbers will vary based on your specific ingredients and portion sizes.
Dietary considerations : This recipe contains gluten, dairy, and eggs. For gluten-free or vegan options, see the variations section above. The cookies are nut-free as written, but double-check your chocolate for cross-contamination if that’s a concern.
I’m not a nutritionist, and I don’t pretend to be one. These cookies are about joy, not macros. But if you’re looking for a slightly more balanced option, use dark chocolate with a higher cacao percentage and reduce the sugar by a quarter cup. The texture will be slightly different, but they’ll still be delicious.
Conclusion
These perfect chewy peppermint crinkle cookies with dark chocolate have become a staple in my kitchen for good reason. They’re impressive enough for holiday parties and cookie exchanges, but simple enough for a random Tuesday when you just need something sweet. The combination of cool peppermint and rich dark chocolate is timeless, and the crinkle tops make every batch feel special.
What I love most about this recipe is how adaptable it is. You can make it your own—add more chocolate, dial up the mint, or throw in some spices. The base is solid, and it’s meant to be played with. That’s the beauty of a good cookie recipe: it becomes yours the more you make it.
I’d love to hear how these turn out for you. Drop a comment below and let me know if you tried any variations, or tag me in your photos if you share them online. There’s something magical about seeing a recipe travel from my kitchen to yours. Happy baking, and don’t forget to save a few for yourself before they disappear!
Frequently Asked Questions
Can I use peppermint extract instead of peppermint oil?
You can, but the results won’t be the same. Peppermint extract is water-based and can alter the dough’s texture, plus the flavor is weaker. If you only have extract, use 1 teaspoon and expect a more subtle mint taste. The cookies might also spread a bit more.
Why didn’t my cookies crinkle?
This usually happens for one of three reasons: the dough wasn’t chilled enough, the powdered sugar coating was too thin, or the oven temperature was too low. Make sure you’re rolling the dough balls generously in powdered sugar—the thick coating is what creates those cracks as the cookies expand.
How do I crush peppermint candies without making a mess?
Put the candies in a sturdy ziploc bag, seal it, and wrap it in a kitchen towel. Then pound with a rolling pin or heavy skillet. The towel catches any sharp pieces and prevents the bag from tearing. You can also use a food processor, but pulse gently—you want a mix of textures, not dust.
Can I make the dough ahead of time?
Absolutely. The dough can be refrigerated for up to 48 hours before baking. You can also freeze the shaped dough balls for up to 3 months. Just bake them directly from frozen, adding 2-3 minutes to the baking time. This is my favorite trick for holiday hosting—I always have a batch ready to go.
Why are my cookies spreading too much?
Several things could be at play: the butter was too soft, the dough wasn’t chilled enough, or your baking sheet was too warm. Make sure you’re using cool baking sheets—run them under cold water and dry them between batches if needed. Also, check that your baking powder is fresh; expired leavening agents lose their power.
Pin This Recipe!

Perfect Chewy Peppermint Crinkle Cookies with Dark Chocolate

These perfect chewy peppermint crinkle cookies with dark chocolate are impressive enough for holiday parties and cookie exchanges, but simple enough for a random Tuesday when you just need something sweet. The combination of cool peppermint and rich dark chocolate is timeless, and the crinkle tops make every batch feel special.
- Prep Time: 20 minutes
- Cook Time: 12 minutes
- Total Time: 2 hours 32 minutes (includes chilling)
- Yield: 36 cookies 1x
- Category: Dessert
- Cuisine: American
Ingredients
- 1 cup (226g) unsalted butter, softened
- 1 ½ cups (300g) granulated sugar
- ½ cup (100g) light brown sugar, packed
- 2 large eggs, room temperature
- 2 teaspoons pure vanilla extract
- ½ teaspoon peppermint oil (not extract)
- 2 ½ cups (312g) all-purpose flour
- ¾ cup (75g) unsweetened cocoa powder (Dutch-process preferred)
- 2 teaspoons baking powder
- ½ teaspoon fine sea salt
- 8 oz (225g) dark chocolate (70% cacao), chopped
- ½ cup (60g) crushed peppermint candies
- ½ cup (60g) powdered sugar, for rolling
Instructions
- Cream the butter and sugars: In a large mixing bowl, beat the softened butter, granulated sugar, and brown sugar together on medium speed until light and fluffy, about 3-4 minutes. Scrape down the sides halfway through.
- Add the wet ingredients: Beat in the eggs one at a time, mixing well after each addition. Add the vanilla extract and peppermint oil, then mix until just combined.
- Combine the dry ingredients: In a separate bowl, whisk together the flour, cocoa powder, baking powder, and salt until no lumps remain.
- Mix the dough: Gradually add the dry ingredients to the wet mixture, mixing on low speed until just combined. Fold in the chopped dark chocolate and crushed peppermint candies with a spatula.
- Chill the dough: Cover the bowl with plastic wrap and refrigerate for at least 2 hours, or up to 48 hours.
- Preheat and prepare: When ready to bake, preheat oven to 350°F (175°C). Line two baking sheets with parchment paper. Place powdered sugar in a shallow bowl.
- Shape and coat: Using a cookie scoop or tablespoon, portion dough into 1.5-tablespoon balls (about 25g each). Roll each ball between palms until smooth, then roll in powdered sugar to coat completely.
- Bake: Place coated balls on prepared baking sheets, spacing 2 inches apart. Bake one sheet at a time for 10-12 minutes. Cookies should look puffed and crackled on top, with edges set but centers still soft.
- Cool properly: Let cookies cool on baking sheet for 5 minutes, then transfer to a wire rack to cool completely.
Notes
Don’t skip the chill time—it’s what gives these cookies their chewy texture and prevents spreading. For best flavor, chill dough overnight. Use peppermint oil, not extract, for clean mint flavor without altering texture. Crush peppermint candies to a mix of fine powder and small chunks for best texture. Store in an airtight container at room temperature for up to 5 days; freeze for up to 3 months.
Nutrition
- Serving Size: 1 cookie
- Calories: 165
- Sugar: 14
- Sodium: 85
- Fat: 8
- Saturated Fat: 4.5
- Carbohydrates: 22
- Fiber: 1
- Protein: 2
Keywords: peppermint crinkle cookies, dark chocolate cookies, chewy cookies, holiday cookies, peppermint cookies, chocolate crinkle cookies


