Love this? Save it for later!
Share the inspiration with your friends
My neighbor, Clara, wasn’t trying to impress anyone. I’d stopped by her porch to grab a package that got delivered to her house by mistake, and this warm, spicy-sweet smell hit me before I even made it up the steps. She just shrugged when I asked what she was making. “Oh, just throwing something together. It’s nothing.” She handed me a tiny glass jar filled with this gorgeous layered dessert—creamy, pale orange on top of a dark, crumbly base—and told me to try it. That first bite stopped me mid-sentence. I mean, honestly, I forgot what I was even saying. The texture was like cloud-soft cheesecake, but it had this deep, almost cozy warmth from the pumpkin and spices. And the crunch on the bottom? Pure gingersnap magic. She acted like it was no big deal, but I stood there on her porch eating that little cup in about three seconds flat, and I knew I had to figure out how to make it myself. Maybe you’ve been there—you taste something so unexpectedly perfect that you can’t stop thinking about it for days. That’s exactly what happened to me. So I went home, bought my own gingersnaps, and started testing. This recipe is the result of that porch moment. It’s the kind of dessert that feels like a hug in a cup, and honestly, it’s so easy you’ll wonder why you ever bothered turning on the oven.
Why You’ll Love This Recipe
Let me tell you, I’ve tested this recipe about six times to get it just right. And by “just right,” I mean that perfect balance where the pumpkin isn’t overpowering, the cream cheese tang is there but not too sharp, and the gingersnap crumble stays crunchy even after a day in the fridge. Here’s what makes these cheesecake cups stand out from every other pumpkin dessert you’ve seen:
- No Oven Required: Seriously, zero baking. Which means you can make these even when it’s 90 degrees outside or when your oven is full of Thanksgiving sides.
- Simple Ingredients: You probably already have most of these in your pantry. No fancy extracts or hard-to-find spices.
- Perfect for Fall Gatherings: These are made for cozy nights, Friendsgiving dinners, or even just a quiet Tuesday when you need a little comfort.
- Crowd-Pleaser: I brought these to a potluck last week, and three people asked for the recipe before I even sat down. Kids love them. Adults love them. Even my dad, who claims he doesn’t like pumpkin, ate two.
- Unbelievably Creamy: The secret is letting the cream cheese soften completely and using heavy cream instead of milk. Trust me on this one.
What makes this version different from all those other no-bake pumpkin recipes out there? It’s the texture. So many pumpkin cheesecake cups end up grainy or too dense. But I figured out that whipping the cream cheese and sugar first—before adding anything else—creates this silky, airy base that feels almost mousse-like. And the gingersnap crumble isn’t just crumbs; it’s buttery, spiced, and pressed firmly so every bite has that satisfying crunch. This isn’t just another pumpkin dessert. It’s the one you’ll make every single fall from now on.
What Ingredients You Will Need
This recipe uses simple, wholesome ingredients that come together to create something truly special. Most of these are pantry staples, especially if you’re already in full fall baking mode. Let me walk you through each one so you know exactly what to look for.
For the Gingersnap Crumble Base
- Gingersnap cookies – 1 ½ cups, finely crushed (about 20-25 cookies). I prefer Nabisco Ginger Snaps for their bold spice, but any brand works. You want cookies with actual ginger kick, not just sweet cookies with a hint of spice.
- Unsalted butter – ¼ cup (4 tablespoons), melted. Salted butter works too—just skip the pinch of salt later.
- Brown sugar – 1 tablespoon, packed. This adds a little extra molasses depth that pairs beautifully with the ginger.
- Pinch of salt – Only if using unsalted butter.
For the Pumpkin Cheesecake Filling
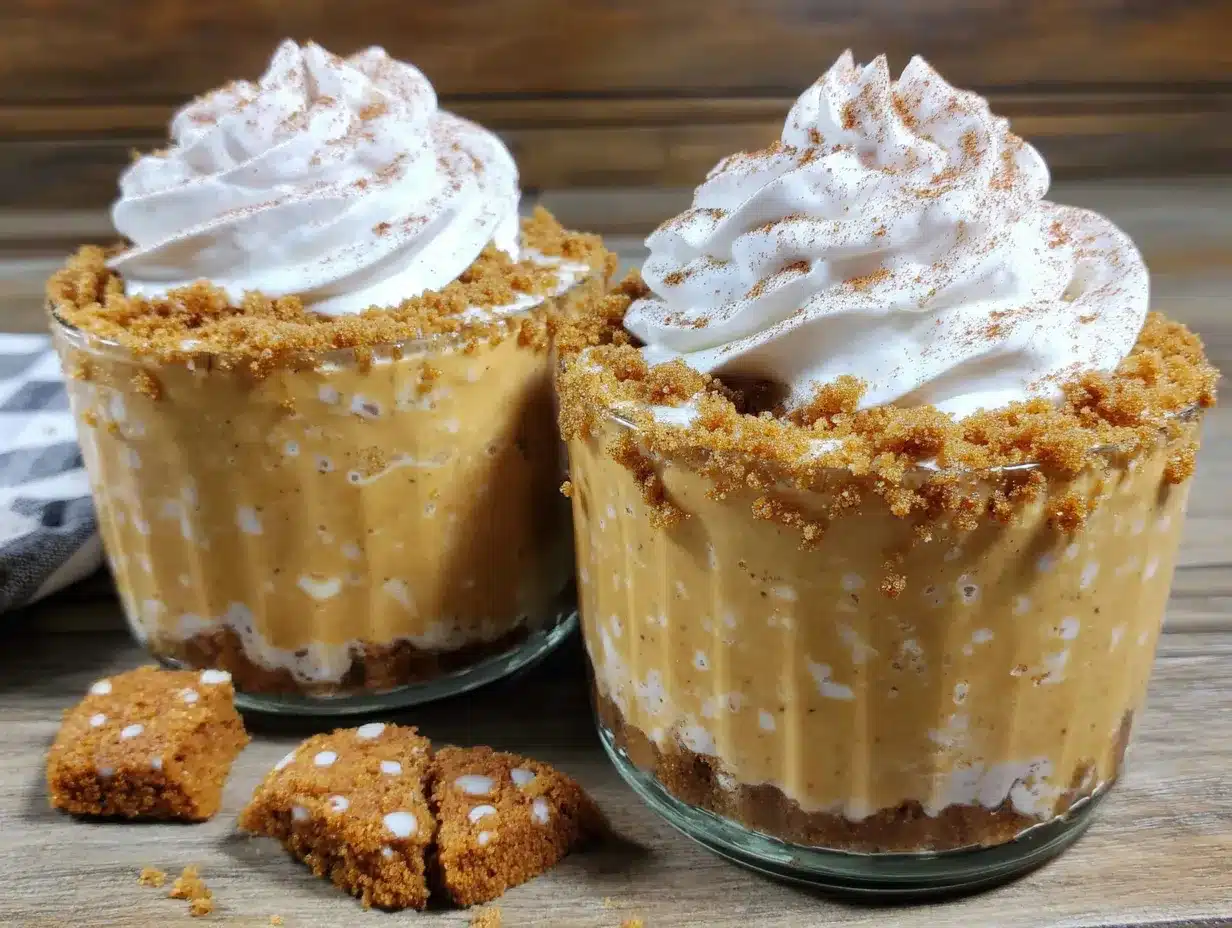
- Cream cheese – 8 ounces (one block), softened to room temperature. This is critical. Cold cream cheese will give you lumpy filling, so let it sit out for at least 30 minutes. I recommend Philadelphia for the creamiest texture.
- Powdered sugar – ½ cup, sifted if you have the patience. It dissolves more smoothly than granulated sugar and keeps the filling silky.
- Pumpkin puree – ½ cup. Make sure it’s 100% pure pumpkin, not pumpkin pie filling. The pie filling has added sugar and spices that will throw off the balance.
- Heavy cream – ½ cup, cold. This gets whipped separately and folded in for that light, airy texture. Don’t substitute with milk or half-and-half—you need the fat content for stability.
- Vanilla extract – 1 teaspoon. Pure vanilla makes a difference here, but imitation works in a pinch.
- Pumpkin pie spice – 1 teaspoon. If you don’t have it, mix ½ teaspoon cinnamon, ¼ teaspoon ginger, ⅛ teaspoon nutmeg, and a pinch of cloves.
- Cinnamon – ½ teaspoon, for extra warmth.
For the Topping (Optional but Recommended)
- Whipped cream – For piping on top. Homemade is lovely, but store-bought works too.
- Extra crushed gingersnaps – For sprinkling.
- Pumpkin pie spice dusting – Just a little pinch on top looks beautiful.
Substitution note: If you need a dairy-free version, use dairy-free cream cheese (like Kite Hill or Violife) and coconut cream instead of heavy cream. The texture will be slightly different but still delicious. For a gluten-free option, use gluten-free gingersnap cookies—Kinnikinnick makes a good one.
Equipment Needed
You don’t need anything fancy for this recipe, which is part of why I love it. Here’s what you’ll want to have on hand:
- Mixing bowls – At least two medium-sized bowls. One for the crumble, one for the filling.
- Hand mixer or stand mixer – You can do this by hand with a whisk, but your arm will thank you for using a mixer. I use my KitchenAid hand mixer and it works perfectly.
- Food processor or zip-top bag – For crushing the gingersnaps. A food processor gives you the finest crumbs, but a rolling pin and a zip-top bag work just as well. I’ve done both, honestly.
- Small glasses or jars – You’ll need about 6 to 8 small serving cups. I use 4-ounce mason jars because they’re cute and portable. Ramekins, small glasses, or even wine glasses work too.
- Measuring cups and spoons – Standard set for accuracy.
- Spatula – A rubber spatula for scraping every last bit of filling.
Budget tip: Don’t have a hand mixer? You can whip the heavy cream by hand with a whisk—it just takes about 5 minutes of vigorous arm work. I’ve done it before when my mixer was in the dishwasher, and it’s totally doable. Just make sure the cream is very cold.
Preparation Method
Alright, let’s get to the fun part. This recipe comes together in about 20 minutes of active time, then needs at least 2 hours to chill. Trust me, the wait is worth it.
Step 1: Crush the Gingersnaps
Place your gingersnap cookies in a food processor and pulse until you have fine crumbs. If you’re using the zip-top bag method, put the cookies in a sturdy bag, seal it, and go at it with a rolling pin until no large pieces remain. You want a consistent crumb texture—not too fine like flour, but not chunky either. Measure out 1 ½ cups of crumbs.
Step 2: Make the Crumble Base
In a medium bowl, combine the gingersnap crumbs, melted butter, brown sugar, and a pinch of salt. Stir with a fork until every crumb is coated and the mixture looks like wet sand. It should hold together when you squeeze it in your fist. Divide the mixture evenly among your serving cups—about 2 to 3 tablespoons per cup depending on size. Press it down firmly with the back of a spoon or the bottom of a small glass. You want a compact, even layer. Pop these in the fridge while you make the filling.
Step 3: Whip the Cream Cheese Base
In a large mixing bowl, beat the softened cream cheese with an electric mixer on medium speed until smooth and fluffy—about 2 minutes. Scrape down the sides and the bottom of the bowl with a spatula. Add the powdered sugar and beat again until fully incorporated, another minute. You want no lumps at all. This is where most people mess up, so take your time.
Step 4: Add the Pumpkin and Spices
Add the pumpkin puree, vanilla extract, pumpkin pie spice, and cinnamon to the cream cheese mixture. Beat on low speed until combined, then increase to medium and beat for another minute until the mixture is smooth and uniform. It should be a beautiful pale orange color. Set this aside for a moment.
Step 5: Whip the Heavy Cream
In a separate clean bowl (make sure it’s very cold—pop it in the freezer for 5 minutes if you have time), pour the cold heavy cream. Beat on medium-high speed until stiff peaks form. This takes about 3-4 minutes with a hand mixer. You’ll know it’s ready when you lift the beaters and the cream stands up in firm peaks that don’t droop. Be careful not to over-whip, or you’ll end up with butter.
Step 6: Fold Everything Together
Here’s the most important step. Take about a third of the whipped cream and gently fold it into the pumpkin-cream cheese mixture using a rubber spatula. Fold in a gentle, sweeping motion—cut through the center, scrape along the bottom, and fold over the top. Once that’s mostly incorporated, add the remaining whipped cream and fold until no white streaks remain. The mixture should be light, airy, and perfectly uniform. Don’t overmix, or you’ll deflate all that air you just whipped in.
Step 7: Assemble the Cups
Remove the cups with the crumble base from the fridge. Spoon or pipe the pumpkin cheesecake filling over the crumble layer, filling each cup almost to the top. Smooth the tops with the back of a spoon if needed. If you want to get fancy, you can use a piping bag with a star tip for a pretty swirl effect.
Step 8: Chill
Cover each cup with plastic wrap or a lid and refrigerate for at least 2 hours, ideally 4 hours or overnight. This allows the filling to set properly. I know it’s tempting to dig in right away, but the texture really does improve with chilling. The flavors meld together, and the filling firms up to that perfect cheesecake consistency.
Step 9: Add Toppings and Serve
Just before serving, add a dollop of whipped cream on top, sprinkle with extra crushed gingersnaps, and dust with a pinch of pumpkin pie spice. Serve cold straight from the fridge.
Cooking Tips & Techniques
I’ve made this recipe enough times to know where things can go wrong. Here are my hard-earned tips so you can avoid the same mistakes I made.
Room temperature cream cheese is non-negotiable. I know you’re in a hurry. I’ve been there too. But cold cream cheese will give you lumpy filling that no amount of mixing can fix. Take it out of the fridge 30-40 minutes before you start. If you forget, unwrap it and microwave it in 10-second bursts until it’s soft but not hot.
Don’t skip the heavy cream whipping. Some recipes use Cool Whip or stabilized whipped cream, but I find that freshly whipped heavy cream gives the lightest, most luxurious texture. Make sure your bowl and beaters are cold for best results. I usually pop my metal bowl in the freezer for 10 minutes before whipping.
Press the crumb base firmly. This is what keeps your layers distinct. If you don’t press hard enough, the crumble will mix into the filling and you’ll lose that beautiful layered effect. Use the bottom of a shot glass or a small measuring cup to really compact it.
Taste as you go. Before you fold in the whipped cream, taste the pumpkin-cream cheese mixture. Does it need more spice? A little extra vanilla? Adjust now, because once the cream is folded in, you can’t mix it too much. I once forgot to add the cinnamon and only realized after everything was assembled. Lesson learned.
Make ahead tip: These cups actually taste better after a day in the fridge. The flavors deepen and the texture sets perfectly. So don’t stress about making them the same day you plan to serve them. They’re actually ideal for prepping a day ahead.
Variations & Adaptations
One of the best things about this recipe is how easy it is to change up. Here are some variations I’ve tried and loved:
Vegan Version
Use dairy-free cream cheese (I like Kite Hill brand) and replace the heavy cream with full-fat coconut cream. Chill the can of coconut cream overnight, then scoop out only the solid white part for whipping. The texture is slightly different but still incredibly creamy. Use vegan butter or coconut oil for the crumble base.
Chocolate Pumpkin Twist
Add 2 tablespoons of cocoa powder to the crumble mixture for a chocolate-gingersnap base that’s absolutely divine. You can also drizzle melted dark chocolate over the top before serving. I tried this last Halloween and it was a huge hit.
Maple Pecan Version
Replace the brown sugar in the crumble with maple sugar, and add ¼ cup of finely chopped pecans to the crumble mixture. Drizzle a little maple syrup over the top before serving. The nutty crunch with the pumpkin is a match made in heaven.
Lower Sugar Option
Use a sugar substitute like Swerve or Monk Fruit in place of powdered sugar. The texture will be slightly less creamy but still very good. You can also reduce the sugar in the crumble to just a teaspoon.
Individual Pumpkin Pie Cups
Swap the gingersnaps for graham crackers and add an extra ½ teaspoon of cinnamon. This gives you more of a classic pumpkin pie flavor profile. I did this for a friend who doesn’t love ginger, and she ate three.
Serving & Storage Suggestions
These cheesecake cups are best served cold, straight from the fridge. The contrast between the cool, creamy filling and the crunchy crumble base is what makes them so satisfying. I like to serve them in clear glass cups so you can see the beautiful layers.
What to serve with them: These are rich enough to stand alone, but they pair beautifully with a cup of hot coffee, chai tea, or even a glass of cold milk. For a full fall dessert spread, serve them alongside apple cider donuts or a warm apple crisp.
Storage: Cover each cup tightly with plastic wrap or a lid and store in the refrigerator for up to 4 days. The crumble will soften slightly over time, but the flavor actually improves. I actually prefer them on day two—the spices meld together so beautifully.
Freezing: You can freeze these cups for up to 2 months. Wrap each cup individually in plastic wrap and then foil. Thaw in the refrigerator overnight before serving. The texture will be slightly softer after freezing, but still delicious. I wouldn’t recommend freezing them with the whipped cream topping—add that fresh after thawing.
Reheating: Don’t. These are meant to be served cold. If you want a warm pumpkin dessert, try a baked version instead.
Nutritional Information & Benefits
Here’s an approximate nutritional breakdown per serving (based on 6 servings, without optional whipped cream topping):
| Nutrient | Amount Per Serving |
|---|---|
| Calories | 320 |
| Total Fat | 22g |
| Saturated Fat | 13g |
| Cholesterol | 65mg |
| Sodium | 210mg |
| Total Carbohydrates | 28g |
| Dietary Fiber | 2g |
| Sugars | 18g |
| Protein | 4g |
| Vitamin A | 90% DV |
| Calcium | 6% DV |
Pumpkin is packed with vitamin A, which is great for eye health and immune function. It’s also a good source of fiber, which helps with digestion. The cream cheese and heavy cream add calcium and protein, though this is definitely a treat rather than a health food. I look at it this way: it’s made with real ingredients, no artificial flavors or preservatives, and it satisfies that dessert craving in a portion-controlled cup. That’s a win in my book.
Allergen note: This recipe contains dairy and gluten (from the gingersnaps). For dairy-free and gluten-free options, see the variations section above.
Conclusion
So there you have it—my take on those magical little cups I had on Clara’s porch. These no-bake pumpkin cheesecake cups with gingersnap crumble are everything I want in a fall dessert: easy to make, incredibly satisfying, and somehow both simple and impressive at the same time. They’re the kind of recipe you’ll pull out for Thanksgiving, for potlucks, for those cozy nights when you just need something sweet without turning on the oven.
I really hope you try these. And when you do, don’t be afraid to make them your own. Add more spice if you like things bold. Swap the gingersnaps for graham crackers. Top them with candied pecans or a drizzle of caramel. The beauty of a simple recipe like this is that it’s a starting point for your own creativity.
If you make these, I’d love to hear about it. Drop a comment below and let me know how they turned out—or better yet, tag me in your photos. There’s something about seeing other people enjoying a recipe that just makes my day. Happy fall baking, friends. Or should I say, happy no-baking.
Frequently Asked Questions
Can I use pumpkin pie filling instead of pumpkin puree?
I wouldn’t recommend it. Pumpkin pie filling already has sugar and spices added, which will make your filling too sweet and throw off the spice balance. Stick with 100% pure pumpkin puree for the best results. If you only have pie filling, reduce the sugar in the recipe by half and skip the added pumpkin pie spice.
How long do these need to chill before serving?
At least 2 hours, but 4 hours is better. Overnight is ideal. The chilling time allows the filling to set properly so you get that clean, firm cheesecake texture instead of a runny pudding consistency. I know it’s hard to wait, but trust me on this one.
Can I make these in a large dish instead of individual cups?
Absolutely. Press the crumble into the bottom of an 8×8 inch baking dish, spread the filling on top, and chill. Cut into squares to serve. Just keep in mind that the crumble won’t be as crunchy because there’s less surface area exposed to the air. You can also make this in a springform pan for a more traditional cheesecake look.
Why is my filling lumpy?
This usually happens when the cream cheese isn’t soft enough before mixing. Next time, let it sit at room temperature for at least 30 minutes. If you’re in a rush, cut the cream cheese into small cubes and microwave for 10-15 seconds. Also, make sure you’re beating the cream cheese alone first before adding any other ingredients.
Can I freeze these for later?
Yes! These freeze beautifully for up to 2 months. Wrap each cup individually in plastic wrap and then foil. Thaw in the refrigerator overnight before serving. Add the whipped cream topping after thawing, not before. The texture will be slightly softer than fresh, but still delicious.
Pin This Recipe!
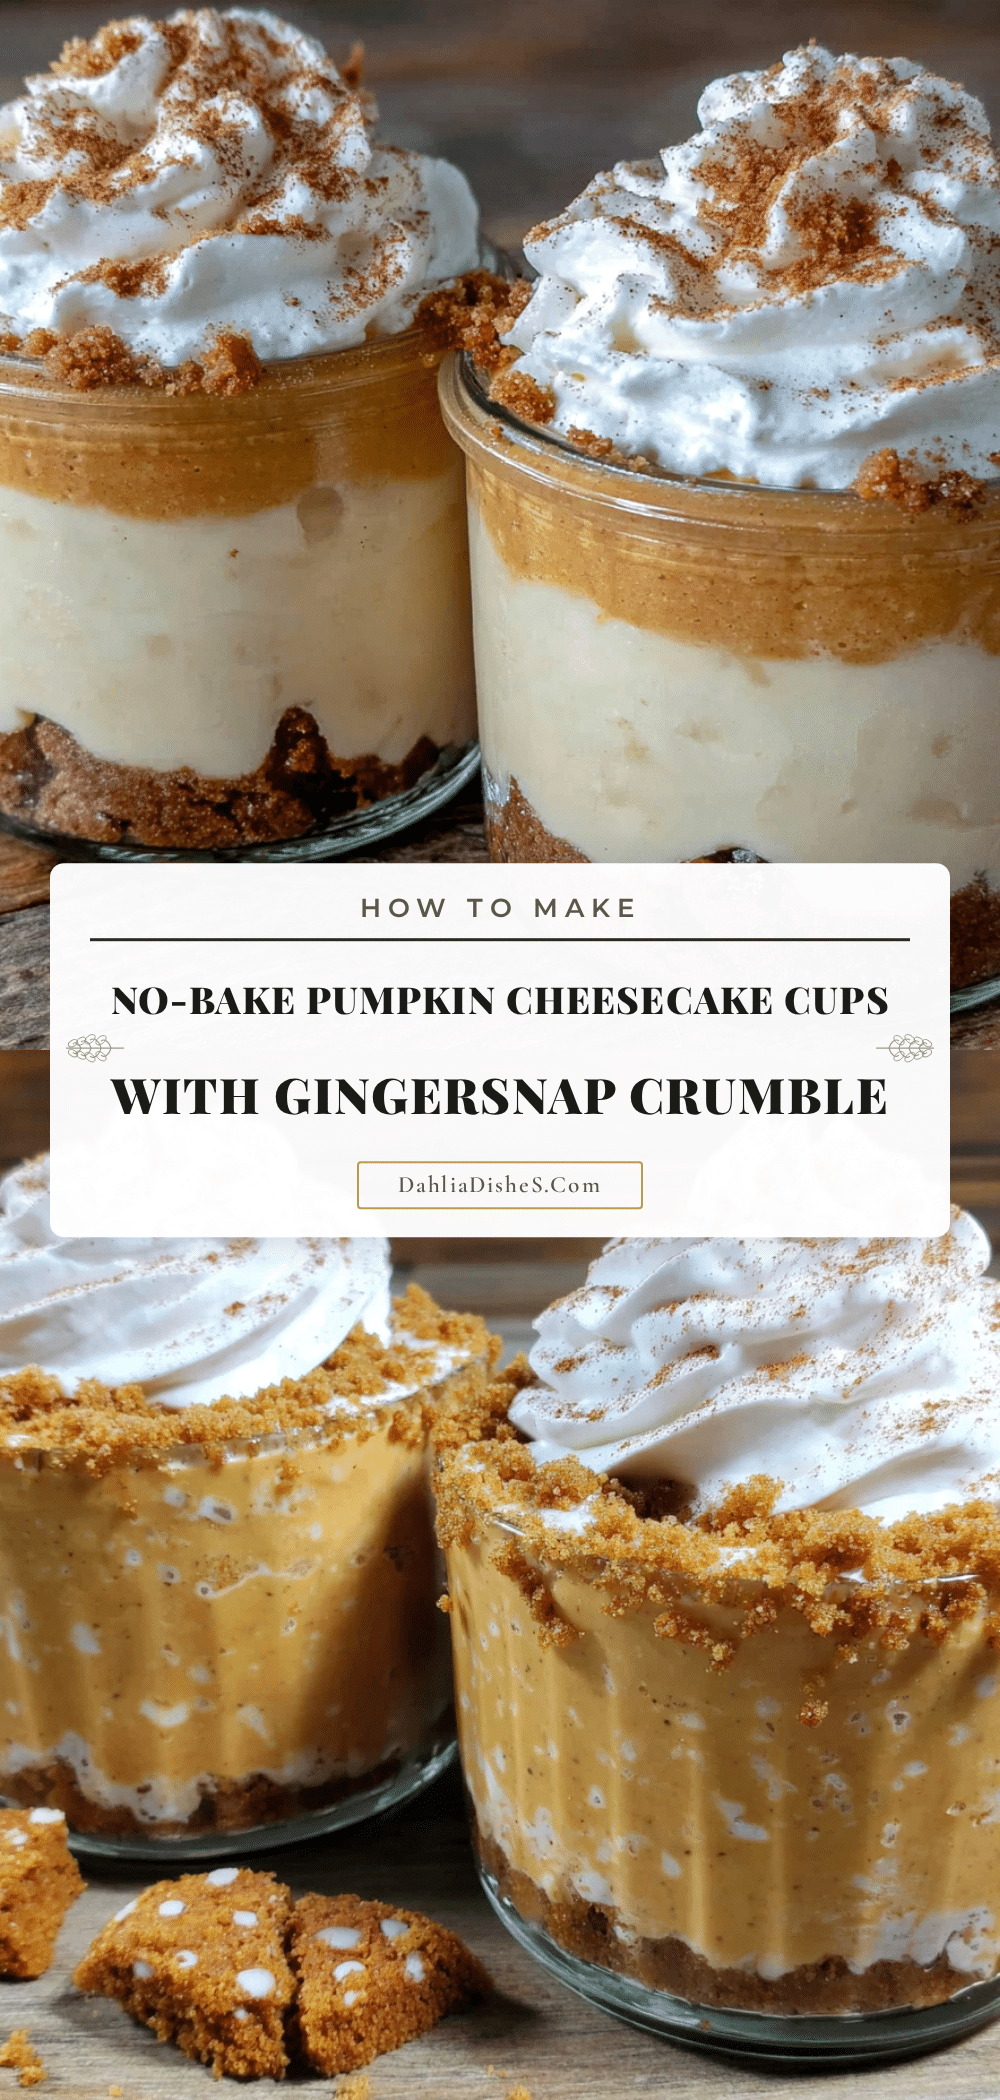
Cozy No-Bake Pumpkin Cheesecake Cups with Gingersnap Crumble
These no-bake pumpkin cheesecake cups feature a creamy, spiced pumpkin filling over a crunchy gingersnap crumble base. Perfect for fall gatherings, they require no oven and come together in just 20 minutes of active time.
- Prep Time: 20 minutes
- Cook Time: 0 minutes
- Total Time: 2 hours 20 minutes (includes chilling)
- Yield: 6-8 servings 1x
- Category: Dessert
- Cuisine: American
Ingredients
- 1 ½ cups finely crushed gingersnap cookies (about 20–25 cookies)
- ¼ cup unsalted butter, melted
- 1 tablespoon packed brown sugar
- Pinch of salt (if using unsalted butter)
- 8 ounces cream cheese, softened to room temperature
- ½ cup powdered sugar, sifted
- ½ cup 100% pure pumpkin puree
- ½ cup cold heavy cream
- 1 teaspoon vanilla extract
- 1 teaspoon pumpkin pie spice
- ½ teaspoon cinnamon
- Whipped cream for topping (optional)
- Extra crushed gingersnaps for topping (optional)
- Pumpkin pie spice dusting for topping (optional)
Instructions
- Crush the gingersnap cookies in a food processor or zip-top bag until fine crumbs form. Measure out 1 ½ cups.
- In a medium bowl, combine the gingersnap crumbs, melted butter, brown sugar, and a pinch of salt. Stir until the mixture resembles wet sand. Divide evenly among 6-8 serving cups (about 2-3 tablespoons per cup) and press firmly into an even layer. Refrigerate while making the filling.
- In a large bowl, beat the softened cream cheese with an electric mixer on medium speed until smooth and fluffy, about 2 minutes. Add the powdered sugar and beat until fully incorporated, about 1 minute.
- Add the pumpkin puree, vanilla extract, pumpkin pie spice, and cinnamon to the cream cheese mixture. Beat on low until combined, then increase to medium and beat for 1 minute until smooth.
- In a separate cold bowl, beat the cold heavy cream on medium-high speed until stiff peaks form, about 3-4 minutes.
- Gently fold about one-third of the whipped cream into the pumpkin-cream cheese mixture using a rubber spatula. Fold in the remaining whipped cream until no white streaks remain.
- Remove the cups with the crumble base from the fridge. Spoon or pipe the pumpkin cheesecake filling over the crumble layer, filling each cup almost to the top. Smooth the tops if needed.
- Cover each cup with plastic wrap or a lid and refrigerate for at least 2 hours, ideally 4 hours or overnight.
- Just before serving, top with whipped cream, extra crushed gingersnaps, and a dusting of pumpkin pie spice. Serve cold.
Notes
Room temperature cream cheese is essential for a smooth filling. For best texture, chill at least 4 hours or overnight. The cups can be stored in the refrigerator for up to 4 days or frozen for up to 2 months (add fresh whipped cream after thawing).
Nutrition
- Serving Size: 1 cup
- Calories: 320
- Sugar: 18
- Sodium: 210
- Fat: 22
- Saturated Fat: 13
- Carbohydrates: 28
- Fiber: 2
- Protein: 4
Keywords: no-bake pumpkin cheesecake, pumpkin dessert, fall dessert, gingersnap crumble, easy cheesecake cups


