Love this? Save it for later!
Share the inspiration with your friends
My mom swore she hated cream cheese desserts. For as long as I could remember, she’d wave a hand at any cheesecake or no-bake pie I brought to a family gathering. “Too heavy,” she’d say. “They just sit in my stomach.” I believed her, honestly. I stopped even offering. Then last Christmas, I made this Perfect Cherries in the Snow Cream Cheese Dessert just for myself—a little something sweet to nibble on while everyone else devoured the triple-chocolate cake she’d requested. I set it on the counter, covered in plastic wrap, and went to take a shower. When I came back, I caught her. She was standing at the counter with a spoon, eating it straight from the dish. “This doesn’t count,” she mumbled, not even looking up. “It’s not a dessert. It’s… snow.” And that, my friends, is how a lifelong cream cheese hater became the biggest fan of this ridiculously simple, creamy, and dreamy no-bake treat. Maybe you’ve got a skeptic in your life too.
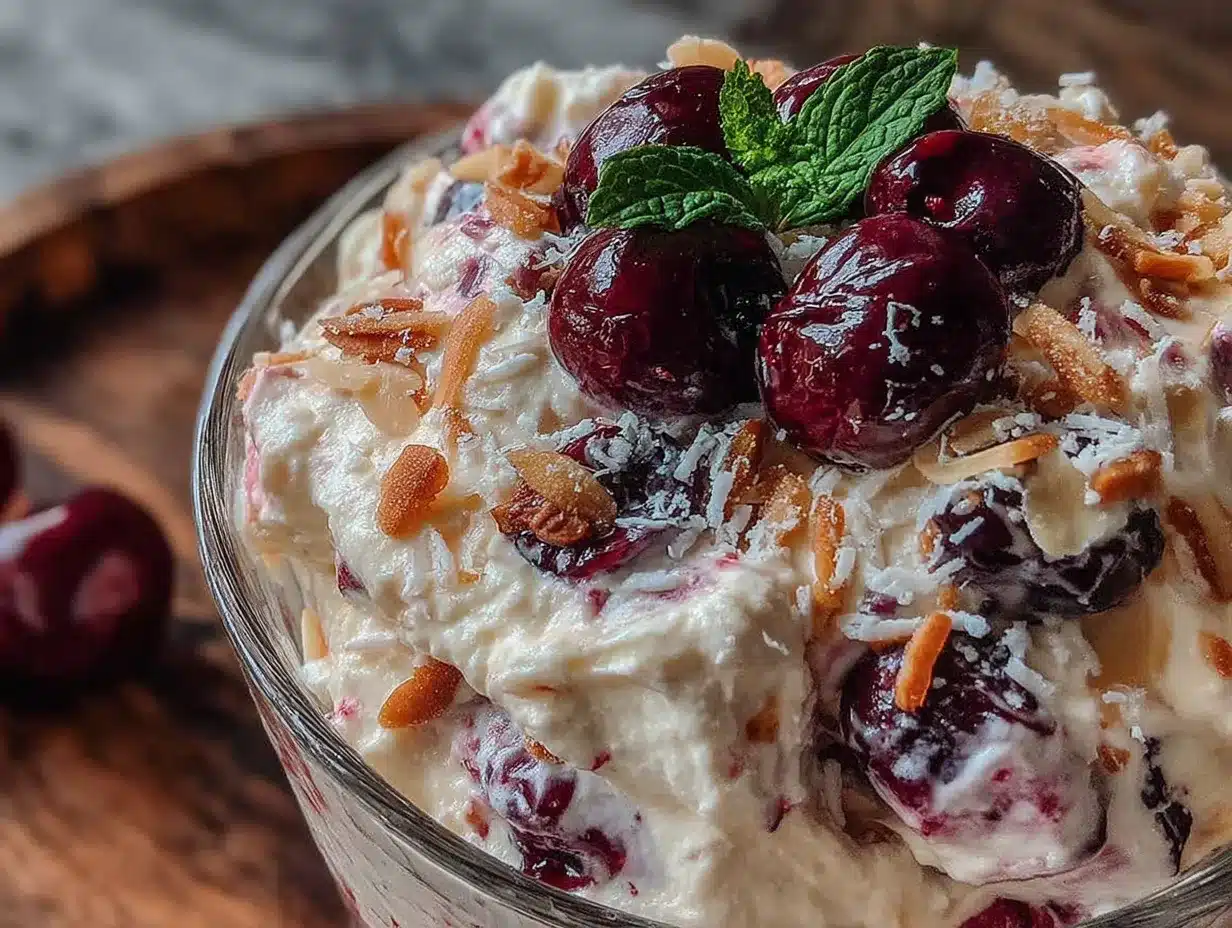
This Perfect Cherries in the Snow Cream Cheese Dessert is the kind of recipe that feels almost too easy to be this good. It’s a luscious, cloud-like cream cheese and whipped cream layer, studded with sweet cherries, all nestled on a buttery graham cracker crust. It’s light, it’s airy, and it has just the right amount of tang from the cream cheese to balance the sweet cherry topping. I mean, the name alone makes you smile, right? It looks like a winter wonderland on a plate, but it’s so simple to throw together that I’ve been making it all year round. It’s become my secret weapon for potlucks, family dinners, and those days when I just need a dessert that feels special without any oven time.
Why You’ll Love This Recipe
After testing this recipe more times than I care to admit (and using my mom as a very enthusiastic taste-tester), I can tell you exactly why this one is a keeper. It’s not just another no-bake dessert—it’s the one you’ll come back to again and again.
- No Oven Required: This is a true no-bake dessert. Perfect for hot summer days or when you just don’t want to heat up the kitchen. It comes together in about 20 minutes of active prep time.
- Simple, Everyday Ingredients: You likely have most of these ingredients in your kitchen right now. Cream cheese, heavy cream, powdered sugar, vanilla, and canned cherry pie filling. No fancy grocery store trips needed.
- Perfect for Any Occasion: This dessert is a chameleon. It looks elegant enough for a holiday table (think Christmas or Valentine’s Day) but is simple enough for a casual Tuesday night treat. It’s always a crowd-pleaser at potlucks and barbecues.
- Unbelievably Light and Creamy: The texture is what truly sets this apart. It’s not a dense, heavy cheesecake. It’s light, airy, and melts in your mouth like a sweet, creamy cloud. The “snow” texture is real!
- Make-Ahead Friendly: This dessert actually gets better after a few hours in the fridge. You can make it a day ahead, which is a lifesaver when you’re entertaining.
What makes this Perfect Cherries in the Snow Cream Cheese Dessert different from other versions is the technique. I whip the heavy cream separately before folding it into the cream cheese mixture. This extra step creates that incredibly light, mousse-like texture that is the hallmark of a truly great “snow” dessert. It’s a small detail, but it makes all the difference between a good dessert and a great one that has people closing their eyes after the first bite.
What Ingredients You Will Need
This recipe uses simple, wholesome ingredients to deliver a dessert that tastes far more complex than its ingredient list suggests. The magic is in how they come together.
Here’s everything you need for the crust, the creamy snow layer, and the cherry topping.
For the Graham Cracker Crust
- 1 ½ cups graham cracker crumbs (about 12 full sheets, crushed finely) – You can buy pre-crushed crumbs or make your own by pulsing graham crackers in a food processor. I find the homemade crumbs give a better texture.
- ⅓ cup granulated sugar – This adds just a touch of sweetness to the buttery crust.
- 6 tablespoons unsalted butter, melted – Use real butter here for the best flavor. Salted butter will work in a pinch, just reduce the added salt in the recipe if you’re sensitive.
- Pinch of salt – This balances the sweetness and enhances the buttery flavor.
For the Cream Cheese Snow Layer
- 8 ounces full-fat cream cheese, softened to room temperature – This is non-negotiable for a smooth, creamy texture. I recommend Philadelphia brand for the most consistent results. Let it sit on the counter for at least 30 minutes before you start.
- ½ cup powdered sugar – Powdered sugar dissolves seamlessly into the cream cheese, preventing any gritty texture.
- 1 teaspoon vanilla extract – Pure vanilla extract adds a warm, rich flavor. Imitation vanilla will work, but the flavor won’t be as deep.
- 1 ½ cups heavy whipping cream, cold – The cream needs to be very cold to whip properly. Keep it in the fridge until you’re ready to use it.
- 2 tablespoons granulated sugar – This is for sweetening the whipped cream.
For the Cherry Topping
- 1 can (21 ounces) cherry pie filling – This is the classic choice and makes the recipe incredibly easy. I prefer the brands that have whole cherries rather than broken pieces. You can also use a homemade cherry compote if you have the time.
Ingredient Substitutions: If you need a gluten-free option, use gluten-free graham crackers or crushed gluten-free vanilla wafers for the crust. For a lower-sugar version, you can use a sugar-free cherry pie filling and a sugar substitute like Swerve in the cream cheese layer. Just note that the texture might be slightly different. If you’re not a fan of cherries, you can absolutely use strawberry, blueberry, or even lemon pie filling instead. The “snow” layer is incredibly versatile.
Equipment Needed
You don’t need any fancy gadgets to make this Perfect Cherries in the Snow Cream Cheese Dessert, which is part of its charm. Here’s what you’ll need:
- 9×13-inch baking dish – This is the perfect size for this recipe. A glass or ceramic dish works best. You could also use a 9-inch square pan for a thicker dessert.
- Mixing bowls – You’ll need at least two medium-sized bowls: one for the crust mixture and one for the cream cheese layer.
- Electric hand mixer or stand mixer – While you could whisk the cream by hand, it would take forever. A hand mixer makes the job quick and easy, and it’s essential for getting the cream cheese perfectly smooth.
- Measuring cups and spoons – For accurate measurements.
- Ziploc bag or rolling pin – For crushing the graham crackers if you’re making your own crumbs. A food processor is even easier.
- Spatula – A rubber spatula is perfect for folding the whipped cream into the cream cheese mixture without deflating it.
I’ve made this dessert with a cheap hand mixer I bought for ten bucks, and it turned out perfectly. Don’t stress about having top-of-the-line equipment. The most important tool is a chilled bowl for whipping your cream—pop it in the freezer for 10 minutes before you start for the best results.
Preparation Method
Let’s get to the fun part—making this beautiful dessert! I’ll walk you through each step with all the little details I’ve learned from making it dozens of times.
Step 1: Make the Crust
In a medium bowl, combine the graham cracker crumbs, ⅓ cup granulated sugar, and a pinch of salt. Pour the melted butter over the mixture and stir with a fork until all the crumbs are evenly moistened. The mixture should look like wet sand and hold together when you squeeze it in your fist. Press this mixture firmly and evenly into the bottom of your 9×13-inch baking dish. I use the bottom of a flat measuring cup to really pack it down. Pop the dish in the refrigerator to set while you prepare the filling.
Step 2: Whip the Cream
In a large, chilled mixing bowl, pour the cold heavy whipping cream. Using your electric hand mixer on medium-high speed, whip the cream until it starts to thicken. Add the 2 tablespoons of granulated sugar and continue whipping until stiff peaks form. This means when you lift the beaters, the cream stands up in peaks that don’t flop over. Be careful not to over-whip, or you’ll end up with butter! Set this bowl aside.
Step 3: Prepare the Cream Cheese Base
In another large bowl, beat the softened cream cheese with your hand mixer (no need to clean the beaters first) until it’s completely smooth and free of lumps. This is crucial—if your cream cheese isn’t smooth, your “snow” will have lumps. Add the ½ cup of powdered sugar and the vanilla extract, and beat again until everything is well combined and fluffy. Scrape down the sides of the bowl with your spatula.
Step 4: Fold Everything Together
This is the most important step for achieving that light, airy texture. Take about a third of the whipped cream and gently fold it into the cream cheese mixture using your rubber spatula. This lightens the cream cheese, making it easier to incorporate the rest of the whipped cream without deflating it. Once the first third is mostly combined, add the remaining whipped cream and fold gently. Use a cutting motion through the center of the bowl, then scrape along the bottom and bring the mixture up and over. Repeat until no white streaks remain. The mixture should be light, fluffy, and cloud-like.
Step 5: Assemble the Dessert
Remove the crust from the refrigerator. Spoon the creamy snow mixture over the crust and spread it into an even layer using your spatula. Take your time here to make sure it’s nice and flat.
Step 6: Add the Topping and Chill
Open the can of cherry pie filling. If the cherries are very large, you can give them a rough chop, but I usually leave them whole. Spoon the cherry pie filling evenly over the cream cheese layer. You can spread it all the way to the edges or leave a border of white “snow” showing—both look beautiful. Cover the dish tightly with plastic wrap and refrigerate for at least 4 hours, but overnight is even better. This chilling time is essential for the dessert to set properly so you can cut clean slices.
Cooking Tips & Techniques
Over the years, I’ve had my fair share of kitchen mishaps with this recipe. Let me save you some trouble with these tried-and-true tips.
Don’t Rush the Cream Cheese Softening: I once tried to soften cream cheese in the microwave. It melted in spots and stayed cold in others, leading to a lumpy, grainy “snow.” Trust me, letting it sit on the counter for 30-45 minutes is the only way to get that silky smooth texture. If you’re in a hurry, cut the cold cream cheese into small cubes—they’ll soften much faster.
Cold Cream is Happy Cream: For the fluffiest whipped cream, your bowl and beaters should be cold. I stick my mixing bowl in the freezer for about 10 minutes before I start. It makes a noticeable difference in how quickly the cream whips up and how stable the peaks are.
The Gentle Fold: This is where most people go wrong. You absolutely cannot stir the whipped cream into the cream cheese. Stirring will deflate all that lovely air you just whipped in. Use a gentle folding motion—cut down through the center, scrape along the bottom, and bring the mixture up and over. Turn the bowl a quarter turn and repeat. Be patient. It will come together.
Patience is a Virtue (for Slicing): I know it’s tempting to dig in after an hour or two, but this dessert needs a solid 4 hours in the fridge to set. If you try to cut it too soon, it will be a soupy, messy disaster. Overnight is truly the sweet spot. The flavors meld, the crust firms up, and the “snow” layer holds its shape perfectly.
Variations & Adaptations
One of the best things about this Perfect Cherries in the Snow Cream Cheese Dessert is how easy it is to change it up. Here are a few of my favorite variations.
Berry Bliss: Swap the cherry pie filling for a mixed berry pie filling or a homemade strawberry topping. In the summer, I love using fresh macerated strawberries. Just slice them, toss with a little sugar, and let them sit for 30 minutes until they release their juices. Spoon them over the top right before serving.
Chocolate Dream: For the chocoholics out there, add ¼ cup of unsweetened cocoa powder to the cream cheese mixture along with the powdered sugar. You can also use a chocolate cookie crust (like Oreo crumbs) instead of graham crackers. Top with chocolate shavings for an extra special touch.
Lemon Lush: Add the zest of one lemon and a tablespoon of fresh lemon juice to the cream cheese mixture. It adds a bright, tangy note that pairs beautifully with the sweet cherry topping. You can also use a lemon curd as a layer between the snow and the cherries.
Individual Servings: Instead of a 9×13 pan, you can make these in individual serving dishes like small mason jars or dessert cups. Layer the crust, the snow, and the cherries for a beautiful parfait-style presentation. They’re perfect for parties or a special treat for yourself.
Serving & Storage Suggestions
This dessert is best served cold, straight from the refrigerator. The texture is at its peak when it’s well-chilled and firm.
How to Serve: Use a sharp knife to cut clean slices, wiping the blade between cuts for the neatest presentation. Serve it on a small plate or in a shallow bowl. A dollop of extra whipped cream on top is never a bad idea, and a fresh mint sprig adds a lovely pop of color. This dessert is rich enough to stand on its own, so you don’t need any accompaniments, but a cup of hot coffee or a glass of cold milk is a perfect pairing.
How to Store: Cover the baking dish tightly with plastic wrap or transfer leftovers to an airtight container. The dessert will keep in the refrigerator for up to 4 days. The crust may soften slightly over time, but it will still be delicious. I actually think the flavors are even better on the second day!
Can You Freeze It? Yes, you can! This dessert freezes surprisingly well. Freeze it in the baking dish, tightly wrapped in a layer of plastic wrap and then a layer of aluminum foil, for up to 2 months. Thaw it overnight in the refrigerator before serving. The texture of the “snow” layer might be slightly less airy after freezing, but it’s still a fantastic make-ahead option.
Reheating: This is a no-bake dessert, so there’s no need to reheat it! In fact, you shouldn’t. Serve it cold for the best texture and flavor.
Nutritional Information & Benefits
While this is definitely a treat, it’s good to know what’s in it. Here are the approximate nutritional values per serving (based on 12 servings):
- Calories: 380
- Fat: 22g
- Carbohydrates: 42g
- Protein: 4g
- Sugar: 32g
Health Highlights: Cream cheese provides a good amount of calcium and vitamin A, which are important for bone health and vision. Cherries are packed with antioxidants, particularly anthocyanins, which have anti-inflammatory properties. Heavy cream, while high in fat, contains fat-soluble vitamins like A, D, E, and K. This dessert is not gluten-free unless you use gluten-free graham crackers, and it contains dairy. For a dairy-free version, you can try using a plant-based cream cheese and coconut cream (the solid part from a can of full-fat coconut milk) instead of heavy cream.
I’m not here to tell you this is a health food. It’s a dessert, and it’s meant to be enjoyed in moderation. But knowing that there’s a bit of calcium and some antioxidants in there makes me feel a little less guilty when I go back for a second slice!
Conclusion
This Perfect Cherries in the Snow Cream Cheese Dessert is more than just a recipe—it’s a memory in the making. It’s the dessert that converted my mom, the one that gets requested at every family gathering, and the one I turn to when I need a showstopper without any stress. It’s creamy, dreamy, and impossibly easy. The combination of the buttery crust, the light-as-air snow layer, and the sweet, tart cherry topping is simply unbeatable.
I encourage you to make this your own. Try it with different fruits, play around with the crust, or make it in individual cups. The beauty of this recipe is its flexibility. Don’t be afraid to experiment and find your perfect version.
I’d love to hear how it turns out for you! Did you try a different topping? Did your family love it as much as mine? Drop a comment below and let me know. And if you’re looking for another easy, no-bake dessert, you might also enjoy my No-Bake Lemon Lush or my Easy Banana Pudding. Happy cooking, friends!
Frequently Asked Questions
Can I use low-fat cream cheese or whipped cream?
You can, but the texture will be different. Full-fat cream cheese and heavy cream are essential for achieving that rich, creamy, and stable “snow” texture. Low-fat versions have more water content, which can make the dessert runny or cause it to separate. For the best results, stick with the full-fat versions.
How long does this dessert need to chill?
At least 4 hours is the minimum, but overnight is highly recommended. The chilling time allows the cream cheese layer to set up properly so you can cut clean slices. If you’re in a rush, you can try chilling it for 3 hours, but it will be much softer and harder to serve.
Can I use homemade cherry pie filling?
Absolutely! Homemade cherry pie filling is a wonderful upgrade. Simply cook fresh or frozen cherries with sugar, a little cornstarch, and a splash of lemon juice until thickened. Let it cool completely before spooning it over the cream cheese layer. It will be even more delicious than the canned version.
My cream cheese mixture turned out lumpy. What went wrong?
This usually happens when the cream cheese isn’t soft enough. Always let your cream cheese come to room temperature before beating it. If you do end up with lumps, you can try beating it for a longer time on high speed. For future batches, make sure your cream cheese is truly softened—it should be very soft to the touch.
Can I make this dessert in a different size pan?
Yes, you can. A 9×13-inch pan is standard, but you can use a 9-inch square pan for a much thicker dessert (you’ll need to increase the chilling time). You can also use individual ramekins or mason jars for single-serving portions. Just adjust the layering accordingly.
Pin This Recipe!

Perfect Cherries in the Snow: Easy Cream Cheese Dessert Recipe

A luscious, no-bake dessert featuring a buttery graham cracker crust, a light and airy cream cheese ‘snow’ layer, and a sweet cherry topping. It’s incredibly easy to make and perfect for any occasion.
- Prep Time: 20 minutes
- Cook Time: 0 minutes
- Total Time: 4 hours 20 minutes (includes chilling)
- Yield: 12 servings 1x
- Category: Dessert
- Cuisine: American
Ingredients
- 1 ½ cups graham cracker crumbs (about 12 full sheets, crushed finely)
- ⅓ cup granulated sugar
- 6 tablespoons unsalted butter, melted
- Pinch of salt
- 8 ounces full-fat cream cheese, softened to room temperature
- ½ cup powdered sugar
- 1 teaspoon vanilla extract
- 1 ½ cups heavy whipping cream, cold
- 2 tablespoons granulated sugar
- 1 can (21 ounces) cherry pie filling
Instructions
- Make the Crust: In a medium bowl, combine graham cracker crumbs, ⅓ cup granulated sugar, and a pinch of salt. Pour melted butter over the mixture and stir with a fork until all crumbs are evenly moistened. Press firmly and evenly into the bottom of a 9×13-inch baking dish. Refrigerate while preparing the filling.
- Whip the Cream: In a large chilled mixing bowl, pour cold heavy whipping cream. Using an electric hand mixer on medium-high speed, whip until it starts to thicken. Add 2 tablespoons granulated sugar and continue whipping until stiff peaks form. Set aside.
- Prepare the Cream Cheese Base: In another large bowl, beat softened cream cheese until completely smooth. Add powdered sugar and vanilla extract, and beat again until well combined and fluffy.
- Fold Everything Together: Take about a third of the whipped cream and gently fold it into the cream cheese mixture using a rubber spatula. Once mostly combined, add the remaining whipped cream and fold gently until no white streaks remain. The mixture should be light and fluffy.
- Assemble the Dessert: Remove the crust from the refrigerator. Spoon the creamy snow mixture over the crust and spread into an even layer.
- Add the Topping and Chill: Spoon cherry pie filling evenly over the cream cheese layer. Cover tightly with plastic wrap and refrigerate for at least 4 hours, preferably overnight, until set.
Notes
For best results, let cream cheese soften at room temperature for 30-45 minutes. Chill the mixing bowl and beaters for 10 minutes before whipping cream. Fold whipped cream gently to maintain airy texture. Chill at least 4 hours, preferably overnight, for clean slices. Can be frozen for up to 2 months.
Nutrition
- Serving Size: 1 slice (1/12 of rec
- Calories: 380
- Sugar: 32
- Sodium: 260
- Fat: 22
- Saturated Fat: 13
- Carbohydrates: 42
- Fiber: 1
- Protein: 4
Keywords: cherries in the snow, cream cheese dessert, no-bake dessert, cherry dessert, easy dessert, graham cracker crust


