Love this? Save it for later!
Share the inspiration with your friends
There used to be a little dive bar called The Rusty Nail on the corner of 7th and Elm that made the best Chex Mix I have ever eaten. When they closed their doors back in 2019—a casualty of a rent hike and a changing neighborhood—I genuinely grieved that snack. It sounds dramatic, I know. But I had spent years sitting at that sticky bar top, nursing a ginger ale and eating bowl after bowl of their perfectly seasoned, impossibly crunchy mix. After 12 tries—and one particularly sad batch that tasted like burnt cardboard and regret—I finally got it.
This Easy Oven-Baked Savory Chex Mix with Worcestershire Butter is the exact recreation of that memory. The secret, let me tell you, is all in the butter-to-Worcestershire ratio and the low-and-slow baking method. Most recipes rush the process, and you end up with soggy cereal and clumpy seasoning. Not this one. Every single piece comes out coated in that salty, savory, slightly tangy butter sauce that makes you reach for “just one more handful” until the entire bowl is gone. Honestly, I made three batches last week alone because my family kept devouring it before I could even photograph it for this post.
Maybe you have a snack memory like that—a specific place or person tied to a particular flavor that you just can’t find anywhere else. If you have been chasing that perfect Chex Mix, the one that tastes like it came from a seasoned pro’s kitchen rather than a box, you are going to love this. It is the kind of snack that disappears at parties, makes the best holiday gift in a pretty tin, and somehow tastes even better the next day. Let me show you how to make it.
Why You’ll Love This Recipe
This is not just another Chex Mix recipe floating around the internet. This is the one I have tested, tweaked, and perfected over years of trial and error. I have burned it, under-seasoned it, and made batches that were so greasy they left oil stains on the paper towels. But this version? This is the one I am proud to share.
- Quick & Easy: From start to finish, you are looking at about 45 minutes of hands-off time. Most of that is just the oven doing the work. Perfect for those evenings when you need a snack for a gathering or just want something crunchy to munch on while watching a movie.
- Simple Ingredients: You probably already have Worcestershire sauce, butter, and garlic powder in your pantry right now. No weird ingredients, no specialty stores. Just honest, pantry-friendly staples.
- Perfect for Parties & Gifting: This makes a massive batch that is ideal for holiday parties, game day gatherings, or packaging up in mason jars for neighbors and coworkers. It keeps for weeks, too, if it lasts that long.
- Crowd-Pleaser: I have brought this to potlucks, office parties, and family reunions. It is always the first bowl to empty. Kids love it, adults love it, even my picky uncle who “doesn’t do snacks” ate half a batch in one sitting.
- Unbelievably Crunchy: The Worcestershire butter bakes into every nook and cranny of the cereal, creating this addictive, savory crunch that you just cannot get from the bagged stuff. It is next-level comfort snacking.
What makes this recipe different from the rest is the baking technique. Instead of dumping everything together and hoping for the best, we take the time to properly melt and emulsify the butter with the Worcestershire and seasonings. This ensures every single piece of cereal, every pretzel, every nut gets an even coating. No more biting into a bland piece while another is drowning in seasoning. It is balanced, intentional, and absolutely delicious.
What Ingredients You Will Need
This recipe uses simple, everyday ingredients to build layers of savory flavor. Nothing fancy here—just smart combinations that work together beautifully. The magic really happens when the butter meets the Worcestershire and those pantry spices get a chance to bloom in the warm oven.
The Cereal Base
- 3 cups Corn Chex cereal (the classic base, sturdy and holds up well to coating)
- 3 cups Rice Chex cereal (adds a lighter, airier texture to the mix)
- 3 cups Wheat Chex cereal (brings a heartier, nuttier flavor—my personal favorite)
The Crunchy Add-Ins

- 2 cups mini pretzel twists (I prefer the mini size so they mix in evenly; Snyder’s is my go-to brand)
- 1 cup rye chips or small pumpernickel pretzels (optional, but adds that classic deli-style flavor)
- 1 cup mixed nuts (unsalted is best here so you control the salt level; I use a mix of peanuts, almonds, and cashews)
- 1 cup Cheez-It crackers or small cheese crackers (adds a cheesy note that complements the Worcestershire beautifully)
The Savory Worcestershire Butter Coating
- 1/2 cup unsalted butter (1 stick; use salted if that is all you have, just reduce the added salt slightly)
- 1/4 cup Worcestershire sauce (Lea & Perrins is my non-negotiable brand—it has the right depth and tang)
- 2 tablespoons soy sauce (adds umami depth; use tamari if gluten-free)
- 1 tablespoon hot sauce (optional, but I love a little kick; Tabasco or Cholula work great)
- 2 teaspoons garlic powder (not garlic salt—we want pure garlic flavor here)
- 2 teaspoons onion powder
- 1 teaspoon smoked paprika (this is the secret ingredient that adds a subtle smokiness)
- 1 teaspoon seasoned salt (Lawry’s is my favorite for this)
- 1/2 teaspoon black pepper (freshly ground if you have it)
I recommend using real butter here, not margarine. The flavor difference is noticeable, and since this is a butter-forward recipe, you want the real deal. For a dairy-free version, I have had good results with plant-based butter sticks, though the texture is slightly less crispy.
Equipment Needed
You do not need much for this recipe, which is part of its charm. Here is what you will need:
- Two large rimmed baking sheets (half-sheet pans are ideal; you need the space to spread everything in a single layer)
- Parchment paper or silicone baking mats (makes cleanup so much easier, though not strictly necessary)
- A large mixing bowl (big enough to hold all the cereal and mix it without spilling)
- A small saucepan (for melting the butter and mixing the Worcestershire sauce)
- A whisk (for emulsifying the butter mixture)
- A rubber spatula (for scraping every last drop of that delicious butter sauce)
- Airtight containers (for storage; I use large mason jars or clip-top glass jars)
If you do not have two baking sheets, you can bake in batches. Just let the first batch cool completely before storing it. I learned that the hard way—warm Chex Mix in a sealed container turns into a soggy mess. Also, invest in a good whisk. I burned through three cheap ones before finally getting a sturdy stainless steel one that actually emulsifies the butter properly.
Preparation Method
Alright, let us get to the good part. This method is straightforward, but there are a few key steps that make all the difference. Follow these closely, and you will have the best Chex Mix of your life.
- Preheat your oven to 250°F (120°C). Yes, this is a low temperature. That is intentional. We are drying out the mix, not toasting it aggressively. Low and slow gives you that perfect crunchy texture without burning the seasonings.
- Line two large rimmed baking sheets with parchment paper. This makes cleanup a breeze and prevents any sticking. Set them aside for now.
- In your largest mixing bowl, combine all the dry ingredients. Add the Corn Chex, Rice Chex, Wheat Chex, mini pretzels, rye chips (if using), mixed nuts, and cheese crackers. Gently toss everything together with your hands so it is evenly distributed. Take a moment to appreciate the colors and textures—this is going to be beautiful.
- In a small saucepan over medium-low heat, melt the butter. Once it is fully melted, remove it from the heat. Add the Worcestershire sauce, soy sauce, hot sauce (if using), garlic powder, onion powder, smoked paprika, seasoned salt, and black pepper. Whisk vigorously until everything is well combined and the mixture looks smooth and slightly emulsified. This should take about 30 seconds of steady whisking. Do not skip this step—whisking properly ensures the seasoning disperses evenly.
- Pour the warm Worcestershire butter mixture over the dry ingredients. Use a rubber spatula to scrape every last drop out of the saucepan. Now, here is where you need to be thorough: use your hands (clean, of course) to toss and coat every single piece. I know it is messy, but your hands do a better job than any spoon ever could. You want to feel that every cereal piece, every pretzel, every nut is glistening with the butter mixture. Take your time here—about 2 minutes of gentle but thorough tossing.
- Divide the mixture evenly between the two prepared baking sheets. Spread it out into a single, even layer. Do not pile it up too high, or the pieces on the bottom will steam instead of crisp. If it looks crowded, use a third sheet or bake in batches.
- Bake for 45 minutes, stirring every 15 minutes. Set a timer—I cannot stress this enough. Stirring is crucial because it ensures even browning and prevents the edges from burning while the center stays soft. Use a spatula to gently flip and redistribute the mixture each time. You will notice the aroma filling your kitchen around the 20-minute mark. That is when you know it is working.
- After 45 minutes, check for doneness. The mix should look slightly darker, feel dry to the touch, and smell deeply savory and toasty. If it still feels a bit soft or damp, give it another 5-10 minutes. Every oven runs a little differently, so trust your senses more than the clock.
- Remove from the oven and let cool completely on the baking sheets. This is the hardest part—waiting. But do not skip it. As the mix cools, it continues to crisp up. If you package it while warm, you will trap steam and lose that perfect crunch. Give it at least 30 minutes to cool completely.
- Once cool, transfer to airtight containers. Or, you know, just start eating it directly off the baking sheet. I will not judge you.
Cooking Tips & Techniques
I have made this recipe more times than I care to count, and I have made every mistake in the book. Let me save you some trouble.
Do not over-bake. I once left a batch in for an extra 10 minutes because I got distracted by a phone call. The result was a dark, bitter, burnt-tasting mix that I had to throw away. The line between perfectly toasted and burnt is thin, especially with the sugar content in Worcestershire sauce. Watch it closely during the last 10 minutes.
Stir from the edges. When you stir the mix during baking, make sure to scrape the edges of the pan where the mixture tends to brown faster. Those edge pieces are the most vulnerable to burning. Push them toward the center and bring center pieces to the edges for even cooking.
Let it cool completely. I know I said this already, but it bears repeating. I once rushed the cooling process and sealed a slightly warm batch in a container. The next day, it was soft and chewy instead of crunchy. Learn from my impatience.
Double the batch if you are making it for a party. This stuff disappears fast. I have learned to always make at least a double batch for any gathering. People will stand around the bowl and eat it like it is their job.
Use fresh spices. Garlic powder and onion powder lose their potency over time. If your spices have been sitting in the cabinet for more than a year, replace them. Fresh spices make a noticeable difference in the final flavor.
Variations & Adaptations
One of the best things about this recipe is how adaptable it is. Here are some variations I have tried and loved:
Spicy Southwest Version: Add 1 tablespoon of chili powder and 1 teaspoon of cayenne pepper to the butter mixture. Swap the hot sauce for a chipotle hot sauce. The smoky heat pairs beautifully with the Worcestershire.
Everything Bagel Version: After coating the mix with the Worcestershire butter, sprinkle 3 tablespoons of everything bagel seasoning over the top before baking. The sesame seeds, poppy seeds, and garlic flakes add incredible texture and flavor.
Sweet & Savory Version: Add 1/2 cup of honey or maple syrup to the butter mixture. This creates a sweet-savory glaze that caramelizes slightly during baking. Be careful with this one—the sugar content means it can burn faster, so check it at the 30-minute mark.
Gluten-Free Version: This recipe is naturally gluten-free if you use gluten-free pretzels and check that your Worcestershire sauce is certified gluten-free (Lea & Perrins is, by the way). Swap the Wheat Chex for additional Corn and Rice Chex, and use gluten-free crackers instead of Cheez-Its.
Low-Sodium Version: Use unsalted nuts, low-sodium soy sauce, and reduce the seasoned salt to 1/2 teaspoon. You can also use a low-sodium Worcestershire sauce if you can find it. The flavor will still be excellent, just less salty.
Serving & Storage Suggestions
This Chex Mix is incredibly versatile when it comes to serving. I love it straight from the bowl at room temperature—that is how it tastes best. The flavors have settled, the crunch is perfect, and every bite is satisfying.
For parties, I serve it in a large wooden bowl or a ceramic serving dish. It looks beautiful on a snack board alongside cheeses, cured meats, and fresh fruit. The salty, savory notes complement a sharp cheddar or a creamy brie beautifully.
For gifting, I pack it in mason jars with a ribbon tied around the neck, or in festive tin containers. It makes a wonderful hostess gift during the holidays. I always include a little tag with the recipe name and a note that says “Baked with love.”
Storage: Store in an airtight container at room temperature for up to 2 weeks. I have kept it for 3 weeks in a pinch, and it was still good, though the crunch had softened slightly. Do not refrigerate it—the moisture in the fridge will ruin the texture.
Reheating: If your mix has lost some of its crunch (which can happen if you live in a humid climate), spread it on a baking sheet and reheat at 250°F (120°C) for 10 minutes. Let it cool completely before storing again. It works like magic.
Flavor development: Honestly, this Chex Mix tastes even better the next day. The flavors have time to meld and deepen. I actually prefer day-old Chex Mix to freshly baked. So do not worry if you make it a day ahead—it is actually ideal.
Nutritional Information & Benefits
Let us be real: Chex Mix is a snack, not a health food. But it does have some redeeming qualities. Here is an approximate nutritional breakdown for a 1-cup serving:
- Calories: 280-320
- Fat: 18g (10g saturated)
- Carbohydrates: 30g
- Fiber: 3g
- Protein: 6g
- Sodium: 580mg
The nuts provide healthy fats, protein, and fiber, which help keep you full longer. The whole grain Chex cereals offer some B vitamins and iron. And Worcestershire sauce, believe it or not, contains small amounts of B vitamins from its anchovy base.
For a lighter version, you can reduce the butter to 1/3 cup and add a splash of water or broth to help the seasoning stick. The texture will be slightly less rich, but still satisfying.
This recipe contains gluten (from the cereals and pretzels), dairy (from the butter), and nuts. For allergen-friendly versions, see the variations section above.
I personally love that this snack feels indulgent but is made from real, recognizable ingredients. No artificial flavors, no preservatives, no mystery chemicals. Just honest food that tastes amazing.
Conclusion
This Easy Oven-Baked Savory Chex Mix with Worcestershire Butter is more than just a snack—it is a little piece of nostalgia that you can recreate in your own kitchen. It is the recipe I reach for when I need a crowd-pleaser, when I want to feel connected to that old bar stool at The Rusty Nail, or when I just need something crunchy and satisfying after a long day.
I love that this recipe is forgiving enough for beginners but rewarding enough for seasoned cooks. You can tweak it, adapt it, make it your own. That is the beauty of a good base recipe—it becomes a canvas for your creativity.
So go ahead, make a batch. Eat some straight off the baking sheet while it is still warm (I will not tell). Share it with people you love. And if you come up with a variation that blows your mind, I want to hear about it. Drop a comment below and tell me how it went. Happy snacking!
Frequently Asked Questions
Can I use microwave instead of oven?
Technically yes, but I do not recommend it. The microwave cooks unevenly and can make the mix chewy rather than crunchy. The oven method gives you that perfect, even crispness that makes this recipe special.
How do I make this vegan?
Use a high-quality vegan butter stick (I like Miyoko’s) and check that your Worcestershire sauce is vegan-friendly. Some brands contain anchovies. Annie’s makes a good vegan Worcestershire sauce.
Why is my Chex Mix soggy?
This usually happens for one of three reasons: the oven temperature was too low, the mix was not baked long enough, or it was stored before cooling completely. Make sure your oven is at 250°F, bake for the full 45 minutes, and let it cool completely before storing.
Can I add chocolate or candy to this?
Absolutely! For a sweet-savory version, let the mix cool completely, then toss in M&Ms, chocolate chips, or chopped candy bars. Just add them after baking so they do not melt into a mess.
How far in advance can I make this?
You can make this up to 2 weeks ahead if stored properly in an airtight container. It actually tastes better after a day or two as the flavors meld. Just keep it in a cool, dry place away from direct sunlight.
Pin This Recipe!
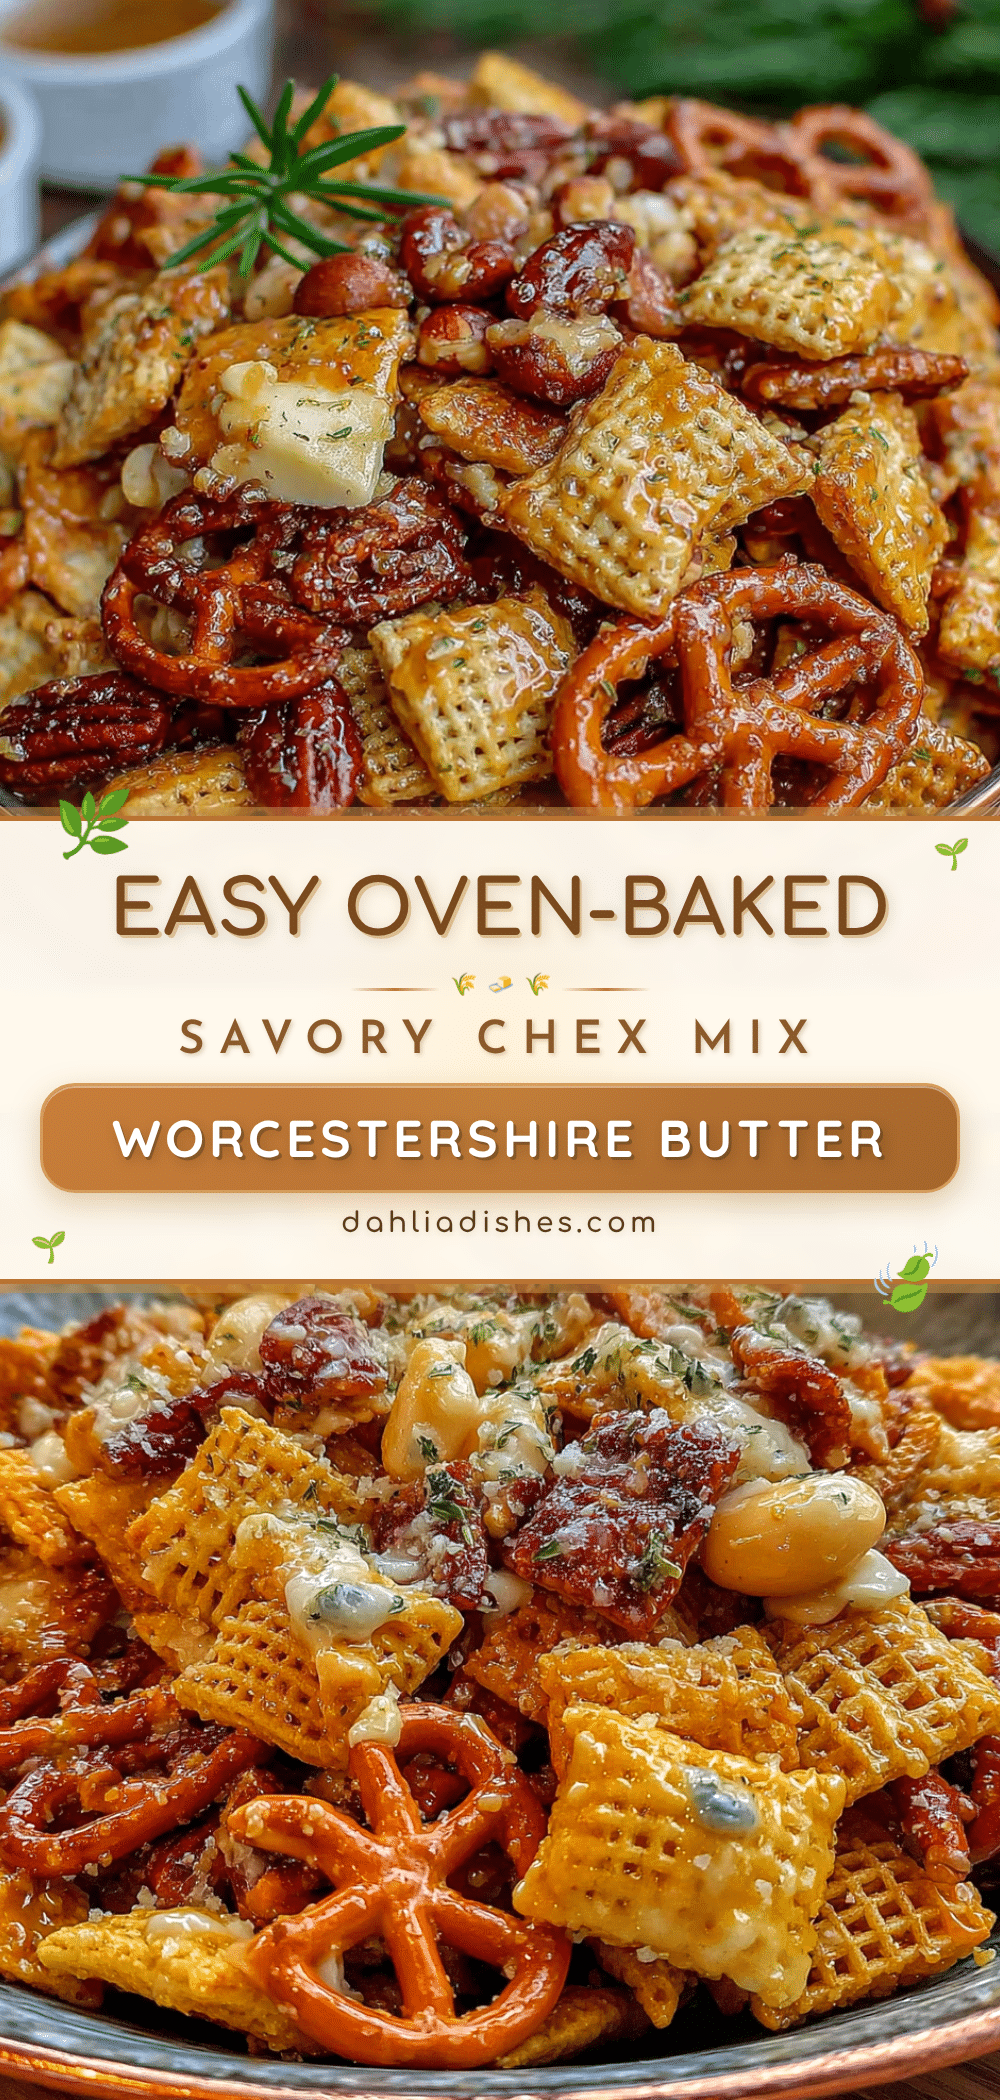
Best Easy Oven-Baked Savory Chex Mix with Worcestershire Butter

This Easy Oven-Baked Savory Chex Mix with Worcestershire Butter is the perfect crunchy, savory snack. Made with a secret butter-to-Worcestershire ratio and a low-and-slow baking method, every piece is coated in a salty, tangy, addictive sauce.
- Prep Time: 15 minutes
- Cook Time: 45 minutes
- Total Time: 1 hour
- Yield: 12 servings 1x
- Category: Snack
- Cuisine: American
Ingredients
- 3 cups Corn Chex cereal
- 3 cups Rice Chex cereal
- 3 cups Wheat Chex cereal
- 2 cups mini pretzel twists
- 1 cup rye chips or small pumpernickel pretzels (optional)
- 1 cup mixed nuts (unsalted)
- 1 cup Cheez-It crackers or small cheese crackers
- 1/2 cup unsalted butter (1 stick)
- 1/4 cup Worcestershire sauce
- 2 tablespoons soy sauce
- 1 tablespoon hot sauce (optional)
- 2 teaspoons garlic powder
- 2 teaspoons onion powder
- 1 teaspoon smoked paprika
- 1 teaspoon seasoned salt
- 1/2 teaspoon black pepper
Instructions
- Preheat your oven to 250°F (120°C).
- Line two large rimmed baking sheets with parchment paper.
- In your largest mixing bowl, combine all the dry ingredients: Corn Chex, Rice Chex, Wheat Chex, mini pretzels, rye chips (if using), mixed nuts, and cheese crackers. Gently toss everything together with your hands.
- In a small saucepan over medium-low heat, melt the butter. Once fully melted, remove from heat. Add Worcestershire sauce, soy sauce, hot sauce (if using), garlic powder, onion powder, smoked paprika, seasoned salt, and black pepper. Whisk vigorously until smooth and slightly emulsified (about 30 seconds).
- Pour the warm Worcestershire butter mixture over the dry ingredients. Use a rubber spatula to scrape every last drop. Use your hands to toss and coat every piece thoroughly (about 2 minutes).
- Divide the mixture evenly between the two prepared baking sheets, spreading it out into a single, even layer.
- Bake for 45 minutes, stirring every 15 minutes. Use a spatula to gently flip and redistribute the mixture each time.
- After 45 minutes, check for doneness. The mix should look slightly darker, feel dry to the touch, and smell deeply savory and toasty. If still soft or damp, bake for an additional 5-10 minutes.
- Remove from the oven and let cool completely on the baking sheets (at least 30 minutes).
- Once cool, transfer to airtight containers.
Notes
Do not over-bake; watch closely during the last 10 minutes. Stir from the edges to prevent burning. Let cool completely before storing to maintain crunch. Double the batch for parties. Use fresh spices for best flavor. Tastes even better the next day.
Nutrition
- Serving Size: 1 cup
- Calories: 300
- Sugar: 4
- Sodium: 580
- Fat: 18
- Saturated Fat: 10
- Carbohydrates: 30
- Fiber: 3
- Protein: 6
Keywords: Chex Mix, oven-baked, Worcestershire butter, savory snack, party snack, holiday snack, game day snack


