Love this? Save it for later!
Share the inspiration with your friends
This was supposed to be roasted chicken. I had the bird, I had the herbs, I had the whole Sunday dinner plan mapped out in my head. But somewhere between the grocery store and my kitchen, I grabbed the wrong bag of produce—cauliflower instead of broccoli, which honestly, I still don’t understand how that happens. The oven was preheated, my kids were hungry, and I was already ten minutes behind schedule. I stood there staring at this head of cauliflower like it had personally wronged me. Roasted chicken needed broccoli, not cauliflower. But I had no backup plan, no time for another store run, and honestly, no patience left. So I threw the cauliflower in the oven alongside the chicken, drizzled it with oil and salt, and figured I’d deal with it later.
What came out of that oven was nothing like I expected. The cauliflower got all golden and sweet at the edges, and when I mashed it with a little butter and the roasted garlic that had been sitting in my pantry forever, something clicked. I mean, really clicked. My husband asked if I’d made mashed potatoes, and I just laughed and said, “Sort of.” That first bite had this unexpected creaminess that made me forget I’d even wanted broccoli in the first place. I kept eating it straight from the bowl, which is not something I normally do, but let me tell you—it was that good.
I’ve made this creamy roasted garlic cauliflower mash at least twice a month ever since. It started as a mistake, but honestly, it’s become one of those recipes I actually look forward to. Maybe you’ve had a moment like that where the wrong ingredient turned into something you can’t stop thinking about. That’s this recipe for me. It’s healthy, it’s ridiculously creamy, and it makes you feel like you accidentally discovered something wonderful.
Why You’ll Love This Recipe
Let me be real with you—I’ve tested this creamy roasted garlic cauliflower mash more times than I can count. I’ve made it for holiday dinners, for random Tuesday nights, and even for a neighbor who swore she hated cauliflower. She asked for the recipe afterward. That’s the kind of recipe this is. It’s not just another healthy side dish that tastes like a compromise. It’s the real deal.
- Quick & Easy: Comes together in about 40 minutes, most of which is hands-off roasting time. Perfect for busy weeknights when you want something that feels special without the effort.
- Simple Ingredients: You need cauliflower, garlic, a little butter or olive oil, and some basic seasonings. No fancy grocery trips or hard-to-find items.
- Perfect for Meal Prep: This mash stores beautifully and actually gets better after a day in the fridge. Make it Sunday and enjoy it all week.
- Crowd-Pleaser: I’ve served this to picky eaters, health-conscious friends, and traditional mashed potato lovers. Everyone goes back for seconds.
- Unbelievably Creamy: The secret is roasting the cauliflower instead of boiling it. That extra step concentrates the flavor and gives you a silky texture that boiling just can’t achieve.
What makes this version different from all the other cauliflower mash recipes out there? It’s the roasted garlic, honestly. Most recipes use raw garlic or garlic powder, but roasting the garlic first transforms it into something sweet, nutty, and almost buttery. That single step changes everything. Plus, I’ve figured out the exact ratio of cauliflower to liquid so you get that creamy consistency without ending up with soup. It’s the kind of recipe that makes you wonder why you ever bothered with regular mashed potatoes.
This creamy roasted garlic cauliflower mash isn’t just good for you—it’s the kind of side dish that makes you close your eyes after the first bite. It’s comfort food reimagined, healthier but with the same soul-soothing satisfaction. Perfect for impressing guests without stress, or turning a simple weeknight dinner into something memorable.
What Ingredients You Will Need
This recipe uses simple, wholesome ingredients that come together to create something surprisingly luxurious. Most of these are probably already in your kitchen, which makes this an easy last-minute side dish whenever you need it.
- 1 large head cauliflower (about 2-2.5 pounds / 900-1100 grams), cut into florets—look for a head that’s firm and white with no brown spots
- 1 whole head of garlic—don’t skimp here, the roasted garlic is what makes this mash special (I prefer using fresh garlic rather than pre-peeled cloves for roasting)
- 2 tablespoons olive oil, divided—use a good quality extra virgin olive oil for roasting; it adds flavor you can actually taste
- 3 tablespoons unsalted butter (or vegan butter for dairy-free)—the butter adds richness, but you can use all olive oil if you prefer
- 1/4 cup heavy cream (or full-fat coconut milk for dairy-free)—this gives the mash its silky texture; don’t use skim milk or you’ll end up with watery mash
- 1/2 teaspoon salt, plus more to taste—I recommend kosher salt for the best flavor distribution
- 1/4 teaspoon black pepper, freshly ground—pre-ground pepper works but fresh really does taste better here
- 1/4 teaspoon garlic powder—optional, but it reinforces that roasted garlic flavor
- 2 tablespoons fresh chives or parsley, chopped—for garnish and a fresh finish
- Optional: 2 tablespoons cream cheese or Greek yogurt—adds extra creaminess and a slight tang; I use this when I want an extra-decadent version
For the best texture, I recommend using a food processor or an immersion blender rather than a potato masher. The food processor gives you that ultra-smooth, silky consistency that makes this mash feel indulgent. If you prefer a chunkier texture, a potato masher works fine—just expect a more rustic result.
Ingredient selection tip: Look for cauliflower that feels heavy for its size and has tightly packed florets. Loose or yellowing florets mean the cauliflower is past its prime. For the garlic, choose heads that feel firm with no soft spots—soft garlic won’t roast as nicely and can taste bitter.
Substitution note: If you’re watching your fat intake, you can use chicken or vegetable broth instead of heavy cream. The mash won’t be as rich, but it will still be delicious. For a vegan version, use olive oil and full-fat coconut milk—the coconut flavor is subtle and actually complements the roasted garlic beautifully.
Equipment Needed
You don’t need a lot of fancy equipment for this recipe, which is one of the reasons I make it so often. Here’s what you’ll need:
- Baking sheet—a rimmed baking sheet works best to catch any oil drips and keep the cauliflower from rolling off
- Parchment paper or aluminum foil—for easy cleanup; I always line my baking sheet because roasted garlic can get sticky
- Food processor or immersion blender—this is the key to that silky smooth texture. I use my Cuisinart food processor and it works perfectly. An immersion blender with a tall container also works great
- Chef’s knife and cutting board—for cutting the cauliflower into florets
- Small knife—for trimming the garlic head
- Aluminum foil—for wrapping the garlic head while it roasts
- Measuring spoons and cups—for accuracy, though honestly, I eyeball the cream most of the time now
- Rubber spatula—for scraping every bit of that creamy mash out of the food processor (trust me, you don’t want to waste any)
If you don’t have a food processor, a potato masher or ricer will work, but the texture will be chunkier. I’ve made this with a hand masher before when my food processor was in the dishwasher, and it was still good—just not as silky. Budget-friendly option: a $20 immersion blender from a kitchen supply store works just as well as an expensive food processor for this recipe.
Preparation Method
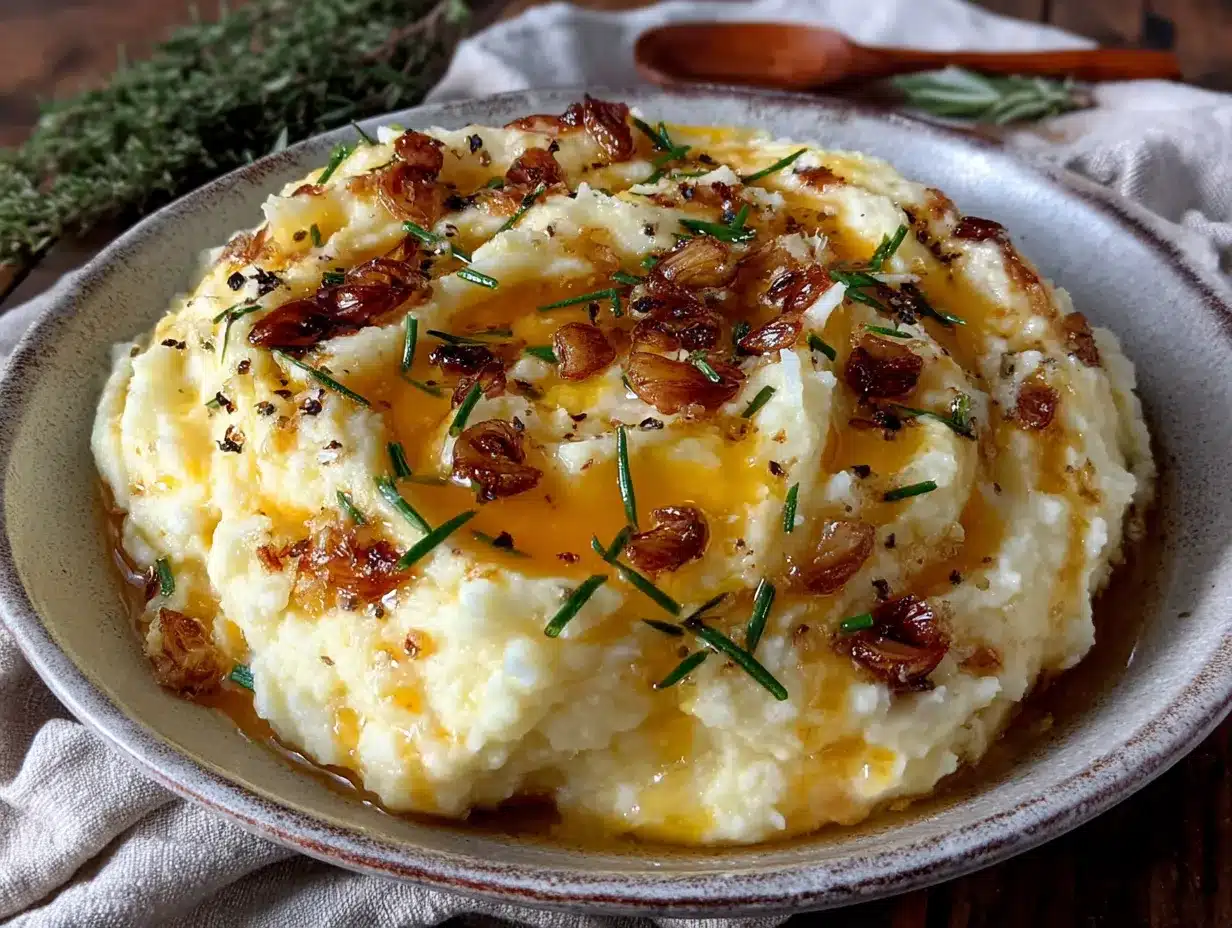
- Preheat your oven to 400°F (200°C). Line a baking sheet with parchment paper or foil for easy cleanup. While the oven heats, get your cauliflower ready.
- Prepare the cauliflower: Remove the leaves and tough stem from the cauliflower head. Cut the cauliflower into evenly sized florets—about 1 to 1.5 inches each. Try to keep them similar in size so they roast evenly. Don’t throw away the smaller pieces that fall off; they’ll roast faster and get extra crispy, which adds nice texture.
- Prepare the garlic: Take the whole head of garlic and slice off the top quarter-inch to expose the cloves. Don’t peel the garlic—just cut the top off. Place the garlic head on a piece of aluminum foil, drizzle with about 1 teaspoon of olive oil, and sprinkle with a tiny pinch of salt. Wrap the foil tightly around the garlic to create a sealed packet.
- Roast the cauliflower and garlic: Spread the cauliflower florets on the prepared baking sheet. Drizzle with the remaining olive oil and sprinkle with salt and pepper. Toss everything with your hands to coat evenly. Place the garlic packet on the same baking sheet. Roast for 25-30 minutes, flipping the cauliflower halfway through. The cauliflower should be golden brown and fork-tender when done. The garlic should be soft and caramelized—you’ll know it’s ready when you can squeeze a clove and it slides right out of its skin.
- Let everything cool slightly: Remove the baking sheet from the oven and let the cauliflower cool for about 5 minutes. Carefully open the garlic packet—be careful, hot steam will escape. Let the garlic cool until you can handle it comfortably, about 5 more minutes.
- Squeeze the roasted garlic: Once the garlic is cool enough to handle, squeeze the bottom of each clove. The soft, roasted garlic paste should slide right out. Discard the papery skins. You should have about 2 tablespoons of roasted garlic paste—if you get more, that’s even better.
- Blend everything together: Transfer the roasted cauliflower to your food processor or a large bowl (if using an immersion blender). Add the roasted garlic paste, butter, heavy cream, salt, pepper, and garlic powder if using. Process until completely smooth, scraping down the sides as needed. This usually takes about 30-60 seconds. If the mash seems too thick, add another tablespoon of cream or warm water. If it seems too thin, don’t panic—it will thicken as it cools.
- Taste and adjust: This is the most important step. Taste the mash and adjust the seasoning. I usually end up adding another pinch of salt and a bit more pepper. The roasted garlic should be noticeable but not overwhelming—you want it to complement the cauliflower, not overpower it.
- Serve immediately: Transfer the mash to a serving bowl. Garnish with fresh chives or parsley and an extra drizzle of olive oil or a pat of butter if you’re feeling fancy. Serve warm.
Sensory cue: At step 4, your kitchen should smell like nutty, caramelized cauliflower and sweet roasted garlic. If you smell anything burnt, your oven might be too hot—check the cauliflower and reduce the temperature if needed.
Prep note: You can roast the cauliflower and garlic up to 2 days ahead of time. Just store them separately in the fridge, then reheat and blend when you’re ready to serve.
Cooking Tips & Techniques
I’ve made this creamy roasted garlic cauliflower mash more times than I can count, and I’ve definitely made my share of mistakes along the way. Here’s what I’ve learned so you don’t have to repeat my errors.
Don’t boil the cauliflower. I know it’s tempting because boiling is faster, but roasted cauliflower has so much more flavor. Boiling adds water that makes your mash watery and bland. Roasting concentrates the natural sweetness and gives you that nutty, caramelized flavor that makes this dish special. Trust me on this one—I learned the hard way when I was in a rush and ended up with sad, watery mash.
Dry your cauliflower well. After washing the cauliflower, make sure you pat it completely dry before roasting. Excess moisture prevents browning and steaming instead of roasting. I use a clean kitchen towel or paper towels to really get in there and dry every floret. It makes a noticeable difference in the final texture.
Don’t overcrowd the baking sheet. The cauliflower needs space to roast, not steam. If you crowd the pan, the florets will release moisture and end up soggy. Use two baking sheets if you need to—it’s worth the extra dish. You want those golden brown edges that add so much flavor.
Blend while everything is still warm. Warm cauliflower blends much more smoothly than cold cauliflower. If your cauliflower has cooled down too much, the mash can turn gummy or lumpy. Work quickly after roasting, or reheat the cauliflower slightly before blending.
Go easy on the liquid. Start with less cream than you think you need. You can always add more, but you can’t take it away. I’ve ruined batches by adding too much cream too quickly and ending up with cauliflower soup. Add the cream gradually and blend until you reach your desired consistency.
Roast extra garlic. Seriously, roast two heads of garlic while you’re at it. Roasted garlic keeps in the fridge for up to a week and is amazing spread on bread, stirred into pasta, or mixed into salad dressings. You’ll thank me later.
Variations & Adaptations
One of the best things about this creamy roasted garlic cauliflower mash is how adaptable it is. I’ve tried quite a few variations, and here are my favorites.
Cheesy Cauliflower Mash: Add 1/2 cup of freshly grated Parmesan or sharp cheddar cheese when you blend the mash. The cheese adds a savory depth that makes this feel even more indulgent. I made this for Thanksgiving last year and my uncle asked for the recipe—he’s a mashed potato purist, so that’s saying something.
Herb-Infused Version: Add 2 tablespoons of fresh herbs like rosemary, thyme, or sage to the cauliflower before roasting. The herbs infuse the cauliflower with their flavor as it roasts. I love using rosemary because it pairs beautifully with the roasted garlic. Just remove the herb sprigs before blending, or leave them in for a more rustic texture.
Spicy Chipotle Mash: Add 1-2 teaspoons of adobo sauce from a can of chipotle peppers when you blend the mash. The smoky heat balances the sweetness of the roasted garlic perfectly. I tried this on a whim one night when I wanted something different, and it’s become my go-to for tacos and grilled meats.
Vegan Version: Use olive oil instead of butter and full-fat coconut milk instead of heavy cream. The coconut flavor is subtle and actually complements the roasted garlic. I’ve served this to non-vegans who didn’t even notice the difference. For extra richness, add a tablespoon of nutritional yeast—it gives a cheesy flavor without the dairy.
Low-Carb/Keto Version: This recipe is already low-carb, but you can make it even keto-friendly by using extra butter or ghee instead of cream. Add a tablespoon of cream cheese for extra fat and creaminess. I’ve made this for friends on keto diets and they always appreciate having a side dish that feels indulgent.
Loaded Cauliflower Mash: Top your finished mash with crispy bacon bits, shredded cheddar cheese, sliced green onions, and a dollop of sour cream. It’s like loaded baked potatoes but healthier. I made this for a potluck and it was the first dish to disappear.
Serving & Storage Suggestions
This creamy roasted garlic cauliflower mash is incredibly versatile when it comes to serving. Here’s how I like to enjoy it.
Serving temperature: Serve this mash warm, straight from the food processor. It’s at its creamiest and most flavorful when freshly made. If you need to hold it for a while, keep it warm in a covered dish in a low oven (200°F/95°C) for up to 30 minutes. Stir it before serving to redistribute any separated liquid.
What to serve it with: This mash pairs beautifully with roasted chicken, grilled steak, pan-seared salmon, or pork chops. It’s also amazing as a base for stews or braised meats—the creamy texture soaks up all those delicious juices. For a vegetarian meal, serve it alongside roasted vegetables or a hearty lentil stew. I love it with my garlic herb roasted chicken for a complete comfort meal.
Leftover ideas: Leftover cauliflower mash is fantastic the next day. Spread it on toast and top with a fried egg for an amazing breakfast. Use it as a thickener for soups or stews. Or simply reheat and serve as a side dish again—it’s that good.
Storage instructions: Store leftover mash in an airtight container in the refrigerator for up to 5 days. The flavors actually meld together and get even better after a day or two. To freeze, portion the mash into freezer-safe bags or containers and freeze for up to 3 months. Thaw overnight in the refrigerator before reheating.
Reheating methods: The best way to reheat this mash is in a saucepan over medium-low heat, stirring frequently. Add a splash of cream or milk to restore the creamy texture. You can also microwave it in 30-second bursts, stirring between each. If the mash seems dry after reheating, add a little butter or cream to bring it back to life.
Flavor development: One thing I’ve noticed is that this mash tastes even better the next day. The roasted garlic flavor mellows and spreads throughout the mash, making everything more cohesive. So don’t worry if you make it ahead—it’s actually a great make-ahead side dish for holiday dinners.
Nutritional Information & Benefits
This creamy roasted garlic cauliflower mash is not just delicious—it’s genuinely good for you. Here’s a rough breakdown per serving (about 1 cup, serves 4):
- Calories: Approximately 180-200 calories per serving
- Carbohydrates: 12g (net carbs about 8g after fiber)
- Fiber: 4g
- Protein: 4g
- Fat: 14g (mostly from healthy olive oil and butter)
- Vitamin C: 77% of your daily needs—cauliflower is packed with it
- Vitamin K: 20% of daily needs
- Folate: 14% of daily needs
Cauliflower is a cruciferous vegetable rich in antioxidants and anti-inflammatory compounds. It’s also a great source of choline, which supports brain health and metabolism. Roasted garlic adds allicin, a compound known for its immune-boosting and heart-healthy properties.
This dish is naturally gluten-free, low-carb, and suitable for keto diets. It’s also vegetarian and can easily be made vegan with simple substitutions. The only potential allergen is dairy, which can be replaced with plant-based alternatives.
From a wellness perspective, I love that this recipe lets me enjoy a creamy, comforting side dish without the blood sugar spike that comes with mashed potatoes. It’s the kind of food that makes you feel good while you’re eating it and even better afterward. No guilt, no regrets—just pure satisfaction.
Conclusion
This creamy roasted garlic cauliflower mash started as a mistake, but honestly, it’s become one of my most-requested recipes. It’s proof that sometimes the best dishes come from moments of distraction and happy accidents. If you’d told me a few years ago that cauliflower would become my go-to comfort food side dish, I would have laughed. But here we are.
What I love most about this recipe is how versatile it is. It works for a quiet weeknight dinner, a holiday feast, or a meal prep Sunday. It’s healthy without tasting like a compromise, and it’s simple enough for a beginner cook to master. The roasted garlic does all the heavy lifting—it transforms humble cauliflower into something that feels genuinely luxurious.
I’d love to hear how this recipe turns out for you. Did you try any variations? Did you serve it with something amazing? Drop a comment below and let me know. And if you’re looking for another healthy side dish to round out your meal, try my roasted balsamic Brussels sprouts—they pair beautifully with this mash. Happy cooking, friends. You’ve got this.
Frequently Asked Questions
Can I make this cauliflower mash ahead of time?
Absolutely! This recipe is perfect for meal prep. Make it up to 2 days ahead and store it in the refrigerator. Reheat gently on the stovetop with a splash of cream or milk to restore the creamy texture. You can also freeze it for up to 3 months.
Why is my cauliflower mash watery?
Watery mash usually happens when you boil the cauliflower instead of roasting it, or when you don’t dry the florets well before cooking. Roasting concentrates the flavor and removes excess moisture. If your mash is already watery, try simmering it in a saucepan over medium heat to evaporate some of the liquid.
Can I use frozen cauliflower for this recipe?
I don’t recommend frozen cauliflower for this recipe. Frozen cauliflower releases a lot of water when cooked, which leads to watery mash. If you’re in a pinch, thaw the frozen cauliflower completely and squeeze out as much moisture as possible before roasting. But fresh cauliflower gives you the best texture and flavor.
How do I get my cauliflower mash super smooth?
A food processor or high-speed blender gives you the smoothest results. Make sure your cauliflower is still warm when you blend it—cold cauliflower can turn gummy. Process for 30-60 seconds, scraping down the sides as needed. If it’s still not smooth enough, add another tablespoon of cream or warm water.
Is this recipe keto-friendly?
Yes! This cauliflower mash is naturally low in carbs and keto-friendly. With about 8g net carbs per serving, it fits perfectly into a keto diet. For an even richer version, use extra butter or ghee instead of cream, and add a tablespoon of cream cheese for extra fat.
Pin This Recipe!
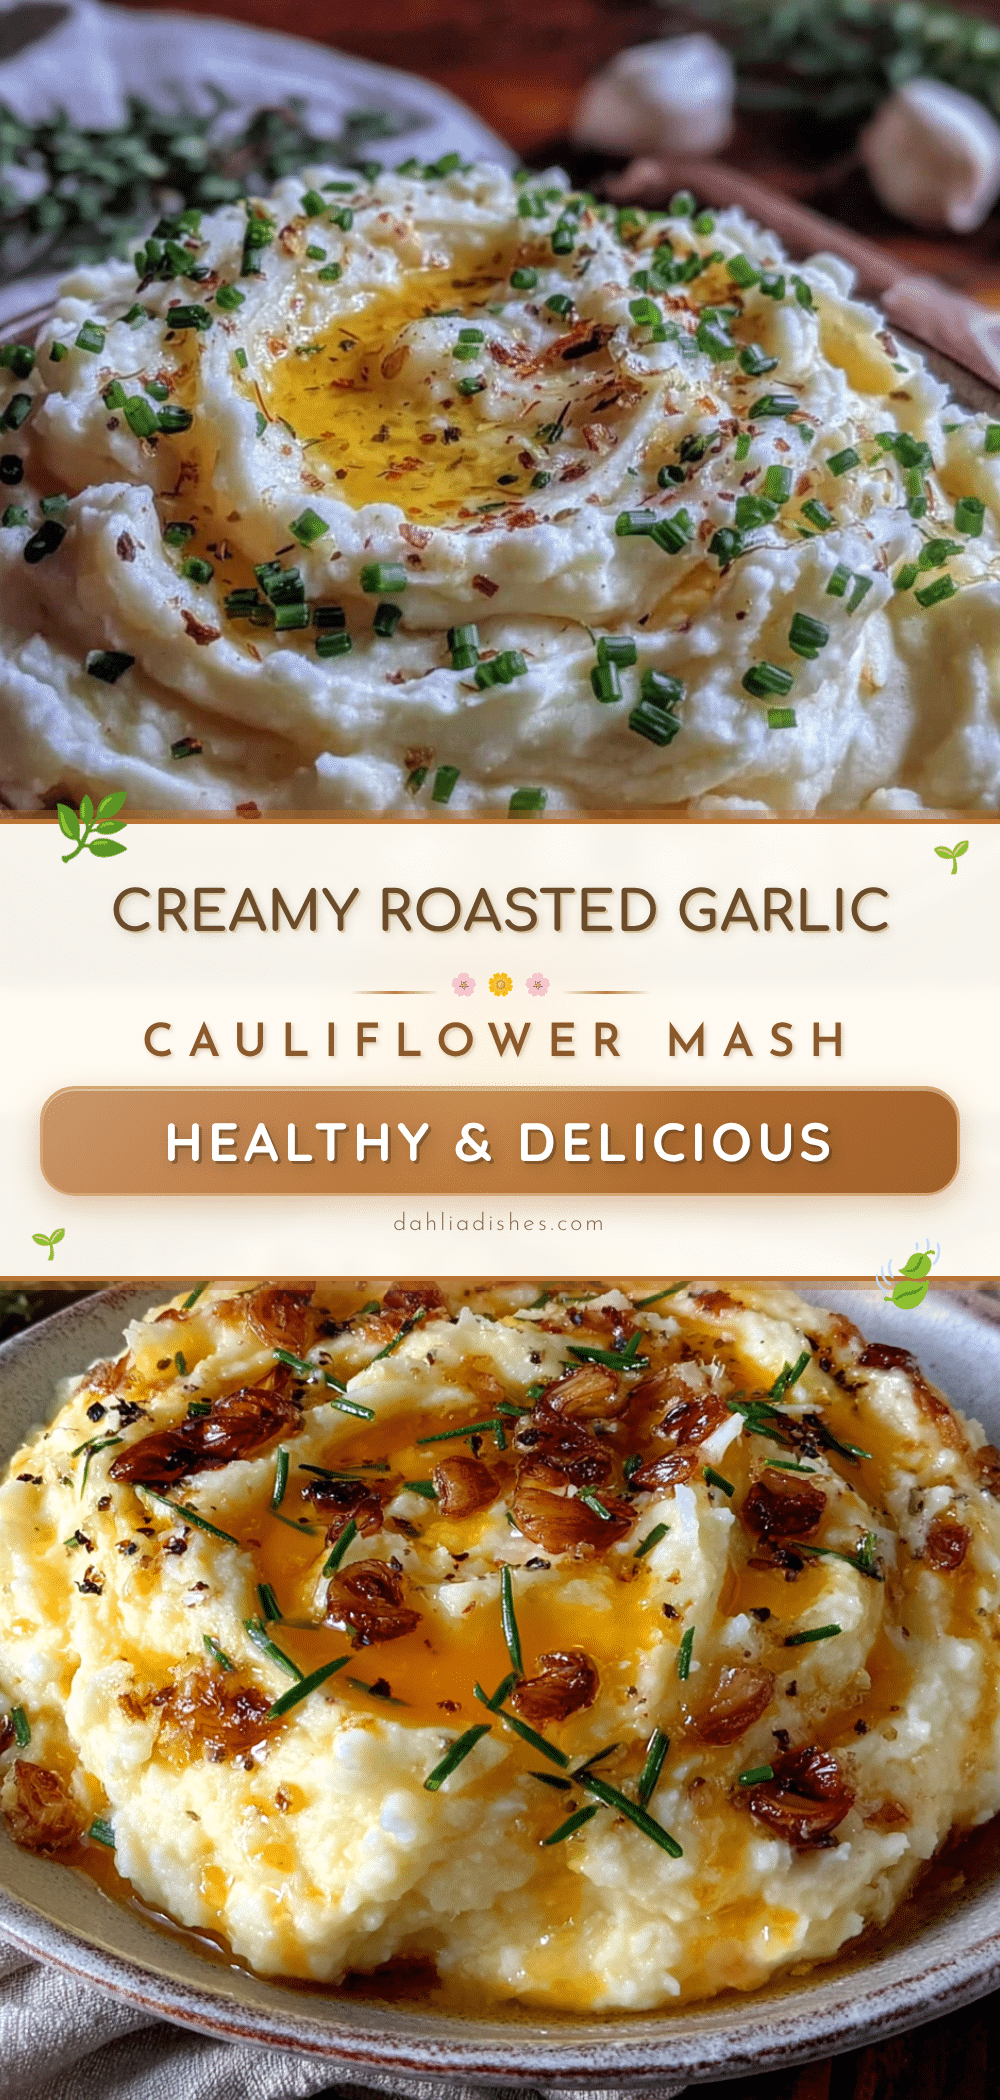
Creamy Roasted Garlic Cauliflower Mash (Easy Healthy Side Dish)
This creamy roasted garlic cauliflower mash is a healthy, low-carb side dish that’s surprisingly luxurious. Roasted cauliflower and garlic blend into a silky, comforting mash that even mashed potato lovers will enjoy.
- Prep Time: 10 minutes
- Cook Time: 30 minutes
- Total Time: 40 minutes
- Yield: 4 servings 1x
- Category: Side Dish
- Cuisine: American
Ingredients
- 1 large head cauliflower (about 2–2.5 pounds / 900–1100 grams), cut into florets
- 1 whole head of garlic
- 2 tablespoons olive oil, divided
- 3 tablespoons unsalted butter (or vegan butter for dairy-free)
- 1/4 cup heavy cream (or full-fat coconut milk for dairy-free)
- 1/2 teaspoon salt, plus more to taste
- 1/4 teaspoon black pepper, freshly ground
- 1/4 teaspoon garlic powder (optional)
- 2 tablespoons fresh chives or parsley, chopped (for garnish)
- Optional: 2 tablespoons cream cheese or Greek yogurt
Instructions
- Preheat your oven to 400°F (200°C). Line a baking sheet with parchment paper or foil.
- Prepare the cauliflower: Remove leaves and tough stem, cut into evenly sized florets (about 1 to 1.5 inches each).
- Prepare the garlic: Slice off the top quarter-inch of the garlic head to expose cloves. Place on a piece of aluminum foil, drizzle with about 1 teaspoon olive oil, and sprinkle with a tiny pinch of salt. Wrap foil tightly to create a sealed packet.
- Roast the cauliflower and garlic: Spread cauliflower florets on the prepared baking sheet. Drizzle with remaining olive oil, sprinkle with salt and pepper, and toss to coat. Place garlic packet on the same sheet. Roast for 25-30 minutes, flipping cauliflower halfway through, until golden brown and fork-tender. Garlic should be soft and caramelized.
- Let everything cool slightly: Remove from oven and let cauliflower cool for about 5 minutes. Carefully open garlic packet and let cool until handleable, about 5 more minutes.
- Squeeze the roasted garlic: Squeeze the bottom of each clove to release the soft garlic paste. Discard skins. You should have about 2 tablespoons of paste.
- Blend everything together: Transfer roasted cauliflower to a food processor or large bowl (if using immersion blender). Add roasted garlic paste, butter, heavy cream, salt, pepper, and garlic powder (if using). Process until completely smooth, about 30-60 seconds, scraping down sides as needed. If too thick, add another tablespoon of cream or warm water.
- Taste and adjust: Adjust seasoning with additional salt and pepper as needed.
- Serve immediately: Transfer to a serving bowl, garnish with fresh chives or parsley and an extra drizzle of olive oil or pat of butter if desired. Serve warm.
Notes
For best texture, roast cauliflower instead of boiling to avoid watery mash. Dry cauliflower well before roasting. Don’t overcrowd the baking sheet. Blend while ingredients are still warm. Start with less liquid and add gradually. Roast extra garlic for other uses. Leftovers can be stored in the refrigerator for up to 5 days or frozen for up to 3 months.
Nutrition
- Serving Size: 1 cup
- Calories: 190
- Sugar: 4
- Sodium: 320
- Fat: 14
- Saturated Fat: 6
- Carbohydrates: 12
- Fiber: 4
- Protein: 4
Keywords: cauliflower mash, roasted garlic, healthy side dish, low-carb, keto, vegetarian, gluten-free, creamy cauliflower


