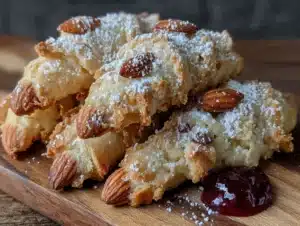
Love this? Save it for later!
Share the inspiration with your friends
I used to think Halloween baking was all about sugar bombs and store-bought candy. Then my daughter came home from school one October afternoon, eyes wide, telling me about her friend’s “spooky witch fingers.” She described them in such detail—the almond fingernails, the creepy knuckles—that I knew I had to try making them myself. But honestly, the first batch I attempted was a disaster. The cookies spread into blobs, the almonds fell off, and my daughter looked at me with that “maybe we should just buy cupcakes” face.
That failure stuck with me. For weeks, I tinkered with the dough, trying to get that perfect shortbread texture that holds its shape. I tested different chilling times, different butter temperatures, and way too many batches of crumbly, broken fingers. My kitchen counter looked like a crime scene of buttery crumbs and misplaced almonds. But somewhere around batch number six, something clicked. The dough felt right in my hands—firm, smooth, and cooperative. When I shaped that first finger, it actually looked like one.
The secret, I discovered, was treating the dough with patience. You can’t rush shortbread, especially when you’re asking it to hold a finger shape. Let me tell you, the first time I pulled a perfect tray of witch fingers from the oven, my daughter actually gasped. She grabbed one before it even cooled, bit into the tip, and said, “Mom, these are better than the real ones.”
These kid-friendly witch finger shortbread cookies have become our family’s Halloween tradition. They’re creepy enough to impress at school parties but made with simple ingredients that won’t break your grocery budget. The best part? Kids can help shape them—messy little hands actually make them look more realistic. Maybe you’ve been there, standing in the baking aisle, wondering if you should just buy another bag of candy. Trust me, these cookies are worth the extra effort.
Why You’ll Love This Recipe
After testing this recipe more times than I care to admit, I can honestly say these witch finger shortbread cookies deliver on every front. They’ve earned their spot in our annual Halloween rotation, and here’s why they’ll earn a place in yours too.
- Budget-Friendly Ingredients : You probably already have butter, flour, sugar, and vanilla in your pantry. The only special purchase is a bag of whole almonds or slivered almonds for the fingernails. No expensive extracts or specialty flours required.
- Kid-Approved Activity : My kids fight over who gets to press the almond nails into the dough. The shaping process is messy and fun, and honestly, imperfect fingers look more realistic. It’s a win-win for parents and little helpers.
- Holds Its Shape Perfectly : Unlike cut-out cookies that spread into unrecognizable blobs, this shortbread recipe maintains its finger shape through baking. The chilling step is non-negotiable, but it guarantees creepy, realistic results every time.
- Make-Ahead Friendly : You can shape the fingers, freeze them on a baking sheet, and bake them straight from the freezer when you need a last-minute Halloween treat. I’ve done this for school parties and it saves so much stress.
- Crowd-Pleasing Flavor : The buttery, melt-in-your-mouth shortbread texture appeals to kids and adults alike. They’re not overly sweet, which means you can enjoy a few without feeling like you’ve eaten a sugar cube.
What sets this recipe apart from other witch finger cookies is the texture. Most versions use a standard sugar cookie dough that spreads or cracks during baking. My shortbread-based dough stays firm, giving you that satisfying snap when you bite into a “finger.” Plus, the almond extract adds just the right amount of spooky aroma without being overwhelming. It’s comfort food with a creepy twist—perfect for Halloween without the scary price tag.
What Ingredients You Will Need
This recipe uses simple, budget-friendly ingredients that come together to create something truly special. Most of these are pantry staples, which means you can whip up a batch of witch finger shortbread cookies without a special grocery trip.
For the Shortbread Dough
- 1 cup (226g) unsalted butter, softened to room temperature (I prefer Land O’Lakes for consistent results)
- ½ cup (100g) granulated sugar (not powdered sugar—granulated gives the right texture)
- 1 large egg yolk, room temperature (save the white for glazing if you want shiny nails)
- 1 teaspoon vanilla extract (pure vanilla makes a difference, but imitation works fine on a budget)
- ½ teaspoon almond extract (this is the secret to that bakery-style flavor)
- 2 cups (250g) all-purpose flour, spooned and leveled (don’t scoop directly from the bag)
- ¼ teaspoon salt (balances the sweetness and enhances the butter flavor)
For the Decoration
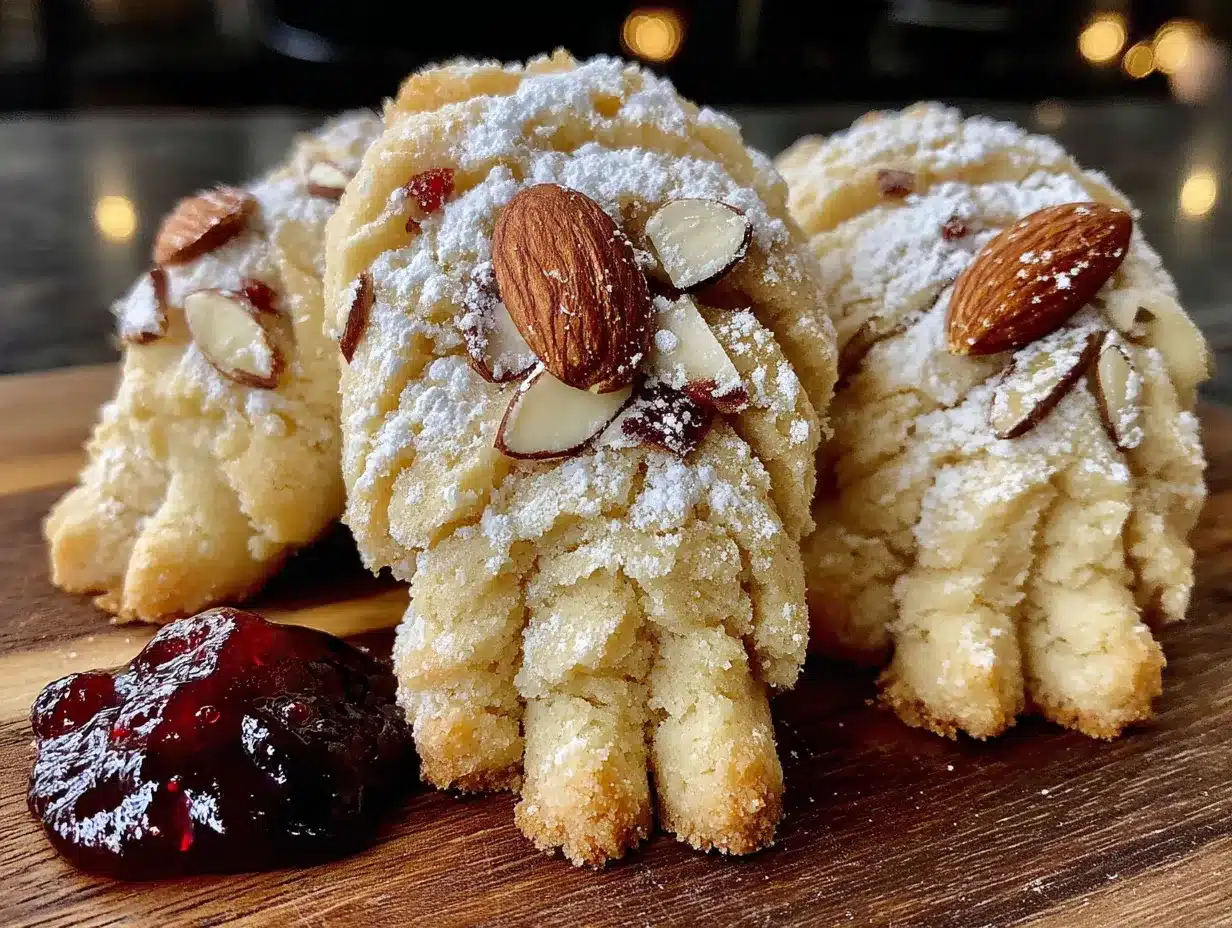
- 24-30 whole almonds or slivered almonds (one per cookie finger; whole almonds look more like real fingernails)
- Red jam or food coloring gel (for bloody knuckle effects—optional but fun for older kids)
- Seedless raspberry jam (my personal favorite for realistic “blood” color)
Ingredient Tips from My Kitchen
Let me share what I’ve learned from making these witch finger cookies more times than I can count. First, butter temperature matters more than you think. If it’s too soft, your dough will be sticky and impossible to shape. If it’s too cold, you’ll struggle to cream it with the sugar. Leave your butter on the counter for about an hour before starting—it should give slightly when you press it with your finger.
For the almonds, look for whole almonds that are relatively uniform in size. You want them to look like actual fingernails, so avoid broken or tiny pieces. If you’re making these for a classroom party where nut allergies are a concern, you can substitute sliced dried apricots or even small pieces of white chocolate for the fingernails.
I’ve tested this recipe with both salted and unsalted butter. If you only have salted butter on hand, reduce the added salt to ⅛ teaspoon. The cookies will still turn out delicious, just slightly saltier. And if you’re out of almond extract entirely, don’t worry—the cookies will still taste amazing with just vanilla.
Equipment Needed
You don’t need fancy equipment to make these witch finger shortbread cookies. Most of these tools are probably already in your kitchen drawers.
- Mixing bowls: One large bowl for the dough, one small bowl for the egg wash if you’re using it
- Electric mixer: A hand mixer or stand mixer works fine. I’ve made these with a wooden spoon too—it just takes more elbow grease.
- Baking sheets: Two standard half-sheet pans work perfectly. Line them with parchment paper for easy cleanup.
- Parchment paper: Non-negotiable in my kitchen. It prevents sticking without adding extra grease.
- Sharp knife or bench scraper: For cutting the dough into finger-sized pieces
- Small offset spatula: Helpful for transferring shaped cookies to the baking sheet
- Plastic wrap: For chilling the dough before shaping
- Cooling rack: Allows air to circulate around the cookies so they cool evenly
If you don’t have an electric mixer, you can cream the butter and sugar by hand. It takes about 5 minutes of vigorous stirring, but it’s a great arm workout. I’ve also used a food processor in a pinch—just pulse the flour and butter mixture, then stir in the sugar and extracts by hand.
One tip I wish I’d known earlier: invest in a good quality baking sheet. Thin, dark sheets can cause the bottoms of your cookies to burn before the tops are done. I use Nordic Ware aluminum sheets, and they’ve lasted for years without warping.
Preparation Method
Making these witch finger shortbread cookies is a process, but each step is straightforward. Take your time, especially with the chilling stages—they’re what make these cookies look so realistic.
Step 1: Cream the Butter and Sugar
In a large mixing bowl, beat the softened butter and granulated sugar together on medium speed until light and fluffy. This takes about 2-3 minutes with an electric mixer. You’re looking for a pale yellow color and a texture that looks like thick frosting. Scrape down the sides of the bowl at least once to make sure everything is evenly mixed.
Pro tip from my failures: Don’t skip the creaming step. I tried rushing this once, and the cookies turned out dense and greasy. The air you incorporate here is what gives shortbread its tender texture.
Step 2: Add the Wet Ingredients
Add the egg yolk, vanilla extract, and almond extract to the butter mixture. Beat on low speed until just combined. The mixture might look slightly curdled at this point—that’s normal. Don’t overmix, or your cookies will be tough.
Sensory cue: At this stage, the mixture should smell like butter cookies with a hint of almond. That aroma is your signal that the flavor base is right.
Step 3: Incorporate the Dry Ingredients
In a separate bowl, whisk together the all-purpose flour and salt. Gradually add this to the wet mixture, mixing on low speed until a soft dough forms. The dough should pull away from the sides of the bowl and feel smooth, not sticky. If it feels too sticky, add an extra tablespoon of flour. If it seems dry and crumbly, add a teaspoon of cold water.
Personal lesson: The first time I made these, I added all the flour at once. Big mistake. The flour flew everywhere, and the dough was impossible to mix evenly. Add it gradually, about ¼ cup at a time, and you’ll get a much better result.
Step 4: Chill the Dough
Shape the dough into a flat disc, wrap it tightly in plastic wrap, and refrigerate for at least 30 minutes. This step is crucial. Chilling solidifies the butter, which prevents the cookies from spreading during baking. If you skip this, your witch fingers will look more like witch blobs.
I’ve left the dough in the fridge overnight with great results. Just let it sit at room temperature for 10 minutes before shaping if it feels too hard.
Step 5: Shape the Fingers
Line your baking sheets with parchment paper. Remove the chilled dough from the refrigerator. Pinch off a piece of dough about the size of a walnut (roughly 1 tablespoon). Roll it between your palms to form a log about 3 inches long and ½ inch thick.
Here’s where the fun begins. Gently taper one end of the log to create the fingertip shape. Use the back of a knife or your fingernail to press small lines into the dough for knuckle creases. Don’t press too deep—you want them visible but not cutting through the cookie.
Realism tip: My daughter discovered that if you gently squeeze the middle of the finger to make it slightly thinner, it looks more like a real witch finger. Imperfect shapes actually look better, so don’t stress about making them uniform.
Step 6: Add the Fingernails
Press one whole almond firmly into the tapered end of each finger. The pointed end of the almond should face outward, like a fingernail. Make sure it’s pressed in well enough that it won’t fall off during baking. If the almond doesn’t stick, dab a tiny bit of water on the dough before pressing.
Warning: I learned the hard way that almonds can burn if they’re too close to the edge of the baking sheet. Keep your fingers at least 1 inch apart and away from the pan edges.
Step 7: Second Chill (The Secret Step)
Place the shaped cookies on the prepared baking sheets and refrigerate for another 15-20 minutes. This second chill firms up the butter again after handling, ensuring your fingers keep their shape. Trust me, this extra 15 minutes makes the difference between cookies that look like fingers and cookies that look like sad, flat worms.
Step 8: Bake to Perfection
Preheat your oven to 325°F (165°C). Bake the chilled cookies for 12-15 minutes, or until the edges are just barely golden. The tops should remain pale—you’re not looking for brown cookies. The almonds should be lightly toasted but not dark.
Sensory cue: Your kitchen will start smelling like buttery shortbread with a hint of toasted almonds. When you see the edges turn a pale gold, they’re done.
Step 9: Cool and Decorate
Let the cookies cool on the baking sheet for 5 minutes, then transfer them to a wire rack to cool completely. The cookies will be soft when warm but firm up as they cool. Once completely cool, you can add “blood” effects using red jam or food coloring gel. I like to dab a tiny bit of seedless raspberry jam at the base of the fingernail for a gruesome touch.
Cooking Tips & Techniques
After making these witch finger shortbread cookies more times than I’d like to admit, I’ve collected a few tricks that make the process smoother and the results more impressive.
Temperature control is everything. Warm hands will soften the dough as you shape it, making it sticky and hard to work with. If your hands get too warm, run them under cold water, dry them thoroughly, and continue. I keep a bowl of ice water nearby when I’m making a large batch.
Don’t overbake. Shortbread continues to cook from residual heat after you pull it from the oven. If the cookies look done at 12 minutes, they’re perfect. Overbaked shortbread becomes dry and crumbly instead of tender and buttery. I once left a batch in for 16 minutes because I was distracted by a phone call, and they turned into brittle, sad little fingers that crumbled at the slightest touch.
Use a ruler for consistency. This sounds ridiculous, but the first few times I made these, my fingers ranged from stubby to freakishly long. Now I use a ruler to measure the first few, and then I can eyeball the rest. Aim for 3 inches long and ½ inch thick for the most realistic proportions.
The knuckle trick. For really realistic knuckles, use the back of a butter knife to press a line about ⅓ of the way down from the fingertip, then another line about ⅔ of the way down. These should be shallow indentations, not cuts. My grandmother taught me this trick, and it makes a huge difference in the final look.
Multitask strategically. While the first batch of shaped cookies chills in the refrigerator, shape the second batch. This way, you’re always working with cold dough, and the process flows smoothly. I’ve made three dozen of these in under an hour using this assembly-line method.
Variations & Adaptations
One of the best things about these witch finger shortbread cookies is how adaptable they are. Here are some variations I’ve tried and loved.
Gluten-Free Version
Substitute the all-purpose flour with a 1:1 gluten-free baking flour blend. I’ve had excellent results with Bob’s Red Mill 1-to-1 Baking Flour. The texture is slightly more crumbly, but the flavor is just as buttery. Add an extra tablespoon of flour if the dough feels too soft.
Vegan Adaptation
Use vegan butter sticks (not spreadable margarine) and replace the egg yolk with 1 tablespoon of aquafaba (the liquid from a can of chickpeas). The cookies won’t be quite as tender, but they’ll still hold their shape and taste delicious. I tested this version for a friend’s vegan Halloween party, and nobody could tell the difference.
Chocolate Witch Fingers
Replace ¼ cup of the flour with unsweetened cocoa powder for a chocolate version. These look especially creepy with dark chocolate “fingernails” made from chocolate chips instead of almonds. My kids actually prefer this version, though I still love the classic buttery shortbread.
Spiced Autumn Fingers
Add 1 teaspoon of pumpkin pie spice or cinnamon to the dry ingredients for a fall-flavored twist. These are perfect for Thanksgiving-themed parties or autumn baking days. The warm spices pair beautifully with the almond extract.
Colored Dough
Add a few drops of green food coloring to the dough for truly witchy fingers. My daughter insists on green dough every year, and the color does make them look more magical. Just be careful not to add too much—gel food coloring works best because it doesn’t alter the dough’s consistency.
Serving & Storage Suggestions
These witch finger shortbread cookies are perfect for Halloween parties, school bake sales, or spooky movie nights. Here’s how to serve and store them for the best experience.
Serving Temperature: These cookies are best served at room temperature. If you’ve stored them in the refrigerator, let them sit out for 10-15 minutes before serving. The buttery flavor really shines when the cookies aren’t cold.
Presentation Ideas: Arrange the fingers on a black platter or cake stand for maximum creep factor. I like to scatter a few loose almonds around the plate to look like broken fingernails. For a truly gruesome display, serve them alongside a bowl of “blood” (raspberry jam) for dipping.
Complementary Treats: These cookies pair beautifully with warm apple cider, hot chocolate, or a glass of cold milk. For an adult Halloween party, they’re excellent with a cup of black coffee or a pumpkin spice latte.
Storage Instructions: Store the cookies in an airtight container at room temperature for up to 5 days. Layer them between sheets of parchment paper to prevent the almond nails from breaking off. If you live in a humid climate, add a silica gel packet to the container to keep the cookies crisp.
Freezer Instructions: These cookies freeze beautifully. Place the baked and cooled cookies in a single layer on a baking sheet and freeze until solid. Transfer to a freezer-safe container or zip-top bag, separating layers with parchment paper. They’ll keep for up to 3 months. Thaw at room temperature for 15 minutes before serving.
Make-Ahead Dough: You can prepare the dough up to 3 days in advance and keep it wrapped in the refrigerator. You can also shape the fingers, freeze them on a baking sheet, and transfer the frozen fingers to a freezer bag. Bake them straight from the freezer, adding 2-3 minutes to the baking time.
Nutritional Information & Benefits
While these witch finger shortbread cookies are a treat, they do offer a few nutritional bright spots. Here’s a breakdown of what you’re getting in each cookie.
| Nutrient | Per Cookie (based on 30 cookies) |
|---|---|
| Calories | 110 |
| Total Fat | 7g |
| Saturated Fat | 4g |
| Cholesterol | 20mg |
| Sodium | 25mg |
| Total Carbohydrates | 11g |
| Sugars | 4g |
| Protein | 2g |
Health Benefits: Almonds are a great source of vitamin E, healthy fats, and magnesium. Using real butter provides vitamin A and healthy saturated fats that support brain health in moderation. The portion-controlled size of these cookies makes it easy to enjoy a treat without overindulging.
Dietary Considerations: These cookies are vegetarian and can be made gluten-free and vegan with the substitutions mentioned above. They contain dairy, eggs, and tree nuts (almonds), so they’re not suitable for those with allergies to these ingredients. For nut-free versions, substitute the almonds with dried fruit or white chocolate chips.
I believe in enjoying treats in moderation, and these cookies fit perfectly into a balanced lifestyle. They’re made with real, recognizable ingredients—no artificial preservatives or mystery additives. That’s something I feel good about serving to my family.
Conclusion
These witch finger shortbread cookies have become more than just a Halloween recipe in our house. They’re a tradition that brings us together in the kitchen, laughing over misshapen fingers and arguing about who gets to press the almonds. Every year, my daughter’s hands get a little bigger, and the fingers look a little different, but the joy of making them together stays the same.
What I love most about this recipe is how forgiving it is. Your fingers don’t have to be perfect—in fact, the imperfect ones look more realistic. The dough is simple enough for beginners but versatile enough for experienced bakers to customize. And the results? They’re always a hit, whether at a classroom party or a family gathering.
I hope you’ll try making these with the people you love. Let the kids get their hands messy, experiment with different decorations, and don’t stress about making them look “perfect.” The best witch fingers are the ones made with laughter and a little bit of spooky spirit. If you make a batch, I’d love to hear how they turned out. Drop a comment below and share your creepiest creations!
Happy haunting, and happy baking.
Frequently Asked Questions
Can I make these witch finger cookies without almond extract?
Absolutely. The almond extract adds a subtle bakery flavor, but you can substitute it with additional vanilla extract or leave it out entirely. The cookies will still taste delicious, just with a simpler butter-vanilla flavor profile.
Why did my cookies spread and lose their finger shape?
This usually happens when the dough wasn’t chilled enough before baking. Make sure you chill the shaped cookies for at least 15-20 minutes before they go into the oven. If your kitchen is warm, pop them in the freezer for 10 minutes instead.
Can I use margarine instead of butter?
I don’t recommend it. Margarine has a higher water content than butter, which can cause the cookies to spread and become greasy. Stick with real butter for the best texture and flavor. If you need a dairy-free option, use vegan butter sticks specifically designed for baking.
How do I keep the almond fingernails from falling off?
Press the almonds firmly into the dough before baking. If they still seem loose, dab a tiny bit of water on the dough before pressing the almond in. You can also use a small amount of egg wash as “glue” to help them stick.
Can I make these cookies ahead of time for a party?
Yes! These cookies are perfect for make-ahead baking. You can bake them up to 5 days in advance and store them in an airtight container. For longer storage, freeze the baked cookies for up to 3 months. They thaw at room temperature in about 15 minutes.
Pin This Recipe!
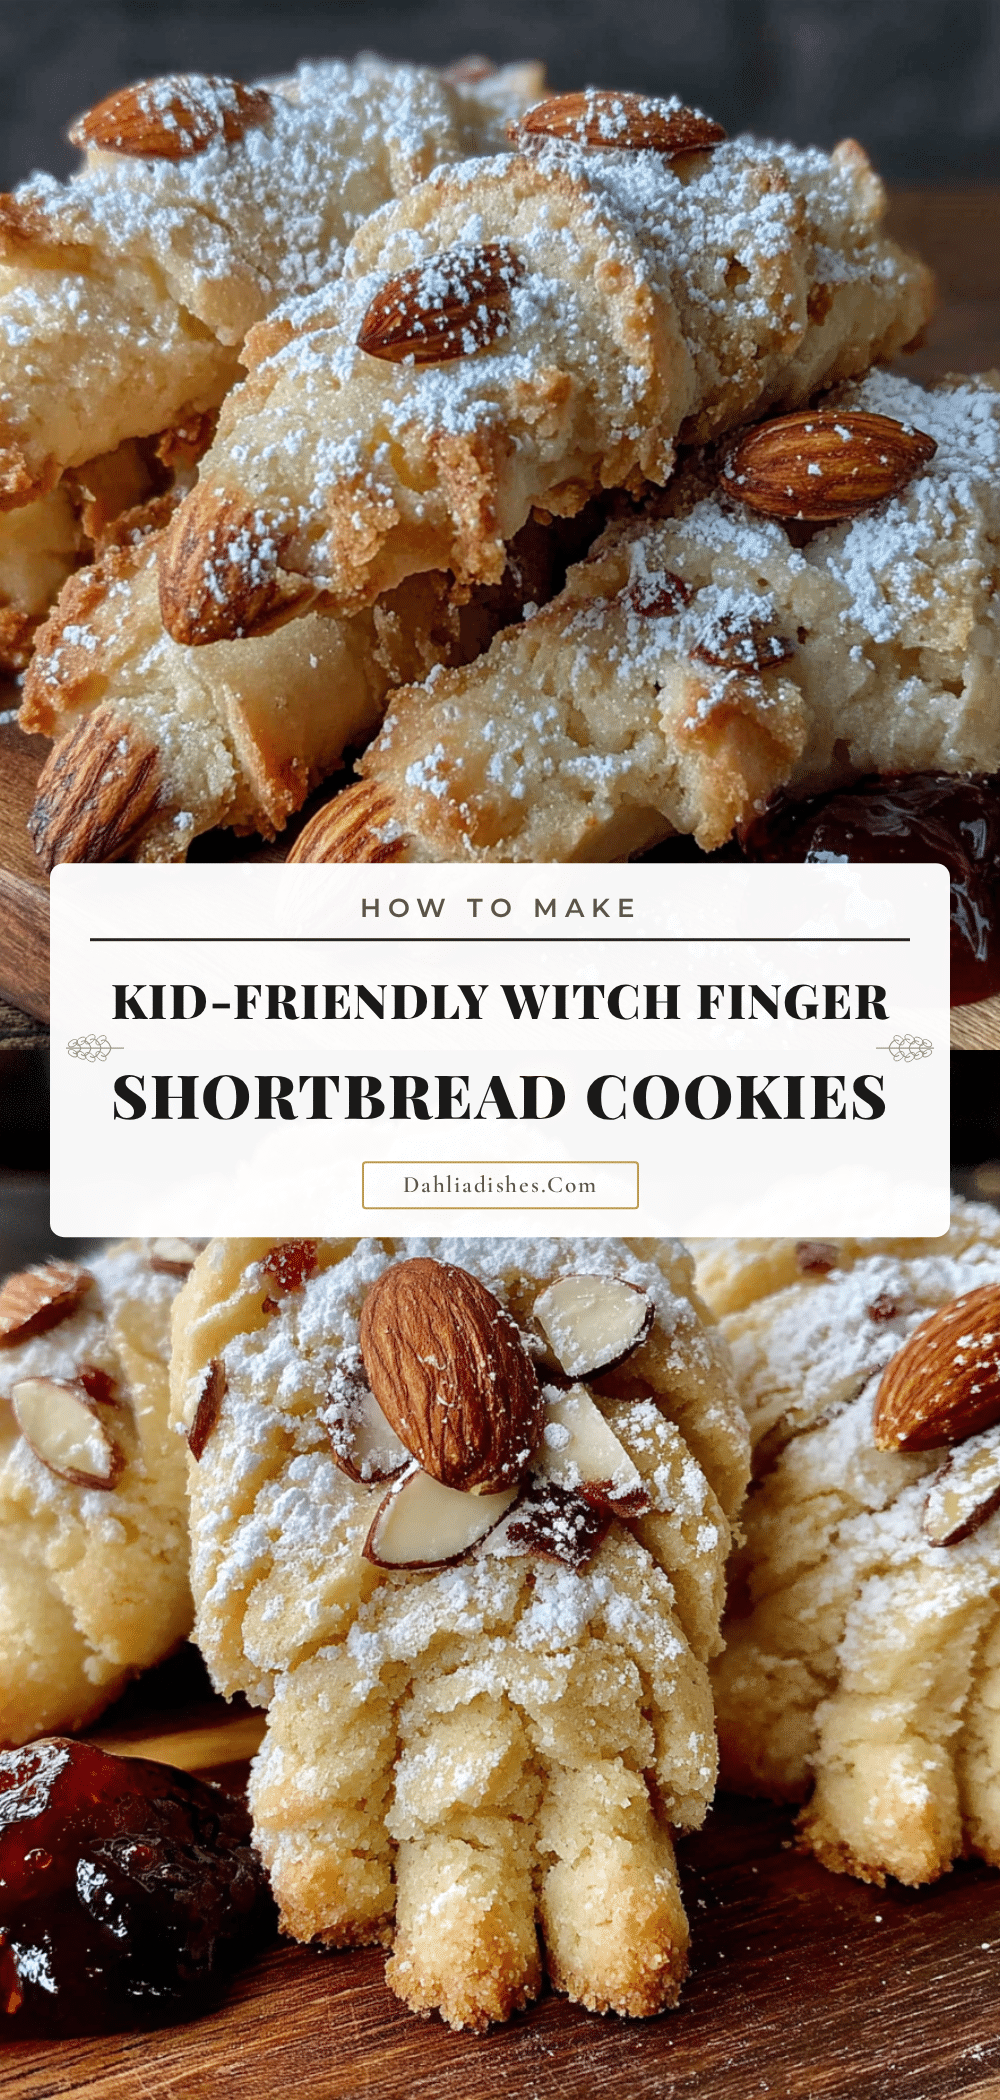
Easy Witch Finger Shortbread Cookies Kids Love

These creepy but kid-friendly witch finger shortbread cookies are a Halloween tradition. Made with simple ingredients, they hold their shape perfectly and are fun to make with children.
- Prep Time: 30 minutes
- Cook Time: 15 minutes
- Total Time: 1 hour 15 minutes
- Yield: 24-30 cookies 1x
- Category: Dessert
- Cuisine: American
Ingredients
- 1 cup (226g) unsalted butter, softened to room temperature
- ½ cup (100g) granulated sugar
- 1 large egg yolk, room temperature
- 1 teaspoon vanilla extract
- ½ teaspoon almond extract
- 2 cups (250g) all-purpose flour, spooned and leveled
- ¼ teaspoon salt
- 24–30 whole almonds or slivered almonds
- Red jam or food coloring gel (optional, for decoration)
- Seedless raspberry jam (optional, for decoration)
Instructions
- In a large mixing bowl, beat the softened butter and granulated sugar together on medium speed until light and fluffy, about 2-3 minutes. Scrape down the sides of the bowl at least once.
- Add the egg yolk, vanilla extract, and almond extract to the butter mixture. Beat on low speed until just combined.
- In a separate bowl, whisk together the all-purpose flour and salt. Gradually add this to the wet mixture, mixing on low speed until a soft dough forms. Add flour gradually, about ¼ cup at a time.
- Shape the dough into a flat disc, wrap it tightly in plastic wrap, and refrigerate for at least 30 minutes (or overnight).
- Preheat oven to 325°F (165°C). Line baking sheets with parchment paper.
- Remove the chilled dough from the refrigerator. Pinch off a piece of dough about the size of a walnut (roughly 1 tablespoon). Roll it between your palms to form a log about 3 inches long and ½ inch thick.
- Gently taper one end of the log to create the fingertip shape. Use the back of a knife or your fingernail to press small lines into the dough for knuckle creases.
- Press one whole almond firmly into the tapered end of each finger, pointed end outward.
- Place the shaped cookies on the prepared baking sheets and refrigerate for another 15-20 minutes.
- Bake the chilled cookies for 12-15 minutes, or until the edges are just barely golden. The tops should remain pale.
- Let the cookies cool on the baking sheet for 5 minutes, then transfer them to a wire rack to cool completely.
- Once completely cool, you can add ‘blood’ effects using red jam or food coloring gel if desired.
Notes
Chilling the dough is crucial to prevent spreading. For best results, chill shaped cookies for 15-20 minutes before baking. Almonds can burn if too close to the edge of the baking sheet. For nut-free versions, substitute almonds with dried fruit or white chocolate chips.
Nutrition
- Serving Size: 1 cookie
- Calories: 110
- Sugar: 4
- Sodium: 25
- Fat: 7
- Saturated Fat: 4
- Carbohydrates: 11
- Protein: 2
Keywords: witch finger cookies, Halloween cookies, shortbread cookies, spooky cookies, kid-friendly Halloween treats