Love this? Save it for later!
Share the inspiration with your friends
There used to be a little pop-up Halloween bakery in my neighborhood called “Witch’s Brew” that made the most incredible savory pastries. When they closed after just one season—the owner moved back to Portland—I was honestly devastated. I mean, I’d been dreaming about their jalapeño popper hand pies all year. After 12 tries—some burnt, some soggy, some that just fell apart—I finally got it.
This recipe for Lightened Up Mummy Jalapeño Popper Crescent Wraps is my love letter to that little bakery. And let me tell you, the first time I pulled these golden little mummies out of the oven, I actually teared up a little. The crispy edges, the gooey center, that perfect little kick of heat—it was all there.
Now, I know what you’re thinking. Jalapeño poppers aren’t exactly known for being healthy. But here’s the thing—I’ve been on this mission to make comfort food that doesn’t leave you feeling like you need a nap afterward. And these little guys? They deliver all the creamy, spicy, cheesy goodness without the heavy feeling. Honestly, my husband didn’t even notice I swapped out half the cream cheese for Greek yogurt. He just kept asking for more.
Maybe you’ve been there too—looking for that perfect Halloween appetizer that feels festive but won’t derail your healthy eating goals. Or maybe you just want something fun to make with the kids that actually tastes amazing. Either way, these mummy wraps are about to become your new favorite thing. Let me show you how to make them.
Why You’ll Love This Recipe
As someone who’s tested this recipe more times than I care to admit (seriously, my neighbors have eaten a lot of failed experiments), I can tell you with confidence—this version is the one. Here’s why these Lightened Up Mummy Jalapeño Popper Crescent Wraps deserve a spot on your Halloween menu:
- Quick & Easy: From fridge to table in under 30 minutes. Perfect for those “oh no, the party starts in an hour” moments.
- Simple Ingredients: You probably already have most of these in your kitchen. No weird specialty items needed.
- Perfect for Halloween: The mummy look is adorable without being complicated. Kids love helping wrap the “bandages.”
- Crowd-Pleaser: Even people who “don’t like spicy food” end up reaching for seconds. The heat is balanced, not overwhelming.
- Unbelievably Delicious: The creamy filling, the flaky crescent dough, the slight char on the peppers—it’s a texture party in your mouth.
What makes this recipe different from all the other jalapeño popper recipes out there? It’s the yogurt trick. By blending Greek yogurt with the cream cheese, you get that same luscious, creamy texture but with way less fat and a little protein boost. I tested it with all cream cheese, half-and-half, and the yogurt version—and honestly? The yogurt version won. It’s lighter, tangier, and somehow even more flavorful.
This is the kind of recipe that makes you close your eyes after the first bite. It’s comfort food reimagined—healthier, faster, but with the same soul-soothing satisfaction. Perfect for impressing your Halloween guests without stress, or turning a simple weeknight into something special.
What Ingredients You Will Need
This recipe uses simple, wholesome ingredients to deliver bold flavor and satisfying texture without the fuss. Most of these are pantry staples, which makes this perfect for last-minute Halloween cravings.
- Fresh jalapeños (6 medium): Look for firm, smooth peppers without wrinkles. Want less heat? Remove all the seeds and membranes. Want more fire? Leave some seeds in.
- Reduced-fat cream cheese (4 oz, softened): I use Philadelphia brand for the smoothest texture. Let it sit out for 20 minutes before mixing.
- Plain Greek yogurt (2 tablespoons): This is my secret lighter swap. Use full-fat Greek yogurt for extra creaminess, or dairy-free if needed.
- Shredded cheddar cheese (1/2 cup): Sharp cheddar gives the most flavor. Pre-shredded works fine, but freshly shredded melts better.
- Garlic powder (1/2 teaspoon): Don’t skip this—it adds that savory depth that makes these irresistible.
- Onion powder (1/4 teaspoon): Balances the heat and adds complexity.
- Salt (1/4 teaspoon): Just a pinch to bring everything together.
- Pillsbury Crescent Rolls (1 can, 8 count): The classic. I’ve tried homemade dough, and honestly, the canned version works best here. It’s flaky, forgiving, and makes the mummy look easy.
- Egg wash (1 egg + 1 tablespoon water): For that golden, glossy finish. You can use milk instead if you prefer.
- Candy eyes (16 small): These are optional but make the mummy look complete. Find them in the baking aisle or online.
Ingredient Selection Tips: For the best texture, look for small to medium jalapeños—they’re usually more uniform in shape and easier to wrap. If you’re sensitive to spice, try using poblano peppers instead. They’re milder but still give that wonderful pepper flavor.
Substitution Guidance: Need this dairy-free? Use dairy-free cream cheese and a thick coconut yogurt. The texture will be slightly different but still delicious. For a gluten-free option, look for gluten-free crescent dough—it’s available at most major grocery stores now.
Equipment Needed
Nothing fancy here—you probably already have everything you need. But let me share a few tips from my own trial-and-error kitchen adventures.
- Baking sheet: A standard half-sheet pan works perfectly. Line it with parchment paper for easy cleanup.
- Small mixing bowl: For combining the filling. Any bowl works, but a wider bowl makes mixing easier.
- Sharp knife: For slicing the jalapeños in half. A paring knife gives you the most control.
- Small spoon: For scooping out the seeds and membranes. A melon baller works great too.
- Pastry brush: For applying the egg wash. If you don’t have one, use a clean finger or a folded paper towel.
- Cutting board: Any board will do. I prefer a wooden one for stability.
Budget-Friendly Tip: Don’t have a pastry brush? No problem. I’ve used a clean, unused paintbrush from the hardware store in a pinch. Just make sure it’s never been used for paint!
Preparation Method
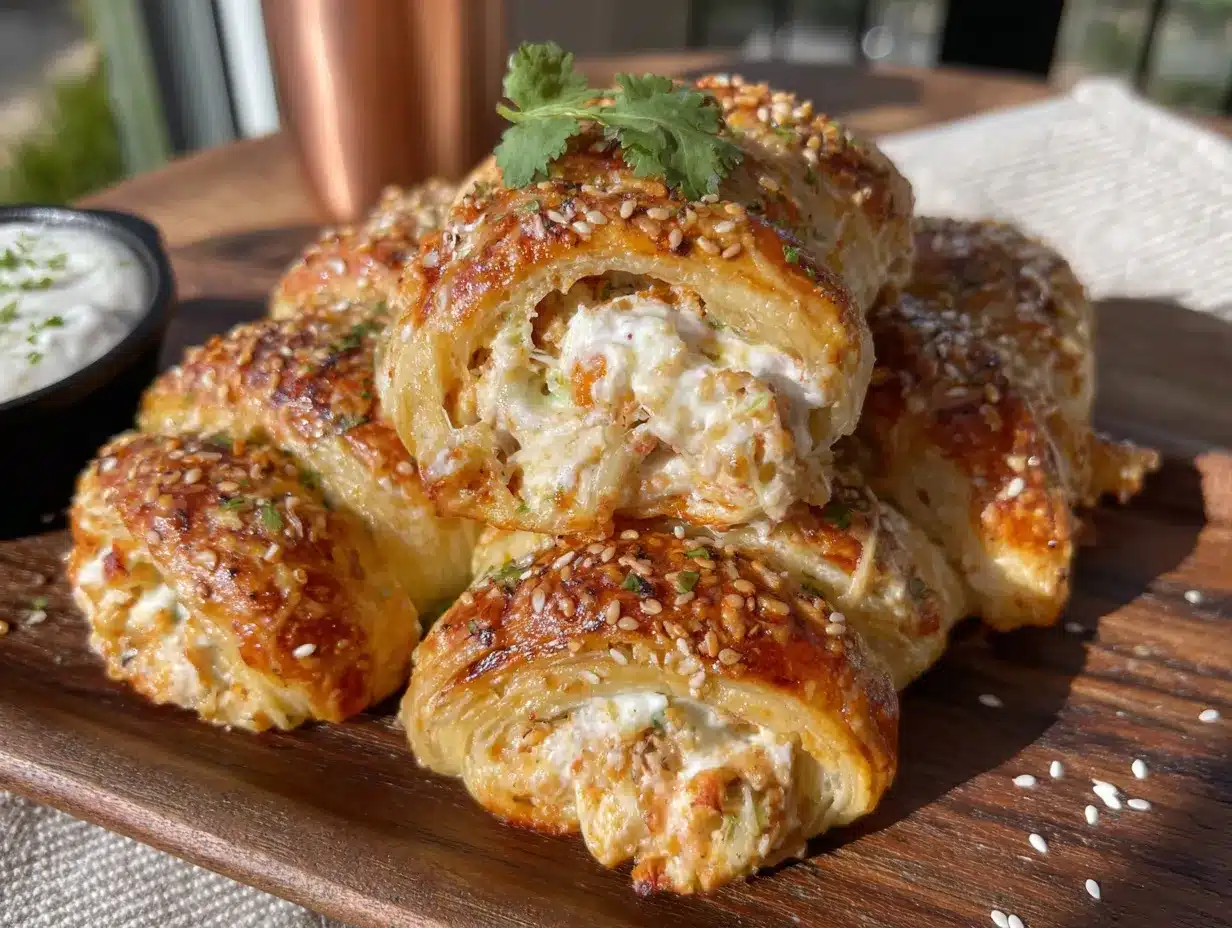
Alright, let’s get cooking! I’ve broken this down into simple steps so even first-timers can nail it. Trust me, if I can do it after 12 failed attempts, you’ve got this.
- Preheat your oven to 375°F (190°C). Line a baking sheet with parchment paper. This is non-negotiable—trust me, the cheese will try to escape otherwise.
- Prepare the jalapeños. Slice each jalapeño in half lengthwise. Using a small spoon, carefully scoop out the seeds and white membranes. I like to do this over the sink to avoid getting pepper juice in my eyes. Pro tip: Wear gloves if you have sensitive skin. I learned this the hard way after rubbing my eye and spending 20 minutes with it burning.
- Make the filling. In a small bowl, combine the softened cream cheese, Greek yogurt, shredded cheddar, garlic powder, onion powder, and salt. Mix until smooth and creamy. Taste it—seriously, just a tiny bit. Adjust the seasoning if needed. The filling should be tangy, savory, and just a little irresistible.
- Fill the peppers. Spoon about 1 teaspoon of the filling into each jalapeño half. Don’t overfill—you want it to be level with the top, not mounding. The cheese will expand slightly as it bakes.
- Prepare the crescent dough. Unroll the crescent dough and separate it into the 8 triangles along the perforated lines. Now, here’s the trick: use a sharp knife to cut each triangle lengthwise into 3 long strips. You’ll have 24 strips total. They don’t have to be perfect—imperfect mummies are actually cuter.
- Wrap the mummies. Take one filled jalapeño half and place it in the center of a dough strip. Wrap the strip around the pepper, overlapping slightly as you go. Leave a small gap at the top where the filling shows through—that’s the mummy’s “face.” Repeat with all 16 jalapeño halves. You’ll use 2 strips per mummy, so you’ll have 8 strips left over. Save those for another use or bake them alongside as “snack strips.”
- Apply the egg wash. In a small bowl, beat the egg with 1 tablespoon of water. Using your pastry brush, gently brush the egg wash over each mummy wrap. This gives them that beautiful golden color. Don’t skip this step—it makes them look bakery-worthy.
- Bake. Place the mummies on the prepared baking sheet, spacing them about 2 inches apart. Bake for 12-15 minutes, or until the crescent dough is golden brown and the filling is bubbly. The edges should be crispy and the dough should be cooked through.
- Add the eyes. Let the mummies cool on the baking sheet for 2-3 minutes. Then, gently press a candy eye onto the exposed filling of each mummy. The residual heat will help them stick. If you’re serving these right away, you can also use small dots of mustard or ketchup for eyes if you don’t have candy eyes.
- Serve warm. These are best enjoyed fresh out of the oven. The dough is flaky, the filling is creamy, and the pepper has just the right amount of crunch.
Cooking Tips & Techniques
After making these more times than I’d like to admit, I’ve collected a few hard-won lessons. Let me save you some trouble.
Don’t skip the yogurt. I know it sounds weird—yogurt in jalapeño poppers? But trust me, it makes the filling lighter and tangier. The first time I tried this swap, I was skeptical. But now I can’t go back to all cream cheese. It’s just too heavy.
Watch the heat. Jalapeños vary wildly in spiciness. I once bought a batch that was so mild, my 5-year-old ate one raw. Another time, I ended up with peppers that could have powered a small rocket. If you’re worried about heat, taste a tiny piece of raw jalapeño before you start. Adjust your seed-removal strategy accordingly.
Don’t overwork the dough. Crescent dough is delicate. If you stretch it too much while wrapping, it can tear. If that happens, just press it back together—the egg wash will hide any imperfections. Remember, mummies are supposed to look a little rough.
Bake them on the lower rack. I discovered this by accident when I forgot to move the rack up. The bottoms get extra crispy while the tops stay golden. It’s perfect.
Make ahead tip. You can assemble these up to 24 hours in advance. Just place them on the baking sheet, cover with plastic wrap, and refrigerate. Add an extra minute or two to the baking time if they’re cold from the fridge.
Variations & Adaptations
One of the best things about this recipe is how versatile it is. Here are some ways to make it your own:
- Vegetarian Version: These are already vegetarian! But if you want to add some extra veggies, try adding a small piece of roasted red pepper or a sliver of avocado to the filling.
- Dairy-Free Option: Use dairy-free cream cheese and a thick coconut yogurt. I’ve tested this with Kite Hill brand and it worked beautifully. The texture is slightly less creamy, but the flavor is still spot-on.
- Spicy Upgrade: For those who love heat, mix a teaspoon of hot sauce or a pinch of cayenne pepper into the filling. You can also use habanero peppers instead of jalapeños if you’re feeling brave.
- Air Fryer Method: I tried this in the air fryer last week and it worked great! Cook at 350°F (175°C) for 8-10 minutes, flipping halfway through. The dough gets extra crispy.
- Flavor Twist: Add a teaspoon of ranch seasoning mix to the filling for a tangy, herbaceous kick. My sister-in-law tried this and now refuses to make them any other way.
Personal Variation: My favorite twist is adding a small piece of cooked bacon to each wrap before baking. I know, I know—it’s not exactly “lightened up” anymore. But sometimes you just need that smoky, salty crunch. I call these my “cheat day mummies.”
Serving & Storage Suggestions
These Lightened Up Mummy Jalapeño Popper Crescent Wraps are best served warm, right out of the oven. The contrast between the hot, gooey filling and the cool, creamy dip is just perfection.
Serving Temperature: Warm is non-negotiable. If they cool down too much, the cheese sets and the dough loses its crispiness. If you’re serving these at a party, I recommend baking them in batches so they’re always fresh.
Presentation Ideas: Arrange them on a platter in a circle, with the “faces” pointing outward. Add a small bowl of ranch dressing or sour cream in the center for dipping. For extra Halloween flair, sprinkle some black sesame seeds around the edges.
Complementary Dishes: These pair beautifully with a simple green salad, roasted vegetables, or a bowl of soup. For a Halloween party spread, serve them alongside other finger foods like mini meatballs, veggie sticks, and a cheese board.
Storage Instructions: Leftovers (if you have any) can be stored in an airtight container in the refrigerator for up to 3 days. To reheat, pop them in a 350°F (175°C) oven for 5-7 minutes, or until warmed through. The microwave works in a pinch, but the dough won’t be as crispy.
Freezer Tips: You can freeze these before baking! Assemble the mummies, place them on a baking sheet, and freeze until solid. Then transfer to a freezer bag. When you’re ready to bake, add 3-5 minutes to the baking time. No need to thaw first.
Flavor Development: Honestly, these are best fresh. The dough loses its magic after a day in the fridge. But the filling? That actually gets better—the flavors meld together overnight. If you have leftover filling, it’s amazing spread on crackers or stirred into scrambled eggs.
Nutritional Information & Benefits
Let’s be real—these are still indulgent. But compared to traditional jalapeño poppers, they’re a serious upgrade.
Estimated Nutritional Values (per mummy wrap):
| Nutrient | Amount |
|---|---|
| Calories | 120 |
| Protein | 5g |
| Carbohydrates | 10g |
| Fat | 7g |
| Saturated Fat | 3g |
| Sodium | 280mg |
| Fiber | 1g |
| Sugar | 2g |
Health Benefits: Jalapeños are surprisingly good for you—they’re packed with vitamin C, vitamin B6, and capsaicin, which can boost metabolism and reduce inflammation. The Greek yogurt adds protein and probiotics, while the cream cheese provides calcium. These are also lower in fat and calories than traditional poppers, thanks to the yogurt swap.
Dietary Considerations: This recipe is vegetarian and can easily be made gluten-free or dairy-free with the right substitutions. They’re naturally low-carb (about 10g net carbs per serving) and can fit into a balanced diet.
Allergen Note: Contains dairy, eggs, and wheat. If you’re serving these at a party, I recommend labeling them so guests with allergies know what’s in them.
My Wellness Perspective: I’m a firm believer that healthy eating shouldn’t mean boring eating. These mummy wraps prove that you can have your fun Halloween appetizer and eat it too—without the guilt. They’re proof that small swaps can make a big difference.
Conclusion
These Lightened Up Mummy Jalapeño Popper Crescent Wraps are more than just a cute Halloween appetizer—they’re a testament to the fact that healthy eating doesn’t have to be boring. With their creamy filling, flaky crust, and just the right amount of heat, they’re guaranteed to be the star of your Halloween spread.
I love that this recipe brings people together. Whether you’re making them with your kids on a rainy afternoon or serving them at a grown-up Halloween party, there’s something magical about watching people’s faces light up when they take that first bite. And knowing that they’re a little lighter on the waistline? That’s just the cherry on top.
Now I want to hear from you! Have you tried making these? Did you add your own twist? Drop a comment below and let me know how they turned out. And if you’re looking for more healthy-ish comfort food recipes, be sure to check out my healthy buffalo chicken dip and lightened up mac and cheese—they’re both reader favorites.
Happy Halloween, and happy cooking!
Frequently Asked Questions
Can I make these ahead of time?
Absolutely! You can assemble the mummies up to 24 hours in advance and keep them covered in the fridge. Just add a minute or two to the baking time if they’re cold. You can also freeze them before baking for up to 3 months.
How do I reduce the spice level?
The easiest way is to remove all the seeds and white membranes from the jalapeños—that’s where most of the heat lives. You can also use milder peppers like poblanos or mini sweet peppers if you’re really sensitive to spice.
Can I use a different type of cheese?
Definitely! Pepper jack adds extra heat, mozzarella gives a stretchier texture, and gouda adds a smoky flavor. I’ve even used crumbled feta for a tangy twist. Just keep the total amount the same.
What if I don’t have candy eyes?
No problem! You can use small dots of mustard, ketchup, or even black sesame seeds to create eyes. I’ve also used tiny pieces of black olive in a pinch. The mummies will still look adorable.
Can I make these in an air fryer?
Yes! Preheat your air fryer to 350°F (175°C) and cook the mummies for 8-10 minutes, flipping halfway through. They come out extra crispy. Just keep an eye on them—air fryers can vary in temperature.
Pin This Recipe!
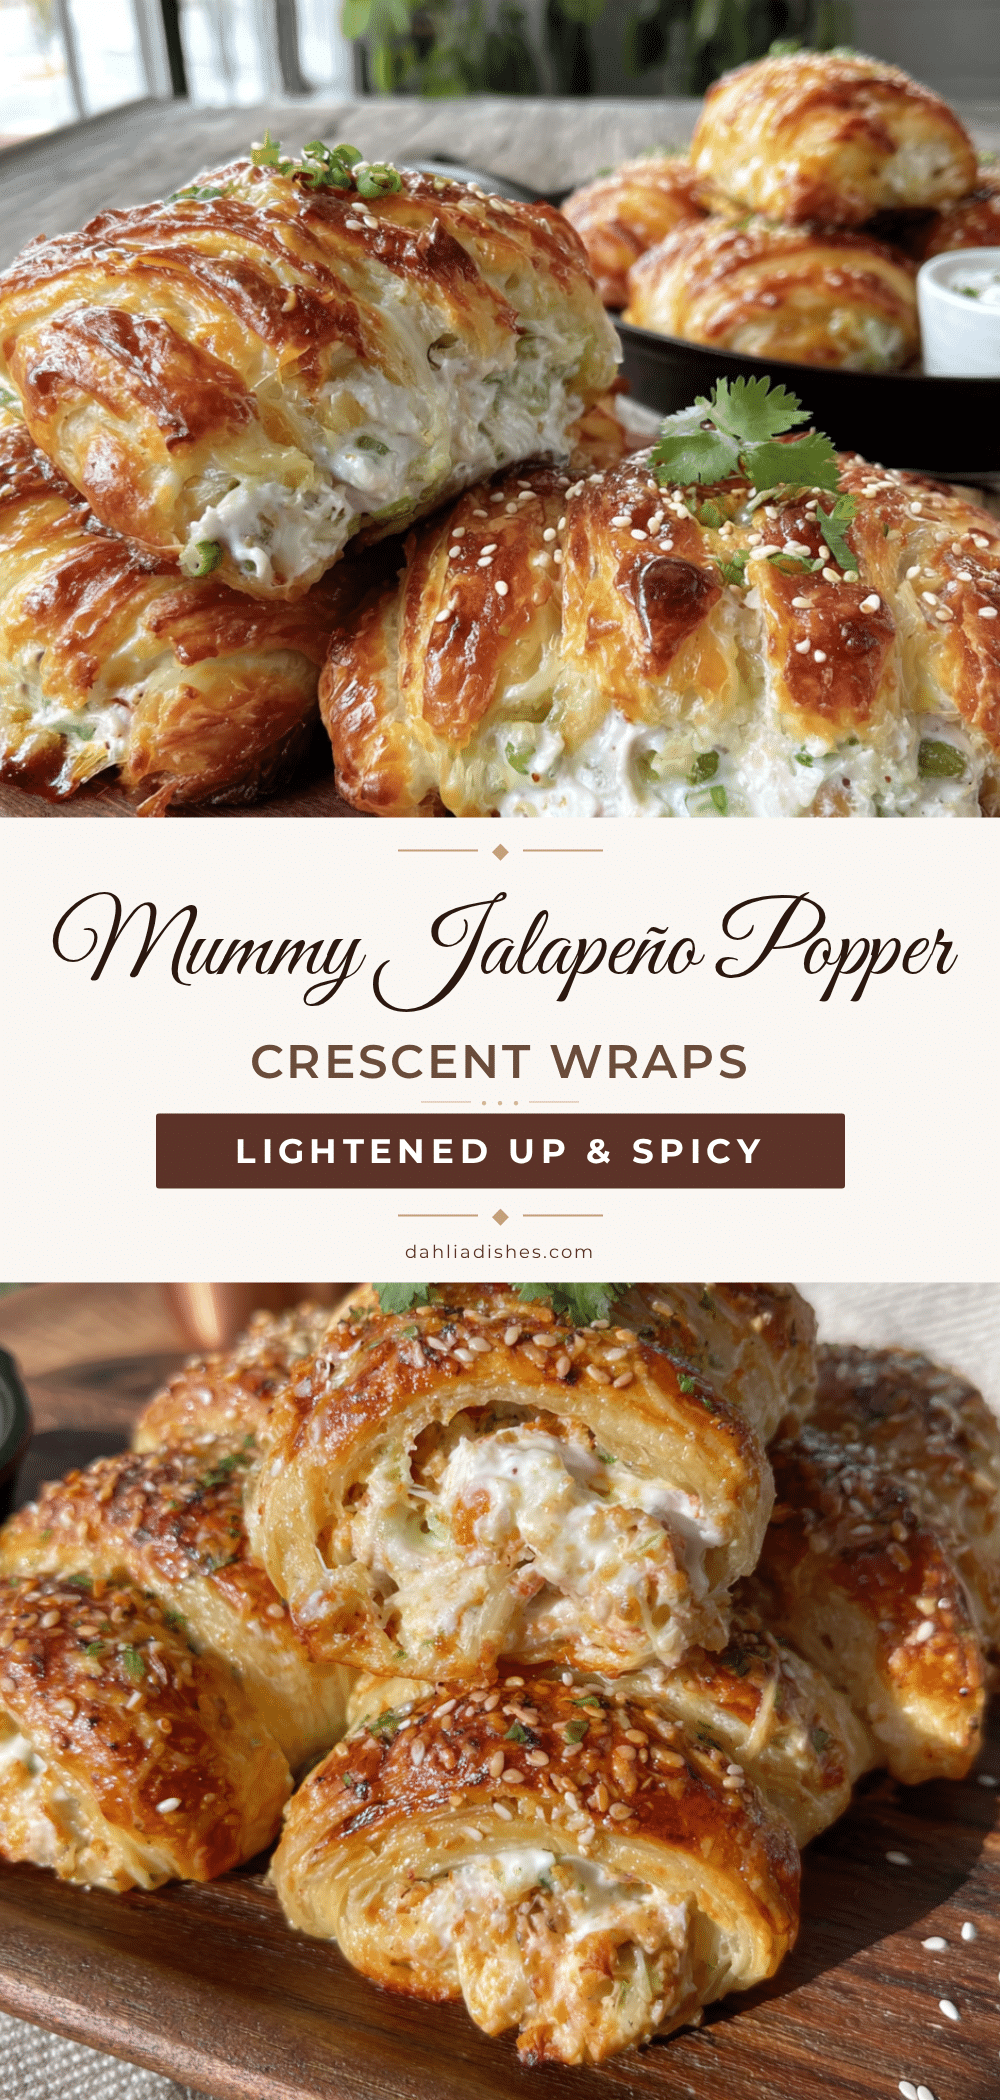
Lightened Up Mummy Jalapeño Popper Crescent Wraps

These Lightened Up Mummy Jalapeño Popper Crescent Wraps are a healthier twist on a classic Halloween appetizer, featuring a creamy, tangy filling with a kick of heat, all wrapped in flaky crescent dough. Perfect for parties or a fun weeknight treat, they deliver all the flavor without the guilt.
- Prep Time: 15 minutes
- Cook Time: 15 minutes
- Total Time: 30 minutes
- Yield: 16 mummy wraps 1x
- Category: Appetizer
- Cuisine: American
Ingredients
- 6 medium fresh jalapeños
- 4 oz reduced-fat cream cheese, softened
- 2 tablespoons plain Greek yogurt
- 1/2 cup shredded cheddar cheese
- 1/2 teaspoon garlic powder
- 1/4 teaspoon onion powder
- 1/4 teaspoon salt
- 1 can (8 count) Pillsbury Crescent Rolls
- 1 large egg
- 1 tablespoon water
- 16 small candy eyes (optional)
Instructions
- Preheat your oven to 375°F (190°C). Line a baking sheet with parchment paper.
- Slice each jalapeño in half lengthwise. Using a small spoon, carefully scoop out the seeds and white membranes.
- In a small bowl, combine the softened cream cheese, Greek yogurt, shredded cheddar, garlic powder, onion powder, and salt. Mix until smooth and creamy.
- Spoon about 1 teaspoon of the filling into each jalapeño half, level with the top.
- Unroll the crescent dough and separate into 8 triangles. Cut each triangle lengthwise into 3 long strips (24 strips total).
- Place one filled jalapeño half in the center of a dough strip. Wrap the strip around the pepper, overlapping slightly, leaving a small gap at the top for the ‘face.’ Repeat with all 16 jalapeño halves, using 2 strips per mummy.
- In a small bowl, beat the egg with 1 tablespoon of water. Brush the egg wash over each mummy wrap.
- Place the mummies on the prepared baking sheet, spacing them about 2 inches apart. Bake for 12-15 minutes, until golden brown and bubbly.
- Let the mummies cool on the baking sheet for 2-3 minutes. Gently press a candy eye onto the exposed filling of each mummy.
- Serve warm.
Notes
For less heat, remove all seeds and membranes. For more heat, leave some seeds in. Wear gloves when handling jalapeños to avoid skin irritation. Can be assembled up to 24 hours in advance and refrigerated. Freeze before baking for up to 3 months.
Nutrition
- Serving Size: 1 mummy wrap
- Calories: 120
- Sugar: 2
- Sodium: 280
- Fat: 7
- Saturated Fat: 3
- Carbohydrates: 10
- Fiber: 1
- Protein: 5
Keywords: Halloween appetizer, jalapeño popper, crescent wraps, lightened up, healthy, mummy, party food


