Love this? Save it for later!
Share the inspiration with your friends
I was at my car’s oil change place—you know, that fluorescent-lit waiting room with the stale coffee and the stack of magazines from 2019—when the mechanic, a guy named Rick with grease permanently etched into his knuckles, started talking about cookies. Not car stuff. Cookies. He was wiping his hands on a rag and telling me about his grandmother’s recipe for something he called “little pumpkin pies that don’t need a fork.” I wasn’t expecting baking advice from a man who spends his days under hoods, but there I was, sitting on a cracked vinyl chair, listening to him describe exactly how to make these perfect little bites. He even drew the shape of the cookie on a napkin—a thumbprint in the center, filled with something orange. “It’s the only thing I bring to Thanksgiving,” he said, and honestly, the way he said it made me believe him. I scribbled notes on the back of my oil change receipt, and three days later, I was in my kitchen trying to recreate what he described. Let me tell you, it took a few tries—the first batch melted into a flat mess, and I may have yelled at my oven—but eventually, these Pumpkin Pie Thumbprint Cookies came together exactly the way Rick promised they would. They taste like Thanksgiving in one bite, and they’re the kind of cookie that makes people stop mid-conversation and ask, “Wait, what’s in this?”
Why You’ll Love This Recipe
These aren’t just another pumpkin cookie. I mean, I’ve tested at least a dozen pumpkin cookie recipes over the years, and most of them end up tasting like spiced cardboard or they fall apart the second you look at them. These Pumpkin Pie Thumbprint Cookies are different—they’re sturdy enough to stack on a platter for a party, but tender enough to melt in your mouth. And that filling? It’s basically a mini pumpkin pie in every single cookie. No fork required.
- Perfect for Hosting: You can make these a day ahead, and they actually taste better the next day—a lifesaver when you’re hosting a dinner party or a Friendsgiving.
- No Special Equipment: You don’t need a stand mixer or a pastry bag. Just a bowl, a baking sheet, and your thumb (or the back of a spoon).
- Crowd-Pleaser Guaranteed: I brought these to a potluck last week, and by the time I got to the dessert table, three people had already asked me for the recipe. They disappear fast.
- Simple Ingredients: Canned pumpkin, butter, flour, sugar, and spices—things you probably already have in your pantry if you’re a fall enthusiast like me.
- Unbelievably Delicious: The cookie base is buttery and slightly crisp on the edges, with a soft center that holds a spoonful of creamy pumpkin filling. It’s the texture contrast that gets you.
What makes these different from every other pumpkin cookie recipe out there is the technique. Instead of mixing the pumpkin into the dough (which makes cookies soggy), you bake the cookie base first, then add the filling and bake again. It’s a two-step process that sounds fussy but is actually dead simple, and it guarantees a cookie that holds its shape and delivers that real pumpkin pie experience.
What Ingredients You Will Need
This recipe uses simple, wholesome ingredients to deliver that classic pumpkin pie flavor in cookie form. Most of these are pantry staples, especially if you’re already in full fall baking mode. Let me walk you through what you’ll need and why each ingredient matters.
For the Cookie Base
- Unsalted butter, softened (1 cup / 226g) — I use Land O’Lakes for baking because the butterfat content is consistent. Make sure it’s truly softened, not melted. If you press your finger into it, it should leave an indentation without sliding around.
- Granulated sugar (3/4 cup / 150g) — Adds sweetness and helps with spreading. You could use coconut sugar here, but the cookies will be darker and slightly less tender.
- Large egg yolk (1, room temperature) — Just the yolk. The white would make the cookies puff up too much, and we want them flat enough to hold that filling.
- Pure vanilla extract (1 teaspoon) — I’m a Nielsen-Massey fan, but any pure vanilla works. Skip the imitation stuff for this one—you’ll taste the difference.
- All-purpose flour (1 and 3/4 cups / 220g) — Spoon and level your flour. Scooping straight from the bag packs in too much and gives you dry cookies.
- Pumpkin pie spice (1 teaspoon) — Store-bought is fine, but if you want to make your own, mix 1/2 tsp cinnamon, 1/4 tsp ginger, 1/4 tsp nutmeg, and a pinch of cloves. That’s what I do when I’m out of the pre-mixed stuff.
- Salt (1/4 teaspoon) — Don’t skip this. Salt makes the spices pop and balances the sweetness.
For the Pumpkin Pie Filling
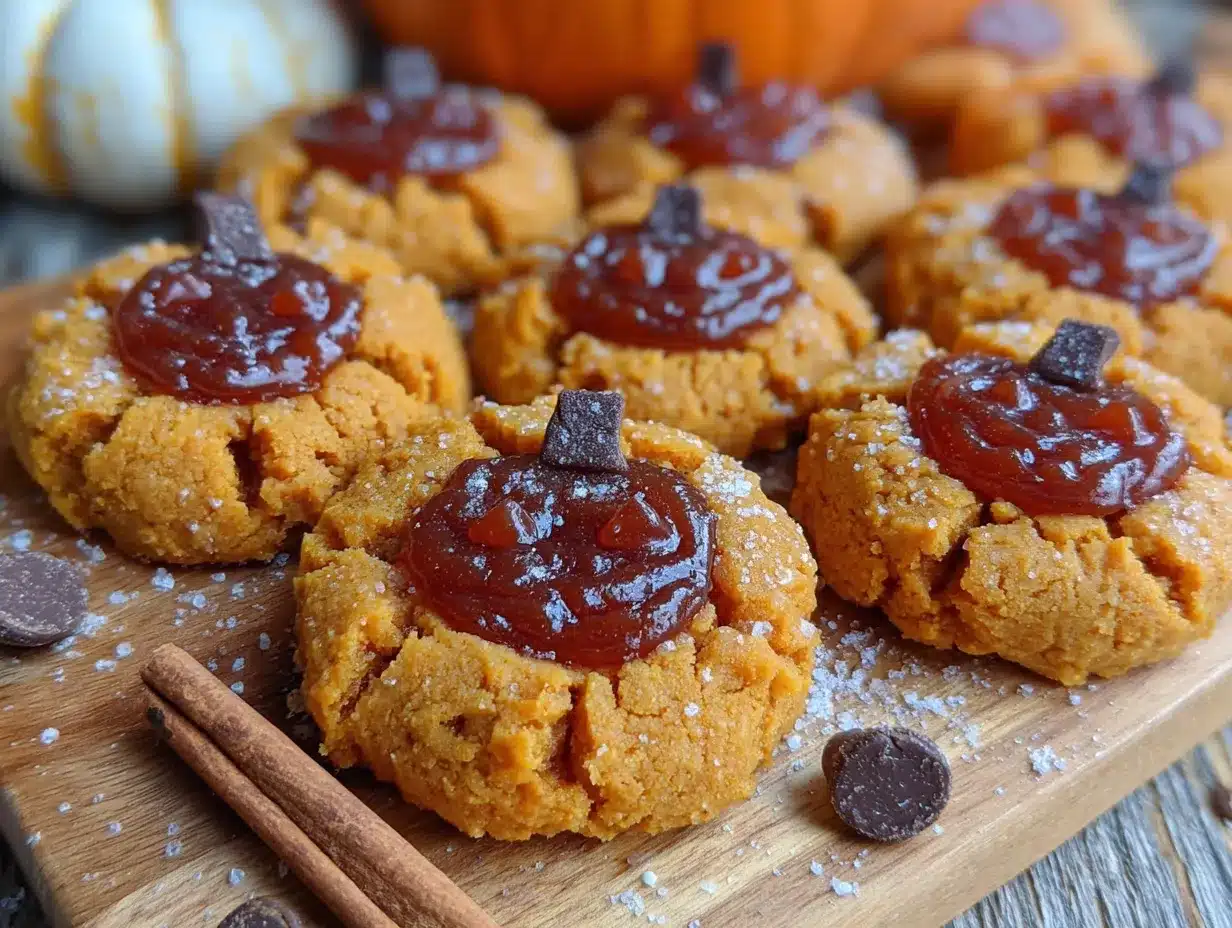
- Canned pumpkin puree (1/2 cup / 120g) — Not pumpkin pie filling. Look for 100% pure pumpkin. Libby’s is my go-to because it’s consistently thick and not watery.
- Brown sugar, packed (1/4 cup / 50g) — Light or dark works. Dark gives a deeper molasses flavor that I personally love with the pumpkin.
- Large egg (1, room temperature) — This binds the filling and gives it that custard-like texture.
- Heavy cream (2 tablespoons / 30ml) — Adds richness. You can substitute with half-and-half or even full-fat coconut milk for a dairy-free option, but the filling won’t be quite as luxurious.
- Pumpkin pie spice (1/2 teaspoon) — Same blend as above. Feel free to add an extra pinch of cinnamon if you’re a cinnamon lover like me.
- Salt (a tiny pinch) — Just to wake up the flavors.
For the Topping (Optional but Recommended)
- Powdered sugar (for dusting) — Adds that bakery-finished look.
- Whipped cream — If you’re serving these at a party, a tiny dollop on top of each cookie before serving is a showstopper.
Equipment Needed
You don’t need a fancy kitchen to make these cookies. Here’s what you’ll actually use:
- Baking sheets (2) — I use Nordic Ware aluminum sheets because they heat evenly and don’t warp. If you only have one, just bake in batches and let the sheet cool completely between rounds.
- Parchment paper or silicone baking mats — Silicone mats are great because the cookies slide right off. Parchment works perfectly too. Avoid greasing the pan directly—it makes the cookies spread too much.
- Mixing bowls (medium and small) — You’ll need one for the cookie dough and one for the filling.
- Electric hand mixer or stand mixer — You can cream the butter and sugar by hand with a wooden spoon, but it takes elbow grease. A hand mixer makes it easy.
- Measuring cups and spoons — Accurate measurements matter in baking. I use metal measuring cups for dry ingredients and glass for liquids.
- Cooling rack — Essential for letting the cookies cool properly before adding the filling. If you don’t have one, a clean wire oven rack works in a pinch.
- Small cookie scoop or teaspoon — For portioning the dough evenly. I use a 1-tablespoon scoop for consistent cookies.
- The back of a measuring teaspoon — This makes the perfect indentation for the filling. Better than your thumb, honestly, because it creates a uniform well.
Preparation Method
Let me walk you through this step by step. I’ve made these Pumpkin Pie Thumbprint Cookies at least a dozen times now, so I’ve figured out all the little tricks that make them turn out perfectly every time.
- Preheat your oven to 350°F (175°C). Line two baking sheets with parchment paper or silicone mats. Do this first so the oven is ready when you are.
- Make the cookie dough. In a medium bowl, beat the softened butter and granulated sugar together with a hand mixer on medium speed until light and fluffy—about 2 to 3 minutes. You want it to look pale and almost doubled in volume. Scrape down the sides of the bowl halfway through. Add the egg yolk and vanilla extract, then beat until combined. It might look a little curdled at this point, but don’t panic—that’s normal.
- Add the dry ingredients. In a separate small bowl, whisk together the flour, pumpkin pie spice, and salt. Gradually add this to the butter mixture, mixing on low speed until just combined. The dough will be soft but not sticky. If it feels too sticky to handle, pop it in the fridge for 10 minutes. If it feels dry and crumbly, add a teaspoon of cold water.
- Shape the cookies. Scoop tablespoon-sized portions of dough (about 1.5 tablespoons each) and roll them into balls. Place them on the prepared baking sheets, spacing them about 2 inches apart. You should get about 24 cookies. Here’s a trick I learned the hard way: don’t press the indentations into the dough before baking. I tried that once, and they puffed right back up in the oven. We’ll do the indentations after the first bake.
- First bake. Bake the cookie balls for 8 to 9 minutes. They should look set around the edges but still soft and slightly puffed in the center. They won’t look fully done, and that’s exactly what you want. Remove them from the oven but keep them on the baking sheet.
- Create the wells. Immediately after the cookies come out of the oven, use the back of a measuring teaspoon (or your thumb, if you’re feeling traditional) to gently press an indentation into the center of each cookie. The cookies will be hot, so be careful. If the edges crack a little, just gently press them back together with your fingers. Let the cookies cool completely on the baking sheet—about 15 to 20 minutes. This step is crucial because if you try to add the filling while the cookies are still warm, it will just soak in and disappear.
- Make the pumpkin filling. While the cookies are cooling, whisk together the pumpkin puree, brown sugar, egg, heavy cream, pumpkin pie spice, and salt in a small bowl. Whisk until completely smooth. The mixture should be thick but pourable—like a loose pudding.
- Fill the cookies. Once the cookies are completely cool, spoon about 1 teaspoon of the pumpkin filling into each indentation. Don’t overfill—it will puff up a little during the second bake, and you don’t want it spilling over the edges.
- Second bake. Bake the filled cookies for another 10 to 12 minutes, or until the filling is set around the edges but still slightly jiggly in the center—like a mini pumpkin pie. The cookie edges should be lightly golden. Let them cool on the baking sheet for 5 minutes, then transfer to a wire rack to cool completely.
- Finish and serve. Once completely cool, dust the cookies with powdered sugar if you like. For a party, add a tiny dollop of whipped cream on top of each one right before serving. Trust me, people lose their minds over this.
Cooking Tips & Techniques
I’ve made every mistake you can imagine with these cookies so you don’t have to. Here’s what I’ve learned:
Don’t skip the chilling step if your dough is sticky. I once made these on a humid summer day (yes, I know pumpkin is for fall, but I couldn’t wait), and the dough was impossible to roll. Ten minutes in the fridge fixed it completely. If your kitchen is warm, chill the dough for 15 minutes before rolling.
Use a cookie scoop for even sizing. This isn’t just about aesthetics—it’s about even baking. If some cookies are bigger than others, the smaller ones will overbake while the bigger ones are still raw in the middle. I use a 1.5-tablespoon scoop, and it makes all the difference.
Press the indentations while the cookies are hot. I forgot this once and waited until the cookies had cooled. The dough was already set, so the indentation barely made a dent. The filling just sat on top and baked into a flat disc. Not ideal. Do it immediately after they come out of the oven.
Don’t overbake the second round. The filling will continue to set as the cookies cool. If you wait until it’s completely firm in the oven, it will be dry and cracked by the time you serve them. Pull them out when the filling is just set around the edges and still a little jiggly in the center.
Make these a day ahead. Honestly, these cookies taste better the next day. The flavors meld together overnight, and the cookie softens slightly from the filling. Just store them in an airtight container in the fridge, and dust with powdered sugar right before serving.
Variations & Adaptations
One of the best things about this recipe is how easy it is to adapt. Here are some variations I’ve tried and loved:
Gluten-Free Version
Substitute the all-purpose flour with a 1:1 gluten-free baking flour blend. I’ve used Bob’s Red Mill and King Arthur Measure for Measure, and both worked great. The cookies will be slightly more delicate, so handle them gently when pressing the indentations.
Dairy-Free Option
Use vegan butter (I like Miyoko’s) in the cookie dough and full-fat coconut cream instead of heavy cream in the filling. The flavor is slightly different—more coconutty—but still delicious. Make sure your pumpkin puree is 100% pumpkin with no added dairy.
Spiced-Up Version
Add 1/4 teaspoon of cardamom and a pinch of black pepper to the pumpkin filling. It sounds weird, but the pepper actually enhances the pumpkin flavor and adds a subtle warmth. I tried this on a whim last Thanksgiving, and it was a hit.
Chocolate Drizzle
Melt 1/2 cup of semi-sweet chocolate chips with 1 teaspoon of coconut oil and drizzle it over the cooled cookies. The chocolate and pumpkin combo is surprisingly good—like a pumpkin pie dipped in chocolate. I do this when I want to dress them up for a party.
Maple Pecan Twist
Replace the brown sugar in the filling with maple syrup (reduce the heavy cream to 1 tablespoon to compensate for the extra liquid) and press a pecan half into the top of each cookie before the second bake. The maple and pecan flavors are a natural match for pumpkin.
Serving & Storage Suggestions
These Pumpkin Pie Thumbprint Cookies are designed to be the star of your dessert table. Here’s how to serve and store them like a pro.
Serving Temperature: Serve them at room temperature. If you’ve stored them in the fridge (which I recommend for the filling), let them sit out for about 20 minutes before serving. The cookie softens up, and the filling becomes perfectly creamy.
Presentation Tips for Hosting: Arrange the cookies on a large wooden board or a white platter for contrast. Dust them with powdered sugar right before guests arrive—it makes them look bakery-fresh. If you’re feeling fancy, add a tiny dollop of whipped cream and a sprinkle of cinnamon on top of each cookie. For a fall-themed party, scatter some mini pumpkins or cinnamon sticks around the platter.
What to Serve Alongside: These cookies pair beautifully with a hot cup of spiced chai or a pumpkin spice latte. If you’re serving them as part of a dessert spread, they go well with apple cider caramel sauce drizzled over vanilla ice cream. For a full fall dessert table, add a plate of cranberry orange shortbread cookies and a warm apple crisp.
Storage: Store the cookies in an airtight container in the refrigerator for up to 5 days. Place a piece of parchment paper between layers to prevent sticking. The cookie base will soften slightly over time, but the flavor actually improves after a day or two.
Freezing Instructions: You can freeze the unfilled cookie bases for up to 3 months. Bake them, press the indentations, cool completely, then freeze in a single layer on a baking sheet. Once frozen, transfer to a freezer bag. When you’re ready to serve, thaw at room temperature, make the filling, and bake as directed. You can also freeze the filled, baked cookies for up to 2 months—just thaw in the fridge overnight and dust with powdered sugar before serving.
Reheating: These are best at room temperature, but if you want a warm cookie, pop one in the microwave for about 10 seconds. The filling will get slightly warm and gooey—like a fresh pumpkin pie.
Nutritional Information & Benefits
Let’s be real: these are cookies, not health food. But they do have some redeeming qualities. Here’s the estimated nutritional breakdown per cookie (based on 24 cookies):
| Nutrient | Amount per Cookie |
|---|---|
| Calories | 135 |
| Total Fat | 8g |
| Saturated Fat | 5g |
| Carbohydrates | 15g |
| Sugar | 8g |
| Fiber | 1g |
| Protein | 2g |
| Vitamin A | 35% DV |
Health Highlights: The pumpkin puree is packed with vitamin A (great for eye health and immune function) and fiber. The pumpkin pie spice contains cinnamon, which may help with blood sugar regulation. And honestly, these cookies are smaller than a slice of pumpkin pie, so you’re getting that same flavor experience in a more portion-controlled package. I feel good about serving these to my family because I know exactly what’s in them—no preservatives, no artificial flavors, just real ingredients.
Dietary Considerations: This recipe contains dairy (butter, heavy cream) and gluten (all-purpose flour). See the variations section for dairy-free and gluten-free adaptations. The cookies are nut-free as written, so they’re safe for school events or parties where allergies are a concern.
Conclusion
These Pumpkin Pie Thumbprint Cookies are the kind of recipe that makes you look like a baking hero with minimal effort. They have all the warm, spiced flavors of a classic pumpkin pie, but in a portable, shareable, fork-free format that’s perfect for parties, potlucks, and holiday gatherings. Every time I bring them somewhere, people ask for the recipe—and now I’m sharing it with you.
What I love most about this recipe is how forgiving it is. You can make the dough ahead, adjust the spices to your liking, or experiment with different toppings. It’s a recipe that invites you to make it your own. So go ahead—try them the way Rick described to me in that greasy mechanic’s waiting room, and then tweak them until they feel like yours.
If you make these cookies, I’d love to hear how they turned out. Drop a comment below and let me know what variations you tried, or tag me in your photos on social media. Happy baking, and here’s to finding great recipes in the most unexpected places!
Frequently Asked Questions
Can I use pumpkin pie filling instead of pumpkin puree?
No, please don’t. Pumpkin pie filling is already sweetened and spiced, so it will throw off the balance of the filling and make it overly sweet. Stick with 100% pure pumpkin puree for the best results.
Why did my cookies spread too much?
This usually happens if the butter was too soft or the dough wasn’t chilled. Make sure your butter is softened but not melted, and if your kitchen is warm, chill the dough for 15 minutes before rolling. Also, check that your baking sheets are completely cool before placing dough on them.
Can I make these cookies ahead of time for a party?
Absolutely! In fact, I recommend it. You can bake and fill the cookies a day ahead, store them in the fridge, and dust with powdered sugar right before serving. The flavors actually meld together overnight and taste even better the next day.
How do I prevent the filling from soaking into the cookie?
Make sure the cookies are completely cool before you add the filling. If the cookies are even slightly warm, the filling will soak right in and you’ll lose that distinct pumpkin pie layer. Let them cool on the baking sheet for at least 15 to 20 minutes after the first bake.
Can I freeze these cookies?
Yes! You have two options: freeze the unfilled cookie bases (after the first bake and indentation) for up to 3 months, or freeze the fully baked and filled cookies for up to 2 months. Thaw in the fridge overnight and dust with powdered sugar before serving.
Pin This Recipe!
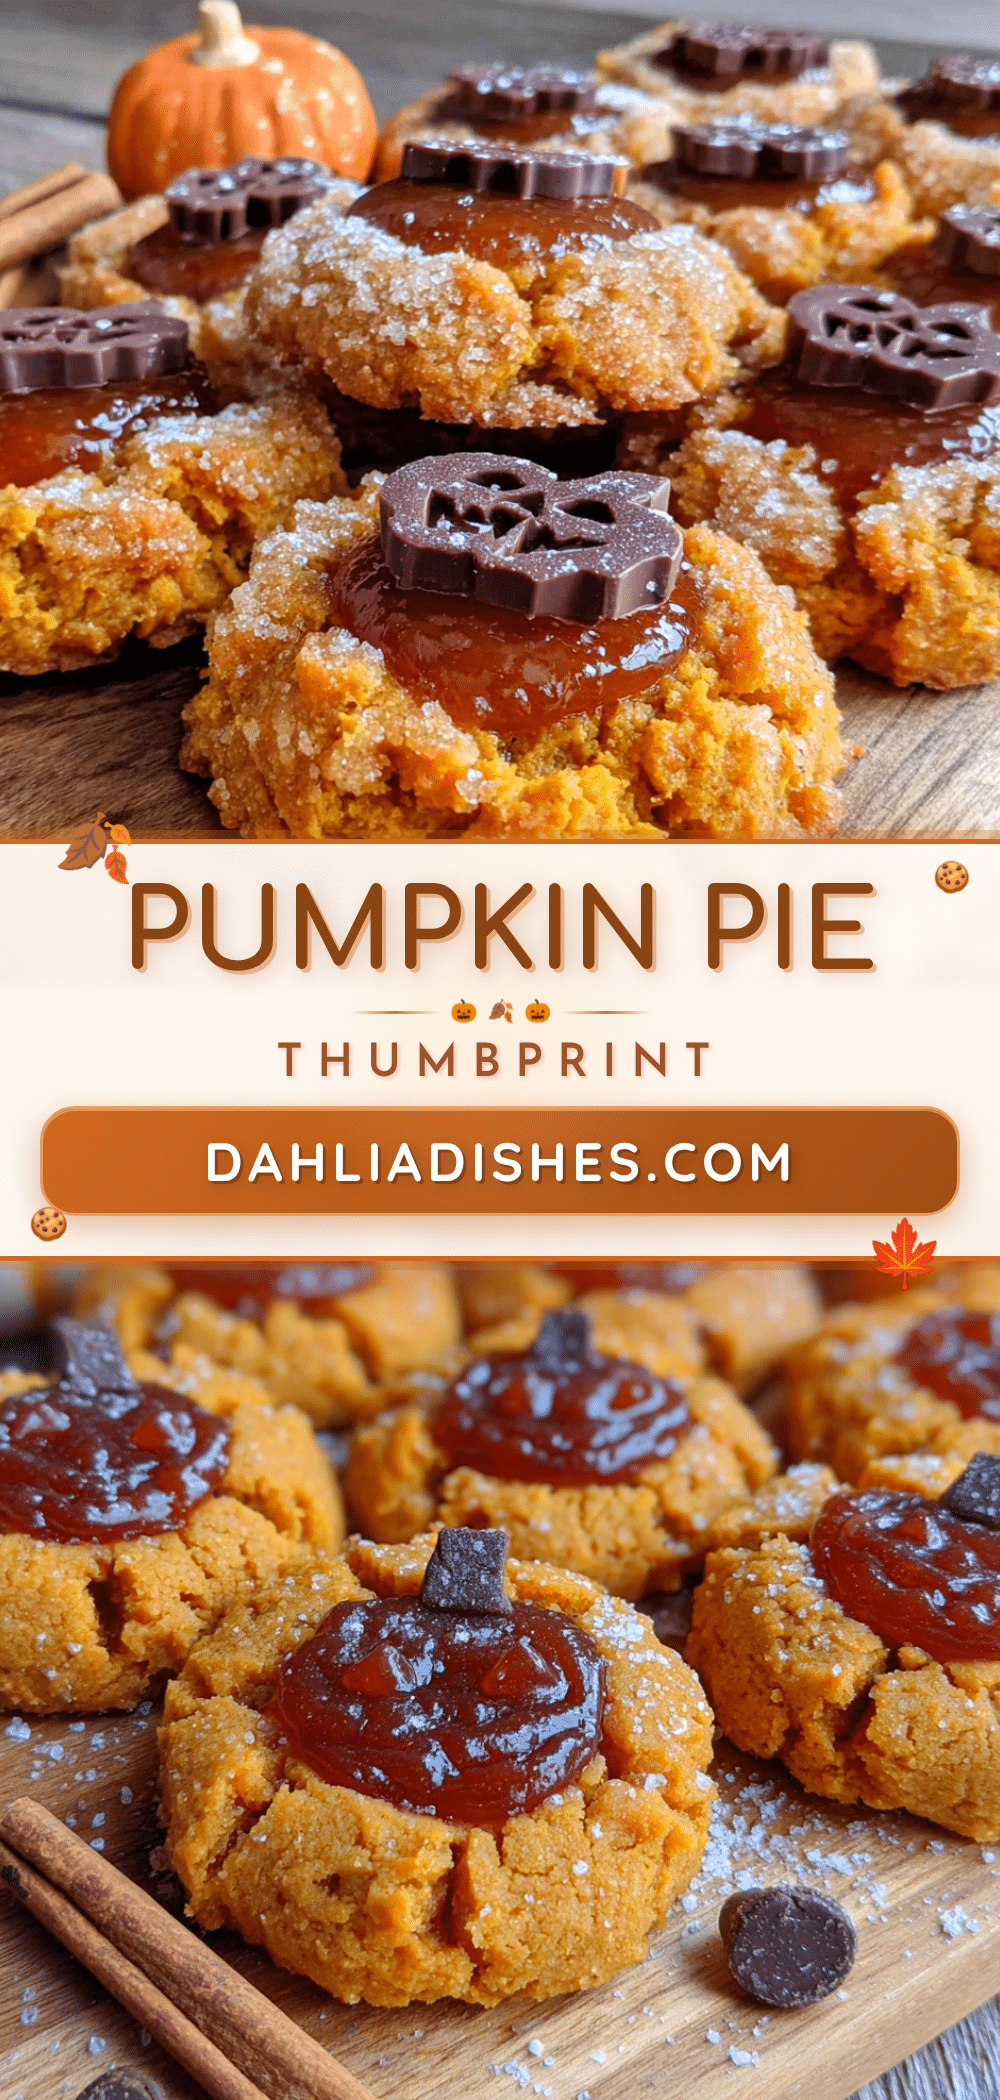
Perfect Pumpkin Pie Thumbprint Cookies: Easy Fall Recipe
These Pumpkin Pie Thumbprint Cookies are buttery, tender cookies with a creamy pumpkin pie filling in the center. They taste like Thanksgiving in one bite and are perfect for parties, potlucks, and holiday gatherings.
- Prep Time: 20 minutes
- Cook Time: 20 minutes
- Total Time: 40 minutes
- Yield: 24 cookies 1x
- Category: Dessert
- Cuisine: American
Ingredients
- 1 cup unsalted butter, softened
- 3/4 cup granulated sugar
- 1 large egg yolk, room temperature
- 1 teaspoon pure vanilla extract
- 1 and 3/4 cups all-purpose flour
- 1 teaspoon pumpkin pie spice
- 1/4 teaspoon salt
- 1/2 cup canned pumpkin puree (100% pure)
- 1/4 cup packed brown sugar (light or dark)
- 1 large egg, room temperature
- 2 tablespoons heavy cream
- 1/2 teaspoon pumpkin pie spice
- 1 tiny pinch salt
- Powdered sugar for dusting (optional)
- Whipped cream for serving (optional)
Instructions
- Preheat oven to 350°F (175°C). Line two baking sheets with parchment paper or silicone mats.
- Make the cookie dough: In a medium bowl, beat softened butter and granulated sugar with a hand mixer on medium speed until light and fluffy, about 2-3 minutes. Add egg yolk and vanilla extract; beat until combined.
- In a separate small bowl, whisk together flour, 1 teaspoon pumpkin pie spice, and 1/4 teaspoon salt. Gradually add to butter mixture, mixing on low speed until just combined. Dough should be soft but not sticky.
- Scoop tablespoon-sized portions (about 1.5 tablespoons each) and roll into balls. Place on prepared baking sheets, spacing 2 inches apart. Do not press indentations before baking.
- First bake: Bake cookie balls for 8-9 minutes, until edges are set but centers are still soft and slightly puffed.
- Immediately after removing from oven, use the back of a measuring teaspoon to gently press an indentation into the center of each cookie. Let cookies cool completely on the baking sheet, about 15-20 minutes.
- Make the pumpkin filling: In a small bowl, whisk together pumpkin puree, brown sugar, egg, heavy cream, 1/2 teaspoon pumpkin pie spice, and a tiny pinch of salt until smooth.
- Once cookies are completely cool, spoon about 1 teaspoon of pumpkin filling into each indentation. Do not overfill.
- Second bake: Bake filled cookies for 10-12 minutes, until filling is set around the edges but still slightly jiggly in the center. Let cool on baking sheet for 5 minutes, then transfer to a wire rack to cool completely.
- Once completely cool, dust with powdered sugar if desired. Serve with a tiny dollop of whipped cream on top if desired.
Notes
Don’t skip chilling the dough if it’s sticky. Press indentations while cookies are hot. Don’t overbake the second round; filling will set as cookies cool. These taste even better the next day. Store in an airtight container in the fridge for up to 5 days. Freeze unfilled cookie bases for up to 3 months or filled baked cookies for up to 2 months.
Nutrition
- Serving Size: 1 cookie
- Calories: 135
- Sugar: 8
- Sodium: 50
- Fat: 8
- Saturated Fat: 5
- Carbohydrates: 15
- Fiber: 1
- Protein: 2
Keywords: pumpkin pie thumbprint cookies, pumpkin cookies, fall cookies, thumbprint cookies, pumpkin dessert, easy pumpkin recipe


