Love this? Save it for later!
Share the inspiration with your friends
There used to be a tiny, dimly lit diner on the corner of Elm and 3rd called The Witching Hour that made the most ridiculous Halloween-themed kids’ menu. When they closed down two years ago — just a “Sorry, we’re out” sign taped to the door one October morning — I honestly felt a little pang of loss. It wasn’t the ambiance or the coffee; it was their mummy hot dogs. My kids would order them, and the whole table would giggle at the way the crescent dough wrapped around the hot dog like a clumsy bandage. After maybe four or five attempts in my own kitchen — the first batch looked like sad, deflated snakes — I finally cracked the code. These Easy Spooky Mummy Crescent Hot Dogs are the exact thing I was chasing. They’re buttery, a little salty, and so simple you’ll wonder why you ever bought a ticket to a pumpkin patch just for the food.
Why You’ll Love This Recipe
Look, I’ve tested a lot of Halloween recipes over the years. Some are fussy. Some require special cookie cutters you’ll use once and lose forever. These mummy hot dogs? They’re none of that. They’re the kind of recipe you make on a Tuesday night when the kids are bouncing off the walls and you need something fun without a trip to the grocery store.
- Quick & Easy: From fridge to table in under 30 minutes. Seriously. You can make these after school pickup and still have time to carve that pumpkin.
- Simple Ingredients: Hot dogs, crescent dough, and a little mustard for the eyes. That’s it. No weird specialty items.
- Perfect for Halloween Parties: These are the first things to disappear at any spooky gathering. Kids love them, and adults secretly love them too.
- Crowd-Pleaser: I’ve brought these to school potlucks and work parties. They get devoured every single time.
- Unbelievably Fun: There’s something about food that looks like a monster that just makes people happy. The texture of the flaky, golden dough against the juicy hot dog is pure comfort.
What makes this version different from the other mummy hot dog recipes out there? It’s the wrapping technique. I figured out that leaving a tiny gap for the “face” and not overlapping the dough too much gives you that perfect mummy look — not too tight, not too loose. Plus, I add a little trick with the mustard eyes that makes them look genuinely surprised. It’s a small detail, but it makes all the difference.
Honestly, this recipe isn’t just good — it’s the kind that makes you close your eyes after the first bite. It’s Halloween comfort food at its finest: fast, satisfying, and full of personality.
What Ingredients You Will Need
This recipe uses the most basic pantry staples to create something that feels special. You probably already have everything in your fridge or freezer right now.
- Hot dogs: 8 standard-size hot dogs. I prefer beef hot dogs for their flavor and snap, but any variety works. (Use turkey or chicken hot dogs for a lighter option.)
- Crescent dough: 1 can (8 oz) refrigerated crescent rolls. I recommend Pillsbury for the flakiest texture. You can also find store-brand versions that work just as well.
- Mustard: Yellow mustard for the mummy eyes. You can use a squeeze bottle for precision, or just dab it on with a toothpick. (Ketchup or sriracha also work for different colored eyes.)
- Egg wash (optional): 1 large egg, beaten with 1 tablespoon of water. This gives the dough a beautiful golden-brown shine. (You can skip it if you’re in a hurry.)
- Sesame seeds (optional): A sprinkle adds a fun “crust” texture, but it’s totally not necessary.
A quick note on hot dogs: I’ve tried this with both regular and jumbo sizes. The jumbo ones take longer to cook through and the dough-to-meat ratio feels off. Stick with standard-size for the best results. Also, make sure your crescent dough is cold when you start — warm dough is sticky and harder to cut into strips.
For the mustard eyes, I’ve found that the squeeze bottle with the thin tip works best. If you only have a jar, just dip a toothpick in and dot it on. It’s a little messier, but it still looks cute.
Equipment Needed
You don’t need anything fancy for this recipe. Here’s what you’ll need:
- Baking sheet: A standard 13×18-inch sheet pan works perfectly. Line it with parchment paper for easy cleanup.
- Parchment paper: Non-stick and saves you from scrubbing.
- Sharp knife or pizza cutter: For cutting the crescent dough into strips. A pizza cutter makes quick work of it.
- Small bowl: For the egg wash, if you’re using it.
- Pastry brush: For applying the egg wash. A silicone one is easiest to clean.
- Toothpicks: For dotting on the mustard eyes if you don’t have a squeeze bottle.
I’ve made these without parchment paper before — just greased the pan with cooking spray. It works, but the bottoms get a little darker and cleanup is a pain. Parchment is worth the extra step.
Preparation Method
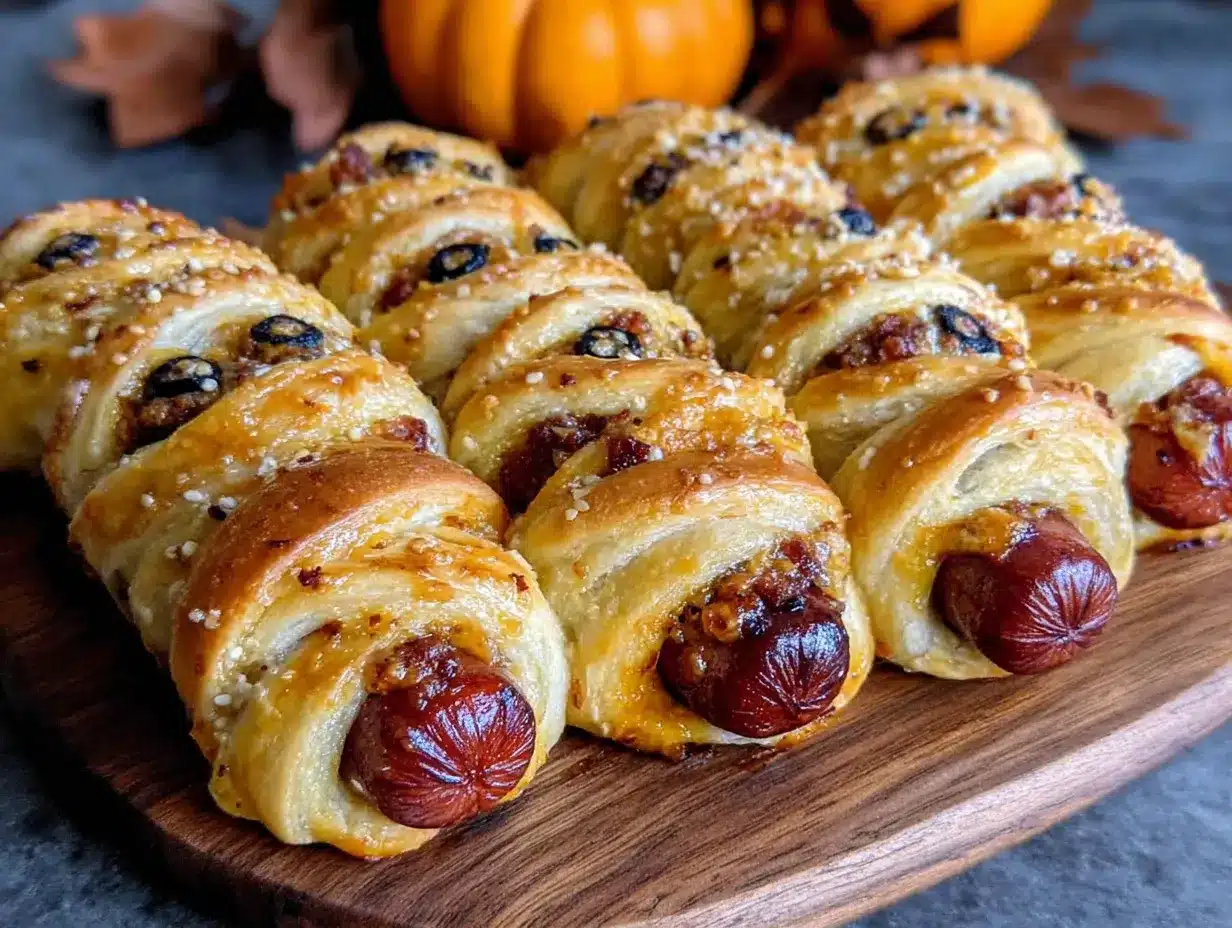
Alright, let’s get to the fun part. These mummy hot dogs come together in about 25 minutes, start to finish.
- Preheat your oven to 375°F (190°C). Line a baking sheet with parchment paper and set it aside.
- Unroll the crescent dough. Carefully peel back the packaging and unroll the dough onto a clean cutting board. You’ll see it’s perforated into triangles. Press the seams together gently to create one solid sheet of dough.
- Cut the dough into strips. Using a sharp knife or pizza cutter, slice the dough lengthwise into 8 thin strips. Each strip should be about 1/2 inch wide. Don’t worry if they’re not perfectly even — the mummy look actually benefits from a little imperfection.
- Wrap the hot dogs. Take one hot dog and start wrapping a strip of dough around it, starting at one end and working your way to the other. Leave a small gap about 1 inch wide near the top of the hot dog — this will be the mummy’s face. Don’t wrap too tightly; the dough will expand as it bakes. Tuck the end of the strip underneath the hot dog to secure it.
- Place on the baking sheet. Arrange the wrapped hot dogs on the prepared baking sheet, leaving about 2 inches of space between each one. They’ll puff up a bit as they bake.
- Apply the egg wash (optional). In a small bowl, beat the egg with 1 tablespoon of water. Using a pastry brush, lightly coat the exposed dough with the egg wash. This gives the mummies a beautiful golden-brown finish. If you’re skipping this step, that’s fine — they’ll still be delicious.
- Bake for 12-15 minutes. Pop the baking sheet into the preheated oven and bake until the dough is golden brown and puffed, and the hot dogs are heated through. Keep an eye on them after the 12-minute mark — ovens vary, and you don’t want burnt mummies.
- Add the eyes. Remove the baking sheet from the oven and let the mummy hot dogs cool for 2-3 minutes. Using a squeeze bottle or toothpick, dab two small dots of yellow mustard on the exposed hot dog area for the eyes. You can make them look scared, angry, or just plain goofy — it’s up to you!
- Serve immediately. These are best eaten warm, when the dough is still flaky and the hot dog is juicy. Arrange them on a platter and watch them disappear.
A few notes: If the dough strips are too long, just trim the excess. You can also press the dough strips together if they break — they’ll fuse during baking. And if you’re making a big batch, keep the finished ones warm in a 200°F oven while you finish the rest.
Cooking Tips & Techniques
I’ve made these mummy hot dogs more times than I care to admit, and I’ve learned a few things the hard way. Here are my best tips:
Keep the dough cold. Crescent dough gets sticky and hard to work with when it warms up. If the dough starts feeling soft, pop it in the fridge for 5 minutes. Trust me, it makes a difference.
Don’t overwrap. The mummy look works best when you can see the hot dog peeking through. Leave small gaps between the dough strips. It also helps the hot dog cook evenly.
Use the egg wash. I know it’s an extra step, but the egg wash gives the dough that gorgeous, glossy finish that makes these look bakery-worthy. If you’re in a rush, skip it — but you’ll miss out on that golden sheen.
Watch the oven. My first batch came out looking like charcoal because I got distracted. Set a timer for 12 minutes and check them. Every oven runs a little differently.
Make ahead tip: You can assemble the mummy hot dogs up to 2 hours ahead of time. Just keep them covered in the fridge until you’re ready to bake. Add an extra minute or two to the baking time if they’re cold from the fridge.
One mistake I made early on? I used jumbo hot dogs. They took forever to cook through, and the dough-to-meat ratio was all wrong. Stick with standard-size hot dogs for the best results.
Variations & Adaptations
This recipe is incredibly flexible. Here are a few ways to change it up:
Cheesy Mummies: Before wrapping the hot dog, slice it lengthwise (not all the way through) and stuff a strip of cheddar or mozzarella cheese inside. Wrap as usual. The cheese melts into the hot dog — it’s amazing.
Spicy Mummies: Use spicy Italian sausages or chorizo instead of regular hot dogs. Add a drizzle of sriracha on the finished mummies for a kick.
Veggie Mummies: Swap the hot dogs for vegetarian or vegan hot dogs. The dough works the same way, and the mustard eyes still look adorable.
Breakfast Mummies: Replace the hot dog with a cooked breakfast sausage link. Serve with a side of maple syrup for dipping. My kids went crazy for these on Halloween morning.
Gluten-Free Option: Use gluten-free crescent dough (it’s available in most grocery stores). The texture is slightly different, but the fun factor is the same.
I once tried these with puff pastry instead of crescent dough. It was a disaster — the puff pastry didn’t cook through, and the layers were too thick. Stick with crescent dough for the best results.
Serving & Storage Suggestions
These mummy hot dogs are best served warm, right out of the oven. Arrange them on a platter with a bowl of ketchup or mustard for dipping. You can also add a few “spooky” sides like carrot sticks (fingers!) or a bowl of popcorn.
For a Halloween party, I like to serve them on a black platter with a few fake spider webs draped around. It’s a small touch, but it makes the table look festive.
Storage: Leftover mummy hot dogs can be stored in an airtight container in the fridge for up to 3 days. The dough will soften a bit, but they’re still tasty.
Reheating: Pop them in a 350°F oven for 5-7 minutes to crisp up the dough again. You can also microwave them for 30 seconds, but the dough won’t be as flaky.
Freezing: You can freeze the assembled (unbaked) mummy hot dogs for up to 1 month. Place them on a baking sheet in the freezer until solid, then transfer to a freezer bag. Bake from frozen, adding 3-5 minutes to the baking time.
The flavors don’t really change much over time, but the texture is definitely best fresh. If you’re making these for a party, bake them just before serving.
Nutritional Information & Benefits
Let’s be real — these are a treat. But here’s the breakdown per mummy hot dog (using standard beef hot dogs and crescent dough):
- Calories: Approximately 220
- Protein: 8g
- Fat: 14g
- Carbohydrates: 16g
- Sodium: 580mg
The hot dogs provide a decent amount of protein, and the crescent dough gives you a little energy from carbohydrates. If you’re watching your sodium, opt for low-sodium hot dogs. The mustard eyes add negligible calories but a nice pop of flavor.
For a slightly healthier version, use turkey or chicken hot dogs and skip the egg wash. You’ll save about 50 calories and a few grams of fat per serving.
These are not a health food, and that’s okay. They’re a fun, occasional treat that brings a smile to everyone’s face. Balance is key, right?
Conclusion
These Easy Spooky Mummy Crescent Hot Dogs are the kind of recipe that makes Halloween feel special without any stress. They’re quick, fun, and so simple that even the kids can help wrap the dough. I love that they bring back that diner memory every time I make them — and now they’re part of our own family tradition.
Feel free to customize them however you like. Add cheese, swap the hot dogs, or experiment with different mustard colors. The beauty of this recipe is that it’s forgiving and endlessly adaptable.
I’d love to hear how yours turn out! Drop a comment below and let me know if your kids loved them as much as mine do. And if you come up with a fun variation, share it — I’m always looking for new ideas. Happy Halloween, and happy cooking!
Frequently Asked Questions
Can I use hot dog buns instead of crescent dough?
No, hot dog buns won’t give you the same mummy look. The crescent dough is what creates those thin, bandage-like strips. If you don’t have crescent dough, you can try puff pastry cut into thin strips, but the texture will be different.
How do I keep the dough from unwrapping during baking?
Make sure you tuck the end of the dough strip underneath the hot dog. The weight of the hot dog will hold it in place. Also, don’t wrap too tightly — the dough needs room to expand as it bakes.
Can I make these ahead of time for a party?
Yes! You can assemble the mummy hot dogs up to 2 hours ahead and keep them covered in the fridge. Bake them just before serving for the best texture. You can also freeze the assembled mummies for up to 1 month.
What can I use instead of mustard for the eyes?
Ketchup works great for red eyes. Sriracha or hot sauce adds a spicy kick. You can also use small dots of cream cheese or sour cream for white eyes. Get creative!
My dough strips keep breaking. What am I doing wrong?
The dough might be too warm. If it’s sticky or soft, pop it in the fridge for 5-10 minutes to firm up. Also, use a sharp knife or pizza cutter — a dull blade will drag and tear the dough.
Pin This Recipe!
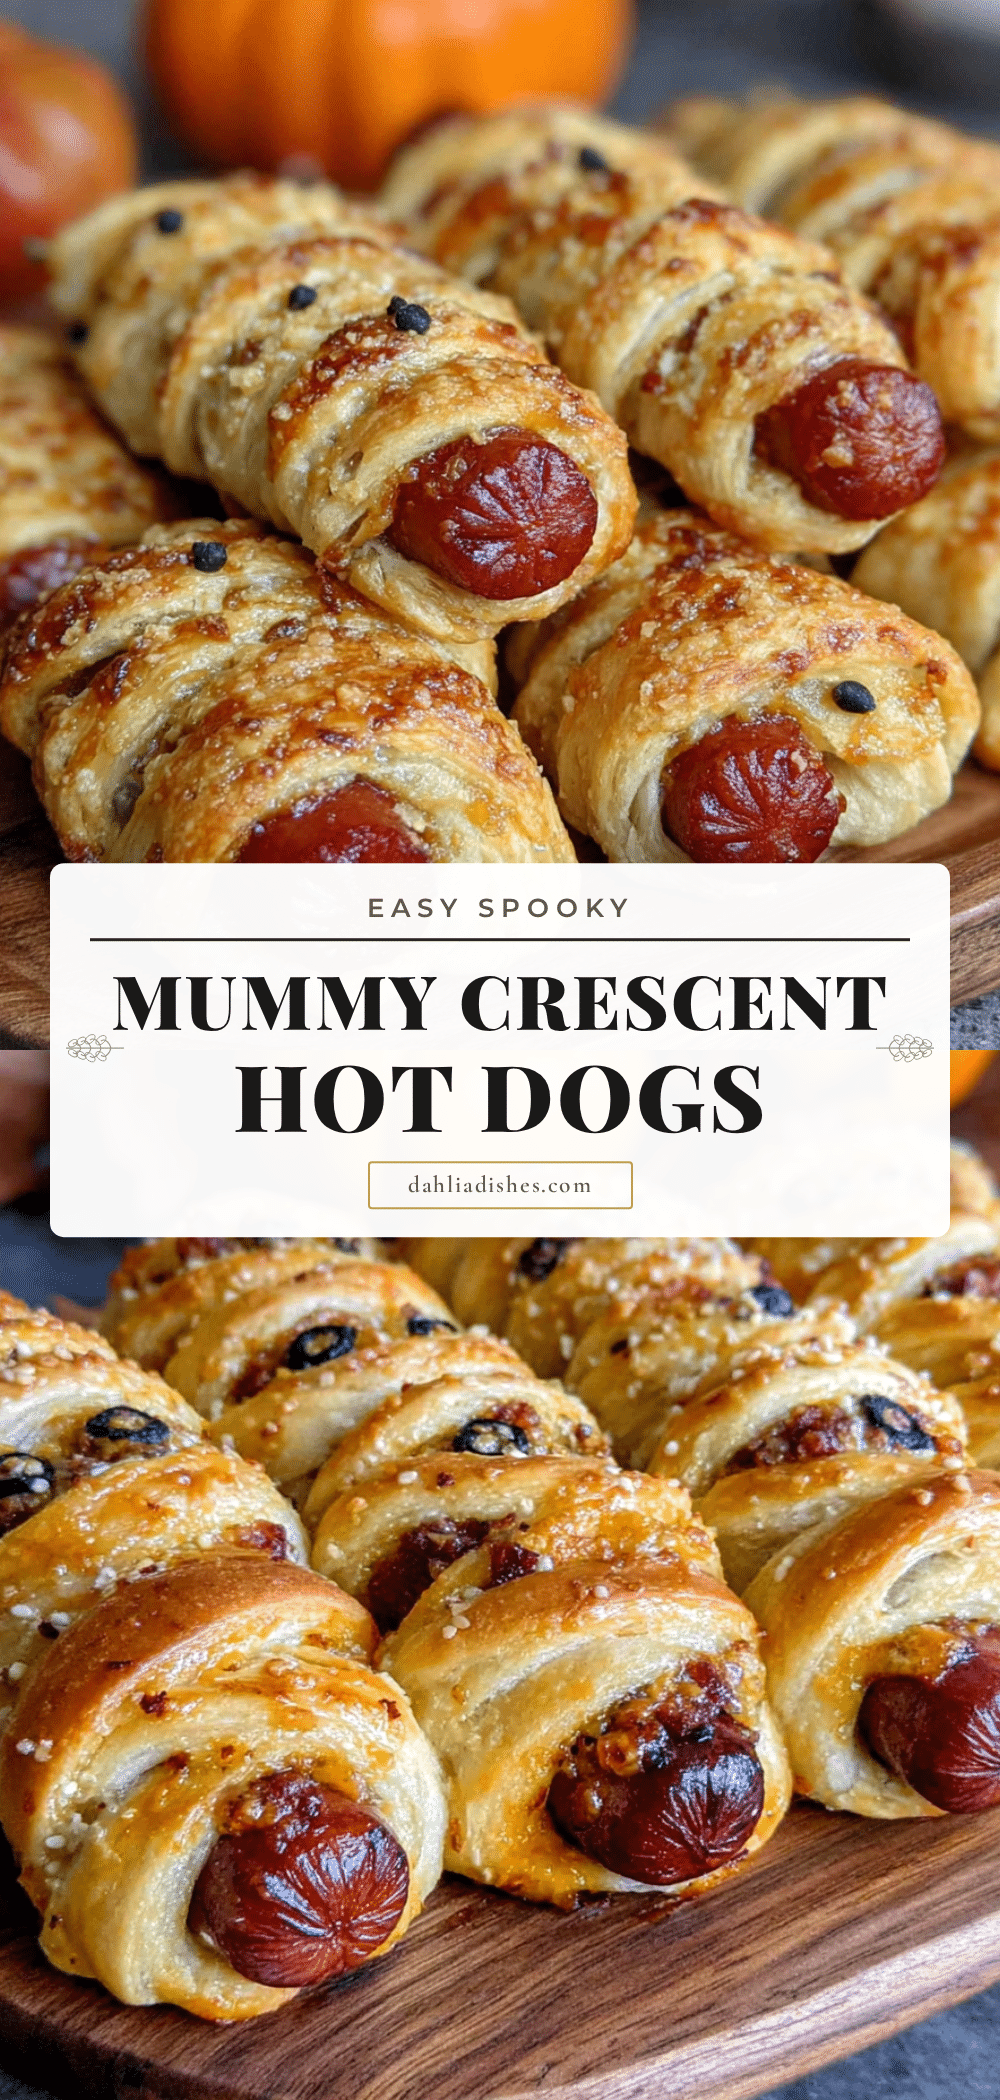
Easy Spooky Mummy Crescent Hot Dogs: Best 30-Minute Recipe
These Easy Spooky Mummy Crescent Hot Dogs are a quick and fun Halloween treat, featuring hot dogs wrapped in flaky crescent dough with mustard eyes. Ready in under 30 minutes, they’re perfect for parties and weeknight fun.
- Prep Time: 10 minutes
- Cook Time: 15 minutes
- Total Time: 25 minutes
- Yield: 8 servings 1x
- Category: Appetizer
- Cuisine: American
Ingredients
- 8 standard-size hot dogs
- 1 can (8 oz) refrigerated crescent rolls
- Yellow mustard (for eyes)
- 1 large egg, beaten with 1 tablespoon water (optional, for egg wash)
- Sesame seeds (optional, for garnish)
Instructions
- Preheat oven to 375°F (190°C). Line a baking sheet with parchment paper.
- Unroll the crescent dough onto a clean cutting board. Press the perforated seams together to form one solid sheet.
- Using a sharp knife or pizza cutter, slice the dough lengthwise into 8 thin strips, about 1/2 inch wide.
- Take one hot dog and wrap a strip of dough around it, starting at one end and working to the other. Leave a 1-inch gap near the top for the mummy’s face. Do not wrap too tightly. Tuck the end of the strip underneath the hot dog.
- Place wrapped hot dogs on the prepared baking sheet, leaving about 2 inches of space between each.
- If using egg wash, lightly brush the exposed dough with the beaten egg mixture.
- Bake for 12-15 minutes, until dough is golden brown and puffed, and hot dogs are heated through.
- Remove from oven and let cool for 2-3 minutes. Using a squeeze bottle or toothpick, dab two small dots of yellow mustard on the exposed hot dog area for eyes.
- Serve immediately.
Notes
Keep dough cold for easier handling. Do not overwrap; leave small gaps for the mummy look. For best results, use standard-size hot dogs. Assemble up to 2 hours ahead and refrigerate until baking. Freeze unbaked mummies for up to 1 month.
Nutrition
- Serving Size: 1 mummy hot dog
- Calories: 220
- Sugar: 3
- Sodium: 580
- Fat: 14
- Saturated Fat: 5
- Carbohydrates: 16
- Protein: 8
Keywords: Halloween, mummy hot dogs, crescent hot dogs, easy Halloween recipe, 30-minute recipe, kid-friendly, party food


