Love this? Save it for later!
Share the inspiration with your friends
I wasn’t expecting cooking advice from my accountant, but there I was, knee-deep in spreadsheets during tax season, listening to Mr. Henderson describe exactly how to make the crispiest chicken thighs he’d ever pulled out of an air fryer. The man who usually talks about deductions and depreciation was suddenly animated, waving his hands around, telling me about this garlic parmesan crust that had apparently become the talk of his entire neighborhood potluck. I just sat there, pen hovering over my tax forms, thinking, “Did my accountant just give me the best recipe idea I’ve heard all year?”
Honestly, I almost didn’t try it. I mean, an accountant’s chicken recipe? But something about the way he described that golden, crunchy exterior stuck with me. So that weekend, I grabbed a pack of chicken thighs, some good parmesan, and decided to give it a shot. Let me tell you, the first batch came out so good I actually forgot to put the leftovers away — and that’s saying something for someone who meal preps like a maniac. The kitchen smelled like a fancy Italian restaurant, and my family just stood around the counter, grabbing pieces straight from the basket.
That first bite had this unexpected crunch that gave way to the juiciest, most tender chicken I’d ever made at home. I’ve been tweaking the recipe ever since, perfecting the coating ratio and the cooking time, and now it’s my go-to for dinner parties, lazy Sundays, and everything in between. You know that feeling when you find a recipe that just works, no fuss, no drama? This is that recipe. Maybe you’ve been hunting for a way to get that deep-fried crunch without the oil bath, or maybe you just need a reliable dish that makes everyone happy. Either way, you’re in the right place.
Why You’ll Love This Recipe
This isn’t just another chicken recipe — it’s the one that disappears first at every gathering. I’ve tested this more times than I can count, tweaking the seasoning blend and the cooking method until it was absolutely foolproof. Here’s why it’s become my most-requested dish:
- Quick & Easy: Comes together in under 30 minutes, perfect for those evenings when you need dinner on the table fast but still want something impressive.
- Simple Ingredients: No fancy grocery trips needed. You likely already have garlic, parmesan, and chicken thighs in your kitchen right now.
- Perfect for Hosting: Great for dinner parties, potlucks, game day spreads, or holiday dinners. It scales beautifully for a crowd and looks stunning on a platter.
- Crowd-Pleaser: Always gets rave reviews from kids and adults alike. I’ve yet to meet someone who doesn’t go back for seconds.
- Unbelievably Delicious: The texture combo is next-level comfort food — crunchy on the outside, juicy on the inside, with that savory garlic parmesan flavor that just hits different.
What makes this recipe different from the rest? It’s the technique. Instead of just tossing the chicken in breadcrumbs, I use a two-step coating process that locks in moisture while creating that shatteringly crisp crust. Plus, the air fryer circulates hot air perfectly, giving you that golden-brown finish without the grease. This isn’t just another version of crispy chicken — it’s my best version, perfected through trial and error.
This recipe is the kind that makes you close your eyes after the first bite. It’s comfort food reimagined — faster, healthier, but with the same soul-soothing satisfaction. Perfect for impressing guests without stress, or turning a simple weeknight dinner into something memorable.
What Ingredients You Will Need
This recipe uses simple, wholesome ingredients to deliver bold flavor and satisfying texture without the fuss. Most of these are pantry staples, but a few key choices make all the difference.
For the Chicken
- Chicken thighs, bone-in and skin-on (about 6-8 thighs, roughly 2 pounds) — the skin adds extra crispiness and keeps the meat incredibly juicy
- Buttermilk, 1 cup (adds tenderness and helps the coating stick; use whole milk mixed with 1 tablespoon lemon juice if you don’t have buttermilk)
- Garlic powder, 2 teaspoons (I prefer McCormick for consistent flavor)
- Onion powder, 1 teaspoon
- Salt, 1 teaspoon (use kosher salt for best results)
- Black pepper, ½ teaspoon, freshly ground
- Paprika, 1 teaspoon (smoked paprika adds a lovely depth)
For the Coating
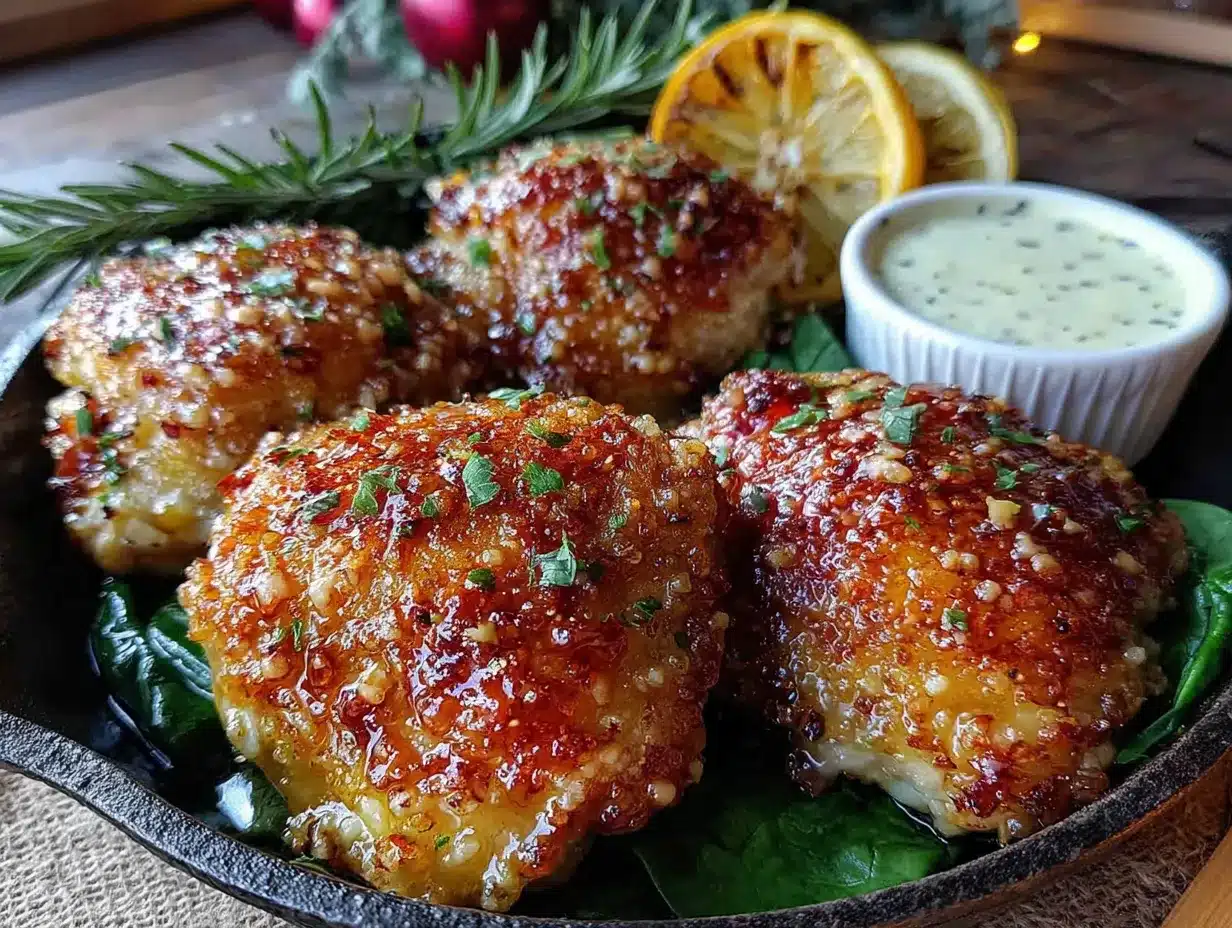
- Panko breadcrumbs, 1 cup (they’re lighter and crispier than regular breadcrumbs; use gluten-free panko if needed)
- Grated parmesan cheese, ½ cup (use the real stuff, not the shelf-stable powder — BelGioioso or Parmigiano-Reggiano are my go-to brands)
- Garlic cloves, 4 cloves, minced (fresh garlic is non-negotiable here — it makes the flavor pop)
- Dried parsley, 1 tablespoon (or 2 tablespoons fresh, chopped)
- Dried oregano, 1 teaspoon
- Olive oil spray (or avocado oil spray, for a higher smoke point)
For Serving (Optional but Recommended)
- Fresh parsley, chopped, for garnish
- Lemon wedges, for squeezing over the top (trust me on this one)
- Extra grated parmesan, for sprinkling
When shopping for chicken thighs, look for ones that are roughly the same size so they cook evenly. If you’re feeding a crowd, you can easily double this recipe — just cook in batches so you don’t overcrowd the air fryer basket. For a dairy-free version, swap the buttermilk for almond milk mixed with lemon juice and use a dairy-free parmesan alternative.
Equipment Needed
You don’t need a fancy kitchen to pull this off, but a few key tools make the process smoother. My air fryer is a Cosori 5.8-quart, which I’ve had for three years and absolutely love. It’s big enough to cook a full batch of chicken thighs without crowding. If you’re using a smaller model, just cook in batches — it’s worth the extra few minutes.
- Air fryer (any size works; just adjust cooking time if needed)
- Mixing bowls (one large for the buttermilk marinade, one medium for the coating)
- Tongs (for handling the chicken without making a mess)
- Measuring cups and spoons
- Sharp knife and cutting board (for mincing garlic)
- Paper towels (for patting the chicken dry — don’t skip this step!)
- Spray bottle with oil (a Misto sprayer is budget-friendly and works great)
- Instant-read thermometer (optional but highly recommended for perfect doneness)
If you don’t have an air fryer, you can bake these in a conventional oven at 400°F for about 25-30 minutes, though you won’t get quite the same level of crispiness. I’ve also tested them in a convection oven with good results — just place the thighs on a wire rack over a baking sheet to allow air circulation.
Preparation Method
Alright, let’s get cooking. This recipe comes together in about 30 minutes, and I promise it’s easier than it sounds. Here’s the step-by-step breakdown:
- Prep the chicken (5 minutes). Pat the chicken thighs dry with paper towels — this is crucial for crispy skin. Trim any excess fat or loose skin, but leave the skin intact. Place the thighs in a large bowl.
- Make the buttermilk marinade (2 minutes). In a small bowl, whisk together the buttermilk, garlic powder, onion powder, salt, pepper, and paprika. Pour this over the chicken thighs and toss to coat. Let them sit for at least 10 minutes while you prepare the coating. If you have more time, marinate for up to 2 hours in the fridge — the buttermilk tenderizes the meat beautifully.
- Prepare the coating (5 minutes). In a medium bowl, combine the panko breadcrumbs, grated parmesan, minced garlic, dried parsley, and dried oregano. Mix well with a fork. The garlic should be evenly distributed — nobody wants a bite with no garlic flavor.
- Coat the chicken (5 minutes). Working one piece at a time, remove a chicken thigh from the buttermilk mixture, letting the excess drip off. Press it firmly into the panko mixture, coating all sides. Don’t be shy — really press it in so the coating adheres. Place the coated thigh on a plate or tray. Repeat with all the thighs.
- Preheat the air fryer (3 minutes). Set your air fryer to 375°F (190°C) and let it preheat for about 3 minutes. This ensures the chicken starts cooking immediately, which helps the coating get crispy.
- Arrange the chicken (2 minutes). Lightly spray the air fryer basket with oil. Place the coated chicken thighs in a single layer, skin-side up, making sure they don’t touch. You may need to cook in batches depending on the size of your air fryer. Spray the tops of the thighs generously with oil — this is what makes them golden and crunchy.
- Cook the first batch (18-20 minutes). Air fry at 375°F for 18-20 minutes, flipping halfway through. At the 10-minute mark, carefully flip each thigh using tongs and spray the other side with oil. The chicken is done when the internal temperature reaches 165°F (74°C) and the coating is deep golden brown. My first batch came out a little pale because I didn’t spray enough oil — learn from my mistake and be generous with that spray!
- Rest and repeat (5 minutes). Transfer the cooked thighs to a wire rack or plate and let them rest for 5 minutes. This allows the juices to redistribute. Meanwhile, cook any remaining batches. Don’t be tempted to skip the rest — it makes a big difference in juiciness.
- Garnish and serve (2 minutes). Sprinkle with fresh parsley and extra parmesan, and serve with lemon wedges on the side. The squeeze of lemon at the end brightens up all the rich flavors.
Your kitchen should smell incredible at this point — that garlic-parmesan aroma is something else. The chicken should look golden and inviting, with a crust that crackles when you bite into it.
Cooking Tips & Techniques
I’ve made this recipe more times than I can count, and I’ve definitely learned a few things along the way. Here are my best tips for perfect results every time:
Don’t overcrowd the basket. This is the number one mistake I see. If the chicken thighs are touching, they’ll steam instead of crisp up. Cook in batches if needed — it’s worth the extra few minutes. I learned this the hard way when I tried to cram eight thighs into my air fryer and ended up with soggy coating.
Spray, spray, spray. Oil is your best friend here. The air fryer needs that fine mist of oil to create the golden, crunchy crust. I use a Misto sprayer filled with olive oil, and I spray both sides of the chicken generously. Don’t rely on the oil in the breadcrumbs — it’s not enough.
Use an instant-read thermometer. Chicken thighs are forgiving, but for the best texture, you want them to reach exactly 165°F. Overcooking dries them out, while undercooking is unsafe. I use a Thermapen and it’s been a game-changer for my cooking.
Flip halfway through. This ensures even cooking and crispiness on both sides. Set a timer so you don’t forget — I’ve definitely gotten distracted and ended up with one side darker than the other.
Let the buttermilk work its magic. Even 10 minutes of marinating makes a difference, but if you have an hour or two, the chicken will be noticeably more tender. The acidity in the buttermilk breaks down the proteins, resulting in juicier meat.
Pat the chicken dry before marinating. This helps the buttermilk mixture adhere better. Wet skin just slides right off, and you want that coating to stay put.
Variations & Adaptations
One of the best things about this recipe is how flexible it is. I’ve tried several variations over the years, and here are my favorites:
Spicy Buffalo Version
Add 1 tablespoon of buffalo sauce to the buttermilk marinade and mix ½ teaspoon of cayenne pepper into the panko mixture. Serve with ranch or blue cheese dressing for dipping. This is my husband’s absolute favorite — he says it’s better than any wing he’s ever had.
Lemon Herb Version
Replace the dried parsley with fresh rosemary and thyme, and add the zest of one lemon to the coating. Squeeze fresh lemon juice over the finished chicken. This version is lighter and perfect for spring dinners or when you want something a little brighter.
Gluten-Free Version
Use gluten-free panko breadcrumbs (I like the Ian’s brand) and ensure your parmesan is gluten-free. The texture is almost identical to the original — I’ve served this to gluten-sensitive friends and they couldn’t tell the difference.
Oven-Baked Version
If you don’t have an air fryer, bake the chicken thighs on a wire rack set over a baking sheet at 400°F for 25-30 minutes, flipping halfway through. The coating won’t be quite as crispy, but it’s still delicious. I’ve done this when my air fryer was full and it worked great.
Dairy-Free Version
Swap the buttermilk for unsweetened almond milk mixed with 1 tablespoon of lemon juice, and use a dairy-free parmesan alternative. The texture is slightly less rich, but the flavor is still fantastic.
Serving & Storage Suggestions
These chicken thighs are incredibly versatile when it comes to serving. Here’s how I like to present them and what to do with leftovers:
Serving Temperature: Serve the chicken hot, straight from the air fryer. The coating is at its crispiest within the first 15 minutes. If you’re serving a crowd, keep the cooked thighs warm in a 200°F oven on a wire rack while you finish the remaining batches.
Presentation: Arrange the thighs on a large platter, sprinkle with fresh parsley and extra parmesan, and place lemon wedges around the edges. The golden color against the green parsley is gorgeous — it’s the kind of dish that makes people grab their phones for photos before eating.
What to Serve Alongside: These pair beautifully with roasted vegetables (asparagus or broccoli are my go-to), a simple green salad with lemon vinaigrette, mashed potatoes, or crusty bread to soak up any juices. For a party, serve them with dipping sauces like ranch, honey mustard, or marinara.
Storage: Store leftover chicken in an airtight container in the refrigerator for up to 4 days. The coating will soften slightly, but it’s still delicious. I often shred leftover thighs and use them in salads or wraps the next day.
Reheating: The air fryer is your best friend here. Reheat at 350°F for 3-4 minutes until the coating crisps back up. Avoid the microwave — it will make the coating soggy and the chicken rubbery. If you’re in a rush, you can reheat in a 375°F oven for about 8-10 minutes.
Freezing: You can freeze cooked chicken thighs for up to 3 months. Let them cool completely, then wrap individually in plastic wrap and place in a freezer bag. Thaw overnight in the fridge and reheat in the air fryer. The texture won’t be quite as perfect as fresh, but it’s still a great option for busy nights.
Nutritional Information & Benefits
Here’s the estimated nutritional breakdown for one serving (one chicken thigh, based on a batch of 6):
- Calories: 320
- Protein: 28g
- Fat: 18g
- Carbohydrates: 8g
- Fiber: 1g
- Sugar: 2g
- Sodium: 520mg
Chicken thighs are a great source of lean protein, which supports muscle health and keeps you feeling full. They also contain important B vitamins, including niacin and B6, which help with energy metabolism. The garlic in this recipe isn’t just for flavor — it’s known for its immune-boosting properties and anti-inflammatory benefits. Parmesan cheese adds calcium and protein, though it’s also higher in sodium, so be mindful if you’re watching your salt intake.
This recipe is naturally low in carbs and can fit into a keto or low-carb diet if you use almond flour instead of panko. It’s also gluten-free if you use gluten-free breadcrumbs. The main allergens are dairy (buttermilk and parmesan) and gluten (panko), but as mentioned above, both are easily substituted.
Conclusion
So there you have it — the recipe that started with an unexpected conversation during tax season and turned into my most-requested dish. These crispy air fryer garlic parmesan chicken thighs are everything you want in a dinner: quick, impressive, and absolutely delicious. Whether you’re hosting a dinner party, feeding your family on a busy weeknight, or just treating yourself to something special, this recipe delivers every single time.
I love that this recipe proves you don’t need a deep fryer or a complicated technique to get that perfect crunch. It’s honest cooking at its best — simple ingredients treated with care and a little bit of patience. The air fryer does most of the work, and you get to take all the credit.
Now I’d love to hear from you! Have you tried making these chicken thighs? Did you add your own twist? Drop a comment below and let me know how it went. And if you loved this recipe, share it with a friend who needs a new go-to dinner idea. Until next time, happy cooking!
Frequently Asked Questions
Can I use chicken breasts instead of thighs?
Absolutely, but keep in mind that chicken breasts cook faster and can dry out more easily. Reduce the cooking time to 14-16 minutes and check for an internal temperature of 165°F. You might also want to pound the breasts to an even thickness for consistent cooking.
Do I have to use buttermilk?
Not at all. If you don’t have buttermilk, you can make a quick substitute by mixing 1 cup of regular milk with 1 tablespoon of lemon juice or white vinegar. Let it sit for 5 minutes before using. Alternatively, you can use plain yogurt thinned with a little milk.
Can I prepare these ahead of time for a party?
Yes! You can coat the chicken thighs up to 4 hours ahead and keep them in the refrigerator. When you’re ready to cook, just pop them in the air fryer. I’ve done this for dinner parties and it makes hosting so much less stressful.
Why is my coating not crispy?
The most common reasons are overcrowding the basket, not using enough oil spray, or not patting the chicken dry before coating. Make sure your air fryer is fully preheated and that you’re cooking in a single layer with space between each piece.
Can I freeze the uncooked coated chicken?
Yes, you can freeze the coated chicken thighs on a baking sheet until solid, then transfer them to a freezer bag. Cook directly from frozen, adding 5-7 minutes to the cooking time. The texture might be slightly less crispy, but it’s still delicious and so convenient for busy nights.
Pin This Recipe!
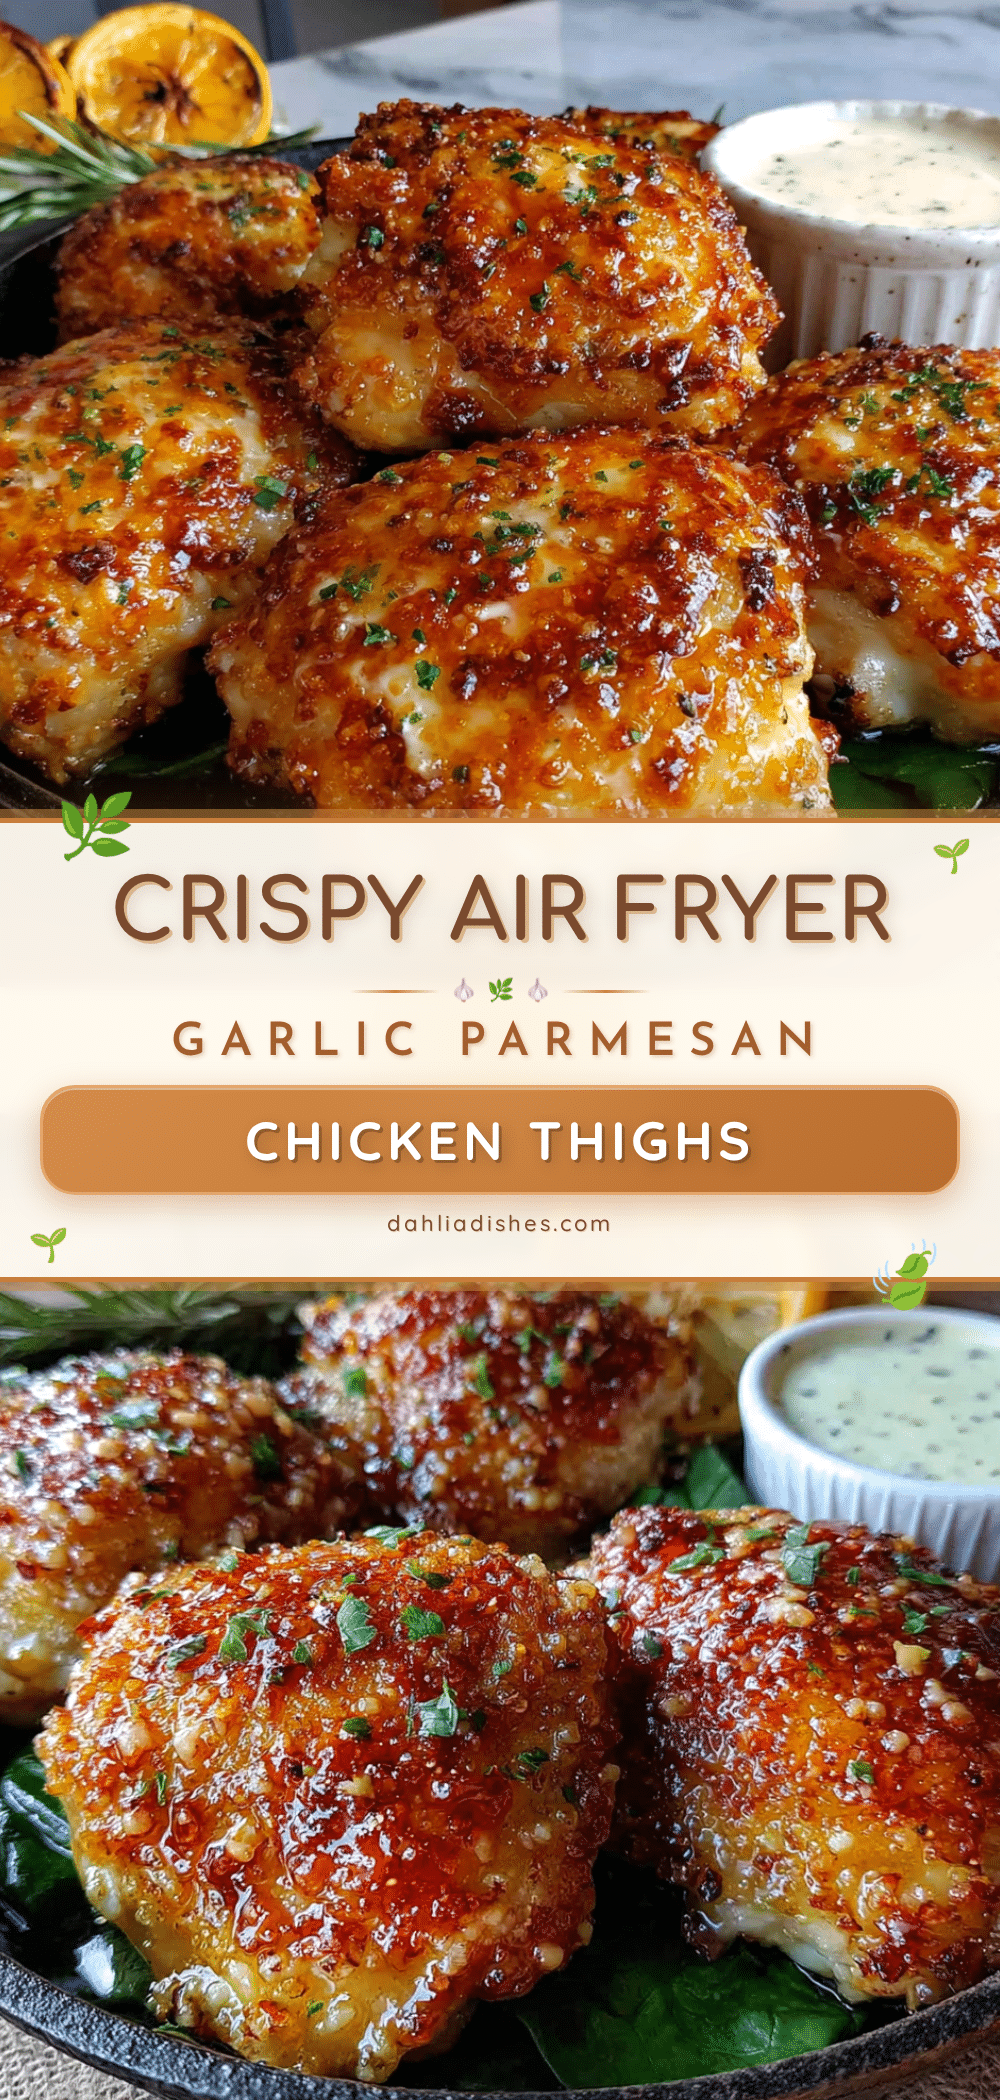
Crispy Air Fryer Garlic Parmesan Chicken Thighs: Easy Dinner

These crispy air fryer garlic parmesan chicken thighs are quick, easy, and perfect for any occasion. With a crunchy coating and juicy interior, they’re a crowd-pleaser that comes together in under 30 minutes.
- Prep Time: 15 minutes
- Cook Time: 20 minutes
- Total Time: 35 minutes
- Yield: 6 servings 1x
- Category: Main Course
- Cuisine: Italian-American
Ingredients
- 6–8 bone-in, skin-on chicken thighs (about 2 pounds)
- 1 cup buttermilk
- 2 teaspoons garlic powder
- 1 teaspoon onion powder
- 1 teaspoon kosher salt
- ½ teaspoon freshly ground black pepper
- 1 teaspoon smoked paprika
- 1 cup panko breadcrumbs
- ½ cup grated parmesan cheese (such as BelGioioso or Parmigiano-Reggiano)
- 4 cloves garlic, minced
- 1 tablespoon dried parsley (or 2 tablespoons fresh, chopped)
- 1 teaspoon dried oregano
- Olive oil spray (or avocado oil spray)
- Fresh parsley, chopped, for garnish (optional)
- Lemon wedges, for serving (optional)
- Extra grated parmesan, for sprinkling (optional)
Instructions
- Pat the chicken thighs dry with paper towels. Trim any excess fat or loose skin, but leave the skin intact. Place the thighs in a large bowl.
- In a small bowl, whisk together the buttermilk, garlic powder, onion powder, salt, pepper, and paprika. Pour over the chicken thighs and toss to coat. Let sit for at least 10 minutes (or up to 2 hours in the fridge).
- In a medium bowl, combine the panko breadcrumbs, grated parmesan, minced garlic, dried parsley, and dried oregano. Mix well.
- Working one piece at a time, remove a chicken thigh from the buttermilk mixture, letting excess drip off. Press firmly into the panko mixture, coating all sides. Place on a plate or tray. Repeat with all thighs.
- Preheat the air fryer to 375°F (190°C) for about 3 minutes.
- Lightly spray the air fryer basket with oil. Place the coated chicken thighs in a single layer, skin-side up, without touching. Spray the tops generously with oil.
- Air fry at 375°F for 18-20 minutes, flipping halfway through. At the 10-minute mark, carefully flip each thigh and spray the other side with oil. Cook until internal temperature reaches 165°F (74°C) and coating is deep golden brown.
- Transfer cooked thighs to a wire rack or plate and let rest for 5 minutes. Repeat with remaining batches if needed.
- Sprinkle with fresh parsley and extra parmesan, and serve with lemon wedges on the side.
Notes
For best results, don’t overcrowd the air fryer basket. Spray the chicken generously with oil to ensure a crispy coating. Let the buttermilk marinate for at least 10 minutes for tender meat. Use an instant-read thermometer to check for doneness at 165°F.
Nutrition
- Serving Size: 1 chicken thigh
- Calories: 320
- Sugar: 2
- Sodium: 520
- Fat: 18
- Saturated Fat: 5
- Carbohydrates: 8
- Fiber: 1
- Protein: 28
Keywords: air fryer chicken thighs, garlic parmesan chicken, crispy chicken thighs, easy dinner, weeknight dinner, chicken recipe


