Love this? Save it for later!
Share the inspiration with your friends
I was standing in the frozen food aisle last December, just staring at a carton of eggnog like it held the secrets to the universe. Honestly, I wasn’t even shopping for it. I was there for frozen peas, of all things. But the second my eyes landed on that familiar red and green carton, the smell hit me — not a real smell, you know, but a memory-smell. And suddenly I was seven years old at my Aunt Maggie’s kitchen table, watching her pour thick, creamy eggnog into a glass for me while snow piled up against the window. She always added an extra sprinkle of nutmeg on top, and I’d stir it with my finger when I thought she wasn’t looking.
Aunt Maggie passed about five years ago now, and I haven’t had a proper glass of eggnog since. Not because I don’t like it — I love it, honestly — but because nothing ever tastes quite like it did at her table. That frozen aisle moment got me thinking though. What if I could take that cozy, holiday-in-a-cup feeling and turn it into something even more indulgent? Something you could slice and share, with that same nutmeg warmth running through every single bite.
That’s how this Cozy Eggnog Cheesecake with Nutmeg Whipped Cream was born. I spent three weekends testing batches — the first one cracked right down the middle, and I may or may not have dropped the second one on the floor (the dog was very happy that day). But the third? That was the one. Creamy, spiced, and topped with clouds of nutmeg-kissed whipped cream that tastes like Christmas morning. Maybe you’ve been there too — chasing a taste from your past that you can’t quite recreate. Well, this cheesecake got me closer than I ever expected.
Why You’ll Love This Recipe
Let me tell you, this isn’t just another cheesecake recipe floating around the internet. I’ve tested this thing six ways from Sunday, and what I landed on is something genuinely special. Here’s why you’re going to want this in your holiday rotation:
- Holiday Perfection in Every Bite: The eggnog flavor isn’t subtle or fake-tasting. It’s rich, creamy, and unmistakably festive, with just the right kick of nutmeg and warm spices.
- No Water Bath Needed: I know, I know — cheesecake without a water bath sounds risky. But trust me on this one. The low-and-slow baking method I use gives you that same silky texture without the hassle of wrapping your pan in foil and praying it doesn’t leak.
- Make-Ahead Friendly: This cheesecake actually gets better after a day or two in the fridge. So you can make it on Wednesday and serve it on Friday without stressing. That’s my kind of holiday planning.
- Simple Ingredients: Nothing weird here. You probably already have most of what you need in your pantry. Even the eggnog is just the regular store-bought stuff — no homemade required.
- Absolute Crowd-Pleaser: I brought this to a Friendsgiving last year, and three separate people asked for the recipe before I even got my coat off. It’s one of those desserts that makes everyone close their eyes after the first bite.
What makes this recipe different from all the other eggnog cheesecakes out there? It’s the texture, honestly. Most eggnog cheesecakes turn out either too dense or too loose because the eggnog adds extra liquid that messes with the structure. I figured out the right balance of cornstarch and eggs to keep things perfectly creamy without any weird jiggle. Plus, that nutmeg whipped cream on top isn’t just decorative — it adds a light, airy contrast to the dense cheesecake that makes every bite feel special.
What Ingredients You Will Need
This recipe uses simple, wholesome ingredients to deliver that bold holiday flavor without any fuss. Most of these are pantry staples during the holiday season, which makes this an easy last-minute dessert option.
For the Crust
- 2 cups graham cracker crumbs (about 16 full sheets, crushed fine — I use a food processor for even texture)
- 1/4 cup granulated sugar
- 1/2 teaspoon ground nutmeg (freshly grated if you have it — it makes a difference)
- 1/2 cup unsalted butter, melted (I prefer using salted butter and skipping the extra salt here, but unsalted works fine too)
For the Cheesecake Filling
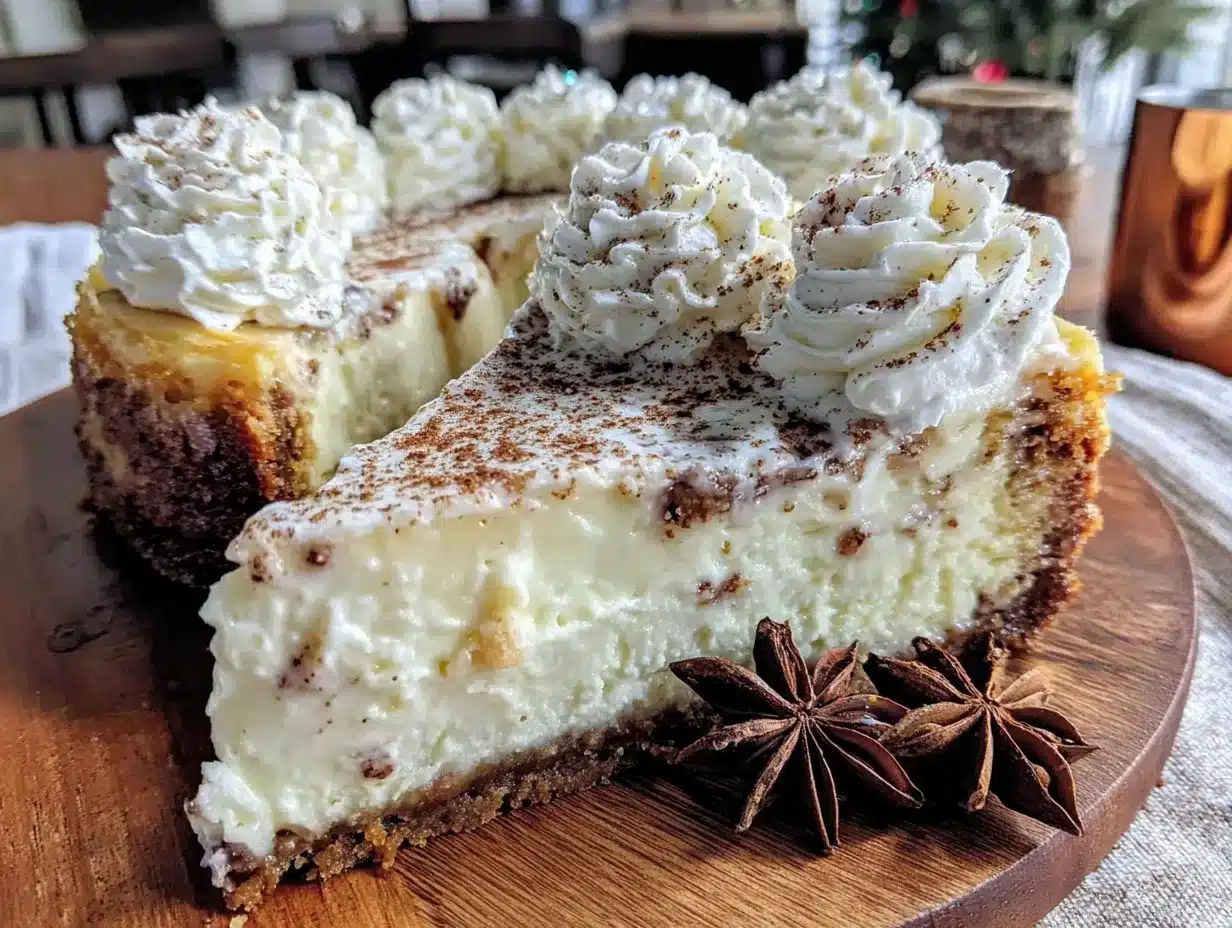
- 32 ounces cream cheese, softened to room temperature (four 8-ounce blocks — I recommend Philadelphia for consistent results)
- 1 cup granulated sugar
- 1 cup eggnog (full-fat, please — light eggnog will make the filling too thin)
- 3 large eggs, room temperature
- 2 large egg yolks, room temperature
- 1 tablespoon vanilla extract
- 1 tablespoon dark rum (optional, but it deepens the flavor beautifully — you can use rum extract if you prefer)
- 1 teaspoon ground nutmeg
- 1/2 teaspoon ground cinnamon
- 1/4 teaspoon ground cloves
- 3 tablespoons cornstarch (this is the secret to a stable, sliceable cheesecake without a water bath)
For the Nutmeg Whipped Cream
- 1 1/2 cups heavy cream, cold
- 3 tablespoons powdered sugar
- 1/2 teaspoon freshly grated nutmeg (plus extra for garnish — pre-ground works in a pinch but fresh is truly better here)
- 1 teaspoon vanilla extract
For the Garnish (Optional but Pretty)
- Extra nutmeg, freshly grated
- Cinnamon sticks
- Fresh cranberries
- Fresh mint sprigs
A quick note on the eggnog — don’t use the low-fat or dairy-free versions here. They have too much water and not enough fat, which will make your cheesecake weepy and sad. Go for the good stuff. And if you’re feeling fancy, try using a locally made eggnog from a creamery. The thicker and creamier, the better.
Equipment Needed
You don’t need a ton of fancy equipment for this recipe, which I love. Here’s what you’ll need:
- 9-inch springform pan — This is non-negotiable for cheesecake. You need the removable sides to get that beautiful slice out without destroying it. I’ve had my Nordic Ware one for years, and it still works like a charm.
- Electric hand mixer or stand mixer — You can mix cheesecake by hand if you really want to, but your arm will hate you. A mixer makes the filling smooth and lump-free in minutes.
- Large mixing bowls — At least two: one for the crust and one for the filling.
- Food processor or zip-top bag and rolling pin — For crushing graham crackers. I use my food processor because it’s faster, but a bag and a rolling pin work just fine if you don’t mind a little arm work.
- Rubber spatula — For scraping every last bit of filling into the pan. Don’t waste a drop of that goodness.
- Measuring cups and spoons — Accurate measurements matter in cheesecake, so don’t eyebit it.
- Parchment paper — For lining the bottom of the springform pan. This makes releasing the cheesecake so much easier.
- Cooling rack — For cooling the cheesecake gradually before refrigeration.
- Sharp knife — For slicing clean pieces. Run it under hot water between cuts for the prettiest slices.
If you don’t have a springform pan, you could technically use a deep 9-inch cake pan lined with parchment, but getting the cheesecake out in one piece will be tricky. I’d recommend investing in a springform — they’re about $15 and worth every penny for cheesecake lovers.
Preparation Method
Alright, let’s make some magic. This looks like a lot of steps, but I promise it’s simpler than it seems. Take your time, and you’ll be rewarded with the creamiest, most festive cheesecake you’ve ever made.
Step 1: Prep Your Pan and Preheat
Preheat your oven to 325°F (163°C). Cut a circle of parchment paper to fit the bottom of your springform pan, then spray the sides lightly with non-stick cooking spray. The parchment isn’t strictly necessary, but it makes releasing the cheesecake so much easier — trust me on this one.
Step 2: Make the Crust
In a medium bowl, combine the graham cracker crumbs, 1/4 cup sugar, and 1/2 teaspoon nutmeg. Pour in the melted butter and stir with a fork until every crumb is moistened. It should look like wet sand. Press this mixture firmly into the bottom of your prepared pan — use the bottom of a measuring cup to get it even and compact. Bake for 10 minutes, then set aside to cool while you make the filling. Don’t skip this pre-bake step; it keeps the crust from getting soggy.
Step 3: Warm Your Cream Cheese
This is the most important step, honestly. Your cream cheese needs to be truly room temperature — not cold, not warm, but soft enough that you can press your finger into it and leave a dent. Take it out of the fridge at least 2 hours before you start. If you forgot (we’ve all been there), cut it into cubes and microwave it in 10-second bursts until soft but not melted.
Step 4: Make the Filling
In a large mixing bowl, beat the softened cream cheese with an electric mixer on medium speed until smooth and creamy — about 2 minutes. Scrape down the sides and bottom of the bowl with a rubber spatula. Add the sugar and beat for another 2 minutes until light and fluffy.
Add the eggnog, vanilla extract, and dark rum (if using), and beat on low until just combined. Don’t go crazy here — you don’t want to incorporate too much air into the batter. Add the eggs and egg yolks one at a time, beating on low after each addition until just combined. Scrape the bowl after every two additions.
In a small bowl, whisk together the cornstarch, nutmeg, cinnamon, and cloves. Add this to the batter and mix on low until smooth and uniform. The cornstarch is what gives this cheesecake its stable, sliceable texture without needing a water bath. Don’t skip it.
Step 5: Pour and Bake
Pour the filling over the cooled crust. Use your spatula to spread it evenly. Gently tap the pan on the counter a few times to release any air bubbles. Place the pan on a baking sheet (just in case of any leaks) and bake at 325°F (163°C) for 55-65 minutes.
Here’s how you know it’s done: The edges should look set and slightly puffed, but the center should still have a slight jiggle — about the size of a silver dollar. It will continue to cook as it cools, so don’t overbake it. A dry, cracked cheesecake is a sad thing.
Step 6: Cool Gradually
Turn off the oven and crack the door open. Let the cheesecake sit in the warm oven for 1 hour. This gradual cooling prevents cracking. After an hour, remove the cheesecake from the oven and run a thin knife around the edge of the pan to loosen it (this also helps prevent cracking as it shrinks). Let it cool completely on a wire rack, about 2 hours.
Step 7: Chill Overnight
Once the cheesecake is at room temperature, cover it loosely with plastic wrap and refrigerate for at least 6 hours, but preferably overnight. This is the hardest part — waiting — but it’s essential for the perfect texture. The flavors meld and deepen, and the cheesecake sets up beautifully.
Step 8: Make the Nutmeg Whipped Cream
Just before serving, pour the cold heavy cream into a chilled bowl. Beat with an electric mixer on medium-high until soft peaks form. Add the powdered sugar, vanilla extract, and freshly grated nutmeg, then continue beating until stiff peaks form. Be careful not to overbeat, or you’ll end up with butter. Trust me, I’ve done it, and it’s not pretty.
Step 9: Assemble and Serve
Release the sides of the springform pan and transfer the cheesecake to a serving plate. Dollop or pipe the nutmeg whipped cream on top. Garnish with a generous dusting of freshly grated nutmeg, and add cinnamon sticks, fresh cranberries, or mint sprigs if you’re feeling fancy. Slice with a hot, dry knife for the cleanest cuts.
Cooking Tips & Techniques
I’ve made this cheesecake about a dozen times now, and I’ve learned a few things the hard way so you don’t have to. Here are my best tips:
Room temperature ingredients are not optional. I know it’s tempting to use cold eggs and cream cheese straight from the fridge, but cold ingredients don’t emulsify properly. You’ll end up with a lumpy, grainy filling. Set everything out at least 2 hours ahead. If you’re in a rush, place the eggs in a bowl of warm water for 10 minutes and microwave the cream cheese in short bursts.
Don’t overmix the batter. Once you add the eggs, mix on low and stop as soon as everything is combined. Overmixing incorporates too much air, which causes the cheesecake to puff up in the oven and then crack as it cools. You want a dense, creamy texture, not a fluffy one.
The jiggle test is your friend. I used to obsessively check my cheesecake with a toothpick, but that just leaves holes. Instead, gently shake the pan. The center should wobble like Jell-O, while the edges should be firm. If the whole thing is still liquidy, give it another 5-10 minutes.
I once forgot the cornstarch. It was a disaster — the cheesecake was so soft it practically poured out of the pan when I released the sides. Don’t be like me. Measure carefully.
Use a hot knife for clean slices. Run your knife under hot water, dry it off, and make one smooth cut. Wipe the blade clean between cuts. This gives you those gorgeous, Instagram-worthy slices with no drag marks.
Variations & Adaptations
One of the best things about this recipe is how flexible it is. Here are some variations I’ve tried and loved:
Boozy Eggnog Cheesecake
If you want to kick the holiday spirit up a notch, increase the dark rum to 3 tablespoons and add 1 tablespoon of bourbon. The alcohol bakes off, but the warm, complex flavor stays. I made this version for a grown-up Christmas party, and it disappeared in about 15 minutes.
Gluten-Free Version
Swap the graham cracker crust for gluten-free ginger snaps or shortbread cookies. Most gluten-free cookies work beautifully here — just make sure they’re crushed fine and bound with enough butter. The filling itself is naturally gluten-free, so you’re good there.
Eggnog Cheesecake Bites
Line a muffin tin with paper liners and press the crust into the bottom of each cup. Fill with the cheesecake batter and bake for 18-22 minutes. These are perfect for holiday parties where people want to grab and go. Top each mini cheesecake with a dollop of nutmeg whipped cream and a sprinkle of cinnamon.
Dairy-Free Adaptation
Use dairy-free cream cheese (I like Kite Hill or Violife), coconut cream instead of heavy cream for the whipped topping, and a dairy-free eggnog alternative. The texture will be slightly different — a bit denser — but it’s still delicious. I tested this for a friend with dairy allergies, and she almost cried (happy tears, I promise).
Spiced Cranberry Topping
Instead of the nutmeg whipped cream, top your cheesecake with a spiced cranberry compote. Simmer 2 cups fresh cranberries with 1/2 cup sugar, 1/4 cup orange juice, and a cinnamon stick until the berries burst and the mixture thickens. Let it cool, then spoon it over the cheesecake. The tartness cuts through the richness beautifully.
Serving & Storage Suggestions
This cheesecake is best served cold, straight from the fridge. The texture is firm but creamy, and the flavors are at their peak. Let it sit at room temperature for about 10 minutes before slicing for the cleanest cuts.
For a truly show-stopping presentation, arrange the cheesecake on a cake stand and garnish with fresh cranberries, a few cinnamon sticks, and a generous dusting of freshly grated nutmeg. A sprig of fresh mint or rosemary adds a lovely green pop that looks beautiful against the warm, golden tones of the cheesecake.
Storage: Cover the cheesecake loosely with plastic wrap or aluminum foil and store it in the refrigerator for up to 5 days. The flavors actually deepen after a day or two, so don’t be afraid to make it ahead. I actually prefer the taste on day two.
Freezing: This cheesecake freezes beautifully. Once it’s fully chilled and set, wrap it tightly in plastic wrap, then a layer of aluminum foil. Freeze for up to 3 months. When you’re ready to serve, thaw it in the refrigerator overnight. Add the whipped cream fresh after thawing — frozen whipped cream doesn’t hold up well.
Reheating: Honestly, I don’t recommend reheating cheesecake. It’s meant to be served cold. But if you have a slice that’s been sitting out and you want to warm it up slightly, pop it in the microwave for about 10 seconds. Just enough to take the chill off without melting it.
Leftover nutmeg whipped cream can be stored in an airtight container in the fridge for up to 2 days. Give it a quick whisk before using to bring back the volume.
Nutritional Information & Benefits
Let’s be real — this is a holiday indulgence, not a health food. But knowing what’s in your food is always a good thing. Here’s the approximate nutritional breakdown per slice (based on 12 servings):
- Calories: 485
- Total Fat: 34g
- Saturated Fat: 20g
- Cholesterol: 145mg
- Sodium: 320mg
- Total Carbohydrates: 38g
- Dietary Fiber: 1g
- Sugars: 28g
- Protein: 8g
- Calcium: 8% of Daily Value
- Vitamin A: 15% of Daily Value
On the bright side, eggnog is a good source of calcium and vitamin A, and the nutmeg in this recipe contains compounds that may have anti-inflammatory properties. The cream cheese provides a decent amount of protein and calcium too. But honestly? This is a treat. It’s meant to be enjoyed in moderation, savored slowly, and shared with people you love. That’s the real benefit.
This recipe contains dairy, eggs, and gluten (from the graham crackers). If you have allergies, check out the variations section for suitable adaptations.
Conclusion
This Cozy Eggnog Cheesecake with Nutmeg Whipped Cream is more than just a dessert — it’s a little slice of holiday nostalgia that you can actually recreate in your own kitchen. Every time I make it, I think of Aunt Maggie and that snow-covered window, and I feel like she’s right there with me, sprinkling extra nutmeg on top.
What I love most about this recipe is how forgiving it is. Even my first attempt, the one that cracked right down the middle, tasted amazing. So don’t stress about perfection. If your cheesecake cracks, cover it with extra whipped cream. If the crust crumbles, call it rustic. The most important thing is that you made something with love, and that’s what the holidays are really about.
I’d love to hear how yours turns out. Did you try one of the variations? Did you add your own twist? Drop a comment below and let me know — I read every single one, and nothing makes me happier than hearing about your kitchen adventures. And if you loved this recipe, please share it with a friend who needs a little holiday cheer. Happy baking, friends!
Frequently Asked Questions
Can I use low-fat or light eggnog in this recipe?
I really don’t recommend it. Light eggnog has a higher water content and less fat, which will make your cheesecake filling too thin and prone to weeping. Stick with full-fat eggnog for the best texture and flavor. Your waistline can forgive you — it’s the holidays!
Why did my cheesecake crack on top?
Cracks happen for a few reasons: overmixing the batter, overbaking, or cooling too quickly. Make sure you’re mixing on low speed, pulling the cheesecake out while the center still has a slight jiggle, and cooling it gradually in the oven with the door cracked. If it still cracks, no worries — that’s what the nutmeg whipped cream is for!
Can I make this cheesecake without a springform pan?
Technically yes, but it’s tricky. You can use a deep 9-inch cake pan lined with parchment paper, but getting the cheesecake out in one piece will be challenging. A springform pan is really the best tool for the job, and they’re affordable — about $15 at most kitchen stores.
How far in advance can I make this cheesecake?
You can make the cheesecake up to 3 days ahead and keep it covered in the refrigerator. The flavors actually improve after a day or two. Just wait to add the nutmeg whipped cream until right before serving. You can also freeze the cheesecake (without the whipped cream) for up to 3 months.
Can I use pre-ground nutmeg instead of fresh?
You can, but fresh nutmeg really does make a difference, especially in the whipped cream. Pre-ground nutmeg loses its volatile oils over time and can taste flat. A whole nutmeg grates easily on a microplane or fine grater, and the flavor is infinitely better. For the cheesecake filling, pre-ground works fine — just make sure it’s relatively fresh.
Pin This Recipe!
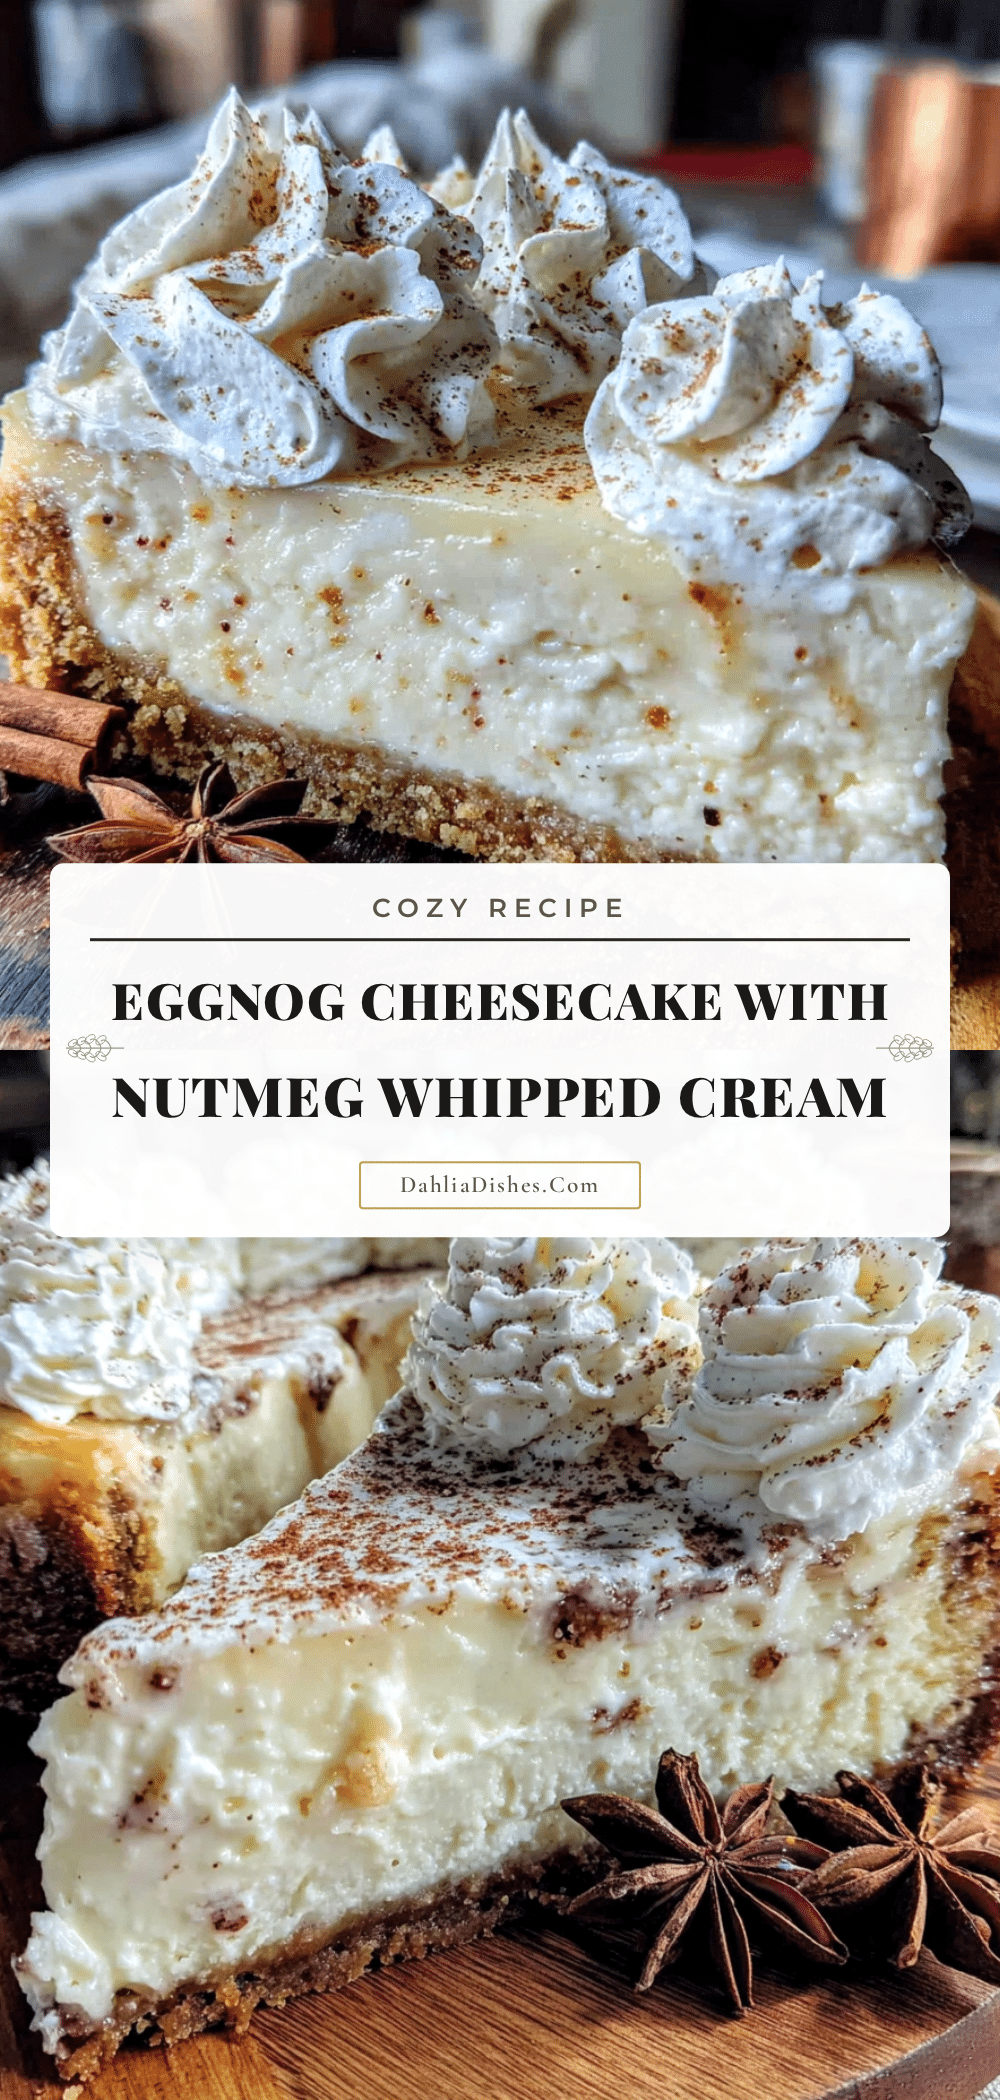
Cozy Eggnog Cheesecake with Nutmeg Whipped Cream
A rich and creamy eggnog cheesecake with a nutmeg-spiced graham cracker crust, topped with clouds of nutmeg-kissed whipped cream. This no-water-bath recipe delivers holiday nostalgia in every bite.
- Prep Time: 30 minutes
- Cook Time: 65 minutes
- Total Time: 9 hours 35 minutes (includes cooling and chilling)
- Yield: 12 servings 1x
- Category: Dessert
- Cuisine: American
Ingredients
- 2 cups graham cracker crumbs (about 16 full sheets)
- 1/4 cup granulated sugar
- 1/2 teaspoon ground nutmeg
- 1/2 cup unsalted butter, melted
- 32 ounces cream cheese, softened to room temperature
- 1 cup granulated sugar
- 1 cup eggnog (full-fat)
- 3 large eggs, room temperature
- 2 large egg yolks, room temperature
- 1 tablespoon vanilla extract
- 1 tablespoon dark rum (optional)
- 1 teaspoon ground nutmeg
- 1/2 teaspoon ground cinnamon
- 1/4 teaspoon ground cloves
- 3 tablespoons cornstarch
- 1 1/2 cups heavy cream, cold
- 3 tablespoons powdered sugar
- 1/2 teaspoon freshly grated nutmeg
- 1 teaspoon vanilla extract
- Extra nutmeg, freshly grated (for garnish)
- Cinnamon sticks (for garnish, optional)
- Fresh cranberries (for garnish, optional)
- Fresh mint sprigs (for garnish, optional)
Instructions
- Preheat oven to 325°F (163°C). Line the bottom of a 9-inch springform pan with parchment paper and lightly spray the sides with non-stick cooking spray.
- Make the crust: In a medium bowl, combine graham cracker crumbs, 1/4 cup sugar, and 1/2 teaspoon nutmeg. Pour in melted butter and stir until moistened. Press firmly into the bottom of the prepared pan. Bake for 10 minutes, then set aside to cool.
- In a large mixing bowl, beat softened cream cheese with an electric mixer on medium speed until smooth and creamy, about 2 minutes. Scrape down the sides and bottom of the bowl.
- Add 1 cup sugar and beat for another 2 minutes until light and fluffy.
- Add eggnog, 1 tablespoon vanilla extract, and dark rum (if using). Beat on low until just combined.
- Add eggs and egg yolks one at a time, beating on low after each addition until just combined. Scrape the bowl after every two additions.
- In a small bowl, whisk together cornstarch, 1 teaspoon nutmeg, cinnamon, and cloves. Add to the batter and mix on low until smooth and uniform.
- Pour the filling over the cooled crust. Spread evenly and tap the pan on the counter a few times to release air bubbles.
- Place the pan on a baking sheet and bake at 325°F (163°C) for 55-65 minutes, until edges are set and center has a slight jiggle.
- Turn off the oven and crack the door open. Let the cheesecake sit in the warm oven for 1 hour.
- Remove from oven and run a thin knife around the edge of the pan. Let cool completely on a wire rack, about 2 hours.
- Cover loosely with plastic wrap and refrigerate for at least 6 hours, preferably overnight.
- Just before serving, make the nutmeg whipped cream: In a chilled bowl, beat cold heavy cream on medium-high until soft peaks form. Add powdered sugar, 1 teaspoon vanilla extract, and 1/2 teaspoon freshly grated nutmeg. Beat until stiff peaks form.
- Release the sides of the springform pan and transfer cheesecake to a serving plate. Top with nutmeg whipped cream and garnish with extra nutmeg, cinnamon sticks, cranberries, or mint sprigs if desired.
Notes
Room temperature ingredients are essential for a smooth texture. Don’t overmix the batter to avoid cracks. The jiggle test is key: center should wobble like Jell-O when done. Use a hot knife for clean slices. Cheesecake can be made up to 3 days ahead and stored in the refrigerator. Freezes well for up to 3 months (without whipped cream).
Nutrition
- Serving Size: 1 slice
- Calories: 485
- Sugar: 28
- Sodium: 320
- Fat: 34
- Saturated Fat: 20
- Carbohydrates: 38
- Fiber: 1
- Protein: 8
Keywords: eggnog cheesecake, holiday dessert, Christmas cheesecake, nutmeg whipped cream, no water bath cheesecake, creamy cheesecake


