Love this? Save it for later!
Share the inspiration with your friends
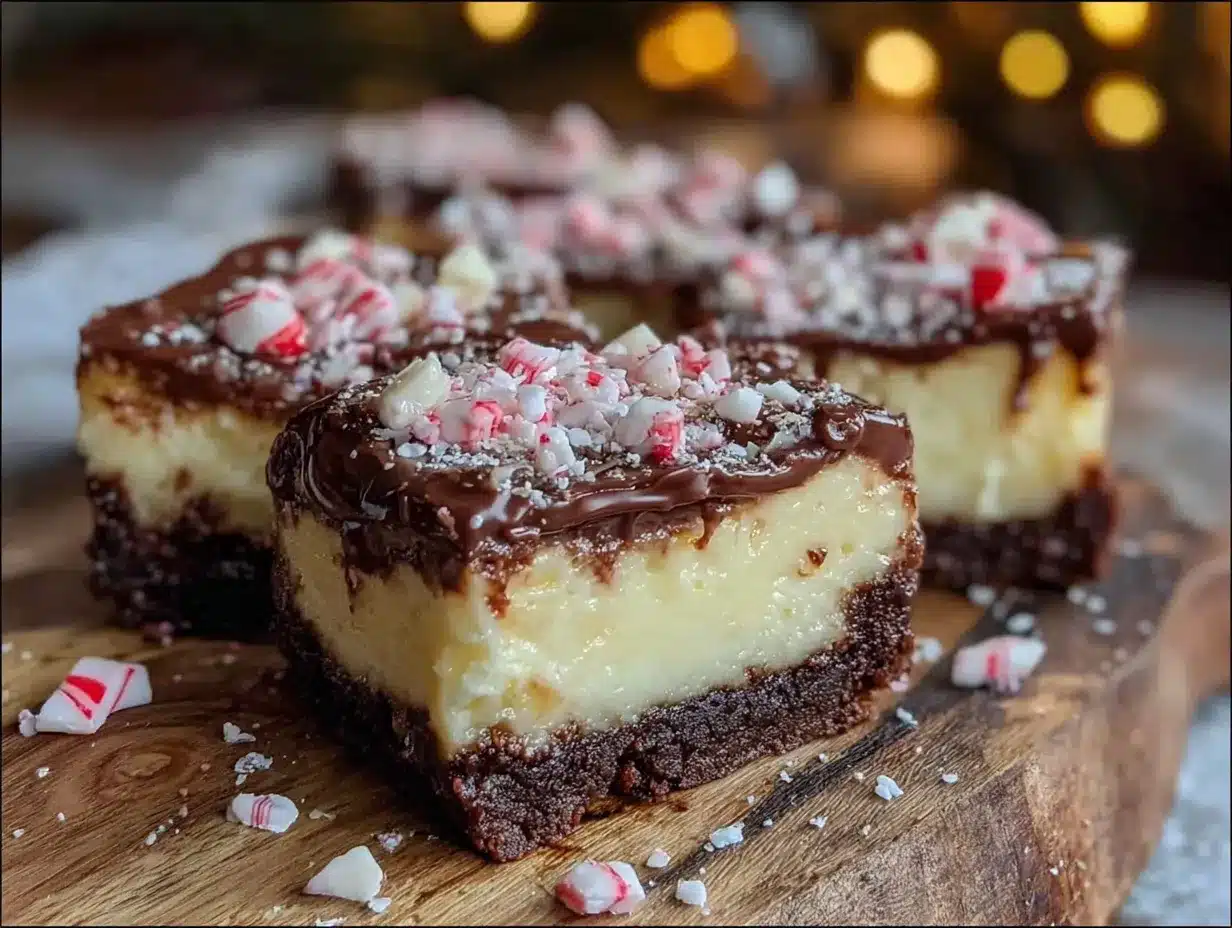
There used to be a tiny bakery on the corner of Elm and 3rd in my hometown—a place called The Frosted Sill—that made a peppermint bark cheesecake bar that stopped me dead in my tracks every single December. When they closed their doors three winters ago, I honestly felt a little pang of grief. That sounds dramatic, I know. But that specific combination of creamy, no-bake cheesecake sitting on a buttery chocolate crust, all topped with a crunchy peppermint bark layer… it was the thing I looked forward to all year.
After eleven tries—eleven!—I finally cracked the code. The first few attempts were too dense. Then they were too sweet. One batch never set properly and turned into a sad, peppermint-flavored soup in my fridge. My kids, bless their hearts, ate every failed version anyway, but they kept saying, “Mom, it’s good, but it’s not *that* one.” You know that feeling when you’re chasing a memory through butter and sugar? That was me, standing over a mixing bowl at 10 PM on a Tuesday, determined to get it right.
The secret, it turns out, is in the crust and the temperature. A crunchy Oreo base that’s packed tight, a cream cheese filling that’s whipped until it’s light as air, and a peppermint bark topping that shatters just right when you bite into it. This recipe is the one. It’s the one my kids now request instead of the bakery version they barely remember. And honestly? That makes me happier than any store-bought bar ever could.
Why You’ll Love This Recipe
Let’s be real for a second. The holidays are busy, your grocery budget is probably stretched, and you need a dessert that looks like you spent hours on it without actually spending hours on it. These no-bake peppermint bark cheesecake bars check every single box. They’re the kind of dessert that makes you look like a hero at the holiday party while you’re actually just a smart cook who knows a good shortcut when she sees one.
- No Oven Required: This is a true no-bake dessert. No worrying about water baths, cracked cheesecakes, or uneven baking. Your oven gets to take the night off.
- Budget-Friendly Ingredients: Cream cheese, heavy cream, Oreos, and peppermint candies. These are not fancy, hard-to-find items. You can grab everything at your regular grocery store without a second mortgage.
- Kid-Approved and Adult-Loved: My kids argue over the last piece every single time. But the adults? They sneak extra pieces too. The peppermint is festive without being overpowering, and the chocolate crust makes everyone happy.
- Make-Ahead Magic: These bars need at least 4 hours to set, which means you can make them the day before your party. One less thing to stress about on the big day.
- Perfect for Sharing: This recipe makes 16 generous bars. They’re easy to cut, easy to transport, and they disappear fast. Bring them to a cookie swap, a potluck, or just keep them in your fridge for when the in-laws pop by.
What sets this recipe apart from the dozens of other no-bake cheesecake bars out there? It’s the texture. The filling is whipped with cold heavy cream, which makes it incredibly light and mousse-like. It’s not dense or gluey. And the peppermint bark layer on top—real melted chocolate mixed with crushed candy canes—gives you that satisfying snap that makes every bite feel special. This isn’t just another version; it’s the version you’ll come back to year after year.
What Ingredients You Will Need
This recipe uses simple, wholesome ingredients to deliver that bakery-quality flavor without the fuss. Most of these are pantry staples during the holiday season, but I’ve included notes on substitutions so you can make it work with what you have.
For the Crust
- 24 Oreo cookies (regular, not double-stuffed) – You want the classic chocolate wafer with the cream filling. The cream acts as a binder, so you don’t need to add much butter. If you use double-stuffed, the crust can get a little greasy.
- 4 tablespoons unsalted butter, melted – This helps the crust hold together when you press it into the pan. I use salted butter in a pinch and just skip the extra salt.
- Pinch of salt – Balances the sweetness of the chocolate and the filling. Don’t skip it.
For the Cheesecake Filling
- 16 ounces cream cheese, softened – Full-fat cream cheese gives the best texture and flavor. Let it sit on the counter for at least 30 minutes before you start. Cold cream cheese makes lumpy filling, and nobody wants that.
- 1/2 cup granulated sugar – Just enough to sweeten the filling without making it cloying. You can reduce this to 1/3 cup if you prefer a less sweet dessert.
- 1 teaspoon vanilla extract – Pure vanilla extract makes a difference here. The imitation stuff has a chemical aftertaste that doesn’t play well with the peppermint.
- 1/2 teaspoon peppermint extract – Go easy here. Peppermint extract is potent, and a little goes a long way. I use Nielsen-Massey brand because it’s pure and not artificially harsh.
- 1 cup cold heavy cream – This is the secret to the light, mousse-like texture. Whip it to stiff peaks before folding it into the cream cheese mixture. Do not use half-and-half or milk—it won’t set properly.
For the Peppermint Bark Topping
- 1 cup semi-sweet chocolate chips – I prefer Ghirardelli or Guittard for their smooth melting quality. Semi-sweet balances the sweetness of the cheesecake and the peppermint.
- 1/2 cup white chocolate chips – This gives you that classic two-tone bark look. Make sure they’re real white chocolate (cocoa butter listed), not white confectionery coating.
- 1 teaspoon coconut oil or vegetable shortening – This thins the chocolate just enough for a smooth, shiny finish. It also helps prevent the chocolate from seizing.
- 1/2 cup crushed peppermint candies or candy canes – Crush them in a zip-top bag with a rolling pin. You want a mix of fine dust and small chunks for texture. Avoid the pre-crushed peppermint bits—they’re often too fine and turn into mush.
Equipment Needed
You don’t need a fancy kitchen to pull this off. Here’s what you’ll need:
- 9×9-inch square baking pan – This is the perfect size for 16 generous bars. If you only have an 8×8 pan, your bars will be slightly thicker, and you may need to increase the setting time by an hour.
- Parchment paper – Line your pan with two overlapping strips, leaving overhang on all sides. This is the easiest way to lift the entire block of cheesecake out for clean cutting. Don’t skip this.
- Food processor or zip-top bag and rolling pin – For crushing the Oreos. A food processor gives you a finer, more even crumb. If you don’t have one, a sturdy bag and a heavy rolling pin work just fine.
- Electric hand mixer or stand mixer – You need this for whipping the cream and beating the cream cheese. A whisk and a strong arm could work, but it’s a lot of effort.
- Medium mixing bowls – At least two. One for the crust, one for the filling, and one for the chocolate.
- Rubber spatula – For folding the whipped cream into the cream cheese. A gentle hand here keeps the filling light.
- Double boiler or microwave-safe bowl – For melting the chocolate. I use the microwave in 30-second bursts, stirring between each. A double boiler is safer if you’re nervous about burning chocolate.
Budget-friendly tip: You don’t need a fancy 9×9 pan. A disposable aluminum pan from the grocery store works perfectly. Just be careful when lifting it out.
Preparation Method
This recipe comes together in about 30 minutes of active time, plus at least 4 hours of chilling. Plan ahead, and you’ll be rewarded with the creamiest, most impressive dessert on the table.
- Prepare the pan. Line your 9×9-inch baking pan with two long strips of parchment paper, crisscrossing them so they overhang on all four sides. This creates a sling that will let you lift the entire cheesecake out later. Set the pan aside.
- Make the crust. Place the 24 Oreo cookies in your food processor. Pulse until they turn into fine crumbs. You should have about 2 cups of crumbs. Add the melted butter and a pinch of salt, then pulse again until the mixture looks like wet sand. If you’re using a bag and rolling pin, crush the cookies first, then mix in the melted butter with a fork.
- Press the crust. Pour the Oreo mixture into your prepared pan. Use the bottom of a flat measuring cup or a glass to press it down firmly and evenly. Don’t just pat it—really compress it. A loose crust will crumble when you cut the bars. Place the pan in the refrigerator while you make the filling.
- Whip the cream. In a clean, cold mixing bowl, pour in the 1 cup of cold heavy cream. Using an electric mixer with the whisk attachment, beat the cream on medium-high speed until stiff peaks form. This takes about 3-4 minutes. You’ll know it’s ready when you lift the beaters and the cream stands up straight without flopping over. Set the bowl in the refrigerator while you work on the cream cheese.
- Beat the cream cheese. In a large mixing bowl, beat the softened cream cheese with the electric mixer on medium speed until it’s completely smooth and free of lumps. This takes about 2 minutes. Scrape down the sides of the bowl with a rubber spatula halfway through. Add the 1/2 cup of sugar and beat for another minute until the mixture is light and fluffy. Add the vanilla extract and the peppermint extract, then beat for 30 seconds more.
- Fold in the whipped cream. Take the whipped cream out of the refrigerator. Add half of it to the cream cheese mixture. Use a rubber spatula to gently fold it in—cut down through the middle, scrape along the bottom, and bring it up over the top. Rotate the bowl as you go. When the first half is mostly incorporated, add the remaining whipped cream and fold until no white streaks remain. The mixture should look smooth, airy, and uniform. Do not overmix, or you’ll deflate the cream.
- Assemble the bars. Take the crust out of the refrigerator. Spoon the cheesecake filling over the crust and spread it into an even layer using an offset spatula or the back of a spoon. Smooth the top as best you can. Tap the pan gently on the counter a few times to release any air bubbles. Cover the pan with plastic wrap and refrigerate for at least 4 hours, but overnight is better. The longer it sets, the cleaner your slices will be.
- Make the peppermint bark topping. About 30 minutes before you’re ready to serve, make the topping. Place the semi-sweet chocolate chips and 1/2 teaspoon of coconut oil in a microwave-safe bowl. Microwave in 30-second bursts, stirring between each, until the chocolate is completely melted and smooth. Be careful not to overheat—chocolate burns easily. In a separate bowl, do the same with the white chocolate chips and the remaining 1/2 teaspoon of coconut oil.
- Layer the chocolate. Take the cheesecake out of the refrigerator. Pour the melted semi-sweet chocolate over the top and spread it into an even layer. Work quickly before the chocolate starts to set. Immediately drizzle the melted white chocolate over the top in a random pattern. Use a toothpick or a knife to swirl the two chocolates together gently. Don’t over-swirl, or you’ll lose the contrast.
- Add the peppermint crunch. Sprinkle the crushed peppermint candies evenly over the melted chocolate. Press them in very lightly with your fingers so they stick. Return the pan to the refrigerator for at least 30 minutes to let the chocolate set completely.
- Slice and serve. When the chocolate is firm, lift the entire block of cheesecake out of the pan using the parchment sling. Place it on a cutting board. Use a large, sharp knife to cut the block into 16 squares. Wipe the knife clean between cuts for the neatest slices. Serve cold.
Troubleshooting Tip: If your filling is too soft to spread after 4 hours, your cream cheese might not have been softened enough, or your whipped cream wasn’t stiff enough. Pop it in the freezer for 30 minutes to speed things up, then proceed.
Cooking Tips & Techniques
I’ve made this recipe more times than I care to count, and I’ve learned a few things the hard way. Here are my best tips to ensure your peppermint bark cheesecake bars turn out perfect every time.
Room temperature cream cheese is non-negotiable. I know you’re in a hurry. I know you forgot to take it out of the fridge. But cold cream cheese will give you lumpy filling no matter how long you beat it. If you’re short on time, cut the cream cheese into small cubes and microwave it on 50% power for 10-second bursts until it’s soft to the touch. Do not melt it—just soften it.
Whip your cream in a cold bowl. Pop your mixing bowl and beaters in the freezer for 10 minutes before you start. Cold equipment helps the cream whip faster and hold its shape better. If your kitchen is warm, this step makes a real difference.
Don’t over-extract the peppermint. I learned this lesson the hard way during attempt number four. I added a full teaspoon of peppermint extract, and the bars tasted like toothpaste. Start with 1/2 teaspoon, taste the filling, and add more in tiny increments if you want a stronger kick. Remember, the topping also has peppermint candies, so the flavor builds.
Press the crust firmly. This is one of those steps where being aggressive pays off. If your crust is loose, it will crumble when you try to cut the bars. Use the flat bottom of a measuring cup and really lean into it. You want the crust to feel like a solid, compact layer.
Patience with the setting time. I know it’s tempting to rush this, but 4 hours is the absolute minimum. Overnight is better. If you try to cut the bars too soon, the filling will be soft and messy. The good news is that these bars actually taste better the next day—the flavors meld together beautifully.
Clean cuts every time. Run your knife under hot water, dry it off, and then make your cut. Wipe the blade clean between each slice. This gives you those beautiful, Instagram-worthy squares with clean edges and no smeared chocolate.
Variations & Adaptations
One of the best things about this recipe is how adaptable it is. Here are a few ways to make it your own.
Gluten-Free Version: Swap the Oreos for gluten-free chocolate sandwich cookies. There are several good brands on the market now, and they work exactly the same way. The rest of the ingredients are naturally gluten-free, so you’re good to go.
Dairy-Free Adaptation: Use dairy-free cream cheese (I like Kite Hill or Violife) and coconut cream instead of heavy cream. Chill a can of full-fat coconut milk overnight, scoop out the solid cream, and whip it just like heavy cream. Use dairy-free chocolate chips for the topping. The texture will be slightly different—a bit softer—but still delicious.
Dark Chocolate Lovers: Use dark chocolate chips (60% cacao or higher) for the topping instead of semi-sweet. The bitterness of the dark chocolate cuts through the sweetness of the cheesecake beautifully. My husband prefers this version.
Mint Chocolate Chip Twist: Fold 1/2 cup of mini chocolate chips into the cheesecake filling before spreading it over the crust. You get little pockets of chocolate in every bite. My kids went absolutely wild for this version.
Peppermint Mocha Variation: Dissolve 1 teaspoon of instant espresso powder in the vanilla extract before adding it to the cream cheese mixture. The coffee flavor doesn’t scream “coffee”—it just deepens the chocolate and makes everything taste more sophisticated. This is my personal favorite for adult gatherings.
Individual Servings: Instead of a 9×9 pan, press the crust into the bottom of 16 paper-lined muffin cups. Divide the filling among the cups, chill, and top with the chocolate and peppermint. These are perfect for holiday parties where people want to grab and go.
Serving & Storage Suggestions
These bars are best served cold, straight from the refrigerator. The filling is firm but creamy, and the chocolate topping has a satisfying snap. Let them sit at room temperature for no more than 10 minutes before serving—any longer, and the cheesecake starts to soften too much.
Presentation Ideas: Arrange the bars on a white platter for maximum contrast. Dust the top with a light sprinkle of powdered sugar just before serving for a snowy effect. You can also add a tiny candy cane on the side of each bar for a festive touch.
What to Serve With Them: A cup of hot coffee or a mug of rich hot chocolate is the perfect companion. The bitterness of the coffee balances the sweetness of the bars. For a dessert spread, serve them alongside classic sugar cookies or a simple vanilla ice cream.
Storage Instructions: Store the bars in an airtight container in the refrigerator for up to 5 days. Layer them between sheets of parchment paper so the chocolate doesn’t stick together. I honestly think they taste even better on day two—the peppermint flavor mellows out and the texture becomes perfectly creamy.
Freezer Instructions: These bars freeze beautifully. Place the fully assembled and chilled bars on a baking sheet and freeze until solid, about 2 hours. Wrap each bar individually in plastic wrap, then place them in a freezer-safe bag or container. They’ll keep for up to 3 months. To serve, let them thaw in the refrigerator for 2-3 hours. Do not thaw at room temperature—the condensation will make the chocolate topping sticky.
Reheating Note: You don’t need to reheat these bars. They’re meant to be served cold. If you want a slightly softer texture, let them sit at room temperature for 5 minutes before serving.
Nutritional Information & Benefits
Let’s be honest—this is a holiday dessert, not a health food. But I believe in knowing what you’re eating so you can enjoy it mindfully. Here’s the estimated nutritional breakdown per bar (based on 16 servings):
| Nutrient | Amount Per Bar |
|---|---|
| Calories | 310 |
| Total Fat | 22g |
| Saturated Fat | 13g |
| Cholesterol | 55mg |
| Sodium | 180mg |
| Total Carbohydrates | 28g |
| Dietary Fiber | 1g |
| Sugars | 21g |
| Protein | 4g |
Health Highlights: The cream cheese provides a small amount of calcium and protein. The dark chocolate in the topping contains antioxidants called flavonoids, which are good for heart health in moderation. The peppermint can aid digestion—which is helpful after a heavy holiday meal.
Dietary Considerations: This recipe contains dairy, gluten (from the Oreos), and soy (in the chocolate). It can be made gluten-free and dairy-free with the substitutions listed in the variations section. It is not suitable for a vegan diet as written, but vegan cream cheese and coconut cream can be used.
My Personal Take: I don’t believe in depriving yourself during the holidays. One of these bars is perfectly reasonable as a treat. I pair mine with a cup of black coffee and savor every single bite. Life is too short to skip dessert.
Frequently Asked Questions
Can I use store-bought graham cracker crust instead of Oreos?
You can, but the flavor won’t be the same. The Oreo crust is what makes these bars taste like a peppermint bark cheesecake—the chocolate cookie complements the filling and the topping perfectly. A graham cracker crust will be much sweeter and less chocolatey. If you must substitute, use chocolate graham crackers for a closer match.
Why did my cheesecake filling turn out lumpy?
This almost always happens when the cream cheese isn’t fully softened. Cold cream cheese doesn’t beat smoothly—it stays in tiny lumps that never dissolve. Next time, let your cream cheese sit at room temperature for at least 30 minutes, or soften it gently in the microwave. Also, make sure you’re beating it alone before adding any other ingredients.
Can I use peppermint extract instead of crushed candy canes for the topping?
You can add a drop of peppermint extract to the melted chocolate for extra flavor, but you still want the crushed candy canes on top. The extract won’t give you that satisfying crunch and festive look. The crushed candies are what make this a “bark” topping. Don’t skip them.
How do I crush candy canes without making a huge mess?
Place the candy canes in a sturdy zip-top bag. Lay the bag on a cutting board and cover it with a kitchen towel. Use a rolling pin or a heavy skillet to gently crush the candies. The towel muffles the noise and contains the mess. You want a mix of fine dust and small chunks—not powder.
Can I double this recipe for a larger crowd?
Absolutely. Double all the ingredients and use a 9×13-inch pan instead of a 9×9. The bars will be slightly thinner, so reduce the setting time to about 3 hours. You’ll get about 24 servings from the larger pan. Just make sure your mixer bowl is big enough to handle the doubled filling.
Conclusion
These no-bake peppermint bark cheesecake bars are everything I loved about that bakery version—creamy, crunchy, chocolatey, and minty—but they’re made in my own kitchen with ingredients I can actually afford. They’ve become a December tradition in our house, and I hope they become one in yours too.
The best part? You can customize them to fit your family’s tastes. Add more chocolate chips to the filling. Swap the peppermint for crushed toffee. Make them gluten-free for your cousin with celiac disease. This recipe is a starting point, not a rulebook. Play with it. Make it yours.
I’d love to hear how these turn out for you. Did your kids fight over the last piece? Did you try one of the variations? Drop a comment below and let me know—I read every single one. And if you’re looking for another easy holiday dessert, you should definitely try my crispy garlic chicken for a savory break from all the sugar. Happy baking, friends. Or, you know, happy no-baking. That’s the whole point.
Pin This Recipe!
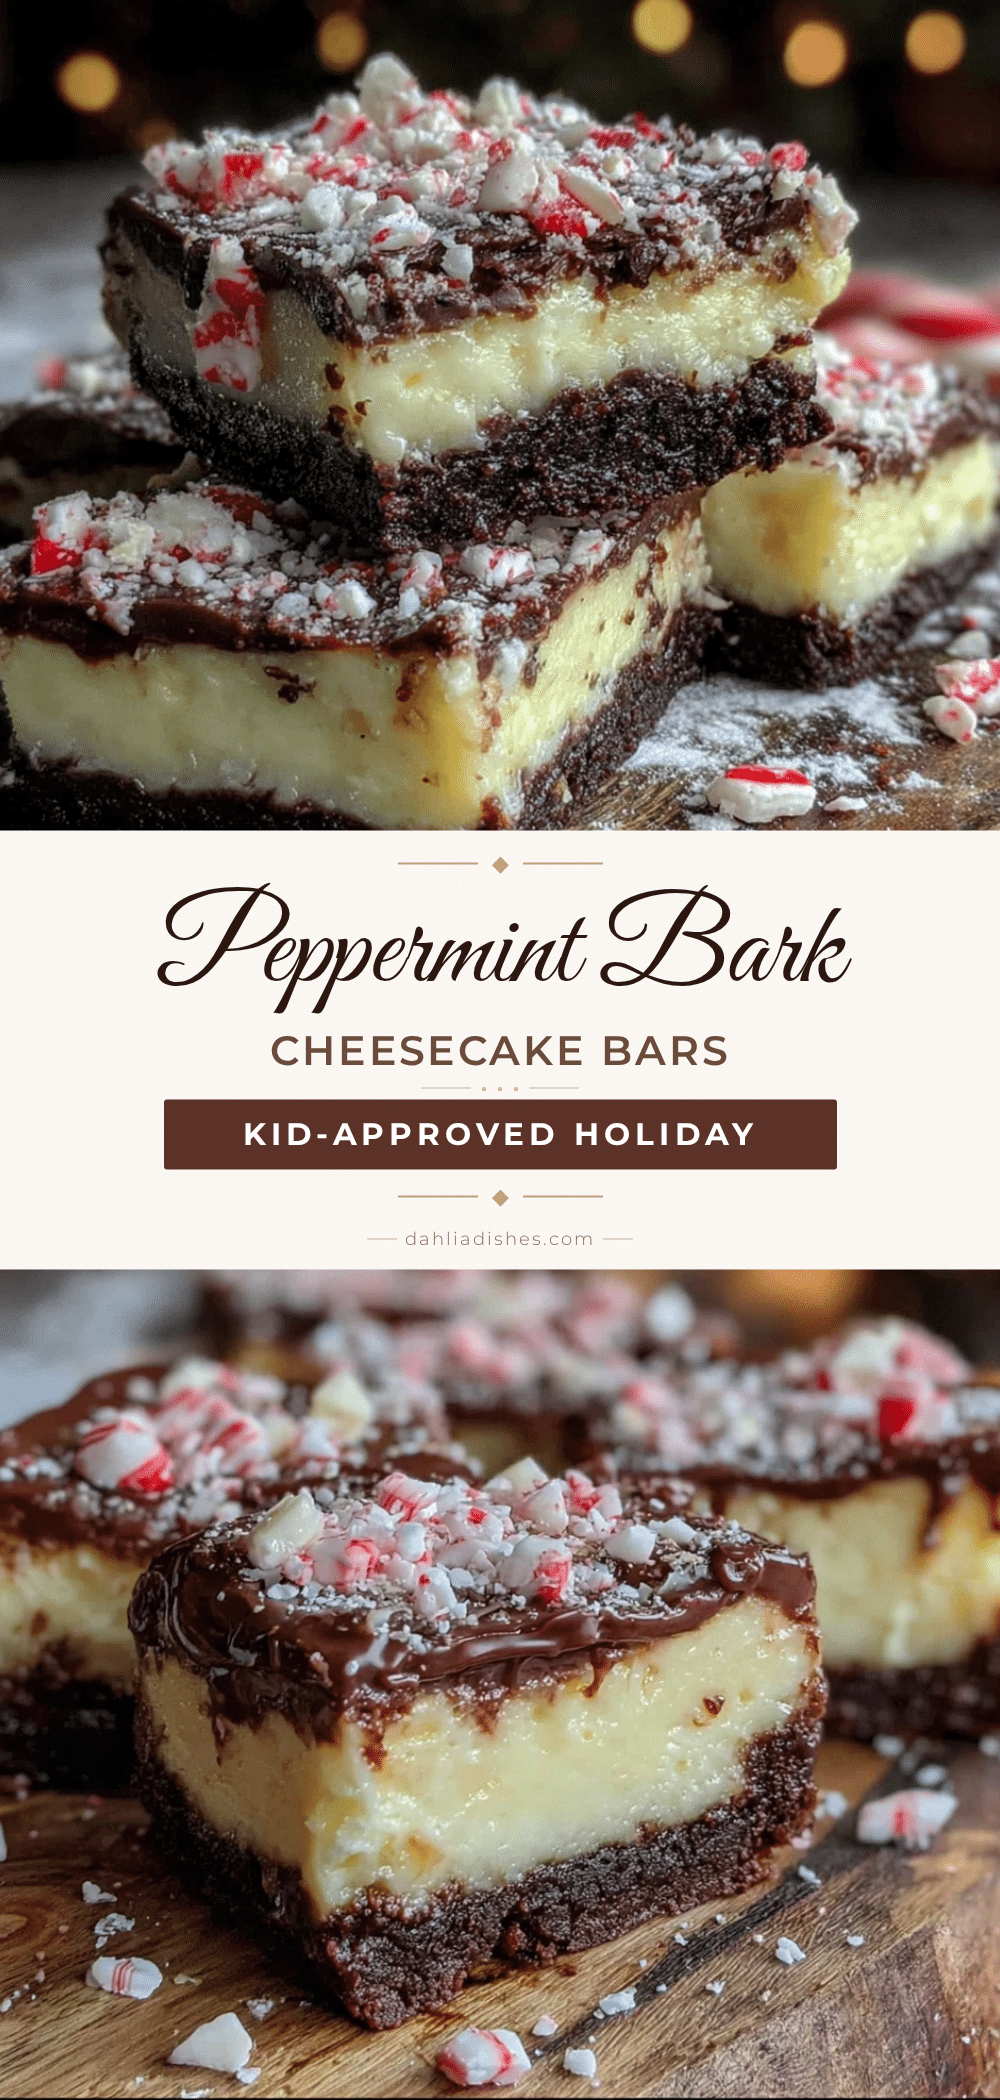
Best No-Bake Peppermint Bark Cheesecake Bars: Easy Holiday Dessert
These no-bake peppermint bark cheesecake bars feature a creamy, mousse-like cheesecake filling on a buttery Oreo crust, topped with a crunchy peppermint bark layer. They’re a festive, make-ahead dessert that’s perfect for holiday parties.
- Prep Time: 30 minutes
- Cook Time: 0 minutes
- Total Time: 4 hours 30 minutes (includes chilling)
- Yield: 16 servings 1x
- Category: Dessert
- Cuisine: American
Ingredients
- 24 Oreo cookies (regular, not double-stuffed)
- 4 tablespoons unsalted butter, melted
- Pinch of salt
- 16 ounces cream cheese, softened
- 1/2 cup granulated sugar
- 1 teaspoon vanilla extract
- 1/2 teaspoon peppermint extract
- 1 cup cold heavy cream
- 1 cup semi-sweet chocolate chips
- 1/2 cup white chocolate chips
- 1 teaspoon coconut oil or vegetable shortening
- 1/2 cup crushed peppermint candies or candy canes
Instructions
- Line a 9×9-inch baking pan with two overlapping strips of parchment paper, leaving overhang on all sides. Set aside.
- Place the Oreo cookies in a food processor and pulse until fine crumbs form. Add melted butter and a pinch of salt, then pulse until the mixture looks like wet sand.
- Pour the Oreo mixture into the prepared pan and press it firmly and evenly into the bottom using a flat measuring cup or glass. Refrigerate while making the filling.
- In a clean, cold mixing bowl, beat the cold heavy cream with an electric mixer on medium-high speed until stiff peaks form, about 3-4 minutes. Refrigerate the whipped cream.
- In a large mixing bowl, beat the softened cream cheese on medium speed until smooth, about 2 minutes. Add the sugar and beat for another minute until light and fluffy. Add the vanilla and peppermint extracts and beat for 30 seconds.
- Gently fold half of the whipped cream into the cream cheese mixture using a rubber spatula. Fold in the remaining whipped cream until no white streaks remain. Do not overmix.
- Spoon the cheesecake filling over the crust and spread into an even layer. Tap the pan gently to release air bubbles. Cover with plastic wrap and refrigerate for at least 4 hours, preferably overnight.
- About 30 minutes before serving, melt the semi-sweet chocolate chips with 1/2 teaspoon coconut oil in a microwave-safe bowl in 30-second bursts, stirring between each, until smooth. Repeat with the white chocolate chips and remaining 1/2 teaspoon coconut oil.
- Pour the melted semi-sweet chocolate over the chilled cheesecake and spread evenly. Drizzle the white chocolate over the top and swirl gently with a toothpick or knife.
- Sprinkle the crushed peppermint candies evenly over the chocolate and press lightly to adhere. Return to the refrigerator for at least 30 minutes to set the chocolate.
- Lift the cheesecake out of the pan using the parchment sling. Cut into 16 squares with a sharp knife, wiping the blade clean between cuts. Serve cold.
Notes
For best results, use room temperature cream cheese and cold heavy cream. The bars need at least 4 hours to set, but overnight is better. For clean cuts, run the knife under hot water and wipe it clean between slices.
Nutrition
- Serving Size: 1 bar
- Calories: 310
- Sugar: 21
- Sodium: 180
- Fat: 22
- Saturated Fat: 13
- Carbohydrates: 28
- Fiber: 1
- Protein: 4
Keywords: no-bake cheesecake, peppermint bark, holiday dessert, Oreo crust, easy dessert


