Love this? Save it for later!
Share the inspiration with your friends
This was supposed to be a batch of classic gingerbread cookies. I had the molasses out, the spices measured, and my grandmother’s cookie press—the one with the dented handle and the slightly crooked star disc—all warmed up and ready to go. Then Tuesday happened. You know the kind of Tuesday where you realize you’re out of brown sugar, the butter you left out is still a cold brick, and you have exactly 20 minutes before you need to pick up the kids. I grabbed the wrong measuring cup—the one for liquids—and poured in a full cup of molasses instead of a half. My first thought was pure panic. My second was, “Well, this is going to be a sticky disaster.”
But here’s the thing about molasses: it doesn’t give up easily. I figured I’d just add more flour, toss in some extra baking soda, and hope for the best. The dough came together in a weird, almost tacky ball that felt wrong in my hands. It was too soft for the cookie press, so I just scooped it into a piping bag—another improvisation—and squeezed out these little messy rosettes onto a parchment-lined sheet. They looked terrible. Honestly, they looked like something a toddler made after a sugar high. I almost threw the whole batch away.
I slid them into the oven anyway, figuring I’d at least salvage the lesson. Ten minutes later, the smell hit me. It wasn’t the sharp, spicy scent of gingerbread. It was deeper, almost caramel-like, with a soft warmth that filled the whole kitchen. When I pulled them out, they had puffed up just slightly, with these gorgeous crackled tops and a chewy, almost fudgy center. They were nothing like the crisp, snap-prone cookies I had planned. They were better. I mean, way better. That first bite had this unexpected softness, a deep molasses flavor that lingered, and a texture that felt like a secret. I’ve made them every week since. Maybe you’ve been there—when a recipe goes completely off the rails and ends up becoming your new favorite. These cookies are that happy accident, and I’m honestly still a little disbelieving that they turned out so good.
Why You’ll Love This Recipe
Let’s be real: most spritz cookies are dry, crumbly, and taste like a cardboard cutout of a cookie. Not these. These are chewy, soft, and packed with that deep, almost smoky molasses flavor that makes you close your eyes after the first bite. I’ve tested this recipe about six times now (because I had to make sure the first time wasn’t a fluke), and each batch has been consistently perfect.
- Quick & Easy: Comes together in under 30 minutes from start to finish. No chilling the dough, no rolling, no fuss. Perfect for that 8 PM craving when you need something sweet, fast.
- Simple Ingredients: You likely have everything in your pantry right now. Molasses, butter, sugar, flour, an egg, and a few spices. No fancy extracts or hard-to-find items.
- Perfect for Weeknights: This is the kind of recipe you make on a Tuesday when you’re tired and just want something warm. It’s also great for holiday cookie swaps because it’s so fast.
- Crowd-Pleaser: I brought these to a potluck last week, and three people asked for the recipe. One guy said they reminded him of his grandmother’s cookies, but “better.” I’ll take that.
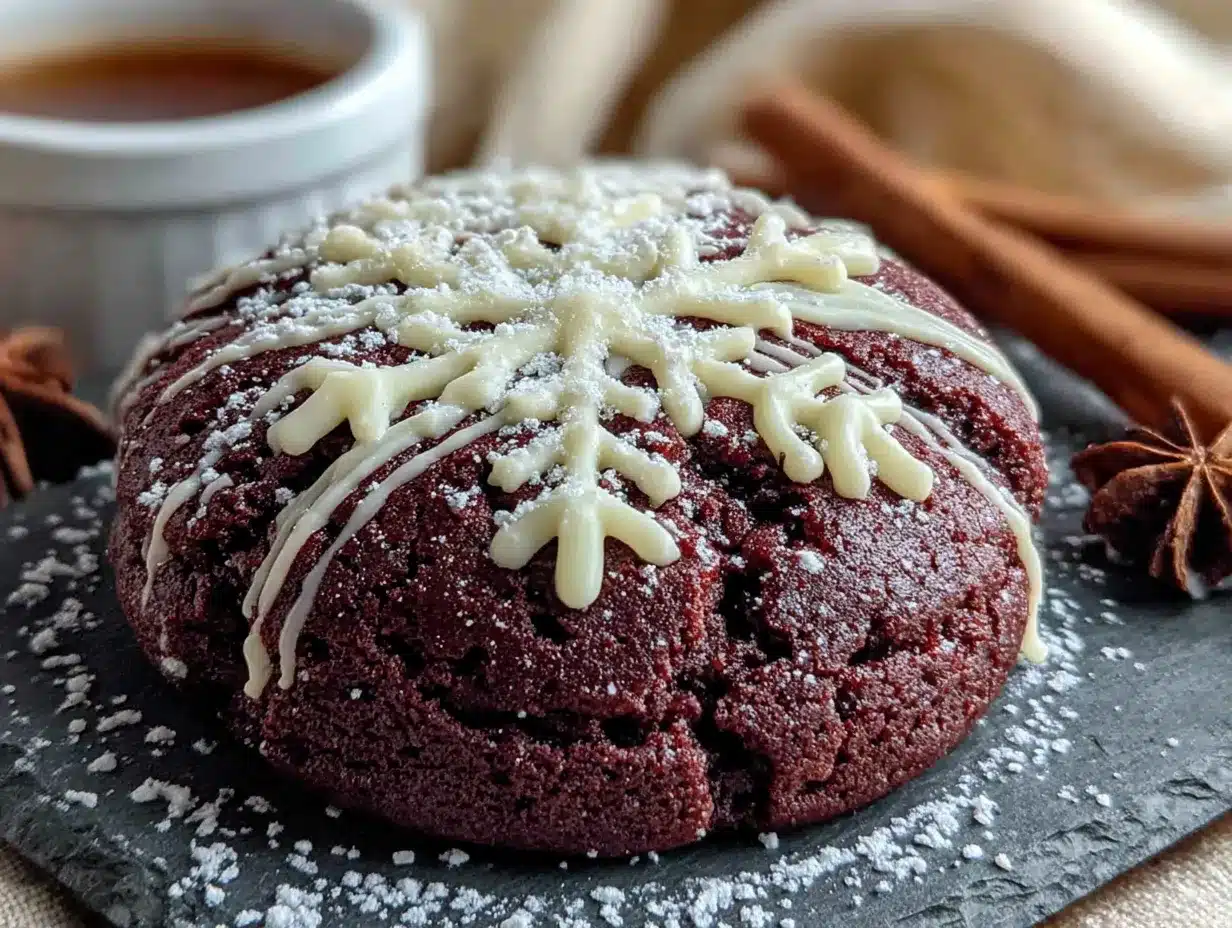
- Unbelievably Delicious: The texture is the real star here. They’re chewy in the middle with a slight crisp on the edges, and the royal icing adds a nice little snap that contrasts beautifully.
What makes this recipe different from all the other molasses cookies out there? It’s the technique. Using a piping bag instead of a cookie press gives you that soft, puffy shape without the fuss. And the ratio of molasses to butter is higher than usual, which creates that signature chewiness. This isn’t just another version—it’s the best version I’ve ever made.
What Ingredients You Will Need
This recipe uses simple, wholesome ingredients to deliver that bold molasses flavor and satisfying chewy texture. Most of these are pantry staples, which is exactly what you want on a busy weeknight.
For the Cookies
- Unsalted butter, softened (1 cup / 2 sticks / 226g) — I use Land O’Lakes because it has a consistent fat content. Make sure it’s truly softened to room temperature, not melted. Cold butter won’t cream properly.
- Granulated sugar (1 cup / 200g) — Regular white sugar works best here. It helps create that slight crisp on the edges.
- Large egg (1, room temperature) — Take it out of the fridge about 15 minutes before you start. A cold egg can seize the batter.
- Molasses (1/2 cup / 170g) — Use unsulphured molasses, not blackstrap. Blackstrap is too bitter and will ruin the texture. Grandma’s or Brer Rabbit are my go-to brands. The molasses is the star here, so don’t skimp.
- All-purpose flour (2 1/4 cups / 280g) — Spoon and level it into your measuring cup. Scooping directly from the bag packs in too much flour and makes the cookies dry.
- Baking soda (1 teaspoon) — This helps the cookies spread just a little and gives them that crackled top.
- Ground cinnamon (1 teaspoon) — Adds warmth without overpowering the molasses.
- Ground ginger (1/2 teaspoon) — Just a hint for depth. You can skip it if you don’t have it, but it adds a nice little kick.
- Salt (1/2 teaspoon) — Balances the sweetness. I use fine sea salt.
For the Royal Icing
- Powdered sugar (1 1/2 cups / 180g) — Sift it if it’s lumpy. Nobody wants lumpy icing.
- Meringue powder (1 tablespoon) — This gives the icing that nice, hard finish. You can find it in the baking aisle or online.
- Water (2-3 tablespoons) — Add slowly. You want a thick but pipeable consistency.
- Vanilla extract (1/2 teaspoon) — Optional, but it rounds out the flavor.
Equipment Needed
You don’t need a lot of fancy gear for this recipe, which is part of why I love it.
- Stand mixer or hand mixer: I use my KitchenAid for most of my baking, but a hand mixer works just fine. You just need to cream the butter and sugar until fluffy.
- Piping bag with a large round tip: I use a Wilton 1A tip. If you don’t have a piping bag, a sturdy zip-top bag with the corner snipped off works in a pinch. It’s not as pretty, but it gets the job done.
- Baking sheets: Two rimmed baking sheets. I prefer Nordic Ware because they don’t warp in the oven.
- Parchment paper or silicone baking mat: Silpat mats are my favorite—they’re reusable and help the cookies bake evenly. Parchment paper is fine too.
- Cooling rack: A wire rack is essential for letting the cookies cool properly. If you leave them on the hot baking sheet, they’ll continue to cook and might get too hard.
- Small offset spatula: For spreading the royal icing, though a butter knife works too.
Preparation Method
This is the straightforward part. Follow these steps, and you’ll have chewy, beautiful cookies in no time.
- Preheat your oven to 350°F (175°C). Line two baking sheets with parchment paper or silicone mats. This is non-negotiable—the cookies will stick to an unlined sheet.
- Cream the butter and sugar. In a large bowl, beat the softened butter and granulated sugar together on medium speed for about 3 minutes, until the mixture is light and fluffy. Scrape down the sides of the bowl once. You want it to look pale and almost whipped. If it’s still grainy, keep beating for another minute.
- Add the egg and molasses. Crack in the egg and pour in the molasses. Beat on low speed until just combined. The mixture will look a little separated and weird at this point—that’s normal. Don’t panic. It will come together when you add the dry ingredients.
- Mix the dry ingredients. In a separate bowl, whisk together the flour, baking soda, cinnamon, ginger, and salt. This ensures the spices are evenly distributed. If you skip this step, you might end up with one cookie that’s super gingery and another that’s bland.
- Combine wet and dry. Gradually add the dry ingredients to the wet mixture, mixing on low speed. Stop as soon as the flour disappears. Overmixing will make the cookies tough. The dough will be soft and slightly sticky—that’s what you want.
- Fill your piping bag. Spoon the dough into your piping bag fitted with a large round tip. Don’t overfill it—about half full is perfect. Twist the top of the bag to seal it.
- Pipe the cookies. Hold the piping bag straight up, about 1/2 inch above the baking sheet. Squeeze out a small rosette or a simple round shape, about 1.5 inches wide. Lift the bag straight up when you’re done. Leave about 2 inches between each cookie—they will spread a little. If the dough is too stiff to pipe, microwave it for 5 seconds to soften it slightly. If it’s too runny, pop it in the fridge for 5 minutes.
- Bake for 8-10 minutes. The cookies are done when the edges are set and the tops are crackled but still soft in the center. They will look slightly underbaked—that’s the secret to the chewy texture. Don’t overbake them, or they’ll be dry.
- Cool on the baking sheet for 5 minutes. This allows them to set up without sticking. Then transfer them to a wire rack to cool completely. If you try to move them too soon, they’ll fall apart.
Make the Royal Icing
- Mix the icing. In a small bowl, whisk together the powdered sugar and meringue powder. Add 2 tablespoons of water and the vanilla extract. Whisk until smooth. If it’s too thick, add another tablespoon of water, a few drops at a time. You want a consistency that’s thick but still flows off the whisk.
- Decorate the cooled cookies. Once the cookies are completely cool, spoon the icing into a small piping bag or a zip-top bag with a tiny corner snipped off. Drizzle the icing over the cookies in a zigzag pattern, or just spread it with a small offset spatula. Let the icing set for about 30 minutes before serving.
Cooking Tips & Techniques
I’ve made a lot of mistakes with this recipe so you don’t have to. Here are the things I learned the hard way.
- Don’t skip the creaming step. I did once because I was in a hurry, and the cookies came out flat and dense. Creaming the butter and sugar for a full 3 minutes incorporates air, which gives the cookies that soft, puffy texture.
- Watch the molasses pour. It’s thick and sticky, and it’s easy to accidentally add too much. Use a liquid measuring cup and pour slowly. If you add too much, your cookies will spread into flat, sticky puddles. I learned this the hard way when I was distracted by my phone.
- Check your baking soda. If your baking soda is old, your cookies won’t spread properly. Test it by dropping a little into vinegar—if it fizzes vigorously, it’s good. If not, buy a new box. It’s cheap, and it makes a huge difference.
- Use a light hand with the piping bag. I used to squeeze too hard and end up with giant, misshapen blobs. Gentle, steady pressure is the key. Practice on a piece of parchment first if you’re nervous.
- Let the cookies cool completely before icing. I once iced a slightly warm cookie, and the icing melted into a gooey mess. Patience is not my strong suit, but it’s worth it here.
Variations & Adaptations
This recipe is forgiving, so feel free to play around with it. Here are a few ways I’ve adapted it.
- Spiced Molasses Cookies: Add 1/4 teaspoon of ground cloves and 1/4 teaspoon of nutmeg to the dry ingredients. It gives the cookies a more complex, holiday-inspired flavor. I did this for a Christmas party, and they were gone in 10 minutes.
- Gluten-Free Version: Swap the all-purpose flour for a 1:1 gluten-free baking flour blend. I’ve used Bob’s Red Mill with great results. The texture will be slightly more tender, but still chewy and delicious.
- Vegan Adaptation: Use a flax egg (1 tablespoon ground flaxseed mixed with 3 tablespoons water) and a vegan butter stick like Earth Balance. The cookies won’t be quite as rich, but they’re still very good. I made these for a vegan friend, and she didn’t believe they were vegan.
- Citrus Twist: Add 1 teaspoon of orange zest to the dough. The orange and molasses combo is surprisingly good—bright and deep at the same time. I tried this on a whim one Sunday, and now it’s my favorite variation.
- Icing Alternatives: If you don’t want to make royal icing, just dust the cookies with powdered sugar while they’re still warm. Or drizzle them with a simple glaze made from powdered sugar and milk. Both are faster and still delicious.
Serving & Storage Suggestions
These cookies are best served at room temperature, with a cold glass of milk or a hot cup of coffee. The contrast between the chewy cookie and the crisp icing is just right.
- Serving: Arrange them on a pretty plate, icing-side up. They look beautiful on a holiday platter or just a simple white dish. For a fun twist, serve them warm with a scoop of vanilla ice cream. The warm cookie and cold ice cream is a killer combo.
- Storage: Store the cookies in an airtight container at room temperature for up to 5 days. Layer them with parchment paper between each layer to prevent the icing from sticking. I use a glass cookie jar, and they stay soft and chewy for days.
- Freezing: You can freeze the baked, un-iced cookies for up to 3 months. Just wrap them tightly in plastic wrap and then in foil. Thaw them at room temperature, then ice them. I’ve also frozen the dough itself—pipe it onto a parchment-lined baking sheet, freeze until solid, then transfer the frozen dough balls to a zip-top bag. Bake from frozen, adding 2-3 minutes to the baking time.
- Reheating: If you want that just-baked warmth, pop a cookie in the microwave for 10 seconds. It softens the cookie and makes it taste fresh out of the oven. Don’t do this if the cookie is iced—the icing will melt.
Nutritional Information & Benefits
Let’s be honest: these are cookies, not health food. But they do have a few redeeming qualities.
- Estimated per cookie (based on 24 cookies): Calories: 145, Fat: 6g, Carbs: 22g, Protein: 2g, Sugar: 14g.
- Molasses is a source of iron and calcium. It’s not a huge amount, but it’s more than you’d get from a regular sugar cookie. One tablespoon of molasses contains about 3.5 mg of iron, which is about 20% of the daily recommended intake.
- Dietary Considerations: This recipe contains gluten, dairy, and eggs. For a gluten-free or vegan version, see the variations section above. The royal icing contains meringue powder, which is made from egg whites, so it’s not vegan.
- Potential Allergens: Wheat, dairy, eggs. If you’re serving these at a party, make sure to label them if anyone has allergies.
- My Personal Perspective: I don’t believe in demonizing sugar. These cookies are a treat, and they’re meant to be enjoyed. The molasses adds a little bit of mineral goodness, but mostly, they’re just delicious. And sometimes, that’s enough.
Conclusion
These Quick Chewy Molasses Spritz Cookies with Royal Icing are the kind of recipe that makes you feel like a genius even when you’re just trying to salvage a mistake. They’re fast, forgiving, and deeply satisfying. Whether you’re baking for a holiday party, a weeknight craving, or just because you need a little sweetness in your life, these cookies deliver. I love that they come together in under 30 minutes, that they use ingredients I already have, and that they never fail to make people smile.
I’d love to hear how these turn out for you. Did you add a different spice? Try a new icing flavor? Mess up the molasses measurement and accidentally create something amazing? Drop a comment below and let me know. Share this recipe with a friend who needs a quick win in the kitchen, and don’t forget to pin it for later. Happy baking, and remember—sometimes the best recipes come from the biggest disasters.
Frequently Asked Questions
Can I use blackstrap molasses instead of unsulphured?
I wouldn’t recommend it. Blackstrap molasses is much thicker, darker, and more bitter. It will overpower the other flavors and make the cookies dense and heavy. Stick with unsulphured molasses for the best texture and flavor.
My dough is too sticky to pipe. What should I do?
Pop the dough in the fridge for about 10 minutes. That will firm it up just enough to make it pipeable. If it’s still too sticky after that, add a tablespoon of flour and mix it in gently.
Can I make these cookies without a piping bag?
Absolutely. You can drop the dough by rounded teaspoonfuls onto the baking sheet, then gently flatten them with the back of a spoon. They won’t have the same rosette shape, but they’ll still taste just as good.
How do I know when the cookies are done baking?
Look for the edges to be set and the tops to be crackled but still soft in the center. The cookies will look slightly underbaked—that’s the secret to the chewy texture. If you wait until they’re firm all over, they’ll be dry.
Can I skip the royal icing?
Yes, you can. The cookies are delicious on their own. You can dust them with powdered sugar, drizzle them with a simple glaze, or just leave them plain. The icing adds a nice decorative touch, but it’s not essential.
Pin This Recipe!
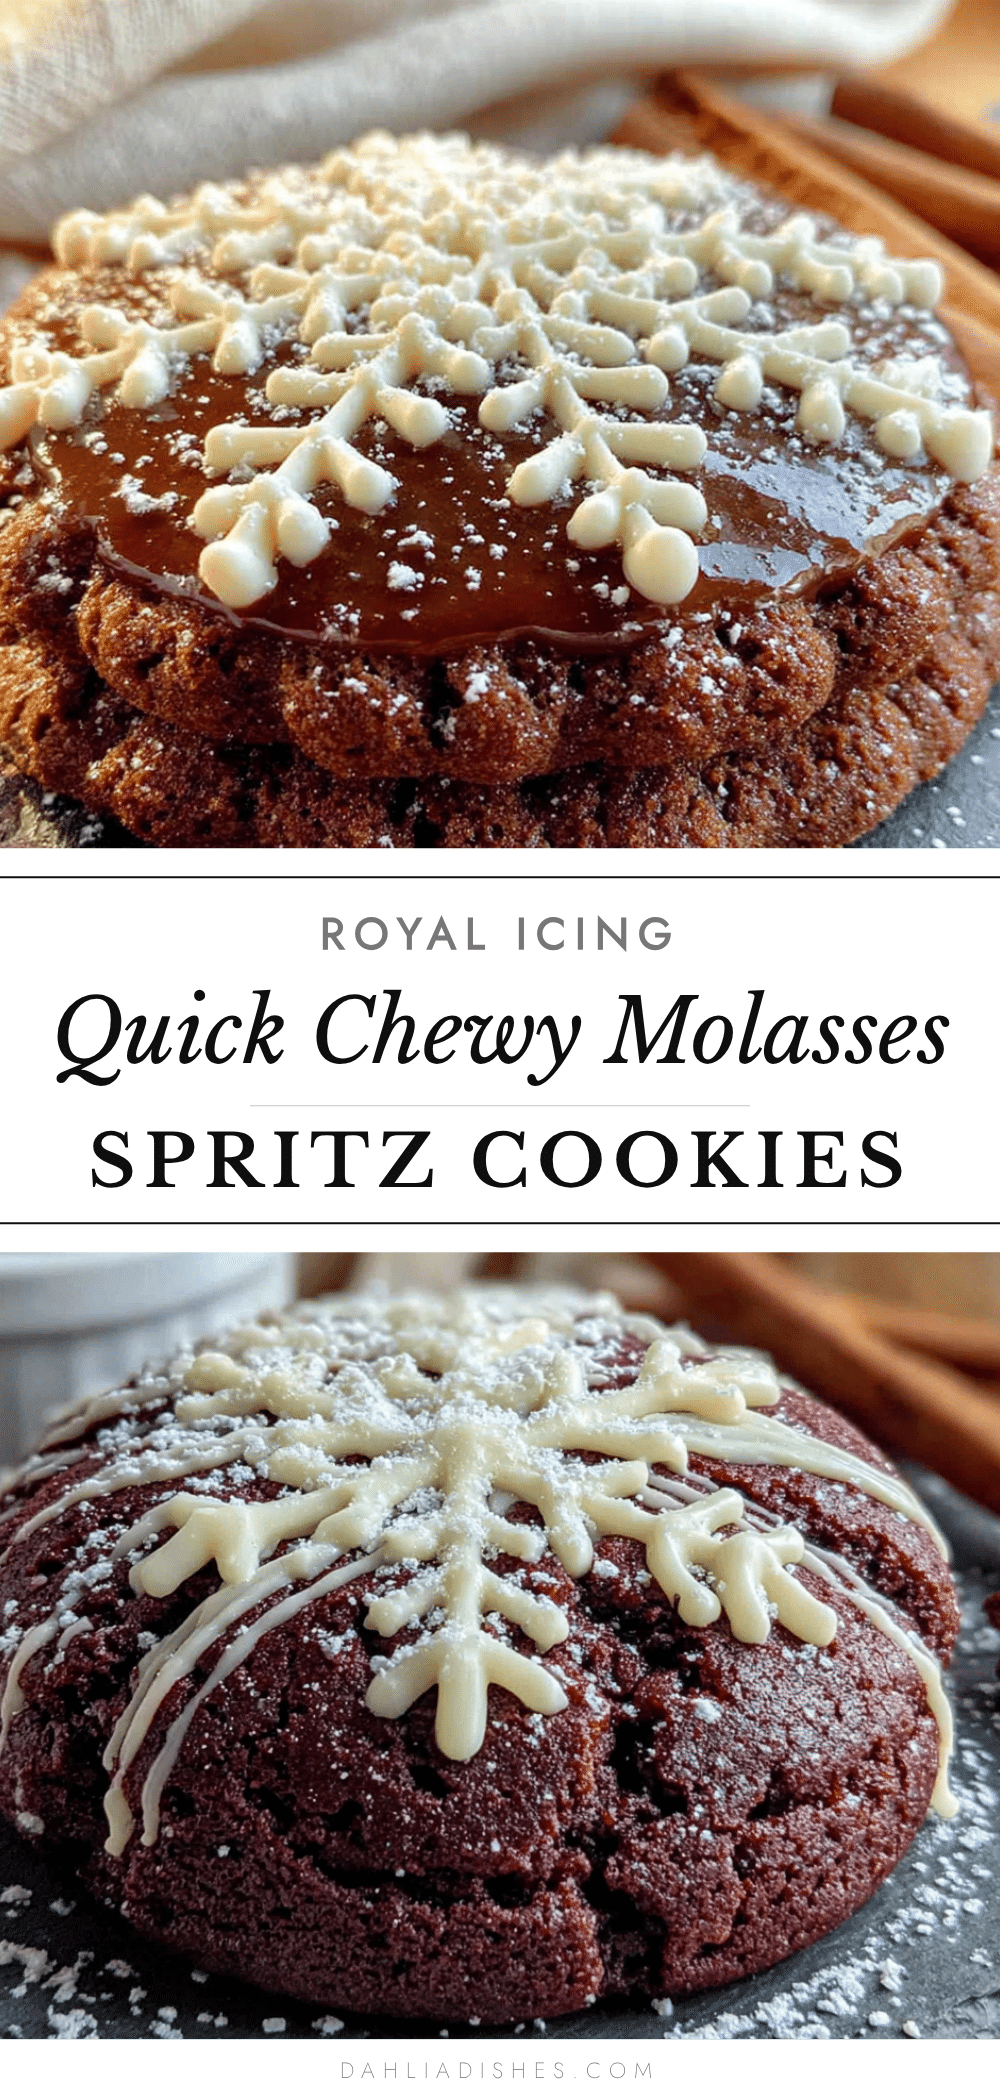
Quick & Easy Chewy Molasses Spritz Cookies with Royal Icing
These chewy molasses spritz cookies are a happy accident that turned into a new favorite. Made with simple pantry ingredients and a piping bag instead of a cookie press, they come together in under 30 minutes for a deeply flavorful, soft, and crackled-top treat.
- Prep Time: 15 minutes
- Cook Time: 10 minutes
- Total Time: 25 minutes
- Yield: 24 servings 1x
- Category: Dessert
- Cuisine: American
Ingredients
- 1 cup (2 sticks / 226g) unsalted butter, softened
- 1 cup (200g) granulated sugar
- 1 large egg, room temperature
- 1/2 cup (170g) unsulphured molasses
- 2 1/4 cups (280g) all-purpose flour
- 1 teaspoon baking soda
- 1 teaspoon ground cinnamon
- 1/2 teaspoon ground ginger
- 1/2 teaspoon fine sea salt
- 1 1/2 cups (180g) powdered sugar
- 1 tablespoon meringue powder
- 2–3 tablespoons water
- 1/2 teaspoon vanilla extract (optional)
Instructions
- Preheat your oven to 350°F (175°C). Line two baking sheets with parchment paper or silicone mats.
- In a large bowl, beat the softened butter and granulated sugar together on medium speed for about 3 minutes, until light and fluffy. Scrape down the sides of the bowl once.
- Add the egg and molasses. Beat on low speed until just combined. The mixture may look separated—this is normal.
- In a separate bowl, whisk together the flour, baking soda, cinnamon, ginger, and salt.
- Gradually add the dry ingredients to the wet mixture, mixing on low speed until just combined. Do not overmix. The dough will be soft and slightly sticky.
- Spoon the dough into a piping bag fitted with a large round tip (e.g., Wilton 1A). Do not overfill—about half full is perfect.
- Pipe small rosettes or simple rounds about 1.5 inches wide onto the prepared baking sheets, leaving about 2 inches between each cookie. Hold the piping bag straight up, about 1/2 inch above the sheet.
- Bake for 8-10 minutes, until the edges are set and the tops are crackled but still soft in the center. Do not overbake.
- Cool on the baking sheet for 5 minutes, then transfer to a wire rack to cool completely.
- For the royal icing: In a small bowl, whisk together the powdered sugar and meringue powder. Add 2 tablespoons of water and the vanilla extract (if using). Whisk until smooth. Add more water, a few drops at a time, if needed to reach a thick but pipeable consistency.
- Once cookies are completely cool, spoon the icing into a small piping bag or zip-top bag with a tiny corner snipped off. Drizzle or spread the icing over the cookies. Let set for about 30 minutes before serving.
Notes
Use unsulphured molasses, not blackstrap, for the best flavor and texture. The dough is intentionally soft and sticky for a chewy result. If too sticky to pipe, refrigerate for 10 minutes. Cookies can be frozen un-iced for up to 3 months. For a vegan version, use a flax egg and vegan butter.
Nutrition
- Serving Size: 1 cookie
- Calories: 145
- Sugar: 14
- Sodium: 95
- Fat: 6
- Saturated Fat: 3.5
- Carbohydrates: 22
- Fiber: 0.5
- Protein: 2
Keywords: molasses cookies, spritz cookies, chewy cookies, easy cookie recipe, royal icing, quick dessert, holiday cookies


