Love this? Save it for later!
Share the inspiration with your friends
My friend Jenna asked me last week why I couldn’t just use a boxed sugar cookie mix instead of making dough from scratch for these fudge bars. I started to explain why that wouldn’t work — then stopped. Honestly? I had no good reason. I was just being stubborn about doing things the “right” way.
See, I’ve spent years perfecting my from-scratch sugar cookie recipe. It’s good. Really good. But it also takes time, and let’s face it — sometimes you want dessert *now*, not after chilling dough for two hours. So when Jenna, who bakes maybe twice a year, suggested I try the shortcut version, I almost laughed. Almost.
But I was standing in my kitchen with a bag of sugar cookie mix I’d bought on a whim, and I thought, “What’s the worst that could happen?” Turns out, the answer was “nothing bad at all.” The bars came out of the oven looking exactly like I’d hoped — golden on the edges, soft in the middle, with those little cracks on top that make sugar cookies so irresistible. I actually said “no way” out loud, which made my dog look at me like I’d lost it.
The texture was lighter than my usual recipe, which for a fudge bar is actually perfect. And the flavor? Sweet, buttery, with that unmistakable sugar cookie taste everyone craves. I added a thick layer of vanilla fudge on top and went wild with sprinkles because, honestly, that’s the whole point. I mean, maybe you’ve been there — spending way too much time on a recipe when a smarter, faster version was right under your nose.
That’s why these lighter sugar cookie fudge bars have become my go-to. They prove that good baking isn’t about being fancy — it’s about knowing when to let go of the rules and just make something delicious. And these bars? They’re exactly that.
Why You’ll Love This Recipe
These lighter sugar cookie fudge bars are the kind of dessert that makes you look like you spent hours in the kitchen when you really didn’t. I’ve tested this recipe about seven times now — yes, seven — because I wanted to make sure the shortcut actually worked as well as the from-scratch version. Spoiler: it does. Maybe better.
- Quick & Easy: From start to finish, these come together in under 30 minutes. No chilling, no rolling, no fuss. Perfect for those “I need dessert NOW” moments.
- Simple Ingredients: You only need 5 main ingredients, and I bet you already have most of them. No weird specialty items that you’ll use once and forget about.
- Perfect for Celebrations: Birthday parties, potlucks, holiday cookie exchanges — these bars fit right in. The sprinkles make them festive without any extra effort.
- Crowd-Pleaser: Kids devour them. Adults sneak seconds. I brought a batch to my book club and they were gone before we even discussed the first chapter.
- Unbelievably Delicious: The combination of soft sugar cookie base and creamy fudge topping is pure comfort. Close-your-eyes-after-the-first-bite good.
What makes these different from other sugar cookie bar recipes is the lighter texture. By using a boxed mix as the base, you get a softer, more tender crumb that pairs perfectly with the rich fudge layer. It’s not dense or heavy — it’s just right. And the sprinkles? They add that little crunch and pop of color that makes every bite feel like a celebration.
This recipe is for those days when you want something sweet but don’t want to spend hours in the kitchen. It’s comfort food made simpler, and honestly, that’s a win in my book.
What Ingredients You Will Need
This recipe uses simple, everyday ingredients to create a dessert that tastes anything but basic. Most of these are pantry staples, which means you can whip up a batch whenever the craving strikes.
- Sugar cookie mix (1 box, about 16 ounces): I prefer Betty Crocker or Pillsbury — both work great. Look for the classic sugar cookie mix, not the gluten-free version unless you’re specifically going that route. The mix already has the right balance of flour, sugar, and leavening agents, which takes the guesswork out of the equation.
- Unsalted butter (1/2 cup, melted and slightly cooled): Using unsalted butter lets you control the salt level. Melt it gently in the microwave or on the stovetop, then let it sit for a couple minutes so it’s not piping hot when you add it to the mix.
- Large egg (1, room temperature): Room temperature egg blends more evenly into the batter. If you forgot to take it out ahead of time, place it in a bowl of warm water for 5 minutes — that trick has saved me more times than I can count.
- Vanilla extract (1 teaspoon): Pure vanilla extract makes a difference here. The imitation stuff works in a pinch, but pure vanilla gives that warm, aromatic flavor that makes sugar cookies taste like, well, sugar cookies.
- Vanilla frosting (about 1 cup, store-bought or homemade): I use store-bought vanilla frosting for convenience — Pillsbury or Duncan Hines are my go-to. If you’re feeling ambitious, a simple buttercream works beautifully too. You’ll want a thick, creamy frosting that spreads easily.
- White chocolate chips (1 cup): These get melted down with the frosting to create the fudge layer. Ghirardelli or Nestle both work well. The white chocolate adds richness and helps the topping set up firm but creamy.
- Sprinkles (about 3 tablespoons): Rainbow jimmies are classic, but use whatever makes you happy. I personally love the little stars and confetti shapes for celebrations. Avoid nonpareils (the tiny round ones) because they tend to bleed color into the fudge layer.
That’s it. Five main ingredients plus sprinkles for fun. No heavy cream, no cream cheese, no complicated components. Just simple, honest ingredients that come together in a way that feels special.
Equipment Needed
You don’t need a fancy kitchen to make these bars. Here’s what you’ll need:
- 8×8-inch baking pan: This is the perfect size for these bars. If you only have a 9×9, that works too — the bars will just be slightly thinner. Line it with parchment paper for easy removal. I use binder clips to hold the parchment in place while I pour the batter. (Learned that trick from a friend and it’s a game-changer.)
- Mixing bowls (one medium, one small): A medium bowl for the cookie base and a small microwave-safe bowl for melting the white chocolate. Glass or ceramic both work fine.
- Electric mixer or whisk: A hand mixer makes quick work of the cookie dough, but a sturdy whisk and some elbow grease will get the job done too. I’ve done it both ways, and honestly, the whisk version builds character.
- Spatula: For spreading the dough evenly in the pan. A silicone spatula is ideal because it won’t scratch your pan.
- Microwave or double boiler: For melting the white chocolate and frosting together. The microwave is faster — just use 30-second intervals and stir in between.
- Sharp knife: For cutting clean bars. A chef’s knife works better than a butter knife. Wipe it clean between cuts for the neatest edges.
If you don’t have parchment paper, you can grease the pan well with butter or non-stick spray. Just be prepared to work a little harder to get the bars out. And if you’re using a glass pan, reduce the oven temperature by 25 degrees to prevent over-browning.
Preparation Method
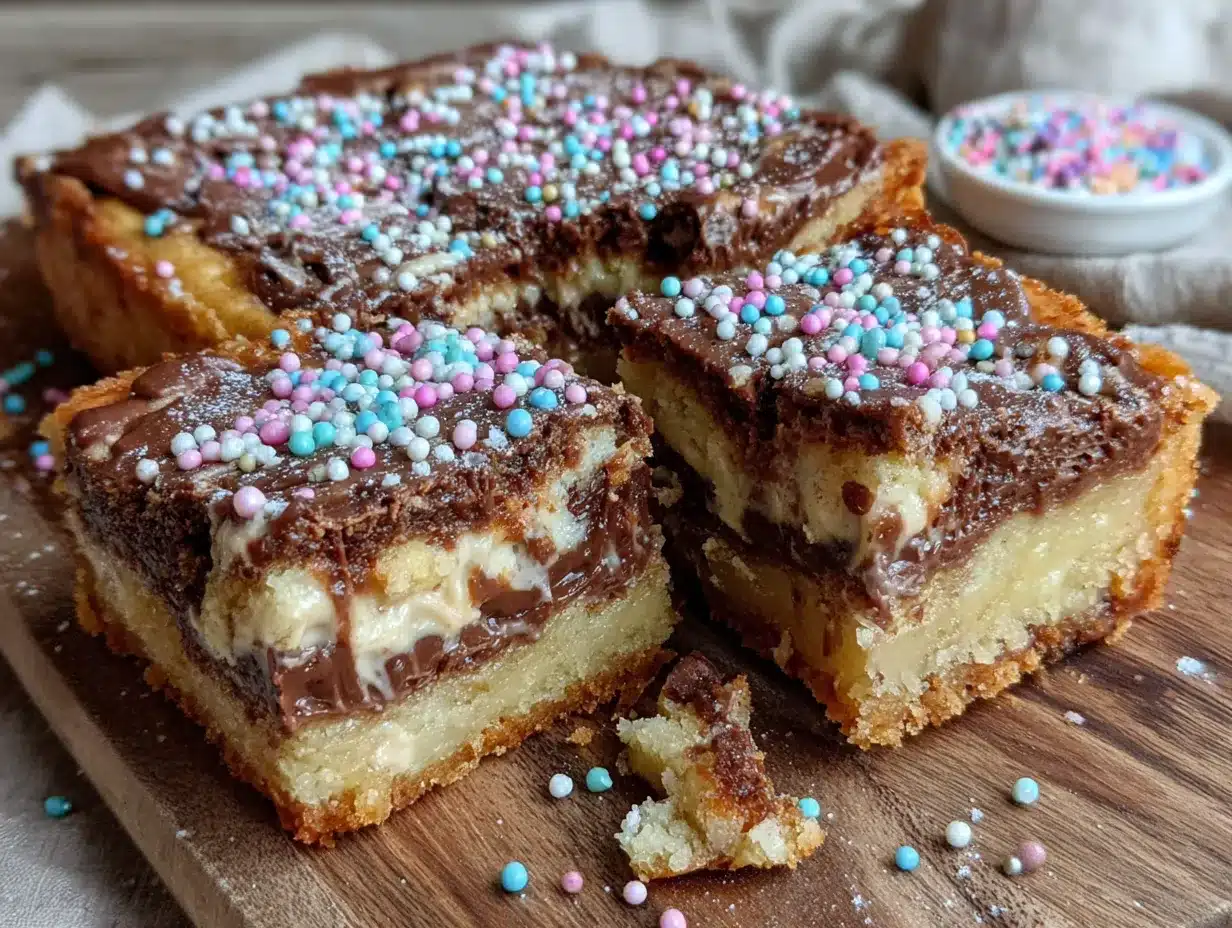
Let’s get to the fun part. Follow these steps and you’ll have a pan of beautiful fudge bars in no time.
- Preheat your oven to 350°F (175°C). Line an 8×8-inch baking pan with parchment paper, leaving some overhang on two sides. This creates little “handles” that make lifting the bars out super easy. Lightly grease the parchment with cooking spray.
- Make the cookie base. In a medium mixing bowl, combine the sugar cookie mix, melted butter, egg, and vanilla extract. Stir with a spatula or mix on low speed with an electric mixer until a soft dough forms. It should be thick and slightly sticky — similar to play-dough consistency. Don’t overmix, or the bars will be tough. About 20 seconds of mixing is all it takes.
- Press the dough into the pan. Transfer the dough to your prepared pan. Using your fingers or the back of a spatula, press it into an even layer. The dough will be a bit sticky, so lightly wet your fingers or spray the spatula with cooking spray to prevent sticking. Make sure the dough reaches all the corners — nobody wants a corner with just fudge.
- Bake the base. Place the pan in the preheated oven and bake for 12-15 minutes. You’re looking for the edges to be lightly golden and the center to look set but still soft. A toothpick inserted in the center should come out with a few moist crumbs — not raw dough. My first batch came out a bit overdone because I waited for the top to get fully golden. Don’t make that mistake. Trust the toothpick test.
- Cool the base completely. Remove the pan from the oven and place it on a wire rack. Let the cookie base cool completely before adding the fudge layer. This is important — if the base is warm, the fudge will melt and get messy. I usually let it sit for about 30 minutes while I clean up the kitchen.
- Make the fudge topping. In a microwave-safe bowl, combine the vanilla frosting and white chocolate chips. Microwave in 30-second intervals, stirring well after each, until the mixture is smooth and fully melted. This usually takes about 1-2 minutes total. Be careful not to overheat, or the white chocolate can seize up and get grainy. If that happens (and I’ve done it), add a teaspoon of vegetable oil and stir vigorously to bring it back.
- Pour and spread the fudge. Pour the melted fudge mixture over the cooled cookie base. Use a spatula to spread it evenly to the edges. Work quickly while the fudge is still warm and fluid. Tilt the pan gently if needed to help it reach the corners.
- Add the sprinkles. Immediately sprinkle the rainbow jimmies over the fudge layer while it’s still wet. Press them in very gently with your fingertips so they stick. Don’t wait on this step — once the fudge sets, the sprinkles won’t adhere properly.
- Chill until firm. Place the pan in the refrigerator for at least 1 hour, or until the fudge layer is completely set and firm to the touch. This step is crucial for clean slicing. I’ve rushed this before and ended up with a gooey mess — patience pays off here.
- Slice and serve. Once the fudge is firm, use the parchment overhang to lift the entire block out of the pan. Place it on a cutting board and use a sharp knife to cut into 16 squares (4 rows by 4 rows). Wipe the knife clean between cuts for the cleanest edges. Serve cold or at room temperature — both are delicious.
Cooking Tips & Techniques
After making these bars more times than I care to admit, I’ve picked up a few tricks that make a real difference. Here’s what I’ve learned the hard way so you don’t have to.
Don’t overbake the base. This is the number one mistake I see people make. The cookie base should be just barely set when you pull it out of the oven. It will continue to cook slightly from the residual heat of the pan. If you wait until the whole top is golden brown, the bars will be dry and crumbly instead of soft and tender. Trust the toothpick test — moist crumbs mean done.
Room temperature ingredients matter. I know, I know — it’s annoying to wait for an egg to come to room temperature. But it really does make a difference in how evenly the dough comes together. A cold egg can cause the melted butter to firm up slightly, leading to a lumpy dough. Set your egg out 15 minutes before you start baking, or use the warm water trick I mentioned earlier.
Let the fudge cool slightly before spreading. If the melted fudge mixture is too hot, it can melt the top of the cookie base and create a messy, blended layer. Let it cool for about 2-3 minutes after microwaving, then stir it again before pouring. You want it warm and fluid, not hot.
Use a hot knife for cleaner cuts. Run your knife under hot water, dry it off, then slice. The warmth helps the knife glide through the fudge without dragging or cracking it. Wipe the blade clean between each cut for the prettiest presentation. This is especially important if you’re making these for a party or gift-giving.
Chill thoroughly before slicing. I know you’re excited to dig in, but trust me on this one. If you try to cut these bars before the fudge is fully set, you’ll end up with a sticky mess and uneven pieces. A full hour in the fridge is non-negotiable. For the cleanest cuts, chill for 2 hours or even overnight.
Variations & Adaptations
One of the best things about this recipe is how easy it is to adapt. Here are some variations I’ve tried and loved.
Chocolate Lover’s Version: Swap the white chocolate chips for semi-sweet or milk chocolate chips, and use chocolate frosting instead of vanilla. The combination of sugar cookie base and chocolate fudge is absolutely divine. My neighbor tried this version and now refuses to go back to the original.
Gluten-Free Option: Use a gluten-free sugar cookie mix — both Betty Crocker and King Arthur Flour make excellent versions. Everything else in the recipe is naturally gluten-free, so this is an easy swap. Just check your sprinkles to make sure they’re certified gluten-free if that’s a concern.
Lemon Sugar Cookie Bars: Add 1 tablespoon of lemon zest to the cookie dough and use lemon frosting instead of vanilla. The bright citrus flavor cuts through the sweetness beautifully. I made these for a spring brunch and they were gone in minutes. Top with yellow sprinkles for extra cheer.
Peppermint Holiday Version: Crush a few candy canes and sprinkle them over the fudge along with (or instead of) the rainbow sprinkles. Use red and green sprinkles for a festive look. These are perfect for Christmas cookie exchanges or holiday parties.
Vegan Adaptation: Use a vegan sugar cookie mix, replace the egg with a flax egg (1 tablespoon ground flaxseed mixed with 3 tablespoons water), and use vegan butter. For the fudge, use dairy-free white chocolate chips and vegan frosting. I’ve tested this version and it works surprisingly well — the texture is slightly different but still delicious.
Serving & Storage Suggestions
These bars are versatile when it comes to serving. Here’s how to make the most of them.
Serving Temperature: I prefer these bars cold from the fridge — the fudge layer is firm and the cookie base is dense and satisfying. But they’re also wonderful at room temperature, where the fudge softens slightly and the cookie base becomes almost cake-like. Try both and see which you prefer.
Presentation Ideas: Arrange the bars on a pretty platter or cake stand for parties. Dust with a light sprinkle of powdered sugar just before serving for an extra touch of elegance. If you’re gifting them, stack them in a decorative tin with parchment paper between layers.
Complementary Pairings: These bars are lovely with a cup of coffee or a glass of cold milk. For a dessert platter, serve them alongside fresh berries or a scoop of vanilla ice cream. The tartness of raspberries is a particularly nice contrast to the sweet fudge.
Storage Instructions: Store the bars in an airtight container in the refrigerator for up to 1 week. They actually get better after a day or two as the flavors meld together. If your kitchen is cool, you can store them at room temperature for 2-3 days, but the fudge may soften.
Freezing Instructions: These bars freeze beautifully. Place them in a single layer in a freezer-safe container with parchment paper between layers. Freeze for up to 3 months. To thaw, transfer to the refrigerator overnight or let sit at room temperature for about 30 minutes. The fudge layer may look slightly different after freezing, but the taste is still amazing.
Reheating Tips: I don’t typically reheat these bars, but if you want a warm dessert experience, pop one in the microwave for about 10 seconds. The cookie base will soften and the fudge will get slightly gooey. It’s a different experience from the cold version, but equally delicious.
Nutritional Information & Benefits
Let’s be real — these are dessert bars, not health food. But compared to traditional sugar cookie fudge bars that use a from-scratch dough with loads of butter and sugar, this lighter version is a step in the right direction.
Estimated Nutritional Values (per bar, based on 16 servings):
- Calories: 210
- Total Fat: 9g
- Saturated Fat: 5g
- Cholesterol: 20mg
- Sodium: 150mg
- Total Carbohydrates: 31g
- Dietary Fiber: 0g
- Sugars: 22g
- Protein: 2g
Dietary Considerations: This recipe contains gluten, dairy, and eggs. For gluten-free and vegan options, see the variations section above. The bars are nut-free as written, which makes them a good option for school events or gatherings where allergies are a concern.
Healthier Perspective: The portion size here is key — one bar is satisfying without being over-the-top. By using a boxed mix instead of a from-scratch dough, you’re saving on butter and sugar without sacrificing flavor. And let’s be honest, sometimes you need a little sweetness in your life. These bars let you have that treat without derailing your whole day.
I personally love that these bars use simple, recognizable ingredients. No artificial preservatives or weird additives — just good, real food that happens to taste like a celebration.
Conclusion
These lighter sugar cookie fudge bars have become my secret weapon for last-minute desserts, and I’m so glad Jenna pushed me to try the shortcut version. They’re proof that good baking isn’t about following rigid rules — it’s about knowing when to adapt and make things work for you.
The combination of soft, buttery cookie base and creamy vanilla fudge is pure comfort. And the sprinkles? They make everything better. Whether you’re making these for a birthday party, a holiday gathering, or just because it’s Tuesday, they never disappoint.
I’d love to hear how these turn out for you. Did you try any of the variations? Did you add your own twist? Drop a comment below and let me know — I read every single one and I’m always looking for new ideas to test in my kitchen.
Happy baking, friends. May your bars be golden, your fudge be creamy, and your sprinkles be plentiful.
Frequently Asked Questions
Can I use a different flavor of cake mix for the base?
This recipe is specifically designed for sugar cookie mix, which has a different texture and sweetness level than cake mix. Cake mix would produce a lighter, more cake-like bar that might not hold up as well under the fudge layer. Stick with sugar cookie mix for the best results.
Do I have to use white chocolate chips in the fudge?
The white chocolate chips help the frosting set into a firm, fudge-like texture. If you skip them, the topping will be more like a soft frosting layer rather than a firm fudge. You can substitute milk chocolate or semi-sweet chips for a different flavor, but the texture will be similar.
Can I make these bars ahead of time?
Absolutely! These bars actually taste better after a day or two in the fridge as the flavors meld together. You can make them up to 3 days ahead and store them in an airtight container in the refrigerator. They also freeze well for up to 3 months.
Why did my fudge layer turn out grainy?
Grainy fudge usually happens when the white chocolate is overheated. Always microwave in 30-second intervals and stir well between each. If the mixture starts to look separated or grainy, add a teaspoon of vegetable oil and stir vigorously to bring it back together.
Can I double this recipe for a 9×13 pan?
Yes! To make a larger batch, double all the ingredients and use a 9×13-inch baking pan. You’ll need to increase the baking time for the cookie base to about 18-22 minutes. Keep an eye on it and use the toothpick test to check for doneness. The chilling time will also be slightly longer since the larger pan takes longer to cool through.
Pin This Recipe!
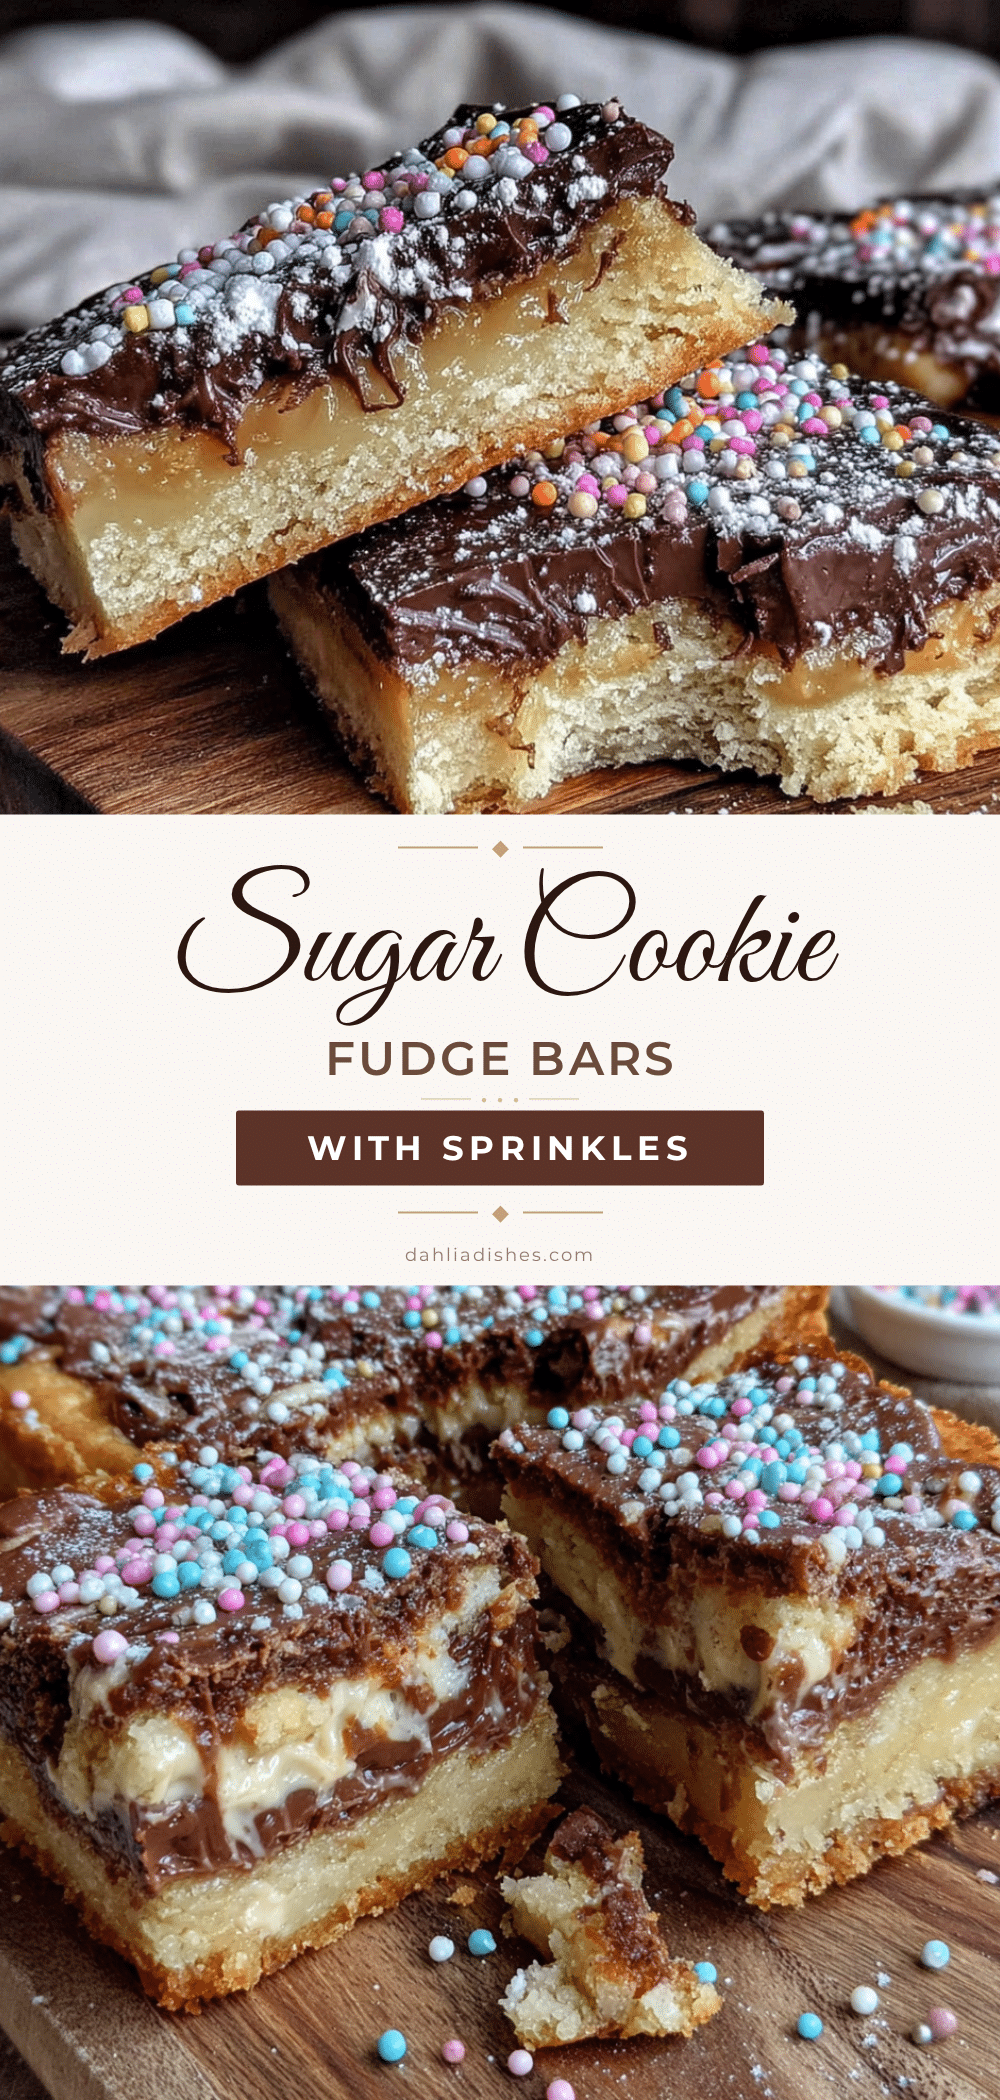
Lighter Sugar Cookie Fudge Bars: Easy 5-Ingredient Dessert

These lighter sugar cookie fudge bars are a quick and easy dessert made with a boxed sugar cookie mix, topped with a creamy vanilla fudge layer and festive sprinkles. Perfect for last-minute celebrations or when you need a sweet treat in under 30 minutes.
- Prep Time: 15 minutes
- Cook Time: 15 minutes
- Total Time: 30 minutes
- Yield: 16 servings 1x
- Category: Dessert
- Cuisine: American
Ingredients
- 1 box (about 16 ounces) sugar cookie mix (e.g., Betty Crocker or Pillsbury)
- 1/2 cup unsalted butter, melted and slightly cooled
- 1 large egg, room temperature
- 1 teaspoon vanilla extract
- 1 cup vanilla frosting (store-bought or homemade)
- 1 cup white chocolate chips
- 3 tablespoons rainbow jimmies sprinkles
Instructions
- Preheat your oven to 350°F (175°C). Line an 8×8-inch baking pan with parchment paper, leaving overhang on two sides. Lightly grease the parchment with cooking spray.
- In a medium mixing bowl, combine the sugar cookie mix, melted butter, egg, and vanilla extract. Stir with a spatula or mix on low speed with an electric mixer until a soft dough forms (about 20 seconds). Do not overmix.
- Transfer the dough to the prepared pan. Using your fingers or the back of a spatula, press it into an even layer. Lightly wet your fingers or spray the spatula with cooking spray to prevent sticking.
- Bake for 12-15 minutes, until the edges are lightly golden and the center is set but still soft. A toothpick inserted in the center should come out with a few moist crumbs. Cool completely on a wire rack (about 30 minutes).
- In a microwave-safe bowl, combine the vanilla frosting and white chocolate chips. Microwave in 30-second intervals, stirring well after each, until smooth and fully melted (about 1-2 minutes total). Let cool for 2-3 minutes.
- Pour the melted fudge mixture over the cooled cookie base. Use a spatula to spread it evenly to the edges.
- Immediately sprinkle the rainbow jimmies over the fudge layer while it is still wet. Press them in gently with your fingertips.
- Refrigerate for at least 1 hour, or until the fudge layer is completely set and firm to the touch.
- Use the parchment overhang to lift the entire block out of the pan. Place on a cutting board and cut into 16 squares (4 rows by 4 rows) with a sharp knife. Wipe the knife clean between cuts for neat edges.
- Serve cold or at room temperature.
Notes
Do not overbake the base; it should be just barely set. Use room temperature ingredients for best results. Let the fudge cool slightly before spreading to avoid melting the cookie base. For cleaner cuts, use a hot knife and chill thoroughly before slicing. Store in an airtight container in the refrigerator for up to 1 week, or freeze for up to 3 months.
Nutrition
- Serving Size: 1 bar
- Calories: 210
- Sugar: 22
- Sodium: 150
- Fat: 9
- Saturated Fat: 5
- Carbohydrates: 31
- Protein: 2
Keywords: sugar cookie fudge bars, easy dessert, 5-ingredient dessert, boxed sugar cookie mix, vanilla fudge, sprinkles, quick dessert, last-minute dessert


