Love this? Save it for later!
Share the inspiration with your friends
This was supposed to be a classic, no-fuss spinach artichoke dip. I had the cream cheese softening, the artichoke hearts draining, and I was feeling pretty good about myself for getting a head start on appetizers for our weekly family game night. Then my three-year-old decided to “help” by dumping the entire bag of shredded cheddar into the bowl before I’d even added the spinach. I stared at the mountain of cheese, then at his proud, grinning face, and felt that familiar pinch of panic. The dip was ruined before it even started.
I couldn’t just toss it all out—we’re on a budget, and wasted food is a sore spot in our house. So I did the only thing that made sense. I scraped the whole mess into a fresh bowl, added a block of cream cheese I’d stashed in the back of the fridge, and started mixing. I threw in some crispy bacon crumbles I’d been saving for breakfast and a packet of ranch seasoning because, honestly, at that moment, I needed a flavor miracle. I rolled the whole thing into a ball, coated it in more cheese and bacon, and prayed.
When I set it on the table with a bag of crackers, my husband took one skeptical bite. Then another. Then he looked at me and said, “You need to make this again.” The kids devoured it. The spinach artichoke dip I’d planned was forgotten. What came out of that accidental cheese avalanche was nothing like the plan—and better. Maybe you’ve been there, staring at a kitchen disaster that somehow turns into a win. This cheesy bacon ranch cheese ball is proof that sometimes the best recipes are born from a total mess.
Why You’ll Love This Recipe
Let me tell you, this isn’t just another cheese ball recipe. I’ve tested a dozen versions over the years, and this one is the clear winner for real, busy families. It’s the kind of appetizer that disappears before the main course even hits the table, and it’s so simple you’ll wonder why you ever bought store-bought.
- Quick & Easy: Comes together in under 15 minutes of active time. No baking, no complicated steps—just mix, shape, and chill.
- Simple Ingredients: You likely have cream cheese, shredded cheddar, bacon, and ranch seasoning in your kitchen right now. No fancy grocery trips needed.
- Perfect for Family Gatherings: Great for game nights, birthday parties, potlucks, or just a Tuesday snack attack. It pleases kids and adults alike.
- Crowd-Pleaser: I’ve brought this to three different family events, and every single time, someone asks for the recipe. Even picky eaters go back for seconds.
- Unbelievably Delicious: The creamy, tangy ranch flavor paired with smoky bacon and sharp cheddar is next-level comfort food. It’s the kind of bite that makes you close your eyes.
What makes this recipe different from the rest? It’s the balance. Many cheese balls are either too heavy on the cream cheese or too salty from the bacon. I’ve dialed in the ratios so every ingredient shines without overpowering the others. Plus, using room-temperature cream cheese is non-negotiable—it ensures a smooth, spreadable texture that clings perfectly to crackers without being a crumbly mess. This isn’t just another version; it’s my best version, born from a happy accident and refined over many, many batches.
What Ingredients You Will Need
This recipe uses simple, wholesome ingredients to deliver bold flavor and satisfying texture without the fuss. Most of these are pantry staples or fridge basics, making it easy to whip up anytime.
- 16 oz cream cheese, softened (two 8-oz blocks) — Use full-fat for the creamiest texture. I recommend Philadelphia brand for consistent results. Let it sit on the counter for 30 minutes before starting.
- 1 ½ cups shredded sharp cheddar cheese — Sharp cheddar gives more flavor than mild. Pre-shredded works in a pinch, but freshly shredded melts better and has a smoother texture. (Adds richness)
- 1 cup cooked bacon, crumbled — About 8-10 slices. I prefer center-cut bacon for less grease. You can use store-bought bacon bits, but freshly cooked tastes much better. (Use turkey bacon for a lighter option)
- 1 packet (1 oz) ranch seasoning mix — Hidden Valley is my go-to. If you’re watching sodium, use a reduced-sodium version or make your own with dried herbs.
- ½ cup chopped green onions — About 4-5 green onions, white and light green parts only. They add a mild oniony bite that cuts through the richness. (Omit if feeding super picky kids)
- ¼ cup chopped pecans or walnuts (optional) — Adds a lovely crunch for coating. Leave out if you want a nut-free version. I often skip them for kid-friendly parties.
- Additional ½ cup shredded cheddar cheese — For coating the outside of the ball. This gives that gorgeous, cheesy crust.
- Additional ¼ cup crumbled bacon — For coating. Because you can never have too much bacon.
Substitution Guidance: For a gluten-free option, check that your ranch seasoning mix is certified gluten-free. Use dairy-free cream cheese and cheddar-style shreds if needed, though the texture will be slightly softer. For a lower-fat version, use Neufchâtel cheese (1/3 less fat cream cheese) and turkey bacon. I’ve tried all these variations, and while the original is best, they all work well.
Equipment Needed
You don’t need fancy gadgets for this recipe. Here’s what you’ll need:
- Large mixing bowl — A standard-sized bowl works fine. I use a glass bowl because it’s easy to clean and doesn’t hold odors.
- Hand mixer or stand mixer — A hand mixer makes blending the cream cheese smooth and effortless. You can do it by hand with a sturdy spoon, but it takes more elbow grease and might leave lumps.
- Rubber spatula — For scraping every last bit of cheesy goodness from the bowl. Don’t skip this—waste not, want not.
- Plastic wrap — Essential for shaping and chilling the cheese ball. It keeps it from sticking to your hands and the bowl.
- Parchment paper or wax paper — For rolling the coated cheese ball without making a huge mess. I learned this trick after my first attempt left bacon bits all over my counter.
- Serving platter — Any flat plate or board works. I like a wooden board for a rustic look.
Budget-Friendly Tip: If you don’t have a hand mixer, a sturdy fork works for mashing the cream cheese, then switch to a spatula for mixing. It takes a bit longer but saves you from buying a gadget you might not use often. I’ve done it both ways, and honestly, the results are the same.
Preparation Method
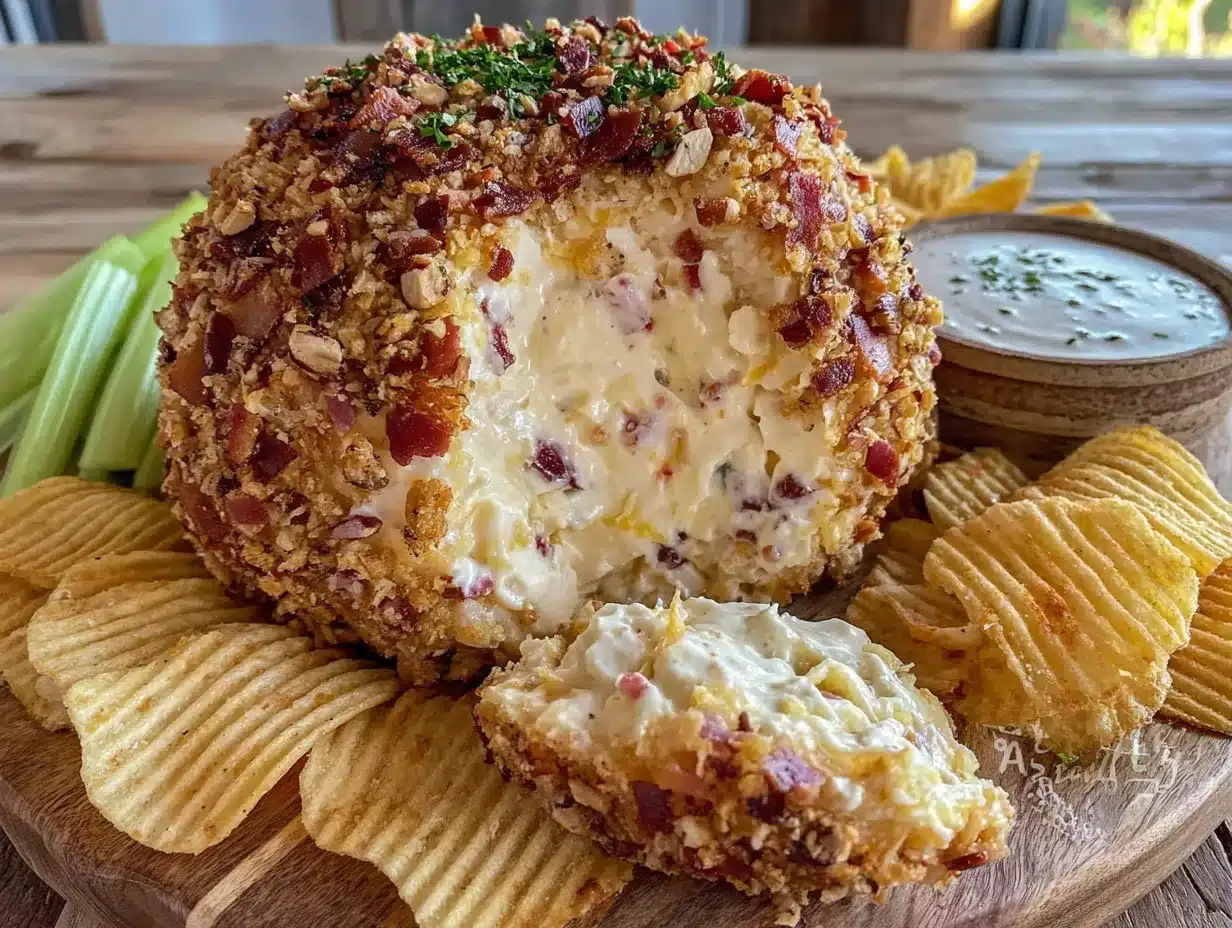
- Soften the cream cheese. Take the cream cheese out of the fridge 30-45 minutes before starting. It should be soft enough that you can easily press a finger into it. If you’re short on time, unwrap the blocks and microwave them on a low power setting (30% power) for 15-20 seconds. Be careful not to melt them—you want soft, not liquid.
- Mix the base. In a large mixing bowl, beat the softened cream cheese with a hand mixer on medium speed until it’s smooth and fluffy, about 2 minutes. Scrape down the sides of the bowl with a rubber spatula. Add the ranch seasoning mix and beat for another 30 seconds until fully incorporated. The mixture will smell amazing already.
- Add the mix-ins. Fold in the 1 ½ cups shredded cheddar cheese, 1 cup crumbled bacon, and chopped green onions using the spatula. Mix until everything is evenly distributed. Taste a tiny bit—if you want more ranch flavor, add another teaspoon of the seasoning. I always sneak a taste here, and it never disappoints.
- Chill the mixture. Cover the bowl with plastic wrap and refrigerate for at least 1 hour. This step is crucial. The mixture needs to firm up so you can shape it into a ball without it falling apart. I’ve tried skipping this step, and let me tell you, it’s a sticky mess. Plan ahead for this chill time.
- Shape the cheese ball. Lay a large piece of plastic wrap on your counter. Scoop the chilled cheese mixture onto the center of the plastic wrap. Use the plastic wrap to help you shape it into a smooth, round ball. Twist the top of the plastic wrap to secure it. Refrigerate for another 30 minutes to let the shape set. This double-chill method is my secret to a perfectly round cheese ball.
- Prepare the coating. On a piece of parchment paper, combine the additional ½ cup shredded cheddar cheese and ¼ cup crumbled bacon. Mix them together with your fingers. If you’re using nuts, add them here too.
- Coat the cheese ball. Unwrap the chilled cheese ball and roll it gently in the cheese-bacon mixture, pressing lightly so the coating sticks. Use your hands to pat on any extra coating. Don’t worry if it looks a little messy—that’s part of the charm.
- Final chill. Place the coated cheese ball on a serving platter, cover loosely with plastic wrap, and refrigerate for at least 30 minutes before serving. This helps the coating set. You can make it up to 24 hours in advance.
Sensory Cue: The mixture should feel firm but pliable when you shape it. If it’s too soft, chill it longer. The coating should stick easily without falling off. When you slice into it later, the inside should be creamy and smooth, not crumbly.
Cooking Tips & Techniques
I’ve made this cheese ball more times than I can count, and I’ve learned a few things the hard way. Here are my best tips for success.
Don’t skip the softening step. I once tried to mix cold cream cheese straight from the fridge, and it was a lumpy disaster. The lumps never fully smoothed out, and the texture was grainy. Room-temperature cream cheese is non-negotiable for that silky, spreadable finish. Trust me on this.
Toast the nuts if using. If you decide to add pecans or walnuts, toast them in a dry skillet over medium heat for 3-4 minutes until fragrant. It deepens their flavor and adds a wonderful crunch. I forgot to toast them once, and the coating was bland. Never again.
Use a light hand with the bacon. Too much bacon can make the cheese ball greasy and overpower the other flavors. Stick to the measurements, and drain the bacon well on paper towels after cooking. Pat off any excess grease before crumbling. I learned this after one batch turned into a greasy puddle on the platter.
Chill between steps. The double-chill method isn’t just for show. Chilling the mixture before shaping makes it easier to handle, and chilling again after shaping helps the coating adhere. If you’re short on time, you can skip the second chill, but the coating might slide off when you serve it. I’ve done it both ways, and the double-chill is worth the wait.
Make ahead for better flavor. This cheese ball actually tastes better the next day. The flavors meld together overnight, and the ranch seasoning really shines. I often make it a day ahead for parties, and it’s always a hit. Just keep it wrapped tightly in plastic wrap until you’re ready to coat and serve.
Variations & Adaptations
This recipe is incredibly versatile. Here are some ways to make it your own.
Spicy Southwest Version: Add ½ cup canned black beans (rinsed and drained), ¼ cup diced jalapeños, and 1 teaspoon cumin to the cream cheese mixture. Use pepper jack cheese instead of cheddar. Coat with crushed tortilla chips mixed with a little extra cheddar. This is my husband’s favorite variation—he loves the heat.
Everything Bagel Cheese Ball: Omit the bacon and green onions. Mix in 2 tablespoons everything bagel seasoning and ¼ cup finely diced red onion. Coat with a mixture of sesame seeds, poppy seeds, dried garlic, and dried onion flakes. This version is amazing with bagel chips or fresh cucumber slices. I made this for a brunch party, and it was gone in 20 minutes.
Holiday Cranberry Pecan Version: Swap the bacon for ½ cup dried cranberries and ½ cup toasted pecans. Use a mixture of cream cheese and goat cheese for a tangier flavor. Coat with additional chopped pecans and dried cranberries. This is perfect for Thanksgiving or Christmas gatherings. The sweetness balances the savory ranch beautifully.
Kid-Friendly No-Bacon Version: For picky eaters who don’t like bacon, simply omit it. Add ¼ cup finely chopped red bell pepper and 2 tablespoons finely chopped fresh parsley for color and crunch. My own kids went through a “no bacon” phase, and this version saved me. They never knew the difference.
Dairy-Free Adaptation: Use dairy-free cream cheese and cheddar-style shreds. Add 1 tablespoon nutritional yeast for extra cheesy flavor. The texture will be slightly softer, so chill it for an extra 30 minutes before shaping. I’ve tested this with a friend who’s lactose intolerant, and she said it was the best cheese ball she’d had in years.
Serving & Storage Suggestions
Serve this cheese ball chilled, straight from the fridge. Let it sit at room temperature for about 10 minutes before serving to soften slightly—this makes it easier to spread. I like to place it on a wooden board surrounded by an assortment of crackers, pretzel chips, and fresh vegetable sticks like celery, carrot sticks, and bell pepper strips.
Complementary Dishes: This cheese ball pairs beautifully with a simple charcuterie board featuring salami, grapes, and nuts. It also works great alongside a bowl of soup or as part of a game-day spread with wings and sliders. For a lighter option, serve with cucumber rounds or apple slices.
Storage Instructions: Store the cheese ball tightly wrapped in plastic wrap in the refrigerator for up to 5 days. Do not freeze—the texture becomes watery and grainy upon thawing. I’ve tried freezing it twice, and both times, the results were disappointing. Just make it fresh or a day ahead.
Reheating: This is a cold appetizer, so no reheating needed. If you want to serve it warm, you can microwave individual portions for 10-15 seconds, but it’s best enjoyed chilled.
Flavor Development: The flavors continue to meld and deepen over time. Day two is actually the sweet spot—the ranch seasoning fully infuses the cream cheese, and the bacon flavor becomes more pronounced. If you can resist eating it all on day one, you’ll be rewarded on day two.
Nutritional Information & Benefits
Here’s an approximate nutritional breakdown per serving (based on 12 servings):
| Nutrient | Amount per Serving |
|---|---|
| Calories | 245 |
| Total Fat | 20g |
| Saturated Fat | 11g |
| Cholesterol | 55mg |
| Sodium | 480mg |
| Total Carbohydrates | 4g |
| Dietary Fiber | 0g |
| Sugars | 2g |
| Protein | 10g |
Health Benefits: Cream cheese provides calcium and protein, while cheddar adds more calcium and vitamin A. Bacon contributes protein and B vitamins, though it’s higher in sodium and saturated fat. The green onions offer a small dose of vitamin K and antioxidants. This isn’t a health food, but it’s a satisfying treat that can be part of a balanced diet when enjoyed in moderation. I always remind myself that a little indulgence is good for the soul.
Dietary Considerations: This recipe is naturally low-carb and keto-friendly (about 4g net carbs per serving). For a gluten-free version, ensure your ranch seasoning is certified gluten-free. It contains dairy and, if using nuts, tree nuts. Always check labels if serving to guests with allergies.
Conclusion
This cheesy bacon ranch cheese ball is proof that the best recipes often come from the messiest moments. What started as a toddler’s “helpful” mistake turned into a family favorite that I now make for every gathering. It’s simple, affordable, and absolutely irresistible—the kind of appetizer that makes people linger by the snack table and ask for the recipe before they leave.
I love this recipe because it’s forgiving. You can tweak the mix-ins, adjust the seasoning, or swap the coating based on what you have on hand. It always works. It always disappears. And it always brings a smile to my face when someone takes that first bite and their eyes light up.
Now it’s your turn. Give this recipe a try, and don’t be afraid to make it your own. Add extra bacon, swap in your favorite cheese, or load it up with fresh herbs. I’d love to hear how it turns out! Leave a comment below and tell me about your own happy accident in the kitchen. Share this recipe with a friend who needs a quick, crowd-pleasing appetizer. Happy cooking, friends—may your cheese balls always be perfectly creamy and your bacon always crispy.
Frequently Asked Questions
Can I make this cheese ball ahead of time?
Absolutely! In fact, it tastes even better the next day. Prepare the cheese ball through step 5 (shaping), wrap it tightly in plastic wrap, and refrigerate for up to 24 hours. When you’re ready to serve, coat it with the cheese and bacon mixture and let it sit at room temperature for 10 minutes.
Can I use low-fat cream cheese?
Yes, but the texture will be slightly less creamy. Neufchâtel cheese (1/3 less fat) works well and is my go-to when I’m trying to cut calories. Just make sure it’s fully softened before mixing to avoid lumps.
How do I keep the cheese ball from being too greasy?
Drain your cooked bacon thoroughly on paper towels and pat off any excess grease before crumbling. Also, avoid over-mixing the cream cheese, which can cause it to release moisture. Chilling the mixture before shaping also helps control greasiness.
Can I freeze this cheese ball?
I don’t recommend freezing it. The cream cheese becomes watery and grainy upon thawing, and the bacon loses its texture. It’s best made fresh or up to 2 days in advance and stored in the refrigerator.
What can I serve with this cheese ball besides crackers?
So many options! Try pretzel chips, bagel chips, pita chips, fresh vegetable sticks (celery, carrots, bell peppers), apple slices, pear slices, or cucumber rounds. For a low-carb option, serve with pork rinds or endive leaves.
Pin This Recipe!
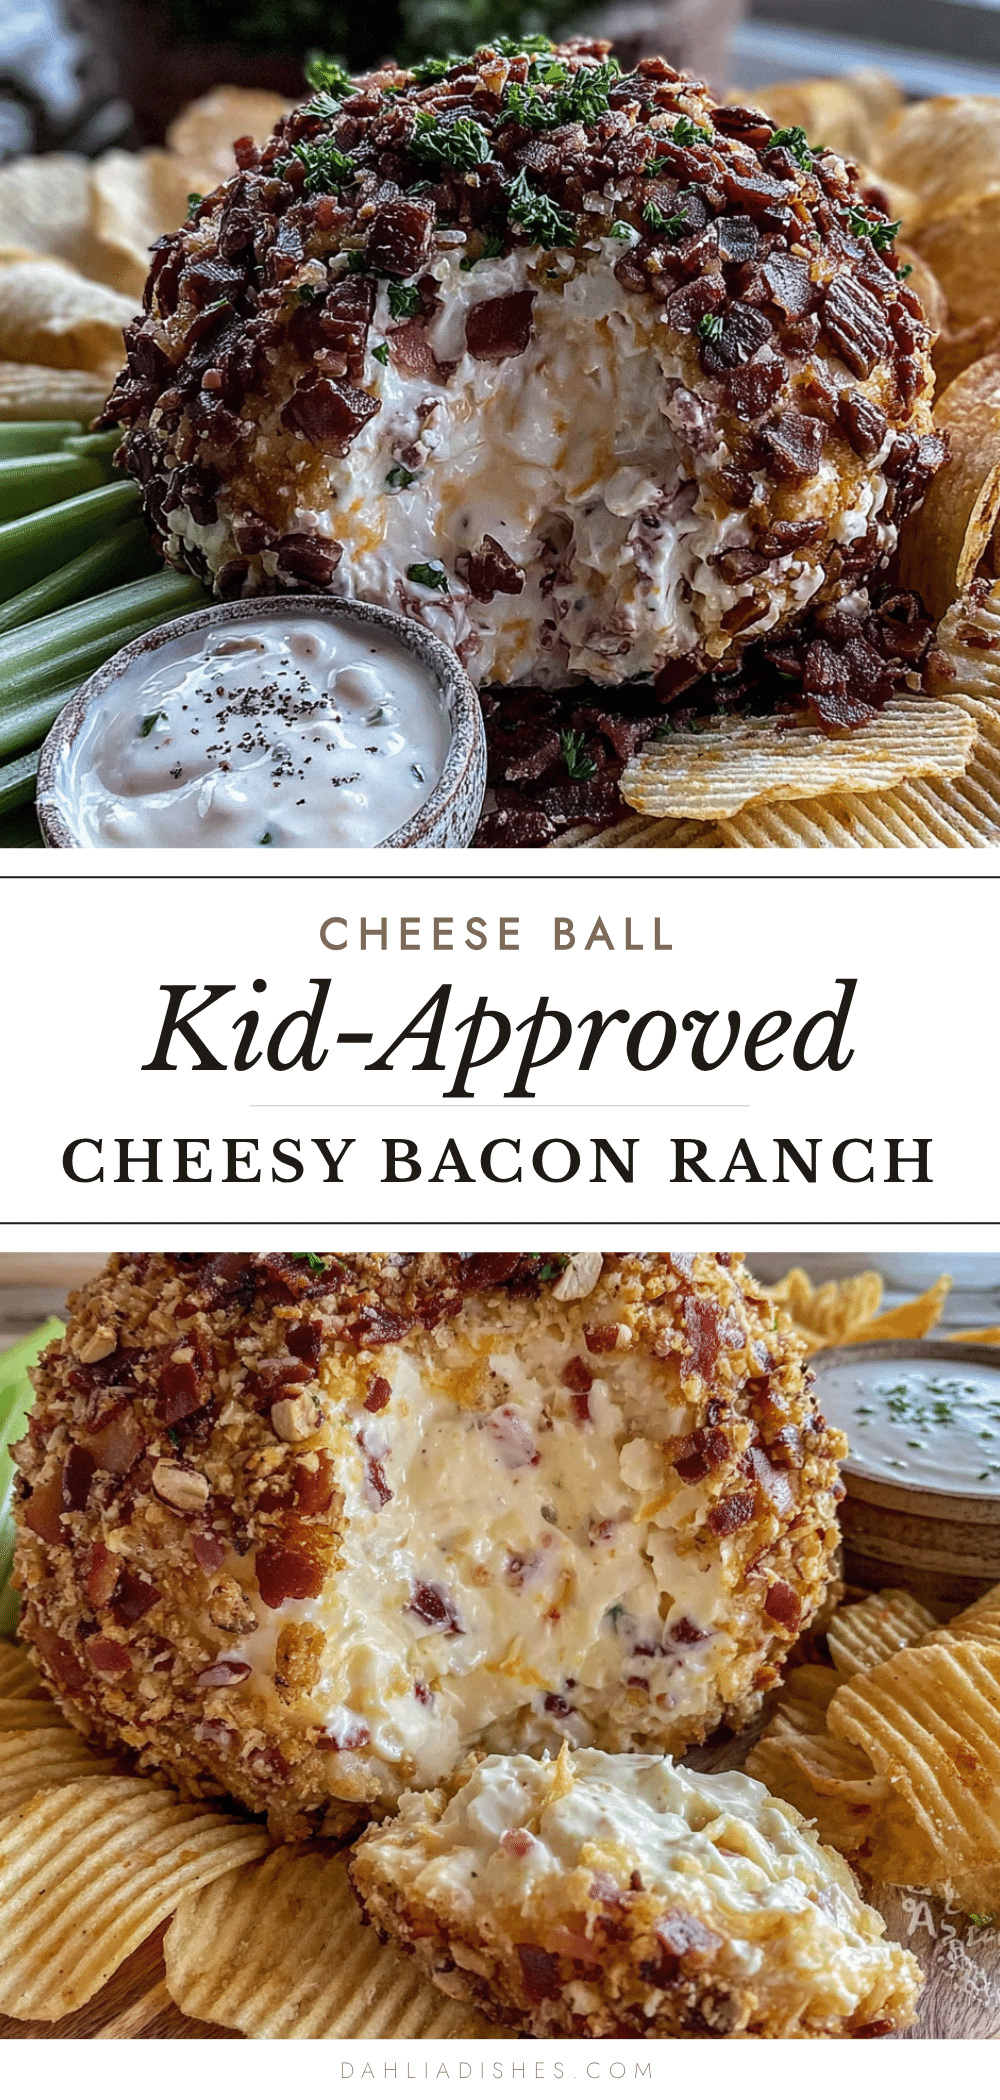
Easy Cheesy Bacon Ranch Cheese Ball Kids Love

A creamy, savory cheese ball loaded with sharp cheddar, crispy bacon, and ranch seasoning. Perfect for parties, game nights, or any gathering, this easy appetizer comes together in minutes and disappears even faster.
- Prep Time: 15 minutes
- Cook Time: 0 minutes
- Total Time: 2 hours 15 minutes (includes chilling time)
- Yield: 12 servings 1x
- Category: Appetizer
- Cuisine: American
Ingredients
- 16 oz cream cheese, softened (two 8-oz blocks)
- 1 ½ cups shredded sharp cheddar cheese
- 1 cup cooked bacon, crumbled (about 8–10 slices)
- 1 packet (1 oz) ranch seasoning mix
- ½ cup chopped green onions (about 4–5 green onions, white and light green parts only)
- ¼ cup chopped pecans or walnuts (optional)
- Additional ½ cup shredded cheddar cheese (for coating)
- Additional ¼ cup crumbled bacon (for coating)
Instructions
- Soften the cream cheese: Take the cream cheese out of the fridge 30-45 minutes before starting. It should be soft enough that you can easily press a finger into it. If short on time, unwrap the blocks and microwave on low power (30% power) for 15-20 seconds. Be careful not to melt them.
- Mix the base: In a large mixing bowl, beat the softened cream cheese with a hand mixer on medium speed until smooth and fluffy, about 2 minutes. Scrape down the sides of the bowl with a rubber spatula. Add the ranch seasoning mix and beat for another 30 seconds until fully incorporated.
- Add the mix-ins: Fold in the 1 ½ cups shredded cheddar cheese, 1 cup crumbled bacon, and chopped green onions using the spatula. Mix until everything is evenly distributed. Taste and adjust seasoning if desired.
- Chill the mixture: Cover the bowl with plastic wrap and refrigerate for at least 1 hour. This step is crucial for firming up the mixture so it can be shaped into a ball.
- Shape the cheese ball: Lay a large piece of plastic wrap on your counter. Scoop the chilled cheese mixture onto the center of the plastic wrap. Use the plastic wrap to help shape it into a smooth, round ball. Twist the top of the plastic wrap to secure it. Refrigerate for another 30 minutes to let the shape set.
- Prepare the coating: On a piece of parchment paper, combine the additional ½ cup shredded cheddar cheese and ¼ cup crumbled bacon. Mix them together with your fingers. If using nuts, add them here too.
- Coat the cheese ball: Unwrap the chilled cheese ball and roll it gently in the cheese-bacon mixture, pressing lightly so the coating sticks. Use your hands to pat on any extra coating.
- Final chill: Place the coated cheese ball on a serving platter, cover loosely with plastic wrap, and refrigerate for at least 30 minutes before serving. This helps the coating set. Can be made up to 24 hours in advance.
Notes
For best results, use room-temperature cream cheese and chill the mixture between steps. The cheese ball tastes even better the next day as flavors meld. Do not freeze. For a gluten-free version, ensure ranch seasoning is certified gluten-free. For a dairy-free version, use dairy-free cream cheese and cheddar-style shreds.
Nutrition
- Serving Size: 1 serving (based on
- Calories: 245
- Sugar: 2
- Sodium: 480
- Fat: 20
- Saturated Fat: 11
- Carbohydrates: 4
- Protein: 10
Keywords: cheese ball, bacon ranch cheese ball, easy appetizer, party food, game day snack, kid-friendly appetizer


