Love this? Save it for later!
Share the inspiration with your friends
It was 11:47 PM on a random Wednesday in December, and I had a ridiculous, undeniable craving for cheesecake. Not just any cheesecake—I wanted that rich, creamy, spiced flavor of eggnog, but in cheesecake form. The problem? I didn’t have any graham crackers for a crust, and the store was long closed. But I had a box of nutmeg-spiced cookies I’d picked up on a whim, a carton of eggnog, and a wild idea that felt way too ambitious for that hour. Honestly, I almost talked myself out of it. “Just go to bed,” my brain said. But my stomach had other plans.
So there I was, in my quiet kitchen, pulling out cream cheese to soften and hoping this wouldn’t be a total disaster. I mean, I’ve had late-night cooking experiments go wrong before—like that time I tried making caramel sauce and ended up with a pan I had to throw away. But this felt different. Something about the quiet, the dim light, and the smell of nutmeg in the air made me think this might actually work. And you know that feeling when you just know a recipe is going to be good, even before you taste it? That was this.
I crushed those cookies with a rolling pin—probably waking up my neighbor in the process—and pressed them into the pan with butter that was barely soft enough. It was messy, imperfect, and honestly, a little ridiculous. But when I pulled that cheesecake out of the water bath the next morning, perfectly set and smelling like Christmas morning, I knew I had stumbled onto something special. The nutmeg crust added this warm, slightly crunchy base that perfectly balanced the creamy, spiced filling. It was cozy, indulgent, and exactly what that late-night craving needed. And let me tell you, I’ve been making it every holiday season since.
Why You’ll Love This Recipe
Let’s be real for a second—there are a million cheesecake recipes out there. But this one? It’s different. It’s the kind of dessert that makes people close their eyes after the first bite and just savor it. Here’s why this eggnog cheesecake with nutmeg crust is going to become your new holiday staple:
- Quick & Easy: While it needs time to chill, the active prep time is just about 20 minutes. Perfect for busy holiday weeks when you’re already juggling a million things.
- Simple Ingredients: No weird, hard-to-find items. You probably have most of these in your pantry right now—especially if you’re a holiday baker.
- Perfect for Christmas & New Year’s: This is the ultimate festive dessert. It screams “holiday party” without screaming for attention. It just quietly steals the show.
- Crowd-Pleaser: I’ve served this to family, friends, and even picky coworkers. Everyone loves it. Kids love the creamy texture, and adults appreciate the sophisticated spice blend.
- Unbelievably Creamy: The texture is next-level. It’s dense but silky, rich but not heavy. The secret? A water bath and room-temperature ingredients. Trust me on this.
What makes this recipe different from all the other eggnog cheesecakes out there is that nutmeg crust. Most recipes use a standard graham cracker crust, but the nutmeg adds this warm, aromatic base that elevates the whole dessert. It’s not just a cheesecake with eggnog flavor—it’s a cohesive, thoughtfully balanced dessert where every component sings together. I tested this recipe three times to get the spice ratio just right, and I can honestly say this is my best version.
This isn’t just a dessert—it’s the kind that makes you feel all warm and cozy inside. It’s comfort food reimagined for the holidays: indulgent, but with a familiar, soul-soothing satisfaction. Perfect for impressing guests without stress, or for turning a quiet December evening into something memorable.
What Ingredients You Will Need
This recipe uses simple, wholesome ingredients that come together to create something truly special. Most of these are pantry staples during the holiday season, which makes this dessert incredibly accessible. Let’s break down what you’ll need and why each ingredient matters.
For the Nutmeg Crust
- 1 ½ cups crushed nutmeg cookies (about 12-15 cookies) – I recommend using speculoos or Biscoff cookies for the best flavor. The spices in these cookies complement the eggnog filling perfectly. If you can’t find them, you can use graham crackers and add 1 teaspoon of freshly grated nutmeg.
- 5 tablespoons unsalted butter, melted – This binds the crust together. Use real butter for the best flavor and texture. Margarine won’t give you the same richness.
- 2 tablespoons granulated sugar – Just a touch to balance the spices. You can reduce this if your cookies are already sweet.
- ¼ teaspoon salt – Don’t skip this! It balances the sweetness and enhances the nutmeg flavor.
For the Eggnog Cheesecake Filling
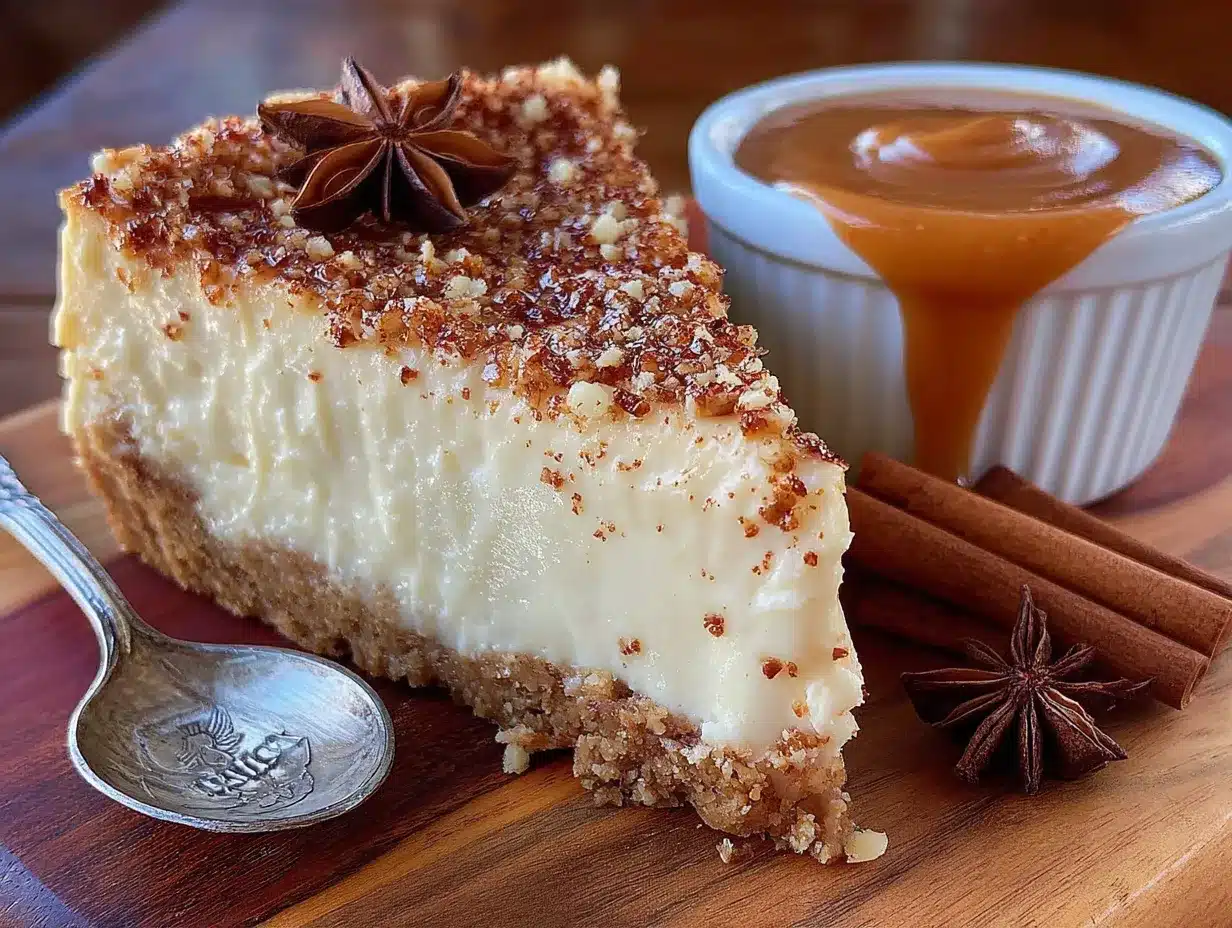
- 32 ounces (4 blocks) cream cheese, softened – This is crucial. Your cream cheese must be at room temperature, or you’ll end up with a lumpy filling. I recommend Philadelphia brand for consistent results. Take it out of the fridge at least 2 hours before you start.
- 1 cup granulated sugar – Adds sweetness and helps create that silky texture. You can reduce this to ¾ cup if you prefer a less sweet cheesecake.
- 3 large eggs, room temperature – Room temperature eggs incorporate more evenly into the batter. If you forgot to take them out, place them in a bowl of warm water for 5 minutes.
- 1 ½ cups eggnog – Use full-fat eggnog for the richest flavor. I prefer the store-bought stuff from a local dairy, but homemade works too. Avoid low-fat or light versions—they have too much water and can make the cheesecake runny.
- 1 teaspoon vanilla extract – Enhances the warm spices and adds depth. Use pure vanilla extract, not imitation.
- 1 teaspoon freshly grated nutmeg – This is non-negotiable. Pre-ground nutmeg is okay in a pinch, but freshly grated has a much more aromatic, complex flavor. I use a Microplane for this.
- ½ teaspoon ground cinnamon – Adds warmth and complements the nutmeg. You can add a pinch of cloves or allspice if you’re feeling adventurous.
- ¼ teaspoon salt – Balances the sweetness and makes the other flavors pop.
- 2 tablespoons all-purpose flour – This helps stabilize the cheesecake and prevents cracking. You can substitute with cornstarch if you’re gluten-free.
Optional Toppings
- Whipped cream – Homemade is best. Just heavy cream, a little sugar, and a splash of vanilla.
- Extra freshly grated nutmeg – For garnish. It looks beautiful and adds a burst of flavor.
- Caramel sauce – A drizzle of salted caramel takes this over the top. (adds richness)
Equipment Needed
You don’t need a professional bakery setup for this recipe, but having the right tools makes a big difference. Here’s what you’ll need:
- 9-inch springform pan – This is essential for easy removal. I’ve used a regular cake pan before, and it was a nightmare to get the cheesecake out without destroying it. Springform pans are worth the investment.
- Electric mixer – A stand mixer is ideal, but a hand mixer works perfectly fine. You’ll need it to get that smooth, creamy texture. Mixing by hand is possible, but your arm will hate you.
- Large roasting pan – For the water bath. Make sure it’s big enough to hold your springform pan. I use a cheap aluminum one from the grocery store.
- Aluminum foil – You’ll need heavy-duty foil to wrap the bottom of your springform pan. Regular foil can tear and let water in, which ruins the crust. Trust me, I learned this the hard way.
- Microplane or fine grater – For freshly grating nutmeg. A regular box grater works, but a Microplane gives you that fine, fluffy texture.
- Rolling pin or food processor – For crushing the cookies. A food processor is faster and more consistent, but a rolling pin and a zip-top bag work just fine. It’s also a great way to release some stress!
- Rubber spatula – For scraping down the bowl and folding ingredients. A good spatula is your best friend in the kitchen.
- Cooling rack – Essential for cooling the cheesecake slowly to prevent cracking.
If you don’t have a springform pan, you can use a deep-dish pie plate, but the slices won’t be as clean. And if you don’t have a roasting pan for the water bath, a large baking dish works in a pinch—just make sure it’s deep enough to hold at least an inch of water.
Preparation Method
Alright, let’s get into it. This recipe has a few steps, but I promise it’s straightforward. Take your time, follow these instructions, and you’ll end up with a stunning cheesecake that tastes like the holidays in every bite.
- Preheat and prep. Preheat your oven to 325°F (163°C). Place a large pot of water on the stove to boil—you’ll need it for the water bath later. This is one of those small steps that makes a big difference when you’re in the middle of things.
- Make the nutmeg crust. In a food processor, pulse the nutmeg cookies until they turn into fine crumbs. If you’re using a rolling pin, place the cookies in a zip-top bag and crush them until you have even crumbs. Transfer to a medium bowl, then add the melted butter, sugar, and salt. Stir until the mixture looks like wet sand and holds together when pressed.
- Press the crust. Pour the crumb mixture into your springform pan. Use the bottom of a measuring cup or a glass to press it firmly and evenly into the bottom and about 1 inch up the sides. Don’t skip pressing it up the sides—it helps contain the filling and adds that extra nutmeg flavor to every bite. Bake for 10 minutes, then set aside to cool while you make the filling. Leave the oven on.
- Prepare the springform pan for the water bath. Tear off two large sheets of heavy-duty aluminum foil and wrap them tightly around the bottom and sides of your springform pan. Make sure there are no tears or gaps—water is sneaky and will find its way in. Place the wrapped pan in your large roasting pan.
- Beat the cream cheese. In a large mixing bowl, beat the softened cream cheese with an electric mixer on medium speed until smooth and creamy, about 2 minutes. Scrape down the sides and bottom of the bowl with a rubber spatula. This step is crucial—lumpy cream cheese means lumpy cheesecake.
- Add the sugar. Gradually add the sugar and beat until well combined, about 1 minute. Scrape down the bowl again. Don’t overmix at this stage—you don’t want to incorporate too much air, which can cause cracking.
- Add the eggs one at a time. Crack each egg into a small bowl first (to avoid shell bits), then add to the cream cheese mixture. Beat on low speed after each addition until just combined. Overbeating the eggs can make the cheesecake puff up and then collapse, causing cracks.
- Mix in the wet ingredients. Add the eggnog and vanilla extract, then beat on low speed until just combined. The mixture will look thin and soupy—don’t worry, that’s normal. It will set beautifully in the oven.
- Add the dry ingredients. Sprinkle the freshly grated nutmeg, cinnamon, salt, and flour over the batter. Beat on low speed until just combined. Scrape down the bowl one last time and give it a gentle stir with your spatula to make sure everything is evenly mixed.
- Pour and smooth. Pour the filling into the cooled crust. Use your spatula to gently smooth the top. Tap the pan on the counter a few times to release any air bubbles.
- Create the water bath. Carefully pour the boiling water into the roasting pan until it reaches about halfway up the sides of the springform pan. Be careful not to splash water onto the cheesecake—water spots on the top can cause discoloration.
- Bake. Bake at 325°F (163°C) for 55-65 minutes. The cheesecake is done when the edges are set and the center still jiggles slightly when you gently shake the pan. It will look a bit underdone in the middle—that’s exactly what you want. Overbaking is the number one cause of cracks.
- Cool slowly. Turn off the oven and crack the oven door open. Let the cheesecake sit in the warm oven for 1 hour. This gradual cooling helps prevent cracks. After 1 hour, remove the cheesecake from the water bath and place it on a cooling rack. Run a knife around the edge of the pan to loosen the cheesecake (this prevents it from sticking as it shrinks). Let it cool completely at room temperature, about 2 hours.
- Chill overnight. Cover the cheesecake with plastic wrap and refrigerate for at least 6 hours, but preferably overnight. This is the hardest part—waiting! But trust me, the texture improves dramatically after a full chill. The flavors meld together, and the texture becomes perfectly creamy.
- Serve. When you’re ready to serve, remove the sides of the springform pan. Slice with a sharp knife dipped in hot water (wipe it dry between cuts for clean slices). Top with whipped cream and a dusting of freshly grated nutmeg.
Cooking Tips & Techniques
After making this eggnog cheesecake more times than I can count, I’ve picked up a few tricks that make the process smoother and the results more consistent. Let me share what I’ve learned—including a few mistakes I’ve made so you don’t have to.
Room temperature ingredients are non-negotiable. I know I’ve said this already, but it’s worth repeating. Cold cream cheese creates lumps that no amount of mixing can fix. Cold eggs don’t incorporate evenly. Take everything out of the fridge at least 2 hours before you start. If you’re in a rush, you can cut the cream cheese into cubes and microwave it in 10-second bursts, but be careful—you want it soft, not melted.
Don’t overmix the batter. This was my biggest mistake when I first started making cheesecakes. I thought more mixing meant smoother texture, but it actually incorporates too much air. Those air bubbles expand in the oven, then collapse, leaving you with a cracked, sunken cheesecake. Mix on low speed and stop as soon as everything is combined.
The water bath is your friend. I know it seems fussy, but it’s the secret to a perfectly creamy, crack-free cheesecake. The steam creates a moist environment that prevents the top from drying out and cracking. If you’re worried about water leaking in, use two layers of heavy-duty foil and check for any tears before adding the water.
Let it cool gradually. Thermal shock is a real thing in cheesecake baking. Going from hot oven to cold counter is a recipe for cracks. The slow cool in the oven, followed by room temperature cooling, then refrigeration, gives the cheesecake time to adjust. I once tried to speed this up by putting a warm cheesecake directly in the fridge, and it cracked right down the middle. Never again.
Use a sharp knife for clean slices. This sounds simple, but it makes a huge difference. Dip your knife in hot water, wipe it dry, then slice. Repeat for each cut. The hot knife glides through the cold cheesecake without dragging or sticking. Your slices will look bakery-perfect.
Variations & Adaptations
One of the best things about this recipe is how versatile it is. I’ve experimented with several variations over the years, and they’ve all been delicious in their own way. Here are some ideas to make this cheesecake your own.
Gluten-Free Version: Simply use gluten-free nutmeg cookies or gluten-free graham crackers for the crust. The filling is naturally gluten-free as long as you use a gluten-free flour blend or cornstarch instead of all-purpose flour. I’ve tested this with Bob’s Red Mill 1-to-1 Baking Flour, and it works perfectly.
Bourbon Eggnog Cheesecake: Add 2 tablespoons of bourbon to the filling along with the eggnog. The warmth of the bourbon complements the nutmeg and cinnamon beautifully. I made this for a New Year’s Eve party once, and it was gone in 20 minutes. Just be aware that the alcohol doesn’t fully cook out, so this version is best for adults.
Pumpkin Eggnog Cheesecake: For a fall twist, reduce the eggnog to 1 cup and add ½ cup of pumpkin puree. Increase the cinnamon to 1 teaspoon and add ¼ teaspoon of ground ginger. The pumpkin adds a lovely earthiness that pairs surprisingly well with the eggnog. I tried this on a whim last October, and it’s now my go-to for Thanksgiving.
Mini Cheesecakes: Use a muffin tin with liners instead of a springform pan. Press the crust into the bottom of each liner, fill with batter, and bake for 18-22 minutes. These are perfect for parties or portion control. Just reduce the water bath—place a pan of water on the lower oven rack instead.
Dairy-Free Adaptation: Use dairy-free cream cheese (I like Kite Hill or Tofutti), coconut cream instead of eggnog, and a vegan butter substitute for the crust. The texture won’t be exactly the same—it’ll be slightly less dense—but it’s still delicious. I developed this version for a friend with lactose intolerance, and she said it was the best cheesecake she’d had in years.
Serving & Storage Suggestions
This cheesecake is a showstopper on its own, but a few thoughtful touches can take it from great to unforgettable. Here’s how I like to serve and store mine.
Serving Temperature: Serve the cheesecake cold, straight from the refrigerator. Let it sit at room temperature for about 10-15 minutes before slicing—this takes the chill off without making it too soft. The texture is at its best when it’s cold but not frozen.
Presentation Ideas: Top each slice with a generous dollop of freshly whipped cream and a dusting of freshly grated nutmeg. For extra flair, drizzle with caramel sauce or sprinkle with crushed nutmeg cookies. I like to serve it on a white platter to let the golden color of the cheesecake stand out.
Complementary Pairings: This cheesecake pairs beautifully with a cup of hot coffee, spiced tea, or a glass of cold milk. For a festive touch, serve with a side of mulled wine or a bourbon cocktail. The richness of the cheesecake balances the acidity of coffee and the warmth of spiced drinks.
Storage Instructions: Store leftover cheesecake in the refrigerator, covered, for up to 5 days. The flavors actually deepen and meld together over the first 2-3 days, so leftovers might taste even better than the fresh version. To prevent the cheesecake from absorbing fridge odors, wrap it tightly in plastic wrap or store it in an airtight container.
Freezing Instructions: This cheesecake freezes beautifully. Place the fully chilled cheesecake (without toppings) in the freezer for 1-2 hours until firm. Then wrap it tightly in plastic wrap, followed by a layer of aluminum foil. Freeze for up to 3 months. To thaw, transfer to the refrigerator and let it thaw overnight. Add fresh toppings after thawing. I always make an extra cheesecake during the holidays to freeze for a rainy day—it’s like finding a gift to your future self.
Reheating: Cheesecake is best served cold, so I don’t recommend reheating it. However, if you prefer it slightly warm, let a slice sit at room temperature for 30 minutes or microwave it for 10-15 seconds on low power. Just be careful—it can go from perfectly soft to melted in seconds.
Nutritional Information & Benefits
Let’s be honest—cheesecake isn’t health food. But that doesn’t mean it can’t have a place in a balanced diet, especially during the holidays when indulgence is part of the joy. Here’s a rough breakdown of what you’re getting in each slice.
| Nutrient | Amount Per Slice (1/12 of recipe) |
|---|---|
| Calories | ~420 |
| Total Fat | 28g |
| Saturated Fat | 16g |
| Cholesterol | 135mg |
| Sodium | 350mg |
| Total Carbohydrates | 36g |
| Dietary Fiber | 1g |
| Sugars | 28g |
| Protein | 8g |
| Calcium | 10% DV |
| Vitamin A | 15% DV |
Health Highlights: While this isn’t a low-calorie dessert, it does offer some nutritional value. The cream cheese provides calcium and protein, which help with bone health and muscle repair. The eggs add high-quality protein and essential vitamins like B12 and D. And the nutmeg in the crust contains antioxidants and anti-inflammatory compounds—though in small amounts, every little bit helps.
Dietary Considerations: This recipe contains dairy, eggs, and gluten (from the cookies and flour). For a gluten-free version, use gluten-free cookies and cornstarch. For a dairy-free version, use dairy-free cream cheese and coconut cream. The recipe is naturally vegetarian and can be made nut-free by ensuring your cookies are nut-free.
My Perspective: I believe in balance. During the holidays, I don’t stress about calories or macros. I enjoy a slice of this cheesecake, savor every bite, and move on. Food is about joy, connection, and celebration—and this cheesecake delivers all three. If you’re looking for a lighter option, you can reduce the sugar or use low-fat cream cheese, but honestly, I think the full-fat version is worth the splurge.
Conclusion
So there you have it—my best homemade eggnog cheesecake with nutmeg crust. It’s creamy, spiced, and absolutely perfect for the holiday season. Whether you’re serving it at a Christmas party, bringing it to a New Year’s Eve gathering, or just treating yourself on a cozy December evening, this cheesecake delivers every time.
What I love most about this recipe is how it brings people together. The first time I made it, I brought it to a small holiday dinner with friends, and everyone kept going back for seconds. There’s something about that combination of rich, creamy cheesecake and warm, aromatic spices that just feels like the holidays. It’s comfort in dessert form.
I’d love to hear how yours turns out! Did you try any of the variations? Did you add your own twist? Drop a comment below and let me know. And if you share a photo on social media, tag me—I love seeing your creations. Honestly, this recipe is meant to be shared, so go ahead and pass it along to someone who needs a little holiday cheer.
Happy baking, and may your holidays be filled with good food, good company, and at least one slice of this incredible cheesecake. You’ve got this!
Frequently Asked Questions
Can I use low-fat eggnog for this recipe?
I don’t recommend it. Low-fat eggnog has a higher water content, which can make the cheesecake filling runny and prevent it from setting properly. Full-fat eggnog gives you that rich, creamy texture that makes this dessert so indulgent. If you’re watching calories, consider reducing the sugar slightly instead.
Why did my cheesecake crack?
Cracks are usually caused by overbaking, overmixing, or sudden temperature changes. Make sure you take the cheesecake out of the oven when the center is still slightly jiggly. Cool it gradually—first in the turned-off oven with the door cracked, then at room temperature, then in the fridge. And don’t overmix the batter once you add the eggs.
Can I make this cheesecake ahead of time?
Absolutely! In fact, I recommend it. This cheesecake needs at least 6 hours to chill, but it’s even better after 24 hours. The flavors meld together and the texture becomes perfectly creamy. You can make it up to 2 days in advance and keep it covered in the refrigerator. It also freezes beautifully for up to 3 months.
How do I know when the cheesecake is done baking?
The edges should look set and slightly puffed, but the center should still jiggle when you gently shake the pan. It should look a bit underdone in the middle—like it’s not quite set. The residual heat will continue to cook it as it cools. If the center looks completely firm, it’s overbaked. Trust the jiggle!
Can I use pre-ground nutmeg instead of fresh?
You can, but fresh nutmeg really does make a difference. Pre-ground nutmeg loses its volatile oils over time and can taste flat or dusty. Freshly grated nutmeg has a bright, aromatic, almost floral quality that elevates the entire cheesecake. A whole nutmeg lasts forever in your spice drawer, and a Microplane makes grating it effortless. It’s worth the extra 30 seconds.
Pin This Recipe!
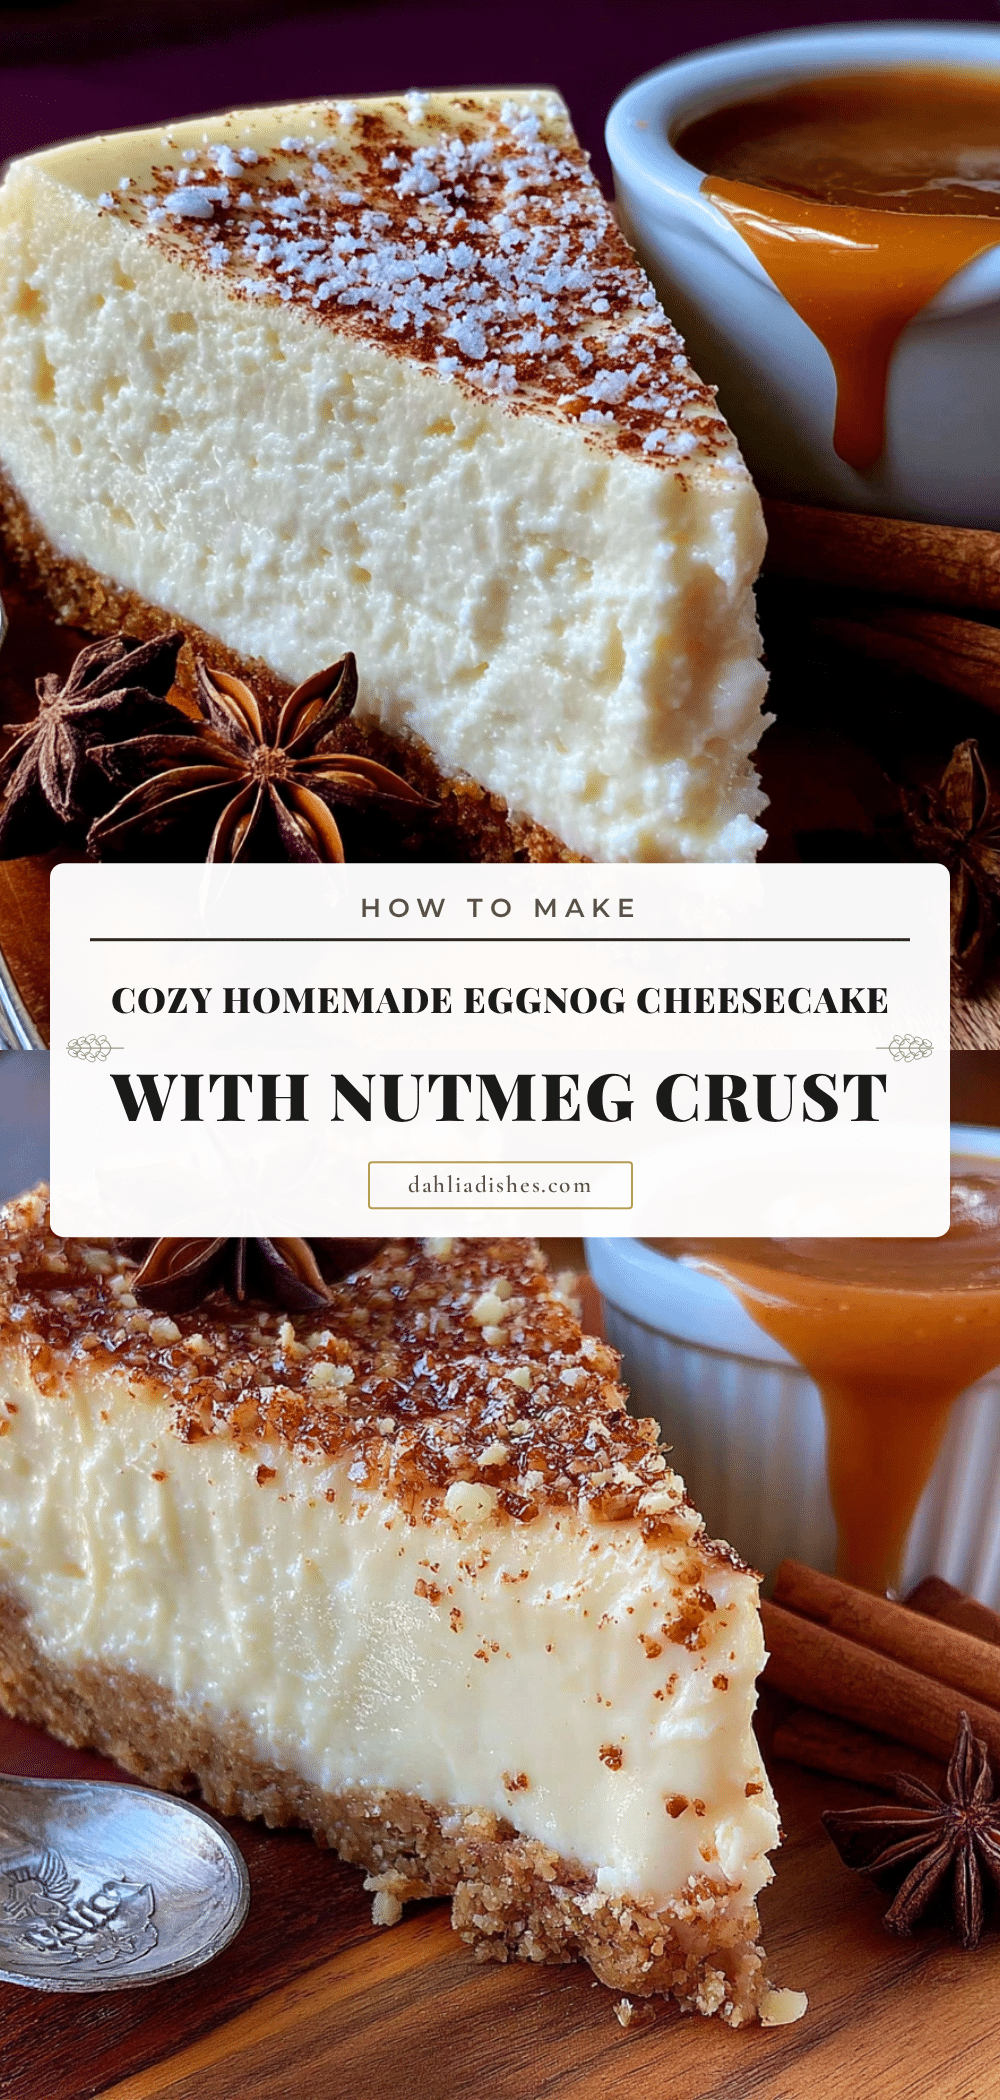
Best Homemade Eggnog Cheesecake Recipe (Easy & Creamy)
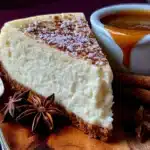
A rich, creamy eggnog cheesecake with a warm nutmeg cookie crust, perfect for holiday celebrations. This easy recipe delivers a silky, spiced dessert that’s sure to impress.
- Prep Time: 20 minutes
- Cook Time: 55-65 minutes
- Total Time: 1 hour 20 minutes (plus 6 hours chilling)
- Yield: 12 servings 1x
- Category: Dessert
- Cuisine: American
Ingredients
- 1 ½ cups crushed nutmeg cookies (about 12–15 cookies, such as speculoos or Biscoff)
- 5 tablespoons unsalted butter, melted
- 2 tablespoons granulated sugar
- ¼ teaspoon salt
- 32 ounces (4 blocks) cream cheese, softened
- 1 cup granulated sugar
- 3 large eggs, room temperature
- 1 ½ cups eggnog (full-fat)
- 1 teaspoon vanilla extract
- 1 teaspoon freshly grated nutmeg
- ½ teaspoon ground cinnamon
- ¼ teaspoon salt
- 2 tablespoons all-purpose flour
- Whipped cream (for topping, optional)
- Extra freshly grated nutmeg (for garnish, optional)
- Caramel sauce (for topping, optional)
Instructions
- Preheat oven to 325°F (163°C). Place a large pot of water on the stove to boil for the water bath.
- Make the nutmeg crust: In a food processor, pulse nutmeg cookies into fine crumbs. Transfer to a medium bowl, add melted butter, sugar, and salt. Stir until mixture resembles wet sand and holds together when pressed.
- Press the crust into a 9-inch springform pan, using the bottom of a measuring cup to press firmly and evenly into the bottom and about 1 inch up the sides. Bake for 10 minutes, then set aside to cool. Leave the oven on.
- Prepare the springform pan for the water bath: Tear off two large sheets of heavy-duty aluminum foil and wrap tightly around the bottom and sides of the springform pan. Place the wrapped pan in a large roasting pan.
- Beat the cream cheese: In a large mixing bowl, beat softened cream cheese with an electric mixer on medium speed until smooth and creamy, about 2 minutes. Scrape down the sides and bottom of the bowl.
- Add the sugar: Gradually add sugar and beat until well combined, about 1 minute. Scrape down the bowl again.
- Add the eggs one at a time: Crack each egg into a small bowl, then add to the cream cheese mixture. Beat on low speed after each addition until just combined.
- Mix in the wet ingredients: Add eggnog and vanilla extract, then beat on low speed until just combined.
- Add the dry ingredients: Sprinkle freshly grated nutmeg, cinnamon, salt, and flour over the batter. Beat on low speed until just combined. Scrape down the bowl and give a gentle stir with a spatula.
- Pour and smooth: Pour the filling into the cooled crust. Use a spatula to gently smooth the top. Tap the pan on the counter a few times to release air bubbles.
- Create the water bath: Carefully pour boiling water into the roasting pan until it reaches about halfway up the sides of the springform pan.
- Bake at 325°F (163°C) for 55-65 minutes, until edges are set and center still jiggles slightly when shaken.
- Cool slowly: Turn off the oven and crack the oven door open. Let cheesecake sit in warm oven for 1 hour. Remove from water bath and place on a cooling rack. Run a knife around the edge of the pan to loosen. Let cool completely at room temperature, about 2 hours.
- Chill overnight: Cover cheesecake with plastic wrap and refrigerate for at least 6 hours, preferably overnight.
- Serve: Remove sides of springform pan. Slice with a sharp knife dipped in hot water (wipe dry between cuts). Top with whipped cream and a dusting of freshly grated nutmeg.
Notes
Room temperature ingredients are crucial for a smooth texture. Do not overmix the batter to avoid cracks. The water bath helps prevent cracking. Cool the cheesecake gradually to avoid thermal shock. For clean slices, dip a sharp knife in hot water and wipe dry between cuts.
Nutrition
- Serving Size: 1 slice (1/12 of rec
- Calories: 420
- Sugar: 28
- Sodium: 350
- Fat: 28
- Saturated Fat: 16
- Carbohydrates: 36
- Fiber: 1
- Protein: 8
Keywords: eggnog cheesecake, holiday dessert, Christmas cheesecake, nutmeg crust, creamy cheesecake, easy cheesecake recipe