Love this? Save it for later!
Share the inspiration with your friends
I was supposed to be making a pumpkin pie. That was the plan, anyway. I had the can of pumpkin puree, the evaporated milk, the whole lineup of spices sitting on the counter. But somewhere between pulling out the mixing bowls and realizing my pie plate was still dirty from last week’s quiche, things went sideways. The gingersnap cookies I’d bought for a quick crust? I crushed them without thinking. The cream cheese I’d planned to use for something else entirely? It was sitting there, looking at me. And honestly, I was already tired. It was a Tuesday night, I’d worked late, and the idea of rolling out pie dough felt like a personal insult. So I just started throwing things together. Cream cheese, sugar, pumpkin, spices. I poured it over that crushed gingersnap crust, slid it into the oven, and waited for it to be a disaster. Maybe you’ve been there—that moment when you’re convinced you’ve just wasted good ingredients on a bad idea.
What came out of the oven was nothing like the plan. And better. Way better. The crust was this perfect, spicy, crunchy base that didn’t get soggy. The filling was creamy but firm, with just the right tang from the cream cheese cutting through the sweet pumpkin. I stood there at the counter, eating a piece still warm, and I actually laughed. I mean, I’d messed up so thoroughly, and somehow ended up with the best thing I’d made all month. That’s the thing about these Easy Pumpkin Cheesecake Bars with Gingersnap Crust. They weren’t supposed to exist. But now I can’t imagine fall without them. They’re the recipe I make when I want the flavor of a fancy dessert without the fuss. And honestly? They taste like the happy accident that just kept giving.
Why You’ll Love This Recipe
Let me tell you why these Easy Pumpkin Cheesecake Bars with Gingersnap Crust have become my go-to fall dessert. First off, they come together in under 30 minutes of active prep time. I’m not kidding. You can have these in the oven while you’re still cleaning up from dinner. For those busy weeknights when you want something special but don’t have the energy for a full production, this is it.
- Quick & Easy : From start to finish, you’re looking at about 45 minutes total, including baking. The hardest part is waiting for them to cool.
- Simple Ingredients : You probably have most of this stuff already. Cream cheese, pumpkin puree, sugar, eggs, and those gingersnap cookies from the store. No fancy grocery trips required.
- Perfect for Weeknights : This is the dessert you make on a random Wednesday when you just need something good. It’s not just for holidays.
- Crowd-Pleaser : I’ve brought these to potlucks, family dinners, and even to the office. People go crazy for them. Kids love them, adults love them, everyone wins.
- Unbelievably Delicious : The combo of that spicy, crunchy gingersnap crust with the smooth, tangy pumpkin cheesecake filling is next-level. It’s comfort food in bar form.
What makes this recipe different from all the other pumpkin cheesecake bars out there? It’s the crust, honestly. Most recipes use graham crackers, which are fine, but they’re kind of boring. The gingersnaps add this deep, molasses-y, spicy kick that just works with the pumpkin. And I’ve tested this version about six times to get the ratios right. Not too thick, not too thin. The filling is perfectly balanced—not too sweet, with just enough tang. It’s the kind of dessert that makes you close your eyes after the first bite. It’s comfort food, but faster and easier, with the same soul-soothing satisfaction. Perfect for impressing guests without stress, or turning a simple Tuesday into something memorable.
What Ingredients You Will Need
This recipe uses simple, straightforward ingredients to deliver big flavor without the fuss. Most of these are pantry staples or easy to find at any grocery store.
For the Gingersnap Crust
- 2 cups (about 8 ounces) gingersnap cookies, finely crushed — I recommend using store-bought gingersnaps for convenience. Look for a brand that’s not too soft; you want them crunchy. Nabisco’s are my go-to.
- 6 tablespoons unsalted butter, melted — This binds the crust together. You can use salted butter if that’s all you have, just reduce the added salt in the filling a tiny bit.
- 2 tablespoons granulated sugar — Just a little sweetness to balance the spice of the gingersnaps.
- Pinch of salt — Optional, but it helps bring out the flavors.
For the Pumpkin Cheesecake Filling
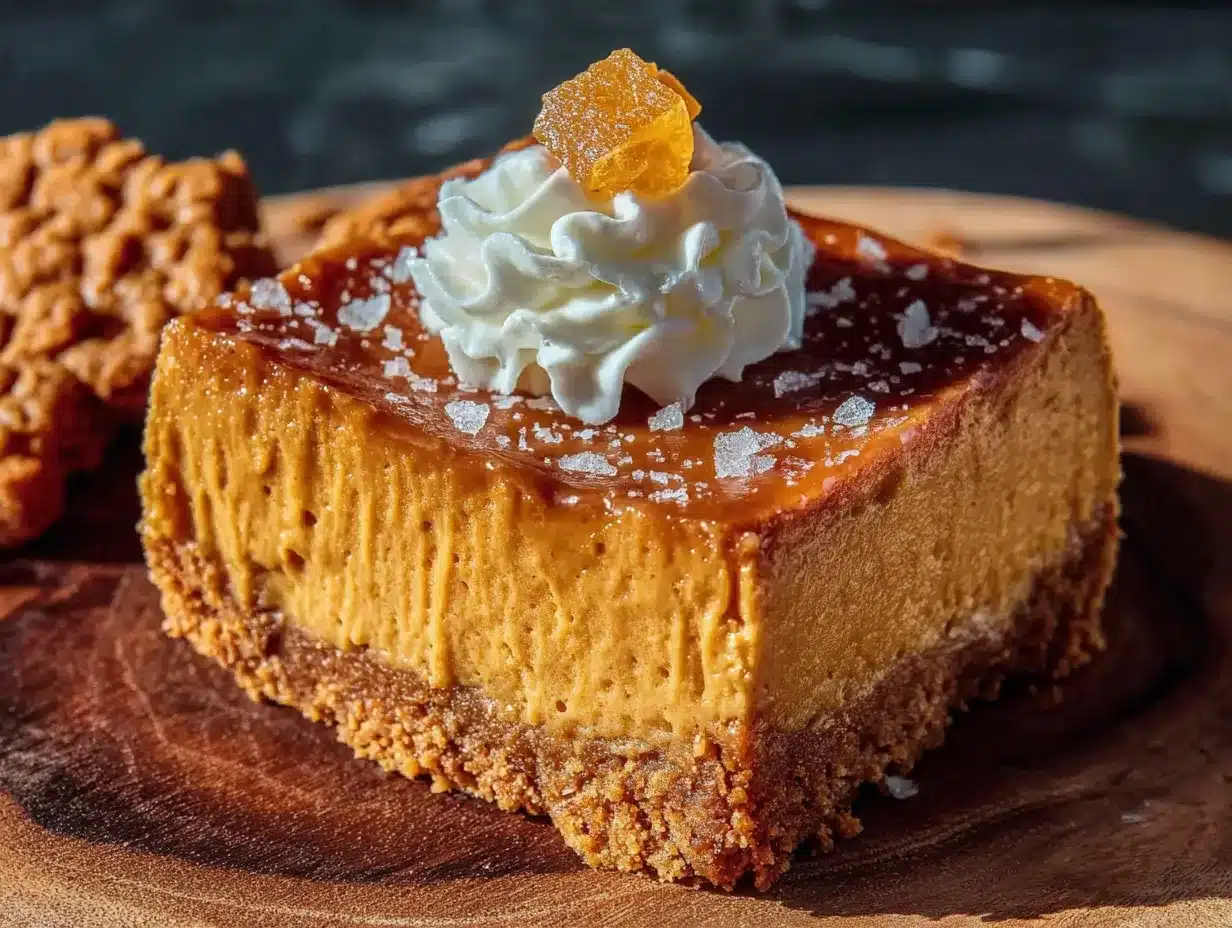
- 16 ounces (two 8-ounce blocks) cream cheese, softened — Full-fat is best here for that creamy, rich texture. Let it sit out for about 30 minutes before you start. If you’re in a hurry, you can microwave it in 10-second bursts, but be careful not to melt it.
- ¾ cup granulated sugar — Just enough sweetness without being cloying.
- 2 large eggs, room temperature — Room temperature eggs mix in more smoothly. If you forgot to take them out, put them in a bowl of warm water for 5 minutes.
- 1 cup pumpkin puree — Not pumpkin pie filling! Make sure you get pure pumpkin puree. Libby’s is my trusted brand. (Adds richness and that perfect pumpkin flavor)
- 1 teaspoon vanilla extract — Pure vanilla extract if you have it, but imitation works fine too.
- 1 teaspoon pumpkin pie spice — You can use a store-bought blend or make your own with cinnamon, nutmeg, ginger, and cloves.
- ½ teaspoon ground cinnamon — Extra warmth and depth.
- ¼ teaspoon salt — Balances the sweetness and brings out the tang of the cream cheese.
Substitution Guidance
If you need a gluten-free option, use gluten-free gingersnap cookies for the crust. For a dairy-free version, you can try a dairy-free cream cheese alternative, but the texture might be slightly softer. I’ve tested it with Kite Hill’s brand, and it works okay. If you don’t have pumpkin pie spice, just mix ½ teaspoon cinnamon, ¼ teaspoon ginger, ¼ teaspoon nutmeg, and a pinch of cloves. Simple.
Equipment Needed
You don’t need a lot of fancy equipment for these Easy Pumpkin Cheesecake Bars with Gingersnap Crust. Here’s what you’ll need:
- 9×9-inch baking pan — This is the perfect size for these bars. An 8×8 works too, but the bars will be slightly thicker and may need a few extra minutes of baking time.
- Mixing bowls — One medium bowl for the crust, one large bowl for the filling.
- Electric hand mixer or stand mixer — You can mix by hand if you want a workout, but a mixer makes the filling smooth and creamy without lumps. I’ve used both, and the mixer is just easier.
- Ziploc bag or food processor — For crushing the gingersnaps. A rolling pin works too if you want to release some frustration.
- Spatula — For scraping every last bit of filling into the pan. Don’t waste any!
- Measuring cups and spoons — Standard stuff.
- Parchment paper — This makes lifting the bars out of the pan so much easier. Trust me on this one.
If you don’t have a 9×9 pan, you can use a 9-inch round cake pan. Just adjust the baking time slightly. And if you’re on a budget, skip the food processor and just crush the cookies in a bag with a rolling pin. It’s a little more work, but it gets the job done.
Preparation Method
Alright, let’s get into it. Here’s how to make these Easy Pumpkin Cheesecake Bars with Gingersnap Crust step by step.
- Preheat your oven to 350°F (175°C). Line your 9×9-inch baking pan with parchment paper, leaving some overhang on two sides. This will be your handle to lift the bars out later. Spray the parchment lightly with non-stick spray just to be safe.
- Make the crust. Put the gingersnap cookies in a ziploc bag and crush them with a rolling pin until you have fine crumbs. Or use a food processor if you’re feeling fancy. You want about 2 cups of crumbs. Pour the crumbs into a medium bowl, add the melted butter, 2 tablespoons of sugar, and a pinch of salt. Stir with a fork until everything is evenly moistened. It should look like wet sand.
- Press the crust into the pan. Dump the crumb mixture into your prepared pan. Use the bottom of a measuring cup or a flat glass to press it down firmly and evenly. Don’t skip this step—a firmly packed crust holds together better. Pop the pan in the fridge while you make the filling. This helps the crust set up.
- Beat the cream cheese. In a large bowl, beat the softened cream cheese with an electric mixer on medium speed until it’s smooth and creamy, about 1 minute. Scrape down the sides of the bowl with a spatula.
- Add the sugar. Add the ¾ cup of sugar and beat until combined, another 30 seconds. Scrape the bowl again.
- Add the eggs one at a time. Beat in the first egg on low speed until just combined. Then add the second egg and beat until smooth. Don’t overmix here—you don’t want to incorporate too much air, which can cause cracks.
- Add the pumpkin and flavorings. Add the pumpkin puree, vanilla extract, pumpkin pie spice, cinnamon, and salt. Mix on low speed until everything is combined and the filling is smooth and a beautiful orange color. Scrape the bowl one last time.
- Pour the filling over the crust. Take the crust out of the fridge. Pour the cheesecake filling over the crust and spread it evenly with a spatula. Give the pan a gentle tap on the counter to release any air bubbles.
- Bake. Place the pan in the preheated oven and bake for 30-35 minutes. The edges should be set and slightly puffed, but the center should still have a slight jiggle when you gently shake the pan. That’s the sign it’s done. If the center is completely firm, it’s overbaked.
- Cool completely. Let the bars cool in the pan on a wire rack for about 1 hour. Then transfer the pan to the refrigerator and chill for at least 3 hours, or overnight. This is crucial. The bars need to be fully chilled to set up properly and cut cleanly.
- Cut and serve. Use the parchment paper overhang to lift the entire block of cheesecake bars out of the pan. Place it on a cutting board. Use a sharp knife to cut into squares. For clean cuts, wipe the knife clean between each cut.
Sensory cues: When you press the crust, it should feel firm and hold together. The filling should be smooth and creamy, not lumpy. When you tap the pan, you’ll see the surface ripple slightly. The finished bars should have a pale golden color around the edges and a creamy, slightly darker center.
Cooking Tips & Techniques
I’ve made these Easy Pumpkin Cheesecake Bars with Gingersnap Crust more times than I can count, and I’ve learned a few things along the way. Let me share some tips so you don’t make the same mistakes I did.
Don’t overmix the filling. This is the number one mistake people make. When you beat too much air into the cream cheese mixture, it puffs up in the oven and then collapses, causing cracks. Mix until just combined. It’s okay if there’s a tiny lump or two—they’ll melt during baking.
Use room temperature ingredients. Cold cream cheese and cold eggs don’t mix well. You’ll end up with a lumpy filling. Take the cream cheese and eggs out of the fridge about 30 minutes before you start. If you forget, cut the cream cheese into small cubes to help it soften faster.
Press the crust firmly. A loose crust will crumble when you try to cut the bars. Use the bottom of a glass or a measuring cup to really pack it down. I once got lazy and just used my fingers, and the crust fell apart completely. Learn from my mistake.
Don’t overbake. The center should still jiggle when you take it out of the oven. It will continue to set as it cools. Overbaking leads to dry, crumbly cheesecake, and nobody wants that.
Be patient with chilling. I know it’s hard to wait, but these bars need at least 3 hours in the fridge. Overnight is even better. The flavors meld together and the texture becomes perfectly creamy. I’ve tried cutting them after just an hour, and it was a mess. Trust the process.
Use a sharp knife for clean cuts. A dull knife will drag through the cheesecake and make a mess. Run the knife under hot water, wipe it dry, then cut. Wipe the blade clean between each cut. This gives you those beautiful, bakery-style squares.
Variations & Adaptations
One of the best things about this recipe is how easy it is to change up. Here are some variations I’ve tried and loved.
Gluten-Free Version
Swap the regular gingersnap cookies for gluten-free gingersnaps. The rest of the recipe is naturally gluten-free. I’ve tested this with a few different brands, and they all work great. Just make sure to check the labels.
Dairy-Free Version
Use a dairy-free cream cheese alternative, like Kite Hill or Tofutti. The texture will be slightly softer, but the flavor is still fantastic. Use a dairy-free butter substitute for the crust as well. I’ve done this for a friend who’s lactose intolerant, and she said it was the best thing she’d eaten in months.
Spice It Up
If you like things a little more intense, add an extra ½ teaspoon of ginger or a pinch of cayenne pepper to the filling. The heat plays beautifully with the sweet pumpkin and creamy cheesecake. I did this once on a whim, and it was surprisingly good.
Nutty Crust
For extra texture, add ¼ cup of finely chopped pecans or walnuts to the crust mixture. Toast them first for even more flavor. This adds a nice crunch and a nutty depth that pairs well with the gingersnaps.
Chocolate Drizzle
After the bars have chilled and been cut, drizzle melted dark chocolate over the top. The bitterness of the chocolate cuts through the sweetness and makes it feel really fancy. I did this for a holiday party, and people thought I’d bought them from a bakery.
Serving & Storage Suggestions
These Easy Pumpkin Cheesecake Bars with Gingersnap Crust are best served cold, straight from the fridge. The texture is firm and creamy, and the flavors are at their peak. If you want to get fancy, let them sit at room temperature for about 10 minutes before serving—they’ll soften up just a touch.
For presentation, I like to cut them into neat squares and arrange them on a platter. A dollop of whipped cream on top is always a good idea. A sprinkle of cinnamon or a few crushed gingersnap crumbs adds a nice finishing touch. They pair beautifully with a cup of hot coffee or a glass of cold milk.
Storage: Keep the bars in an airtight container in the refrigerator. They’ll stay fresh for up to 5 days. I’ve found that the flavors actually get better after a day or two—the spices meld together and the crust softens slightly. If you want to keep them longer, you can freeze them.
Freezing: Wrap individual bars in plastic wrap, then place them in a freezer-safe bag or container. They’ll keep for up to 3 months. To serve, just thaw them in the refrigerator overnight. I always keep a stash in the freezer for when a pumpkin craving hits out of season.
Reheating: Honestly, I prefer these cold. But if you want a warm dessert, you can microwave a bar for about 10-15 seconds. It won’t be as firm, but it will be warm and comforting. Not recommended if you’re serving them to guests, though.
Nutritional Information & Benefits
Here’s a rough estimate of the nutritional information for one bar (based on 16 servings):
| Nutrient | Amount per Serving |
|---|---|
| Calories | 280 |
| Total Fat | 18g |
| Saturated Fat | 10g |
| Cholesterol | 75mg |
| Sodium | 220mg |
| Total Carbohydrates | 28g |
| Dietary Fiber | 1g |
| Sugars | 20g |
| Protein | 5g |
Pumpkin is packed with vitamin A, which is great for your eyes and immune system. It’s also a good source of fiber, which helps with digestion. The cream cheese provides calcium and protein, though it’s also where most of the fat comes from. The ginger in the crust has anti-inflammatory properties, so there’s that too. Look, this isn’t health food, but it’s not terrible either. It’s a treat, and treats are good for the soul. I always say, everything in moderation—including moderation.
For those with dietary restrictions: This recipe contains gluten (from the cookies), dairy (from the butter and cream cheese), and eggs. It’s not suitable for vegans or those with celiac disease without the substitutions mentioned above.
Conclusion
These Easy Pumpkin Cheesecake Bars with Gingersnap Crust are the kind of recipe that makes you look like a hero with almost no effort. They’re creamy, spicy, sweet, and satisfying—everything you want in a fall dessert. And they came from a mistake, which is kind of my favorite part. I love that something so good came from me just being tired and distracted on a Tuesday night.
I really hope you give these a try. Don’t be afraid to make them your own—add more spice, swap the crust, drizzle some chocolate on top. That’s the beauty of a simple recipe like this. It’s a starting point for your own kitchen adventures. And if you do make them, I’d love to hear about it. Leave a comment below and tell me how they turned out. Did you add anything? Change anything? Did your family love them as much as mine does? Share your photos, your stories, your happy accidents. Because honestly, those are the best recipes of all.
Happy baking, friends. And remember—sometimes the best things come from when things don’t go according to plan.
Frequently Asked Questions
Can I use a different type of cookie for the crust?
Absolutely! Graham crackers, shortbread cookies, or even vanilla wafers would work. The flavor will be different, of course, but it’ll still be delicious. I’ve used speculoos cookies before and it was amazing.
Why did my cheesecake crack?
Cracks usually happen from overmixing or overbaking. Make sure you mix the filling on low speed just until combined, and take the bars out of the oven while the center still has a slight jiggle. Also, letting them cool slowly in the oven with the door cracked open can help prevent cracks.
Can I make these bars ahead of time?
Yes, and I actually recommend it! They taste even better after a day in the fridge. You can make them up to 3 days in advance. Just keep them covered in the refrigerator.
Can I use fresh pumpkin instead of canned?
You can, but you’ll need to cook and puree the pumpkin first, then drain off as much liquid as possible. Fresh pumpkin has more water than canned, which can make the filling too soft. I usually stick with canned for consistency, but if you have fresh, go for it.
How do I know when the bars are done baking?
The edges should be set and slightly puffed, but the center should still jiggle when you gently shake the pan. If you insert a toothpick near the center, it should come out with a few moist crumbs, not wet batter. The center will firm up as it cools.
Pin This Recipe!
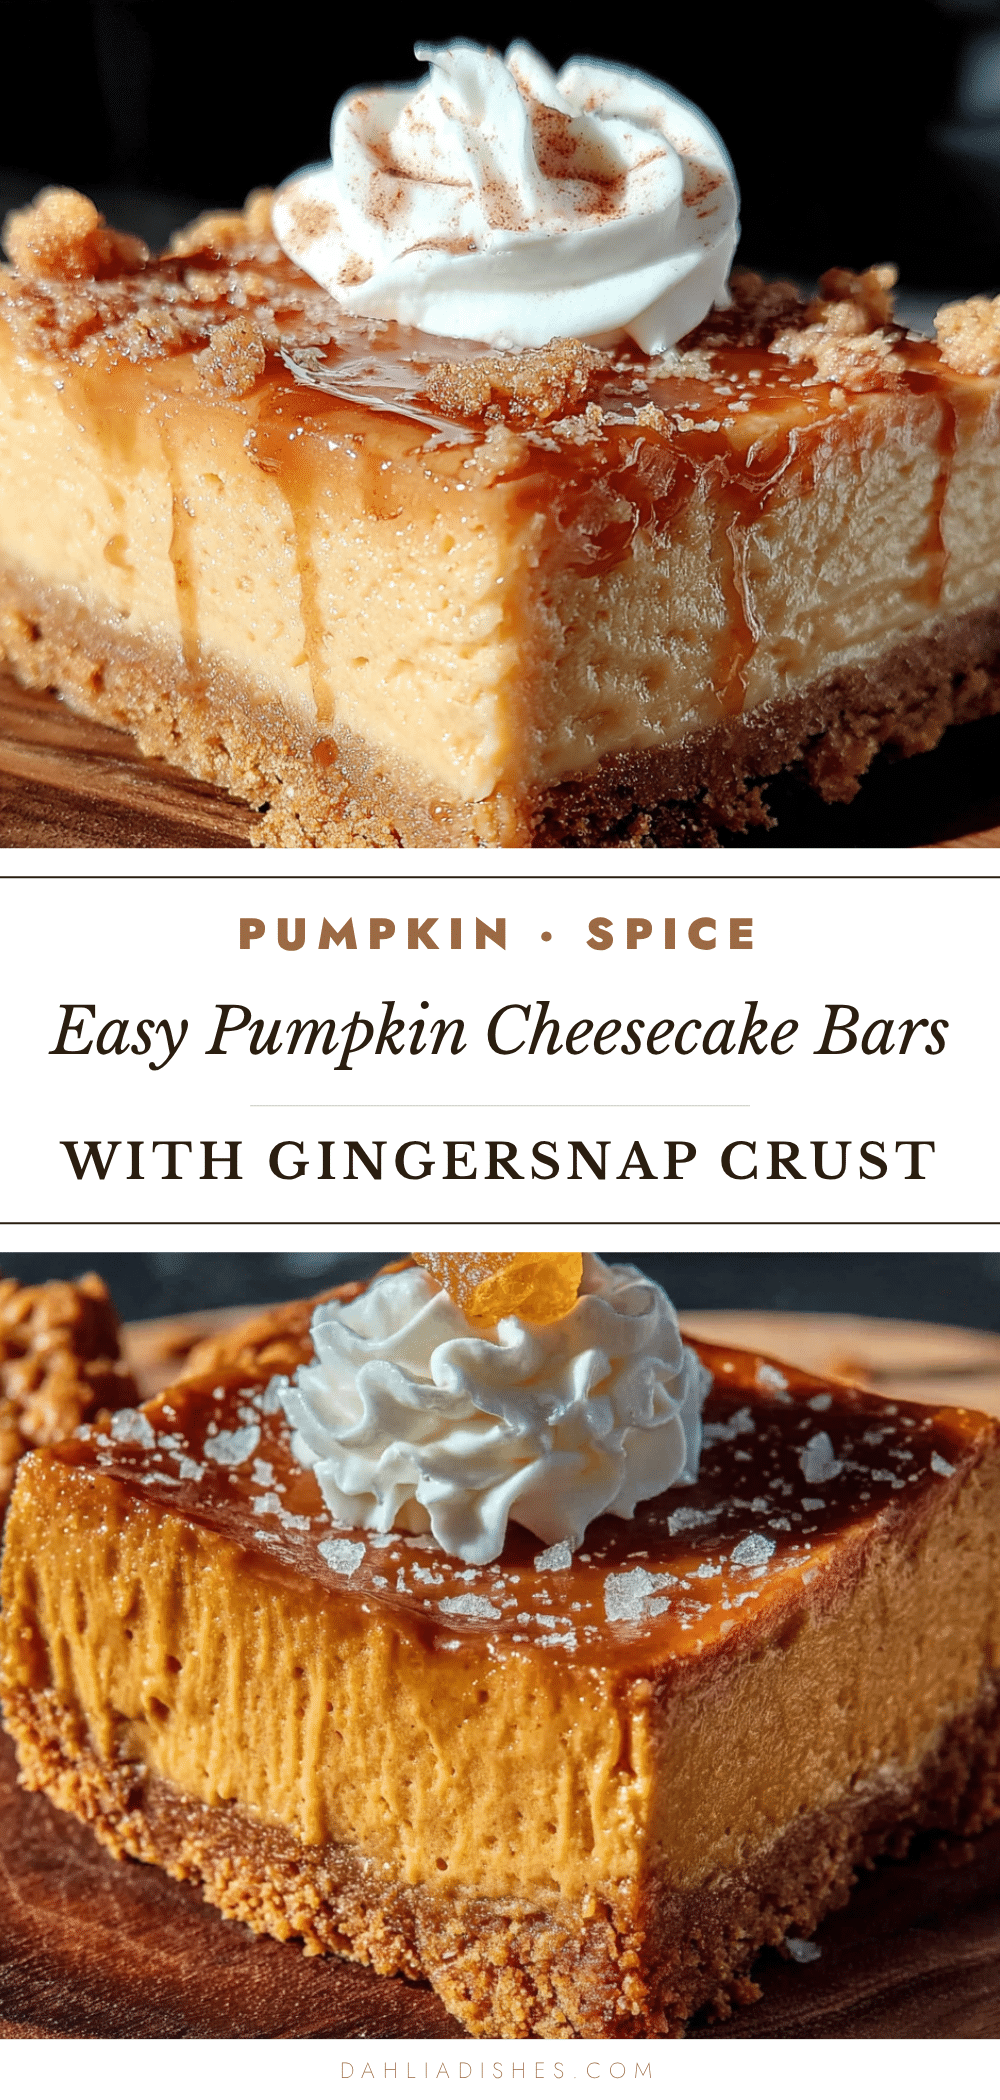
Easy Pumpkin Cheesecake Bars: Best Gingersnap Crust Recipe
These Easy Pumpkin Cheesecake Bars with Gingersnap Crust are a quick and delicious fall dessert, featuring a spicy, crunchy gingersnap crust and a creamy, tangy pumpkin cheesecake filling. Perfect for weeknights or holiday gatherings, they come together in under 30 minutes of active prep time.
- Prep Time: 15 minutes
- Cook Time: 30 minutes
- Total Time: 45 minutes
- Yield: 16 servings 1x
- Category: Dessert
- Cuisine: American
Ingredients
- 2 cups (about 8 ounces) gingersnap cookies, finely crushed
- 6 tablespoons unsalted butter, melted
- 2 tablespoons granulated sugar
- Pinch of salt
- 16 ounces (two 8-ounce blocks) cream cheese, softened
- ¾ cup granulated sugar
- 2 large eggs, room temperature
- 1 cup pumpkin puree
- 1 teaspoon vanilla extract
- 1 teaspoon pumpkin pie spice
- ½ teaspoon ground cinnamon
- ¼ teaspoon salt
Instructions
- Preheat your oven to 350°F (175°C). Line your 9×9-inch baking pan with parchment paper, leaving some overhang on two sides. Spray the parchment lightly with non-stick spray.
- Make the crust: Put the gingersnap cookies in a ziploc bag and crush them with a rolling pin until you have fine crumbs (or use a food processor). Pour the crumbs into a medium bowl, add the melted butter, 2 tablespoons of sugar, and a pinch of salt. Stir with a fork until everything is evenly moistened.
- Press the crust into the pan: Dump the crumb mixture into your prepared pan. Use the bottom of a measuring cup or a flat glass to press it down firmly and evenly. Pop the pan in the fridge while you make the filling.
- Beat the cream cheese: In a large bowl, beat the softened cream cheese with an electric mixer on medium speed until smooth and creamy, about 1 minute. Scrape down the sides of the bowl.
- Add the sugar: Add the ¾ cup of sugar and beat until combined, another 30 seconds. Scrape the bowl again.
- Add the eggs one at a time: Beat in the first egg on low speed until just combined. Then add the second egg and beat until smooth. Do not overmix.
- Add the pumpkin and flavorings: Add the pumpkin puree, vanilla extract, pumpkin pie spice, cinnamon, and salt. Mix on low speed until everything is combined and the filling is smooth.
- Pour the filling over the crust: Take the crust out of the fridge. Pour the cheesecake filling over the crust and spread it evenly with a spatula. Give the pan a gentle tap on the counter to release any air bubbles.
- Bake: Place the pan in the preheated oven and bake for 30-35 minutes. The edges should be set and slightly puffed, but the center should still have a slight jiggle when you gently shake the pan.
- Cool completely: Let the bars cool in the pan on a wire rack for about 1 hour. Then transfer the pan to the refrigerator and chill for at least 3 hours, or overnight.
- Cut and serve: Use the parchment paper overhang to lift the entire block of cheesecake bars out of the pan. Place it on a cutting board. Use a sharp knife to cut into squares. For clean cuts, wipe the knife clean between each cut.
Notes
Don’t overmix the filling to avoid cracks. Use room temperature ingredients for a smooth filling. Press the crust firmly to prevent crumbling. Do not overbake; the center should still jiggle. Chill for at least 3 hours for clean cuts. For gluten-free, use gluten-free gingersnaps. For dairy-free, use dairy-free cream cheese and butter alternatives.
Nutrition
- Serving Size: 1 bar
- Calories: 280
- Sugar: 20
- Sodium: 220
- Fat: 18
- Saturated Fat: 10
- Carbohydrates: 28
- Fiber: 1
- Protein: 5
Keywords: pumpkin cheesecake bars, gingersnap crust, easy fall dessert, pumpkin dessert, cheesecake bars


