Love this? Save it for later!
Share the inspiration with your friends
I was standing in the spice aisle at our local market last Tuesday, staring at a jar of flaky sea salt like it held the answers to the universe. My phone buzzed with a text from my friend Jenna: “Friendsgiving is at my place this year. Bring something sweet but not… you know… heavy.” I laughed out loud, right there next to the vanilla extract. Because that’s the thing about Friendsgiving, right? We all want to show up with something impressive, something that says “I care about you and our chosen family,” but nobody wants to spend the next day in a food coma regretting that third helping. And honestly? I’ve been that person. The one who brings the full-fat, full-sugar, absolutely-decadent-but-also-absolutely-draining dessert that tastes amazing but leaves everyone feeling sluggish halfway through the board games.
I almost grabbed a box of pre-made brownie mix—let’s be real, the convenience is tempting when you’re juggling work and life—but then I remembered my aunt’s caramel sauce. The one she used to make every Christmas, standing at the stove in her worn-out slippers, stirring until the sugar turned the color of a sunset. She passed away three years ago, and I haven’t made that sauce since. Maybe that’s why I paused. Maybe that’s why I put the box mix back and started grabbing cocoa powder, applesauce, and a bag of dates instead. I wanted to recreate that feeling—the warmth, the love, the slightly burnt sugar smell that meant something good was coming—but in a way that fit the Friendsgiving vibe. Something lightened up. Something that wouldn’t weigh anyone down.
These Lightened-Up Salted Caramel Brownie Bites are the result of that grocery store moment. They’re fudgy, they’re rich, they’ve got that perfect salty-sweet thing going on, and they use ingredients that won’t leave you reaching for a nap afterward. I mean, I tested them four times before I got it right. The first batch was too dry. The second was too gooey (which sounds like a win but trust me, it was a mess). The third? That one was close. But the fourth—the one I brought to Jenna’s last weekend for a trial run—that one got the “close your eyes and sigh” reaction. You know the one. That’s the reaction we’re going for.
Why You’ll Love These Lightened-Up Salted Caramel Brownie Bites
Let me tell you why these little bites of heaven are about to become your new go-to for every gathering, not just Friendsgiving. I’ve been developing healthier dessert recipes for about six years now, and I’ve learned that the key isn’t taking things away—it’s adding smart swaps that actually work. These brownie bites have been tested by my picky neighbor, my coworker who claims to hate “healthy desserts,” and a table full of friends who had no idea they were eating something lighter. The verdict? They asked for the recipe before I even finished my glass of wine.
- Quick & Easy: These come together in about 35 minutes from start to finish. No complicated steps, no fancy equipment, and definitely no stress. Perfect for when you’re already juggling a million things before hosting or heading to a gathering.
- Simple Ingredients: You probably already have most of these in your pantry. No weird health food store finds, no expensive superfood powders. Just real ingredients that work together beautifully.
- Perfect for Friendsgiving: These are the ideal Friendsgiving dessert—portable, shareable, and impressive without being over-the-top. They sit beautifully on a platter and everyone can grab one (or three) without needing a plate and fork.
- Crowd-Pleaser: I’ve watched people who swear they don’t like “healthy desserts” eat four of these in one sitting. The secret is that they taste indulgent first, and the healthier part is just a bonus.
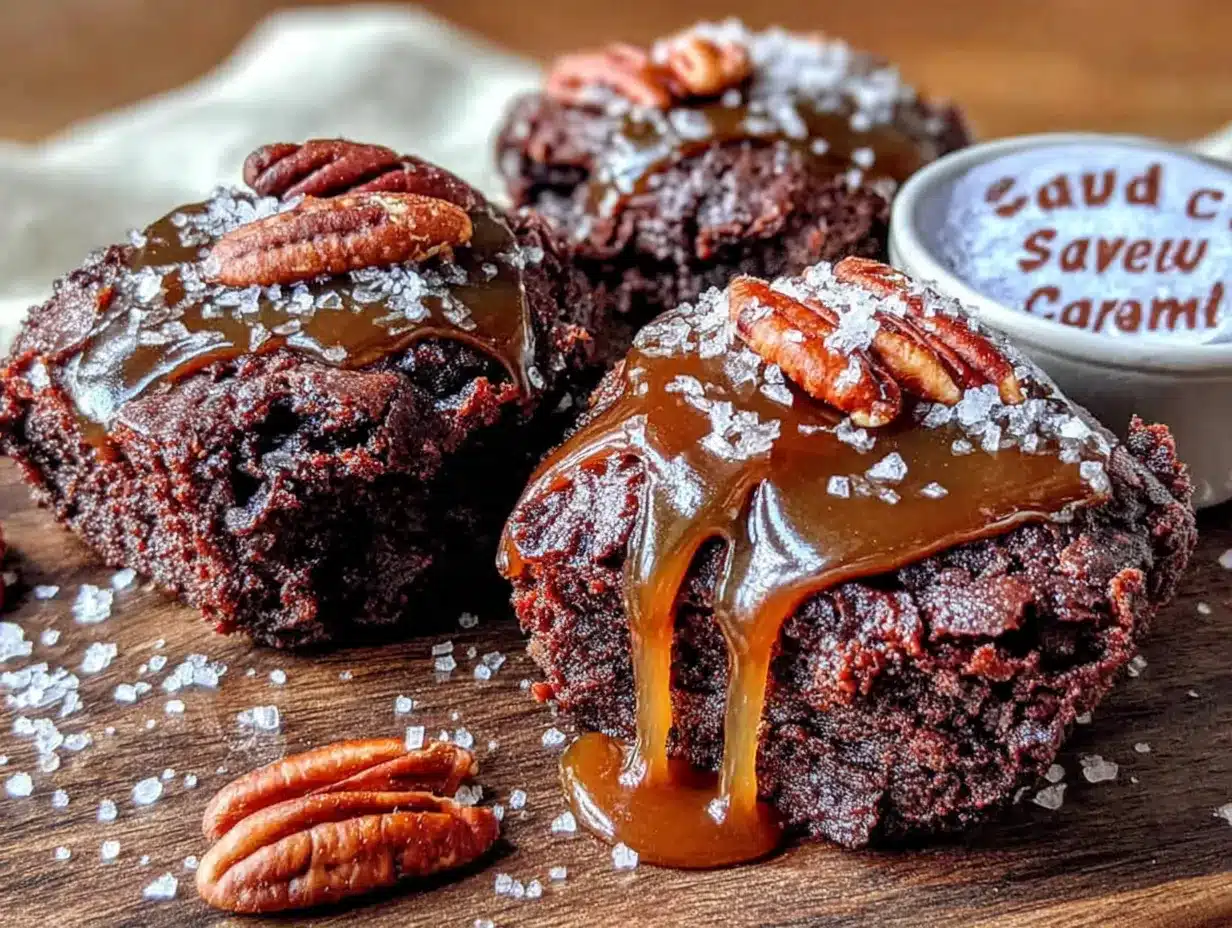
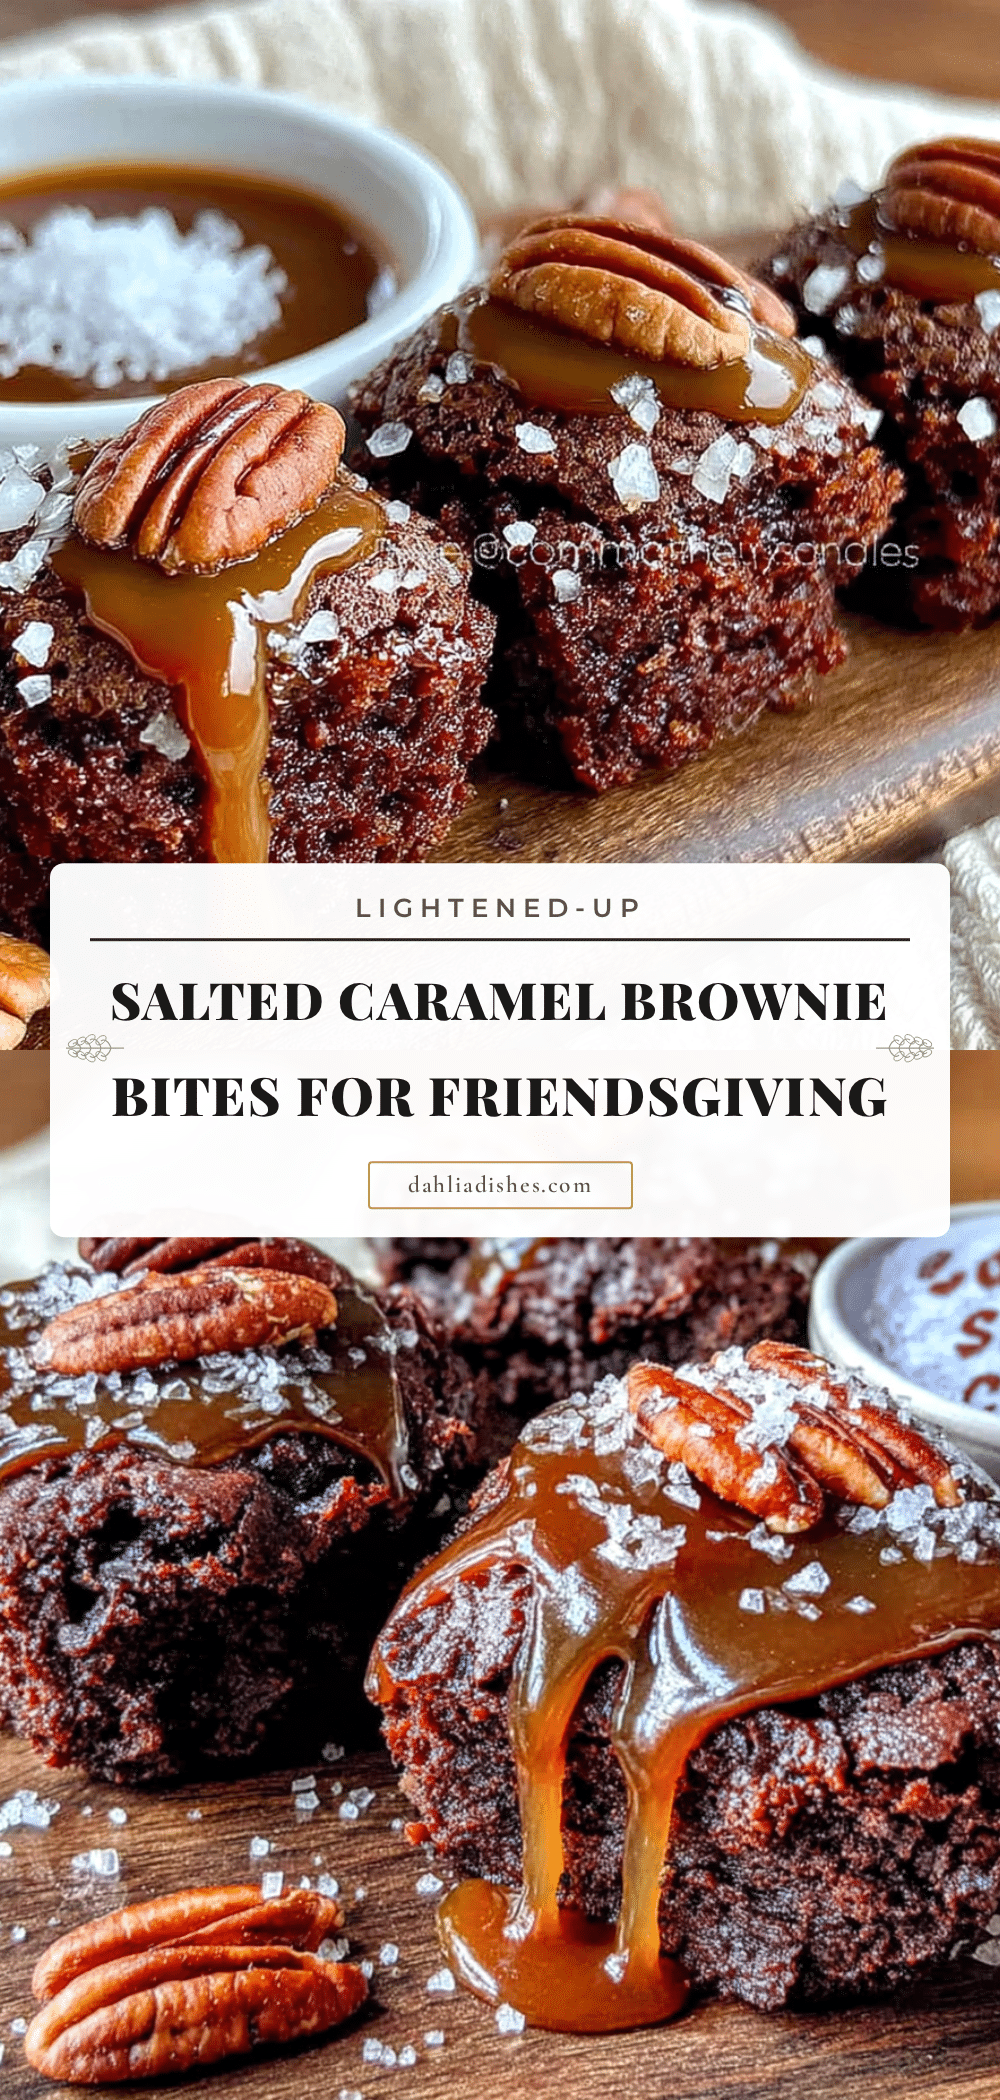
- Unbelievably Delicious: The texture is that perfect brownie edge—slightly crisp on top, fudgy and dense in the middle. The caramel is rich and buttery, and the salt on top? It’s the finishing touch that makes everything pop.
What makes these different from every other healthier brownie recipe out there is the caramel. Most lightened-up versions skip the caramel entirely or use a store-bought sugar-free version that tastes like chemicals. I spent weeks perfecting a date-based caramel that actually tastes like the real thing—rich, smooth, and deeply caramelized. It’s the kind of recipe that makes you feel like you’re getting away with something. And honestly? You kind of are.
These brownie bites are comfort food reimagined. They’ve got the soul-soothing satisfaction of a classic brownie but with ingredients that make you feel good about what you’re eating. They’re perfect for impressing your Friendsgiving crew without spending hours in the kitchen, and they’re the kind of dessert that makes people say “Wait, these are actually good for me?” with genuine surprise in their voices.
What Ingredients You Will Need
This recipe uses simple, wholesome ingredients that come together to create something that tastes far more decadent than it actually is. I’ve tested these with various substitutions, so I’ll share what works and what doesn’t based on my own trial and error.
For the Brownie Bites
- 1/2 cup unsweetened cocoa powder (I prefer using Dutch-processed for a richer, darker flavor, but regular works fine too)
- 1/2 cup almond flour (adds moisture and keeps these gluten-free; you can also use oat flour if you prefer)
- 1/4 cup coconut flour (don’t skip this—it absorbs moisture and gives the brownies that perfect fudgy texture)
- 1/2 teaspoon baking powder
- 1/4 teaspoon salt
- 2 large eggs, room temperature (this matters for even mixing)
- 1/3 cup coconut oil, melted (or use melted butter if you’re not dairy-free)
- 1/2 cup maple syrup (the real stuff, not pancake syrup—it makes a difference in flavor)
- 1 teaspoon vanilla extract
- 1/4 cup unsweetened applesauce (this is my secret ingredient for moisture without extra fat)
For the Date Caramel
- 1 cup Medjool dates, pitted (about 8-10 dates; make sure they’re soft and sticky)
- 1/4 cup warm water (plus more if needed for thinning)
- 2 tablespoons almond butter (smooth, not chunky—this gives the caramel its creamy texture)
- 1 tablespoon coconut oil, melted
- 1/2 teaspoon vanilla extract
- Pinch of salt
For the Topping
- Flaky sea salt (like Maldon or a similar brand—the big flakes make a difference)
- Optional: 2 tablespoons dark chocolate chips (I like Enjoy Life brand for dairy-free, but any dark chocolate works)
A few notes on ingredients: I’ve tried making these with all-purpose flour instead of the almond and coconut flour combo, and they turned out denser and less fudgy. Stick with the flours listed if you can. For the dates, make sure they’re Medjool—they’re naturally sweeter and creamier than regular dates, which means your caramel will be smooth and rich without any added sugar. If your dates feel dry, soak them in warm water for 10 minutes before using.
For the maple syrup, I’ve tested this with honey and agave, and maple syrup gives the best flavor profile for brownies. It’s subtle but it adds a warmth that complements the chocolate perfectly. And the applesauce? I know it sounds weird in brownies, but it replaces some of the oil while keeping the texture moist and tender. You won’t taste it at all, I promise.
Equipment Needed
You don’t need a professional kitchen to make these brownie bites—just a few basics that you probably already have. Here’s what you’ll need:
- Mini muffin tin (this is essential for getting that perfect bite-sized shape; a standard muffin tin works too, but you’ll need to adjust baking time)
- Parchment paper liners or silicone mini muffin cups (trust me on this—these brownies are sticky, and liners make cleanup so much easier)
- Food processor or high-speed blender (for the date caramel; I’ve made it in a regular blender before, but it takes more scraping down and patience)
- Mixing bowls (one medium, one small)
- Whisk
- Spatula
- Measuring cups and spoons
- Small saucepan (if you want to melt the chocolate chips for drizzling)
If you don’t have a mini muffin tin, you can use a regular 12-cup muffin tin and bake for 18-20 minutes instead of 12-14. The texture will be slightly different—more like a traditional brownie—but still delicious. I’ve also made these as bars in an 8×8 pan, baking for about 22 minutes. Just keep an eye on them because ovens vary.
One thing I learned the hard way: don’t skip the liners. My first batch stuck to the pan so badly I had to chip them out with a butter knife, and they looked like a crime scene. Silicone cups are my favorite because they peel right off, but parchment paper liners work great too.
Preparation Method
Alright, let’s get to the fun part. I’ve broken this down into clear steps so you can follow along without any confusion. Take your time, and don’t rush—these are worth every minute.
- Preheat your oven to 350°F (175°C). Line your mini muffin tin with parchment liners or silicone cups. This recipe makes about 24 mini brownie bites, so you’ll need two 12-cup tins or bake in batches.
- Make the date caramel first. In a food processor, combine the pitted Medjool dates, warm water, almond butter, melted coconut oil, vanilla extract, and a pinch of salt. Process for 2-3 minutes, scraping down the sides as needed, until the mixture is completely smooth and creamy. If it’s too thick, add warm water one tablespoon at a time until it reaches a pourable consistency. Set aside. (Pro tip: taste it now and try not to eat it all with a spoon. I’m speaking from experience.)
- Mix the dry ingredients. In a medium bowl, whisk together the cocoa powder, almond flour, coconut flour, baking powder, and salt. Make sure there are no lumps—cocoa powder can be clumpy, so take an extra minute to break them up.
- Mix the wet ingredients. In a small bowl, whisk together the eggs, melted coconut oil, maple syrup, vanilla extract, and applesauce until well combined. The mixture should look smooth and slightly glossy.
- Combine wet and dry. Pour the wet ingredients into the dry ingredients and stir with a spatula until just combined. Don’t overmix—stop as soon as you don’t see any streaks of flour. The batter will be thick and fudgy, almost like a soft cookie dough. That’s exactly what you want.
- Fill the muffin cups. Using a small cookie scoop or a teaspoon, fill each lined muffin cup about 2/3 full with brownie batter. Don’t fill them to the top—these brownies rise slightly, and you want room for the caramel. I usually get exactly 24 bites from one batch.
- Add the caramel. Spoon about 1/2 teaspoon of date caramel onto the center of each brownie bite. Don’t press it in—just let it sit on top. The brownie will rise around it as it bakes, creating a little caramel pocket in the middle. If you want extra caramel flavor, you can swirl it in gently with a toothpick.
- Bake for 12-14 minutes. The edges should look set and slightly cracked, but the centers will still look a little soft. That’s fine—they’ll continue to set as they cool. Overbaking is the number one mistake people make with these, so err on the side of underdone. A toothpick inserted into the brownie part (not the caramel) should come out with a few moist crumbs.
- Cool completely in the pan. This is crucial. Let them cool in the muffin tin for at least 15 minutes before trying to remove them. The caramel needs time to set, and the brownies are fragile when warm. I’ve learned this the hard way—rushing leads to crumbly, sad brownie bites.
- Add the finishing touches. Once cooled, carefully remove the brownie bites from the tin. If you’re using the optional chocolate drizzle, melt the dark chocolate chips in a small saucepan over low heat (or in the microwave in 15-second intervals) and drizzle over the tops. Then sprinkle generously with flaky sea salt. The salt is non-negotiable—it’s what makes these “salted caramel” and it balances the sweetness perfectly.
One more thing: if you’re making these for a gathering, I recommend adding the salt and chocolate drizzle right before serving. The salt can dissolve into the caramel if it sits too long, and the chocolate drizzle looks prettiest fresh. You can make the brownie bites and caramel a day ahead, then finish them just before you head out the door.
Cooking Tips & Techniques
After four rounds of testing these brownie bites, I’ve gathered some wisdom that’ll save you from my mistakes. Let me share what I learned the hard way so you don’t have to.
Don’t overmix the batter. I know I said this already, but it’s worth repeating. Overmixing develops the gluten in the flours and makes the brownies tough instead of fudgy. Mix until you don’t see dry flour, then stop. A few small lumps are totally fine—they’ll bake out.
Watch your oven like a hawk. Every oven runs differently, and these brownie bites go from perfect to overdone in about 60 seconds. Start checking at the 11-minute mark. The tops should look set and slightly cracked, and the edges should pull away from the liners just a tiny bit. If you see the caramel bubbling around the edges, they’re done.
Let them cool completely. I cannot stress this enough. The first time I made these, I was in a rush and tried to pop them out of the pan after five minutes. Big mistake. The caramel was still liquid, the brownies were fragile, and I ended up with a pan of crumbled brownie-caramel mush. It still tasted amazing (I ate it with a spoon, no shame), but it wasn’t pretty. Patience is your friend here.
Make the caramel ahead of time. The date caramel keeps in the fridge for up to a week, so you can make it the day before and save yourself some time. Just let it come to room temperature before using, or warm it slightly so it’s easier to spoon onto the batter.
Use a cookie scoop for consistent sizes. I have this little 1-tablespoon cookie scoop that I use for everything from cookie dough to meatballs, and it’s perfect for these brownie bites. It ensures every bite is the same size, so they bake evenly and look professional on the platter.
Double the batch. Trust me on this one. These disappear fast, and you’ll wish you had more. The recipe doubles beautifully, so if you’re bringing them to a larger Friendsgiving gathering, make two batches. Your future self will thank you.
Variations & Adaptations
One of the things I love about this recipe is how flexible it is. Here are some variations I’ve tried and loved:
Vegan version: Replace the eggs with flax eggs (1 tablespoon ground flaxseed mixed with 3 tablespoons water per egg, let sit for 5 minutes). The texture will be slightly less fudgy but still delicious. I tested this for my vegan friend Sarah, and she gave it her stamp of approval.
Nut-free option: Swap the almond flour for oat flour (just grind rolled oats in a food processor until fine) and use sunflower seed butter instead of almond butter in the caramel. This works great for school events or gatherings where nut allergies are a concern.
Extra chocolatey: Fold 1/4 cup of dark chocolate chips into the batter before baking. I do this when I want a more indulgent version—the pockets of melted chocolate are incredible against the caramel.
Spiced version: Add 1/2 teaspoon of cinnamon and a pinch of cayenne pepper to the dry ingredients. This gives the brownies a warm, slightly spicy kick that’s perfect for fall gatherings. I made this version for a Friendsgiving last year and it was a hit.
Peppermint holiday version: Add 1/4 teaspoon of peppermint extract to the wet ingredients and crush a candy cane over the top instead of sea salt. This is my favorite Christmas variation—it feels festive without being over-the-top.
Gluten-free confirmation: This recipe is naturally gluten-free if you use certified gluten-free oat flour instead of almond flour. The coconut flour is already gluten-free, so you’re good there. Just double-check your cocoa powder and vanilla extract labels if you’re serving someone with celiac disease.
Serving & Storage Suggestions
These brownie bites are best served at room temperature, which makes them perfect for potlucks and gatherings. I like to arrange them on a wooden board or a white platter—the dark brown of the brownies with the golden caramel and white salt flakes looks beautiful against almost anything. If you’re feeling fancy, add a few fresh rosemary sprigs or small cinnamon sticks around the platter for a fall vibe.
For Friendsgiving, I usually bring them on a platter with a little sign that says “Lightened-Up Salted Caramel Brownie Bites” so people know what they’re eating. It always starts a conversation—everyone’s curious about the “lightened-up” part, and I love watching their faces when they taste them and realize healthy can actually taste amazing.
Storage: Store leftover brownie bites in an airtight container at room temperature for up to 3 days. If you stack them, put a piece of parchment paper between layers to prevent sticking. They’ll stay fudgy and delicious for the first two days, then start to dry out slightly on day three (but let’s be real, they won’t last that long).
Freezing: These freeze beautifully! Place the cooled brownie bites on a baking sheet and freeze for 1 hour, then transfer to a freezer-safe bag or container. They’ll keep for up to 3 months. To thaw, let them sit at room temperature for about 30 minutes. I like to add the salt and chocolate drizzle after thawing for the best presentation.
Reheating: If you want that just-baked warmth, pop them in a 300°F oven for 3-4 minutes or microwave for 10-15 seconds. The caramel gets all gooey again, and the brownie becomes extra fudgy. Just don’t overheat them or the caramel will turn into a lava flow—which sounds dramatic but is actually messy.
One thing I’ve noticed: these brownie bites actually get better after a day. The flavors meld together, the caramel soaks into the brownie slightly, and the texture becomes even more fudgy. So if you’re making them for a party, consider making them the day before and storing them in an airtight container. Your future self will thank you.
Nutritional Information & Benefits
Let’s talk numbers. Each brownie bite (based on 24 servings) contains approximately:
- Calories: 98
- Total Fat: 6g
- Saturated Fat: 3.5g
- Carbohydrates: 11g
- Fiber: 2g
- Sugar: 8g (naturally occurring from dates and maple syrup)
- Protein: 2.5g
- Sodium: 85mg
What I love about these numbers is that they’re honest. This isn’t a “health food” pretending to be dessert—it’s a real treat made with better ingredients. The dates provide natural sweetness along with fiber, potassium, and antioxidants. The almond flour adds healthy fats and vitamin E. And the cocoa powder? It’s packed with flavonoids that support heart health and mood. You’re getting a dessert that actually gives your body something good, not just empty calories.
These brownie bites are naturally gluten-free and can easily be made vegan or nut-free with the substitutions I mentioned earlier. They’re also free from refined sugar, which makes them a great option for anyone watching their sugar intake or trying to cut back on processed foods. And at under 100 calories per bite, you can enjoy two or three without any guilt—which is exactly how dessert should feel.
Conclusion
These Lightened-Up Salted Caramel Brownie Bites have become my signature Friendsgiving contribution, and I don’t see that changing anytime soon. They’re everything I want in a dessert—fudgy, rich, sweet, salty, and completely satisfying—without the heaviness that usually follows a big holiday meal. The fact that they’re made with wholesome ingredients is just a bonus, honestly. I make them because they taste incredible, and the healthier part is just my little secret.
I really hope you give these a try for your next gathering. Whether it’s Friendsgiving, a holiday party, a potluck, or just a Tuesday night when you need something sweet, these brownie bites deliver. And don’t be afraid to make them your own—swap the toppings, try different extracts, add your favorite mix-ins. That’s the beauty of a good recipe: it’s a starting point, not a rulebook.
If you make these, I’d love to hear about it. Drop a comment below and let me know how they turned out, what variations you tried, or if your Friendsgiving crew gave them the “close your eyes and sigh” reaction. And if you’re looking for more healthier dessert ideas, check out my collection of lightened-up treats that actually taste indulgent. Happy Friendsgiving, friends—now go make some brownie bites!
Frequently Asked Questions
Can I use regular flour instead of almond and coconut flour?
You can, but the texture will be different. Regular flour makes the brownies denser and less fudgy. If you need to substitute, use 3/4 cup all-purpose flour instead of the almond and coconut flour combination, and reduce the applesauce to 2 tablespoons. The texture will be more like a traditional brownie—still good, but not as moist and tender.
How do I know when the brownie bites are done baking?
Look for set edges that are slightly pulling away from the liners, a cracked top, and centers that still look slightly soft. A toothpick inserted into the brownie part (not the caramel) should come out with a few moist crumbs. If it comes out clean, they’re overbaked. Remember, they continue to cook as they cool in the pan.
Can I make these without a food processor for the caramel?
Yes, but it takes more effort. Soak the dates in warm water for 15 minutes first, then mash them with a fork until smooth. Mix in the remaining caramel ingredients and whisk until combined. The texture won’t be as silky smooth as a food processor version, but it’ll still taste delicious. A high-speed blender also works if you scrape down the sides frequently.
How far in advance can I make these for a party?
You can make the brownie bites up to 2 days ahead and store them in an airtight container at room temperature. I recommend adding the flaky sea salt and chocolate drizzle the day of serving for the best presentation. The caramel will stay gooey and delicious for several days, so don’t worry about that.
Are these really healthy enough to eat without guilt?
They’re made with wholesome ingredients and contain no refined sugar, but they’re still a dessert. I’d say they’re a healthier choice than traditional brownies, but they’re meant to be enjoyed as a treat. The beauty is that they satisfy your sweet tooth without the crash and bloat you might get from a conventional dessert. Eat two or three, enjoy every bite, and feel good about what you’re putting in your body.
Pin This Recipe!
Lightened-Up Salted Caramel Brownie Bites
Fudgy, rich brownie bites with a date-based caramel and flaky sea salt, made with wholesome ingredients for a lighter dessert that doesn’t skimp on flavor. Perfect for Friendsgiving or any gathering.
- Prep Time: 15 minutes
- Cook Time: 14 minutes
- Total Time: 35 minutes
- Yield: 24 servings 1x
- Category: Dessert
- Cuisine: American
Ingredients
- 1/2 cup unsweetened cocoa powder (Dutch-processed preferred)
- 1/2 cup almond flour
- 1/4 cup coconut flour
- 1/2 teaspoon baking powder
- 1/4 teaspoon salt
- 2 large eggs, room temperature
- 1/3 cup coconut oil, melted
- 1/2 cup maple syrup
- 1 teaspoon vanilla extract
- 1/4 cup unsweetened applesauce
- 1 cup Medjool dates, pitted (about 8–10 dates)
- 1/4 cup warm water (plus more if needed)
- 2 tablespoons almond butter (smooth)
- 1 tablespoon coconut oil, melted
- 1/2 teaspoon vanilla extract
- Pinch of salt
- Flaky sea salt (for topping)
- Optional: 2 tablespoons dark chocolate chips (for drizzle)
Instructions
- Preheat oven to 350°F (175°C). Line a mini muffin tin with parchment liners or silicone cups.
- Make the date caramel: In a food processor, combine pitted Medjool dates, warm water, almond butter, melted coconut oil, vanilla extract, and a pinch of salt. Process for 2-3 minutes until smooth and creamy. Add more warm water if needed to reach a pourable consistency. Set aside.
- Mix dry ingredients: In a medium bowl, whisk together cocoa powder, almond flour, coconut flour, baking powder, and salt until no lumps remain.
- Mix wet ingredients: In a small bowl, whisk together eggs, melted coconut oil, maple syrup, vanilla extract, and applesauce until smooth and glossy.
- Combine wet and dry: Pour wet ingredients into dry ingredients and stir with a spatula until just combined. Do not overmix. Batter will be thick and fudgy.
- Fill muffin cups: Using a small cookie scoop or teaspoon, fill each lined muffin cup about 2/3 full with brownie batter.
- Add caramel: Spoon about 1/2 teaspoon of date caramel onto the center of each brownie bite. Do not press in.
- Bake for 12-14 minutes, until edges are set and slightly cracked, and centers still look soft. A toothpick inserted into the brownie part should come out with a few moist crumbs.
- Cool completely in the pan for at least 15 minutes before removing.
- Add finishing touches: If using, melt dark chocolate chips and drizzle over tops. Sprinkle generously with flaky sea salt. Serve at room temperature.
Notes
Don’t overmix the batter. Watch oven closely; brownies go from perfect to overdone quickly. Cool completely before removing from pan. Make caramel ahead of time. Use a cookie scoop for consistent sizes. Double the batch for larger gatherings. Add salt and chocolate drizzle right before serving for best presentation.
Nutrition
- Serving Size: 1 brownie bite
- Calories: 98
- Sugar: 8
- Sodium: 85
- Fat: 6
- Saturated Fat: 3.5
- Carbohydrates: 11
- Fiber: 2
- Protein: 2.5
Keywords: brownie bites, salted caramel, healthy dessert, Friendsgiving, gluten-free, refined sugar-free, date caramel, mini brownies


