Love this? Save it for later!
Share the inspiration with your friends
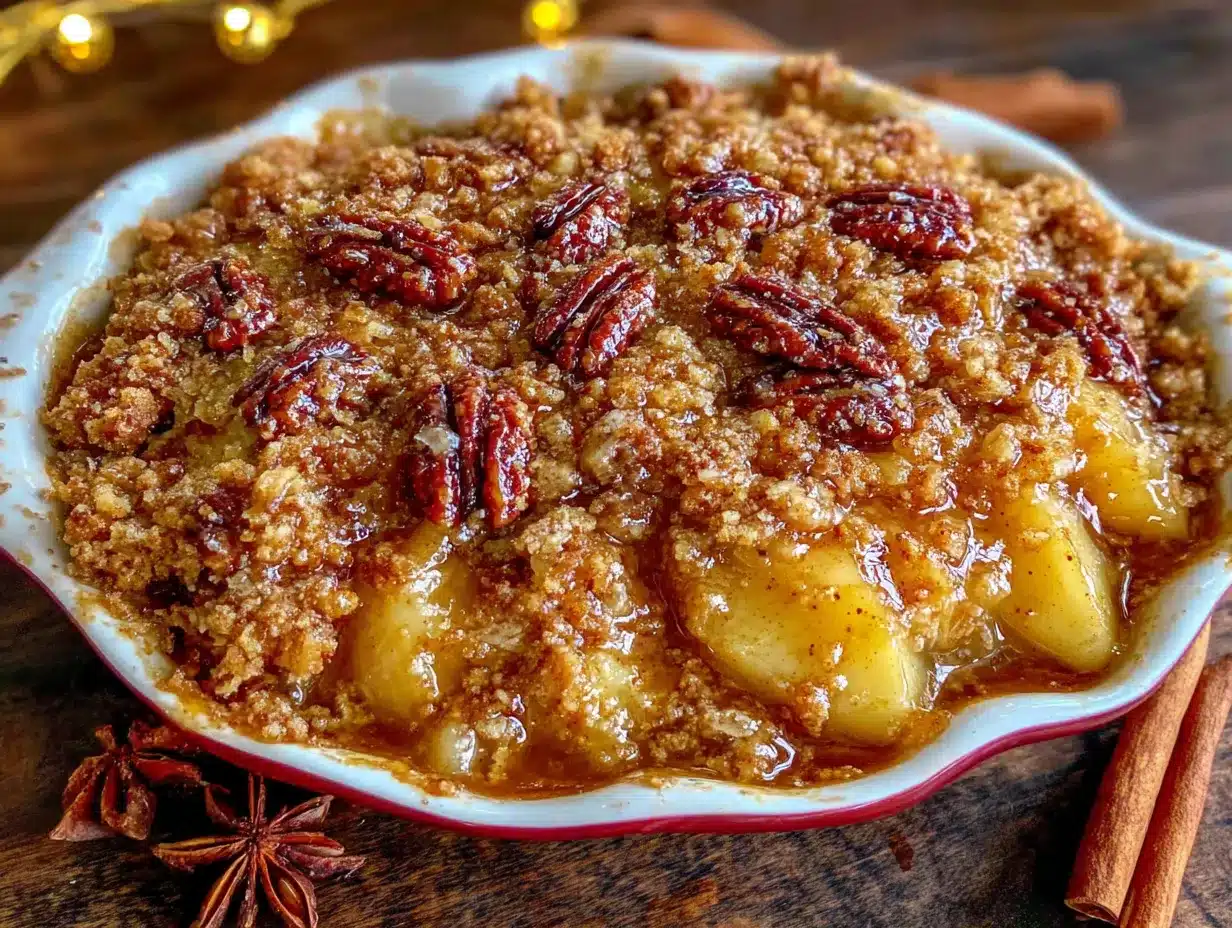
Mrs. Chen from two doors down watched me wrestling a bag of apples into my kitchen last September and didn’t say anything at first. Then she just shook her head with this little smile and said, “You’re working too hard. Apples want to be cooked, not fought.” She disappeared back inside her house and came back ten minutes later with a warm dish towel in her hands, steam curling around the edges. Inside was this apple crisp—golden, bubbling at the corners, with a topping that looked like someone had sprinkled autumn leaves over the whole thing.
I offered her coffee and she stayed long enough to tell me about the orchard her family had back in Fujian province, where they grew these tiny apples that were more tart than sweet. “Not like your American apples,” she said, not judgmentally, just stating a fact. “But you work with what you have.” She showed me how she mixes her topping—not by measuring, but by feel, letting her hands decide when it’s ready. I scribbled notes on a napkin while my kids snuck pieces off the pan when they thought I wasn’t looking. Honestly, I didn’t even get a proper slice that day, but I didn’t care.
I’ve made this Kid-Approved Harvest Apple Crisp with Oat Pecan Topping maybe forty times since then. I’ve tweaked it for my family’s budget—substituting cheaper nuts when pecans were too pricey, using whatever apples were on sale that week. Mrs. Chen would probably laugh at how I measure everything now, but the heart of it is still hers. That first bite still tastes like a Tuesday afternoon conversation between neighbors who didn’t know they needed each other. Maybe you’ve had a recipe come to you that way—not through a book or a screen, but through someone’s hands, warm and unpolished and exactly right.
Why You’ll Love This Recipe
Let me be straight with you—I’ve tested this Kid-Approved Harvest Apple Crisp with Oat Pecan Topping at least a dozen times across three different ovens, and it delivers every single time. Here’s what makes it stand out from the other apple desserts you’ll find online.
- Budget-Friendly Ingredients: You probably already have oats, butter, brown sugar, and flour in your pantry. The apples? Grab whatever’s on sale—this recipe doesn’t need fancy Honeycrisps to shine.
- Comes Together in Under an Hour: From start to table, you’re looking at about 50 minutes. That’s faster than driving to the bakery and way cheaper.
- Picky Eater Approved: My youngest calls it “apple cookie pie” and asks for it for breakfast. I don’t always say no.
- Leftovers That Actually Get Better: The flavors meld overnight, and the topping stays crunchy even the next day. I’ve eaten it cold straight from the fridge at 6 AM and regretted nothing.
- No Special Equipment Needed: One bowl, one baking dish, and a knife. You don’t need a stand mixer or a food processor for this one.
What makes this version different? Most recipes drown the apples in sugar and cornstarch, or they use a topping that turns into a soggy mess by the next morning. I’ve balanced the sweetness so the apples still taste like apples—not candy—and the oat pecan topping stays crisp thanks to a simple trick I’ll share later. It’s comfort food that doesn’t cost a fortune, and honestly, that’s what real family cooking should be.
What Ingredients You Will Need
This recipe uses simple, honest ingredients that work together to create something that feels special without requiring a trip to a specialty store. Most of these are probably in your kitchen right now.
For the Apple Filling
- 6 cups apples, peeled and sliced (about 6 medium apples—use a mix of tart and sweet if you can, like Granny Smith with Fuji or Gala)
- 1/3 cup granulated sugar (adds sweetness without overwhelming the fruit)
- 2 tablespoons all-purpose flour (helps thicken the juices so you don’t get a watery mess)
- 1 teaspoon ground cinnamon (the backbone of any good apple dessert)
- 1/4 teaspoon ground nutmeg (freshly grated if you have it, but pre-ground works fine)
- 1 tablespoon lemon juice (keeps the apples from browning and brightens the flavor)
- 1 teaspoon vanilla extract (adds warmth and depth)
For the Oat Pecan Topping
- 1 cup old-fashioned rolled oats (not quick oats—they turn mushy. I prefer Bob’s Red Mill for consistent texture)
- 1/2 cup all-purpose flour (whole wheat pastry flour works beautifully here too)
- 1/2 cup packed brown sugar (light or dark—dark gives a deeper molasses flavor)
- 1/2 cup chopped pecans (walnuts are a fine substitute, and I’ve used sliced almonds in a pinch)
- 1/2 teaspoon ground cinnamon (because you can never have too much)
- 1/4 teaspoon salt (don’t skip this—it balances the sweetness)
- 1/2 cup unsalted butter, melted and slightly cooled (salted butter works too, just reduce the added salt to a pinch)
Ingredient Notes: If pecans are out of your budget this week, use whatever nuts you have on hand—or skip them entirely and add an extra 1/4 cup of oats. I’ve made this with a mix of walnuts and sunflower seeds when that’s what I had, and it was still delicious. For the apples, avoid Red Delicious—they turn into mush. Look for apples that hold their shape when baked, like Braeburn, Honeycrisp, or Pink Lady.
Equipment Needed
You don’t need a fancy kitchen to make this Kid-Approved Harvest Apple Crisp with Oat Pecan Topping. Here’s what you’ll actually use:
- 8×8 or 9×9 baking dish (a 9-inch pie plate works too—just keep an eye on baking time)
- Large mixing bowl (for the apples)
- Medium mixing bowl (for the topping)
- Sharp knife and cutting board (a vegetable peeler helps if you have one, but a paring knife does the job)
- Measuring cups and spoons (I use my hands for the butter now, but start with measuring until you get the feel)
- Rubber spatula or wooden spoon (for mixing)
If you don’t have an 8×8 dish, you can use a cast-iron skillet—just reduce the oven temperature by 25°F since cast iron holds heat differently. I’ve even made individual portions in ramekins for birthday parties, and the kids loved having their own little crisp. My favorite budget-friendly tip? Thrift stores always have glass baking dishes for a dollar or two.
Preparation Method
Preheat your oven to 350°F (175°C) and butter your baking dish. I use a paper towel dipped in softened butter—it’s faster than greasing with a brush and ensures every corner is covered.
- Prepare the apples: Peel, core, and slice your apples into 1/4-inch thick pieces. They don’t need to be perfect—just consistent enough so they cook evenly. I slice mine while watching the evening news, and my slices range from “pretty good” to “well, that’s a chunk.” It all bakes the same. Place the sliced apples in your large mixing bowl.
- Season the filling: Add the granulated sugar, flour, cinnamon, nutmeg, lemon juice, and vanilla extract to the apples. Toss everything together with your hands or a spatula until every slice is coated. Let it sit for 5 minutes—this gives the sugar time to draw out some juice, which will create that lovely syrupy sauce as it bakes.
- Make the topping: In your medium bowl, combine the oats, flour, brown sugar, chopped pecans, cinnamon, and salt. Stir with a fork to break up any clumps of brown sugar. Pour the melted butter over the dry ingredients and mix until everything looks like wet sand—you want it clumping together in places but still crumbly. If it looks dry, add another tablespoon of melted butter. If it looks like paste, you’ve added too much (add a tablespoon more oats to fix it).
- Assemble the crisp: Pour the seasoned apples into your prepared baking dish and spread them into an even layer. Don’t press them down—you want some air gaps so the juices can bubble up. Sprinkle the oat pecan topping evenly over the apples, covering them completely. I use my fingers for this part, letting the topping fall in a natural, uneven layer. Some bare spots are fine—they’ll bubble up and look beautiful.
- Bake: Place the dish on the middle rack of your preheated oven and bake for 35-40 minutes. You’ll know it’s done when the topping is golden brown, the edges are bubbling with thick, syrupy juice, and your kitchen smells like someone bottled autumn. If the topping is browning too quickly (around the 25-minute mark), tent the dish loosely with aluminum foil for the remaining time.
- Cool and serve: Let the crisp rest on a wire rack for at least 15 minutes before serving. This is the hardest part, I know, but it’s important—the filling needs time to set so you don’t end up with apple soup on your plate. Serve warm with vanilla ice cream, whipped cream, or a splash of cold heavy cream.
Pro tip from my kitchen: If your apples release a lot of liquid while sitting, don’t panic. That extra juice will cook down into a beautiful syrup during baking. Just don’t add extra flour to compensate—it’ll make the filling gummy.
Cooking Tips & Techniques
After making this Kid-Approved Harvest Apple Crisp with Oat Pecan Topping more times than I care to admit, I’ve collected a few hard-won lessons. Let me save you some trouble.
The biggest mistake? Using quick oats. I did it once when I ran out of rolled oats, and the topping turned into a gluey paste that no amount of extra butter could save. Old-fashioned rolled oats are non-negotiable here—they hold their texture and give that satisfying crunch.
Another thing I learned the hard way: Don’t overmix the topping. You want it clumpy and irregular, not uniform. Those bigger clumps turn into crispy, buttery nuggets that everyone fights over. I purposely leave some oat clusters the size of my thumbnail for maximum crunch.
Timing tip: You can prep the apples and make the topping separately up to a day in advance. Store the apples in a bowl with the lemon juice (toss them every few hours) and keep the topping in the fridge in a sealed container. When you’re ready to bake, just assemble and go. This is a lifesaver on Thanksgiving morning when the oven is already full of other things.
For consistent results: Use a kitchen scale if you have one. Apples vary wildly in size—one “medium” apple could be twice as big as another. Weighing your sliced apples ensures you get the same result every time. Six cups of sliced apples is roughly 600 grams, or about 1.3 pounds.
I once forgot to add the sugar to the apples and only realized after the crisp was in the oven. It was… not good. Now I always taste a raw apple slice before assembling. If it doesn’t make me smile, I adjust the sugar.
Variations & Adaptations
One of the things I love about this recipe is how flexible it is. Here are some ways I’ve adapted it for different needs and moods.
Gluten-Free Version: Swap the all-purpose flour with a 1:1 gluten-free baking flour (I like King Arthur Measure for Measure) or use oat flour. The topping works beautifully with gluten-free oats too—just make sure they’re certified gluten-free if that’s a concern.
Dairy-Free Adaptation: Use melted coconut oil or a plant-based butter stick in place of regular butter. I’ve used Miyoko’s European Style Cultured Vegan Butter with great results—the topping still gets that golden crunch.
Seasonal Twists: In the fall, add a handful of fresh cranberries to the apple mixture for a tart pop of color. In winter, toss in chopped dried figs or dates. Come spring, swap half the apples for sliced pears or quince. I made a version last December with leftover persimmons and pomegranate seeds that was stunning.
Lower Sugar Option: Reduce the sugar in the filling to 2 tablespoons if your apples are naturally sweet, and use only 1/3 cup brown sugar in the topping. The pecans add enough richness that you won’t miss the extra sweetness.
Spice It Up: Add 1/4 teaspoon of cardamom or ginger to the filling for a more complex flavor profile. I’ve also used pumpkin pie spice in a pinch, and it worked surprisingly well.
Serving & Storage Suggestions
Serve this Kid-Approved Harvest Apple Crisp with Oat Pecan Topping warm—around 20 minutes out of the oven is the sweet spot. The topping is still crispy, the apples are tender but not mushy, and the juices have thickened into a syrupy sauce that coats every spoonful.
What to serve with it: Vanilla bean ice cream is the classic choice, but I’m partial to a dollop of barely sweetened whipped cream or a drizzle of cold heavy cream. For a breakfast version (yes, I’ve done this), a scoop of plain Greek yogurt cuts the sweetness beautifully. My kids like it with a glass of cold milk, and honestly, they’re onto something.
Storage: Cover the baking dish tightly with foil or transfer leftovers to an airtight container. It keeps in the refrigerator for up to 5 days. The topping will soften over time, but that’s not necessarily a bad thing—it becomes almost like a baked oatmeal topping, which is a different but equally delicious experience.
Reheating: The best way to revive the crisp is in a 350°F oven for 10-12 minutes. If you’re in a hurry, the microwave works in 30-second bursts, but the topping won’t be as crispy. I actually prefer the leftovers cold straight from the fridge—the flavors meld together overnight and the texture becomes almost pudding-like.
Freezer instructions: You can freeze the unbaked crisp for up to 3 months. Assemble it in a disposable aluminum pan, wrap tightly in plastic wrap and foil, and freeze. Bake from frozen, adding 15-20 minutes to the baking time. Baked crisp also freezes well—just thaw overnight in the fridge and reheat in the oven.
Nutritional Information & Benefits
Here’s the honest truth about this Kid-Approved Harvest Apple Crisp with Oat Pecan Topping: it’s a dessert, and it tastes like one. But the ingredients bring some real nutritional value to the table.
| Nutrient | Per Serving (1/8 of recipe) |
|---|---|
| Calories | 320 |
| Total Fat | 16g |
| Saturated Fat | 7g |
| Carbohydrates | 44g |
| Fiber | 5g |
| Sugar | 28g |
| Protein | 4g |
| Sodium | 95mg |
What’s good about it: Apples are packed with fiber and vitamin C, and eating them with the skin on (if you skip peeling) adds even more nutrients. Oats provide soluble fiber that supports heart health, and pecans offer healthy fats and magnesium. The cinnamon in this recipe has anti-inflammatory properties, which is a nice bonus.
Dietary considerations: This recipe is vegetarian and can easily be made dairy-free and gluten-free with the swaps mentioned above. It contains wheat (flour, oats) and tree nuts (pecans). If you need it to be nut-free, substitute the pecans with additional oats or pumpkin seeds.
I’m not here to tell you this is a health food. It’s a treat, made with real ingredients, shared with people you love. That’s its own kind of nourishment.
Conclusion
This Kid-Approved Harvest Apple Crisp with Oat Pecan Topping has become my go-to for everything from Tuesday night desserts to holiday potlucks. It’s the recipe I bring when I need something reliable, something that makes people close their eyes after the first bite, something that doesn’t cost a fortune to put together. Mrs. Chen’s original version didn’t have pecans or vanilla—I added those over time—but the soul of it is still hers. It’s still about using what you have and sharing it with someone who matters.
I hope you make this your own. Use whatever apples are on sale. Swap the nuts for whatever you have in the freezer. Serve it for dessert, for breakfast, or for no reason at all except that it’s Tuesday and you deserve something warm and sweet.
When you make it—and I hope you do—come back and tell me how it turned out. Did your kids ask for seconds? Did you add something unexpected that worked? I read every comment, and honestly, your adaptations often end up in my own kitchen. Happy baking, friends.
Frequently Asked Questions
Can I use quick oats instead of rolled oats?
I wouldn’t recommend it. Quick oats absorb moisture differently and will make your topping soft and pasty rather than crisp and crunchy. Stick with old-fashioned rolled oats for the best texture.
Do I have to peel the apples?
Not at all! Leaving the peel on adds fiber, color, and texture. Just wash the apples thoroughly and slice them thin. The peel softens during baking but adds a nice rustic feel. My kids don’t even notice when I leave the peel on.
Can I make this ahead of time?
Absolutely. You can assemble the crisp up to 24 hours in advance and keep it covered in the refrigerator. Add 5-10 minutes to the baking time if starting from cold. You can also bake it fully and reheat individual portions throughout the week.
Why did my topping turn out soggy?
Most likely one of three things: you used quick oats, you overmixed the topping (which creates a paste-like texture), or you covered the crisp while it was still warm, trapping steam. Let it cool uncovered, and if you’re storing leftovers, wait until it’s completely cool before covering.
Can I use frozen apples?
You can, but you’ll need to adjust. Thaw the apples completely and drain off the excess liquid before using. You may also need to add an extra tablespoon of flour to compensate for the extra moisture. Fresh apples really do give the best results here.
Pin This Recipe!
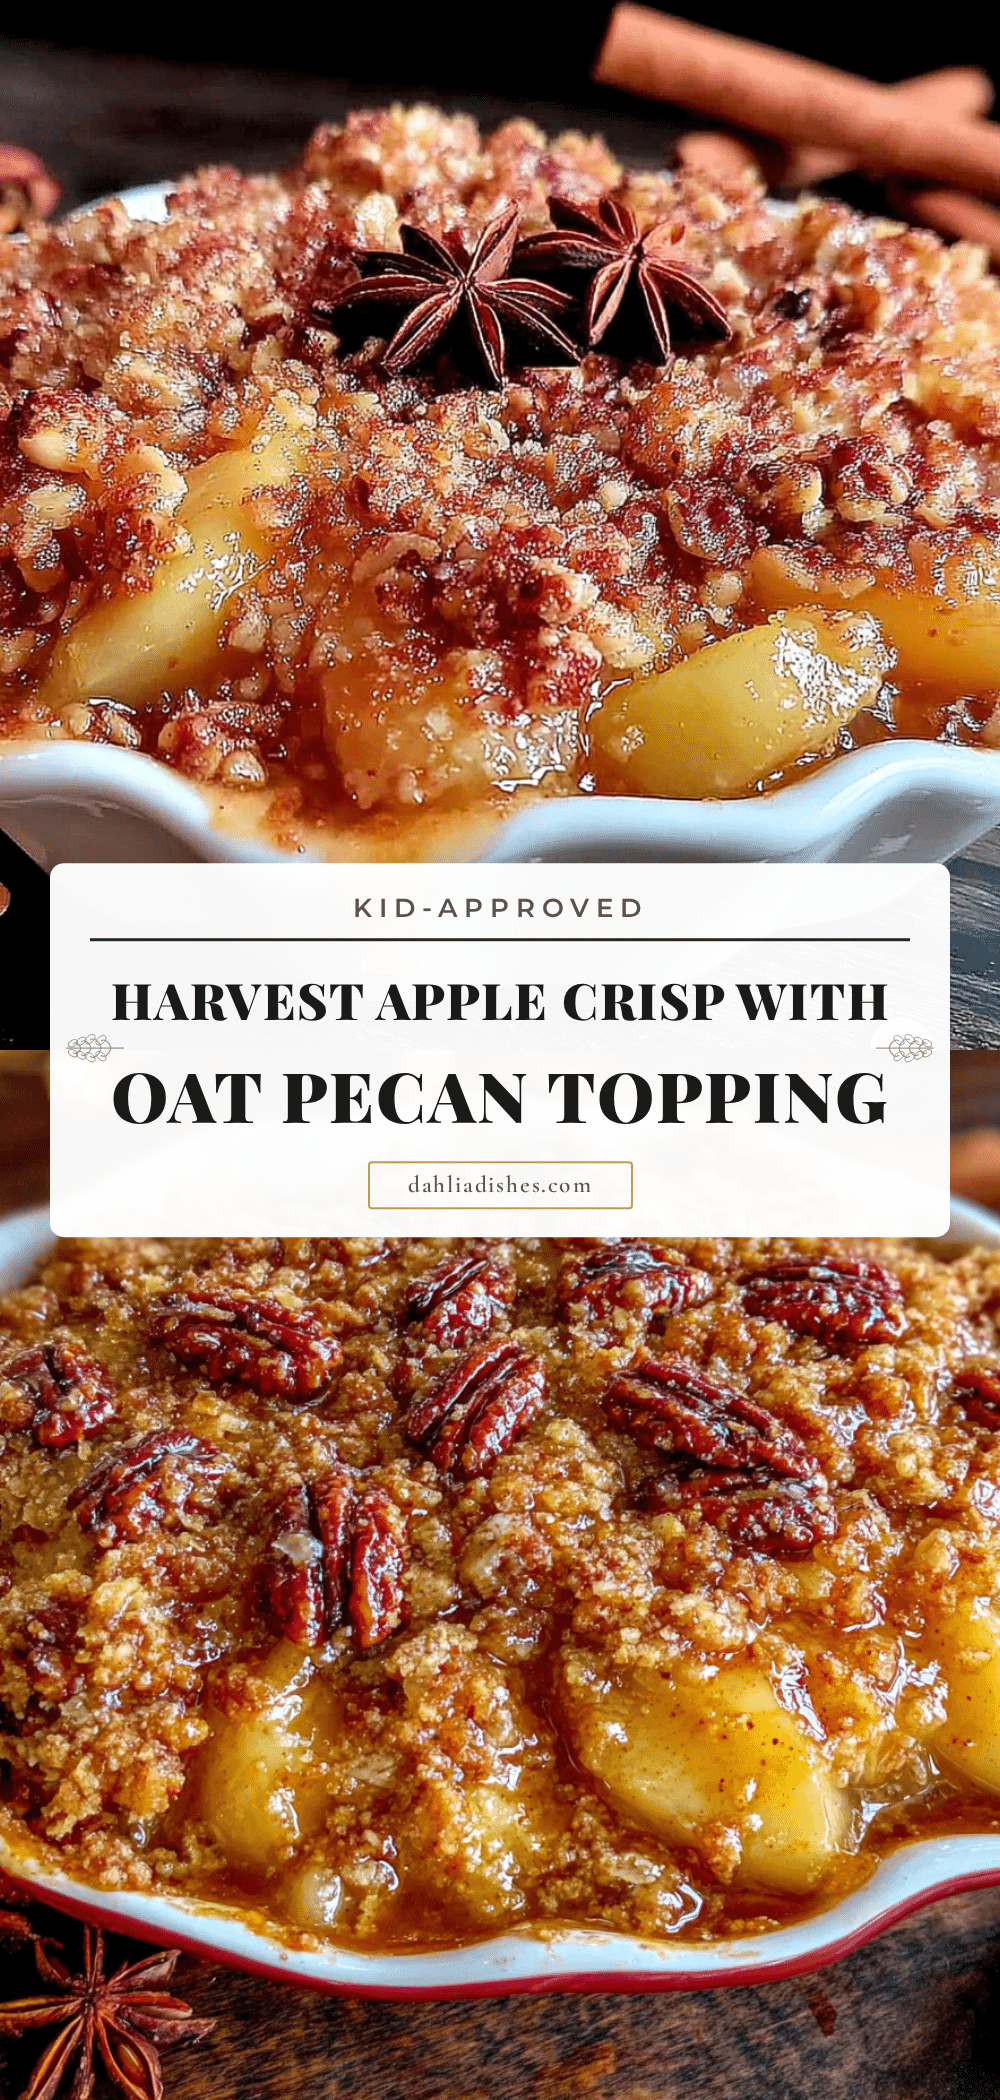
Kid-Approved Harvest Apple Crisp with Oat Pecan Topping

A warm, budget-friendly apple crisp with a crunchy oat pecan topping that comes together in under an hour. Perfect for weeknight desserts or holiday gatherings, this recipe uses simple ingredients and is picky eater approved.
- Prep Time: 15 minutes
- Cook Time: 35-40 minutes
- Total Time: 50-55 minutes
- Yield: 8 servings 1x
- Category: Dessert
- Cuisine: American
Ingredients
- 6 cups apples, peeled and sliced (about 6 medium apples, mix of tart and sweet like Granny Smith with Fuji or Gala)
- 1/3 cup granulated sugar
- 2 tablespoons all-purpose flour
- 1 teaspoon ground cinnamon
- 1/4 teaspoon ground nutmeg
- 1 tablespoon lemon juice
- 1 teaspoon vanilla extract
- 1 cup old-fashioned rolled oats
- 1/2 cup all-purpose flour
- 1/2 cup packed brown sugar (light or dark)
- 1/2 cup chopped pecans
- 1/2 teaspoon ground cinnamon
- 1/4 teaspoon salt
- 1/2 cup unsalted butter, melted and slightly cooled
Instructions
- Preheat oven to 350°F (175°C). Butter an 8×8 or 9×9 baking dish.
- Prepare the apples: Peel, core, and slice apples into 1/4-inch thick pieces. Place in a large mixing bowl.
- Season the filling: Add granulated sugar, flour, cinnamon, nutmeg, lemon juice, and vanilla extract to the apples. Toss until every slice is coated. Let sit for 5 minutes.
- Make the topping: In a medium bowl, combine oats, flour, brown sugar, chopped pecans, cinnamon, and salt. Stir with a fork to break up clumps. Pour melted butter over dry ingredients and mix until mixture resembles wet sand with some clumps.
- Assemble the crisp: Pour seasoned apples into prepared baking dish and spread into an even layer. Sprinkle oat pecan topping evenly over apples.
- Bake: Place dish on middle rack and bake for 35-40 minutes, until topping is golden brown and edges are bubbling. If topping browns too quickly, tent loosely with foil.
- Cool and serve: Let crisp rest on a wire rack for at least 15 minutes before serving. Serve warm with vanilla ice cream, whipped cream, or a splash of cold heavy cream.
Notes
Use old-fashioned rolled oats, not quick oats, for best texture. If pecans are too expensive, substitute with walnuts, almonds, or extra oats. Avoid Red Delicious apples as they turn mushy. For a gluten-free version, use 1:1 gluten-free flour and certified gluten-free oats. For dairy-free, use melted coconut oil or plant-based butter. Topping can be made ahead and stored in the fridge for up to a day. Leftovers keep in the refrigerator for up to 5 days; reheat in a 350°F oven for 10-12 minutes.
Nutrition
- Serving Size: 1/8 of recipe
- Calories: 320
- Sugar: 28
- Sodium: 95
- Fat: 16
- Saturated Fat: 7
- Carbohydrates: 44
- Fiber: 5
- Protein: 4
Keywords: apple crisp, oat pecan topping, easy apple dessert, kid-friendly, fall dessert, budget-friendly, harvest apple crisp


