Love this? Save it for later!
Share the inspiration with your friends
It was 10:47 PM on a random Tuesday in early October, and I was staring into the fridge with that particular kind of tired where logic just sort of… leaves. I had promised myself I’d come up with something fun for the neighborhood Halloween block party, but the day had gotten away from me. The grocery store was closed, and there was no way I was making another trip to the craft store for those plastic pumpkin buckets. I didn’t have candy—honestly, I’d eaten the last of the good stuff three days ago—but I had a massive bag of clementines, a bunch of green grapes that were starting to look a little sad, and a cantaloupe that was finally perfectly ripe. The idea just arrived, fully formed, like a little hallucination: a pumpkin-shaped fruit tray. I grabbed a knife and started cutting, and let me tell you, I was not expecting it to work. I mean, I was half-asleep and working on pure instinct. But when I stepped back and saw this bright, cheerful, actual pumpkin shape staring back at me from the cutting board, I actually laughed out loud. Maybe you’ve been there—that moment when a weird, late-night experiment turns into something you can’t believe you never thought of before. I’ve made this tray for every Halloween gathering since, and it never fails to get that same delighted reaction.
Why You’ll Love This Light & Festive Pumpkin-Shaped Halloween Fruit Tray
Let’s be real for a second—Halloween food can be a total sugar bomb. Between the candy corn, the chocolate bars, and the frosted cookies, it’s easy to feel like you’re running on a pure sugar high by 8 PM. That’s exactly why this fruit tray exists. It’s the dish that saves you from yourself. You get all the festive, seasonal fun of a Halloween centerpiece without the inevitable crash.
- Quick & Easy: This whole thing comes together in under 20 minutes. No baking, no melting, no complicated steps. Just cutting and arranging.
- Simple Ingredients: You probably already have most of this stuff in your kitchen right now. No fancy grocery runs required.
- Perfect for Parties: Whether it’s a school party, a work potluck, or a casual get-together with friends, this tray fits right in. It’s a crowd-pleaser that works for kids and adults alike.
- Surprisingly Festive: I was shocked at how much this actually looks like a pumpkin. The shape is unmistakable, and the colors are so bright and cheerful. It’s genuinely adorable.
- Actually Healthy-ish: For the health-minded among us, this is the perfect way to enjoy Halloween without the guilt. It’s all fruit, so you can snack freely and still feel good about it.
What makes this recipe different from the rest is the clever arrangement technique. It’s not just fruit thrown on a plate—it’s a deliberate, geometric shape that tricks the eye and delights the taste buds. The cantaloupe provides that perfect pumpkin-orange hue, while the green grapes and kiwi create the stem and leaf details. It’s comfort food reimagined—healthier, faster, but with the same soul-soothing satisfaction of a holiday treat. Perfect for impressing guests without stress.
What Ingredients You Will Need
This recipe uses simple, wholesome ingredients to deliver a bold visual impact and satisfying flavor without the fuss. Most of these are pantry staples or seasonal favorites that are easy to find in early fall.
- Cantaloupe (1 large, ripe): This is the star of the show. The deep orange flesh creates that perfect pumpkin color. Look for a cantaloupe that gives slightly at the stem end and smells sweet. (I prefer a smaller, rounder melon for the best shape.)
- Clementines or Mandarin Oranges (4-5): These add little pops of bright color and sweetness. They also help fill out the shape. Seedless is best for easy snacking.
- Green Grapes (1 large bunch): These create the stem and leaf details at the top of the pumpkin. They also add a nice crunch contrast to the soft melon.
- Kiwi (2-3): The bright green of kiwi is perfect for creating leaf shapes or filling in gaps. It adds a tangy note that balances the sweetness.
- Fresh Mint Leaves (optional, for garnish): A few sprigs of mint add a pop of green and a fresh aroma. It’s not necessary, but it looks lovely.
- Pomegranate Seeds (optional, for garnish): These little jewels look like tiny gems scattered around the tray. They add a tart burst and a beautiful red color.
I recommend using a ripe, fragrant cantaloupe for the best flavor. If you can’t find a good one, honeydew can work, but the color won’t be as pumpkin-like. For the clementines, any small, sweet orange will do. If you’re making this for a crowd, feel free to double the fruit quantities—the tray can get devoured quickly!
Equipment Needed
You don’t need any fancy kitchen gadgets for this one. Here’s what you’ll need:
- Large Cutting Board: A sturdy board gives you plenty of space to work. I prefer a wooden one, but plastic works fine.
- Sharp Chef’s Knife: A good knife makes all the difference when cutting melon. A dull knife is a recipe for frustration.
- Melon Baller (optional): If you want perfectly round melon balls, this tool is great. Otherwise, just cut the melon into cubes.
- Small Cookie Cutters (optional): You can use a small leaf-shaped cutter for the kiwi, but a knife works just as well.
- Large Serving Platter or Tray: A round or oval platter works best for the pumpkin shape. A white platter makes the colors pop.
- Paring Knife: This is handy for detail work, like cutting the grape stem.
Honestly, you could make this with just a chef’s knife and a cutting board. I’ve done it many times. The melon baller is nice, but it’s not essential. I bought a cheap one at the grocery store years ago and it’s still going strong.
Preparation Method
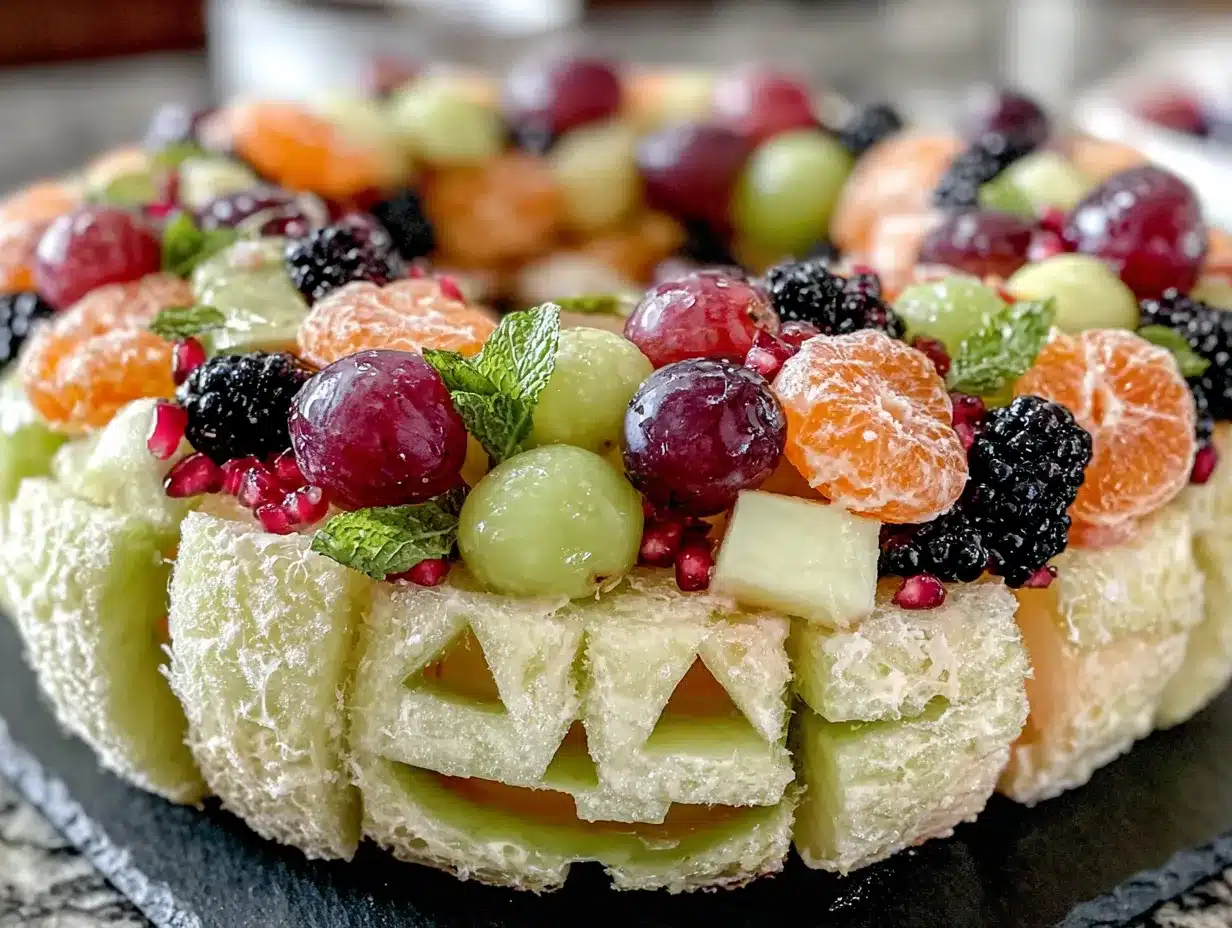
- Prep the Cantaloupe: Cut the cantaloupe in half and scoop out the seeds with a spoon. Slice off the rind. Cut the flesh into 1-inch cubes or use a melon baller to create round balls. You’ll need about 3-4 cups of cantaloupe pieces. (Pro tip: Save the rind for compost or a quick pickle!)
- Prep the Clementines: Peel the clementines and separate them into individual segments. Try to keep the segments intact. Set them aside.
- Prep the Grapes: Rinse the grapes and pat them dry. Leave them whole. Set aside about 10-12 grapes for the stem and leaf detail.
- Prep the Kiwi: Peel the kiwi and slice it into rounds or half-moons. If you want, use a small cookie cutter to cut out leaf shapes. (Honestly, I just use a knife and it looks fine.)
- Create the Pumpkin Base: On your serving platter, arrange the cantaloupe pieces in a large, round pumpkin shape. Start from the center and work your way out. The shape should be slightly wider at the bottom and narrower at the top, like a real pumpkin.
- Add the Segments: Scatter the clementine segments over the cantaloupe base to create the “ridges” of the pumpkin. They add a beautiful color contrast and help define the shape.
- Create the Stem: Take 4-5 green grapes and arrange them in a small cluster at the top center of the pumpkin. This forms the stem. Use a toothpick to secure them if needed.
- Add the Leaves: Arrange the kiwi slices or leaf shapes around the stem to create leaves. You can also use a few mint sprigs here for extra greenery.
- Fill the Gaps: Use the remaining grapes and any extra fruit to fill in any gaps around the edges of the pumpkin shape. This helps create a full, cohesive look.
- Final Touches: Sprinkle pomegranate seeds around the base of the pumpkin for a festive touch. Add a few mint leaves for garnish. Step back and admire your work!
The whole process takes about 15-20 minutes, depending on how detailed you want to get. The sensory cue here is visual—you should see a distinct, recognizable pumpkin shape when you’re done. If it looks a little wonky, that’s okay. It’s handmade, and that’s part of the charm.
Cooking Tips & Techniques
Here are some things I’ve learned from making this tray more times than I can count:
- Choose a firm, ripe cantaloupe: If the melon is too soft, it will be hard to cut clean cubes and the shape won’t hold. A slightly underripe melon actually works better for this.
- Don’t overthink the shape: Your pumpkin doesn’t need to be perfect. Imperfections make it look more organic and charming. I’ve had trays that looked more like a blob than a pumpkin, and people still loved them.
- Use toothpicks for stability: If you’re transporting the tray, use toothpicks to secure the grape stem and kiwi leaves. They can shift during travel.
- Work on a large platter: Give yourself plenty of room. A cramped platter makes it hard to see the shape. A white or light-colored platter makes the orange pop.
- Prep ahead of time: You can cut all the fruit a few hours ahead and store it in the fridge. Just assemble the tray right before serving to keep everything fresh.
- Keep it cold: Fruit tastes best when it’s chilled. If you’re serving outdoors, keep the tray in the fridge until the last minute.
I once made this tray for a party and forgot to secure the grape stem. By the time I got to the party, the stem had fallen off and was rolling around in the bottom of the bag. Lesson learned! Now I always use a toothpick.
Variations & Adaptations
This recipe is super flexible. Here are some ways to make it your own:
- Berry Blast Pumpkin: Swap the cantaloupe for a mix of strawberries and raspberries. The red color still gives a festive vibe, and the berries are naturally sweet. This works great in the summer or early fall.
- Tropical Pumpkin: Use mango, pineapple, and papaya for a tropical twist. The orange and yellow colors still create a pumpkin-like effect. This is perfect for a Halloween party in a warmer climate.
- Apple Cider Pumpkin: Slice apples and pears and arrange them in the pumpkin shape. Toss them in a little lemon juice to prevent browning. This gives a more autumnal, rustic feel.
- Dairy-Free Dip Option: Serve with a side of dairy-free yogurt dip or a simple honey-lime drizzle. It adds a creamy element without the dairy.
- Mini Pumpkins: Make individual mini pumpkin trays using small plates or bowls. This is great for kids’ parties or portion control.
I tried a version with honeydew once, and honestly, it was fine, but the color just wasn’t right. Stick with orange fruit for the best visual effect.
Serving & Storage Suggestions
This fruit tray is best served chilled, straight from the fridge. The cold fruit is refreshing and the colors are brightest when it’s fresh. Arrange it on a large platter and place it in the center of the table for a stunning centerpiece.
For presentation, I like to add a small bowl of yogurt dip or honey-lime dressing in the center of the pumpkin. It adds a creamy element and gives guests something to dip into. A sprinkle of cinnamon on top of the fruit is also lovely.
Storage-wise, this tray is best assembled right before serving. However, you can prep all the fruit up to 24 hours in advance and store it in airtight containers in the fridge. Assemble the tray about 30 minutes before you plan to serve it.
Leftovers can be stored in an airtight container in the fridge for up to 2 days. The fruit will soften slightly, but it’s still delicious. I wouldn’t recommend freezing this—the texture of the fruit will be mushy when thawed.
The flavors actually don’t change much over time, but the visual appeal does. The melon can start to release liquid, so it’s best to enjoy it on the first day.
Nutritional Information & Benefits
This fruit tray is a nutritional powerhouse. It’s packed with vitamins, antioxidants, and fiber. Here’s a rough estimate per serving (about 1 cup of fruit):
- Calories: 80-100
- Carbohydrates: 20-25g
- Fiber: 2-3g
- Vitamin C: 60-80% of the Daily Value
- Vitamin A: 100-120% of the Daily Value (from the cantaloupe)
The cantaloupe is rich in vitamin A, which supports eye health and immune function. Clementines are loaded with vitamin C, a powerful antioxidant. Grapes contain resveratrol, which is great for heart health. Kiwi is packed with fiber and vitamin K.
This recipe is naturally gluten-free, dairy-free, and vegan. It’s also low in fat and sodium. The only potential allergen is the fruit itself—some people have oral allergy syndrome with certain fruits. If you’re serving a crowd, it’s always good to check.
From a wellness perspective, this is the kind of recipe that makes you feel good about eating. It’s a treat that’s actually good for you. I love that I can indulge in something festive without the sugar crash.
Conclusion
Honestly, this pumpkin-shaped fruit tray is one of my favorite things to make. It’s so simple, yet it always gets the biggest reaction. People walk by and do a double-take. They can’t believe it’s just fruit. And that moment—when someone realizes they can eat the centerpiece—is pure joy.
I hope you give this a try for your next Halloween gathering. Don’t be afraid to customize it based on what you have in your fridge. The beauty of this recipe is that it’s forgiving. Use whatever fruit you have on hand. The shape is the star.
I’d love to see your creations! Leave a comment below and let me know how it turned out. Did you add your own twist? What fruit did you use? Share your photos and tag me—I can’t wait to see your pumpkin trays!
Happy Halloween, and happy snacking!
Frequently Asked Questions
Can I make this fruit tray ahead of time?
You can prep the fruit up to 24 hours in advance, but I recommend assembling the tray no more than 30 minutes before serving. The fruit will stay fresher and the shape will hold better.
What if I can’t find a good cantaloupe?
No problem! You can use honeydew melon, but the color won’t be as pumpkin-like. Alternatively, use mango or papaya for a similar orange hue. The shape is what matters most.
How do I keep the fruit from browning?
Toss apples or pears in a little lemon juice or pineapple juice to prevent browning. For the cantaloupe and grapes, they don’t brown easily, so no special treatment is needed.
Can I add a dip to this tray?
Absolutely! A yogurt-based dip, a honey-lime dressing, or even a chocolate fondue would be amazing. Just put the dip in a small bowl in the center of the pumpkin.
Is this recipe kid-friendly?
Yes! Kids love the fun shape and the bright colors. It’s a great way to get them to eat fruit at a party. Let them help with the assembly—they’ll love arranging the grapes and kiwi.
Pin This Recipe!
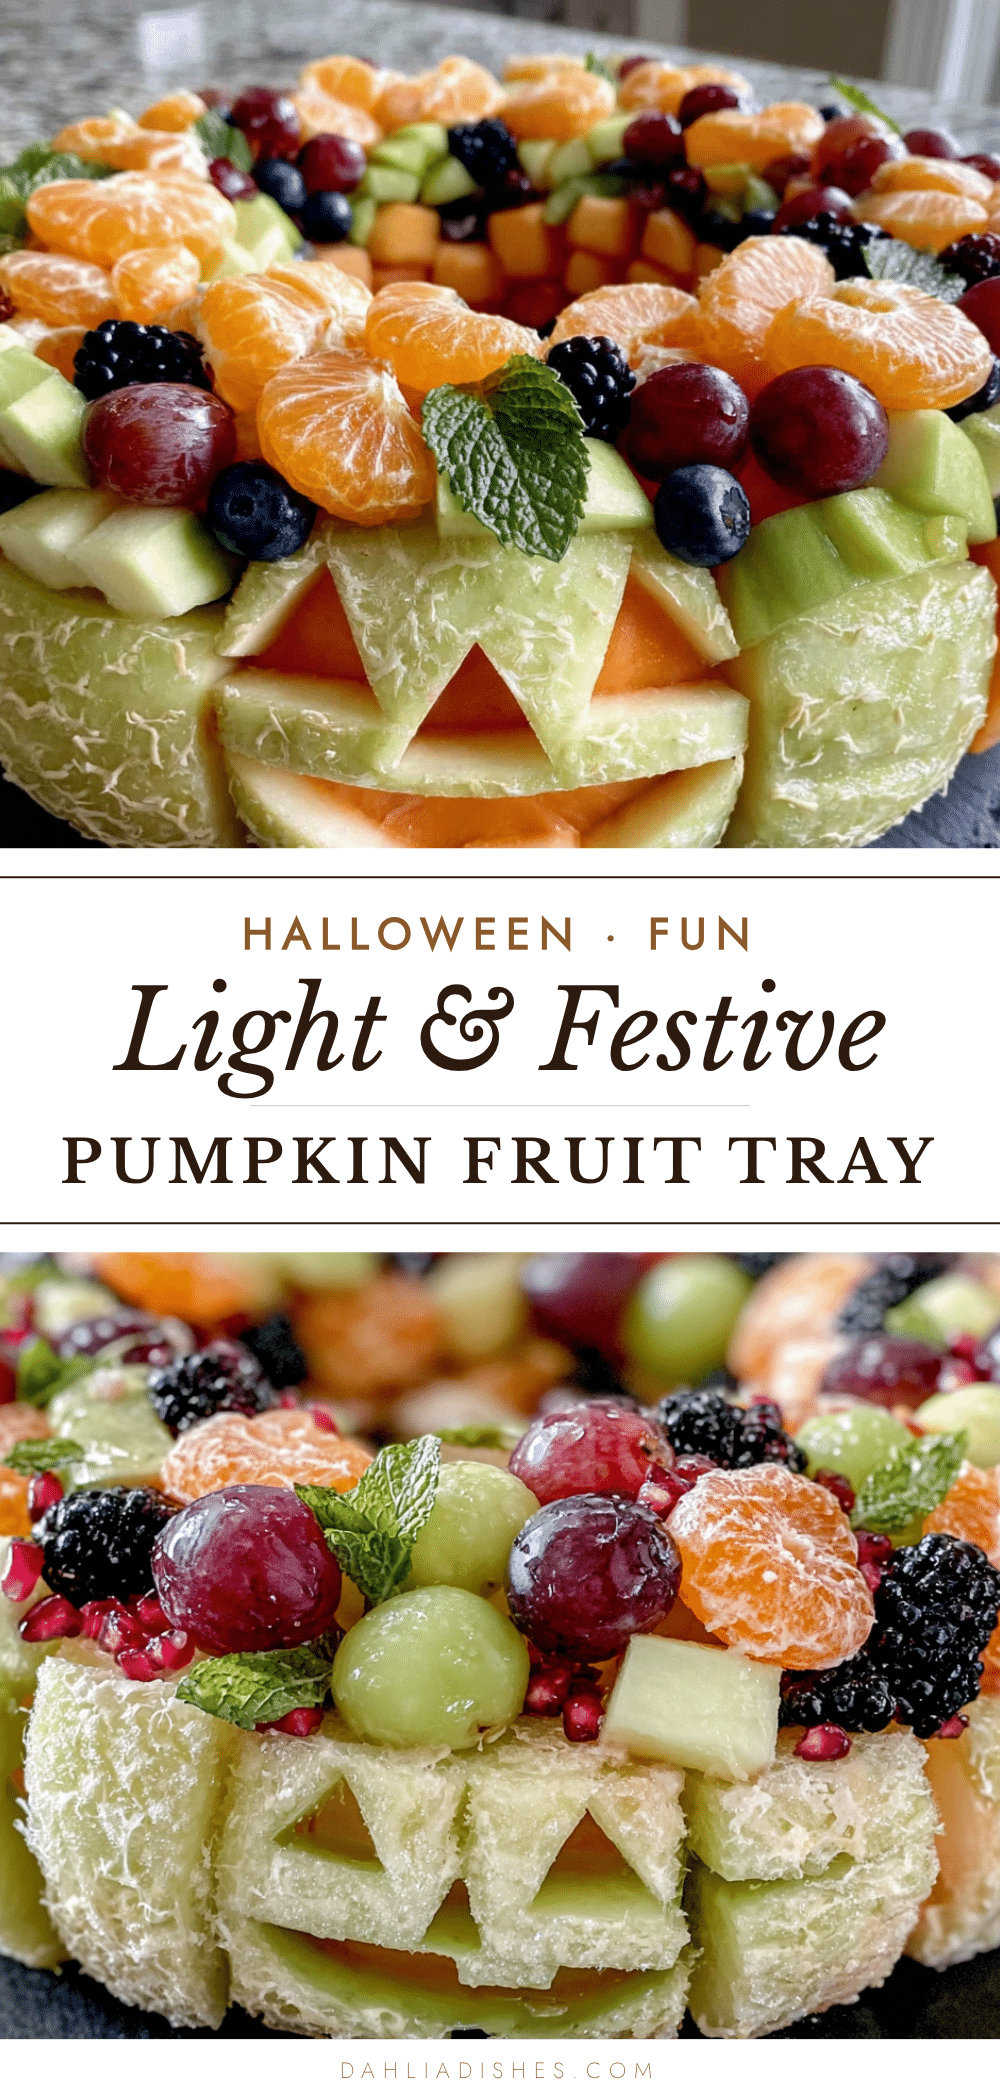
Best Easy Light & Festive Pumpkin-Shaped Halloween Fruit Tray
A quick and easy Halloween fruit tray shaped like a pumpkin, made with cantaloupe, clementines, grapes, and kiwi. Perfect for parties, it’s a healthy and festive centerpiece that comes together in under 20 minutes.
- Prep Time: 15 minutes
- Cook Time: 0 minutes
- Total Time: 15 minutes
- Yield: 8 servings 1x
- Category: Appetizer
- Cuisine: American
Ingredients
- 1 large ripe cantaloupe
- 4–5 clementines or mandarin oranges
- 1 large bunch green grapes
- 2–3 kiwi
- Fresh mint leaves (optional, for garnish)
- Pomegranate seeds (optional, for garnish)
Instructions
- Prep the Cantaloupe: Cut the cantaloupe in half and scoop out the seeds with a spoon. Slice off the rind. Cut the flesh into 1-inch cubes or use a melon baller to create round balls. You’ll need about 3-4 cups of cantaloupe pieces.
- Prep the Clementines: Peel the clementines and separate them into individual segments. Try to keep the segments intact. Set them aside.
- Prep the Grapes: Rinse the grapes and pat them dry. Leave them whole. Set aside about 10-12 grapes for the stem and leaf detail.
- Prep the Kiwi: Peel the kiwi and slice it into rounds or half-moons. If you want, use a small cookie cutter to cut out leaf shapes.
- Create the Pumpkin Base: On your serving platter, arrange the cantaloupe pieces in a large, round pumpkin shape. Start from the center and work your way out. The shape should be slightly wider at the bottom and narrower at the top, like a real pumpkin.
- Add the Segments: Scatter the clementine segments over the cantaloupe base to create the ‘ridges’ of the pumpkin. They add a beautiful color contrast and help define the shape.
- Create the Stem: Take 4-5 green grapes and arrange them in a small cluster at the top center of the pumpkin. This forms the stem. Use a toothpick to secure them if needed.
- Add the Leaves: Arrange the kiwi slices or leaf shapes around the stem to create leaves. You can also use a few mint sprigs here for extra greenery.
- Fill the Gaps: Use the remaining grapes and any extra fruit to fill in any gaps around the edges of the pumpkin shape. This helps create a full, cohesive look.
- Final Touches: Sprinkle pomegranate seeds around the base of the pumpkin for a festive touch. Add a few mint leaves for garnish. Step back and admire your work!
Notes
Choose a firm, ripe cantaloupe for best shape. Don’t overthink the shape—imperfections add charm. Use toothpicks to secure the grape stem and kiwi leaves if transporting. Prep fruit up to 24 hours in advance, but assemble just before serving. Keep chilled.
Nutrition
- Serving Size: 1 cup
- Calories: 90
- Sugar: 18
- Sodium: 15
- Fat: 0.5
- Carbohydrates: 22
- Fiber: 3
- Protein: 1
Keywords: Halloween fruit tray, pumpkin-shaped fruit tray, healthy Halloween snack, fruit platter, festive fruit tray, easy Halloween recipe


