Love this? Save it for later!
Share the inspiration with your friends
The PTA Halloween party was in twelve hours and I’d completely forgotten. I mean, I’d remembered to buy the costume—my kid was going as a slightly terrified hot dog—but the treat table? That was a black hole in my brain until 9 PM the night before. Everyone else would be bringing those elaborate, multi-day creations: hand-piped ghost cupcakes, caramel apples dipped three times, cake pops shaped like eyeballs. I had a box of butter, some sugar, and a vague memory of a cookie bar recipe I’d seen online.
Let me tell you, standing in my kitchen at 9:15 PM, staring at a bag of Halloween sprinkles I’d bought on a whim, I felt the panic set in. I didn’t have time for rolling dough or chilling anything. I needed something that looked like I tried, but that could be made with one hand while I helped a kindergartener wrestle a hot dog costume. I grabbed my biggest baking sheet and just started mixing, hoping for the best. Honestly, I was just trying to avoid showing up with a bag of store-bought cookies.
These Easy Halloween Sugar Cookie Bars with Orange Frosting were born out of pure desperation. And you know what? They were the first thing to disappear. The orange frosting, a color I achieved by accident because I only had red and yellow food coloring, looked incredibly festive. People actually asked me for the recipe. I had to sheepishly admit it was a last-minute panic bake. That’s the thing about these bars—they look like you spent hours, but they come together in about 30 minutes of active time. Maybe you’ve been there, staring down a school event deadline with nothing to bring. This is your secret weapon.
Why You’ll Love This Recipe
I’ve tested this recipe about five times since that frantic night, tweaking the butter-to-sugar ratio and the bake time until it was absolutely foolproof. It’s the kind of recipe that makes you look like a baking hero without the stress. Here’s why these are my go-to Halloween bars:
- Quick & Easy: From mixing bowl to cooling rack in under 40 minutes. No rolling, no cutting, no chilling. Just press the dough into a pan and bake.
- Simple Ingredients: You likely have everything in your pantry right now. No fancy extracts or hard-to-find candy needed. It’s pure, buttery sugar cookie goodness.
- Perfect for Halloween Parties: Whether it’s a classroom party, a work potluck, or a family get-together, the bright orange frosting and festive sprinkles make them a visual hit.
- Crowd-Pleaser: Kids go crazy for the soft, chewy texture, and adults appreciate that it’s not overly sweet. I’ve seen a whole tray vanish in ten minutes.
- Unbelievably Delicious: The cookie base is thick, soft, and buttery—like the best sugar cookie you’ve ever had, but in bar form. The orange frosting is tangy and creamy, cutting through the sweetness perfectly.
What sets this apart from other cookie bars is the texture. I use a technique where you cream the butter and sugar for a full three minutes, which creates a light, almost cake-like crumb that’s still dense enough to hold a thick layer of frosting. It’s not just another bar cookie—it’s the one you’ll reach for again and again. This is comfort food for the Halloween season: fast, festive, and deeply satisfying.
What Ingredients You Will Need
This recipe uses simple, wholesome ingredients to deliver that classic sugar cookie flavor with a festive twist. Most of these are pantry staples, which makes this perfect for last-minute baking emergencies.
For the Cookie Bars
- Unsalted butter, softened: (1 cup / 2 sticks / 226g) I always use unsalted to control the salt level. Let it sit out for about an hour until it’s soft to the touch but not melting.
- Granulated sugar: (1 ½ cups / 300g) Regular white sugar gives the bars that classic crisp edge and soft center.
- Large eggs: (2, room temperature) Cold eggs can seize the butter, so let them sit out for 15 minutes or place them in a bowl of warm water for 5 minutes.
- Vanilla extract: (2 teaspoons) Pure vanilla is best, but imitation works in a pinch. It adds that warm, cozy flavor we all love.
- All-purpose flour: (2 ¾ cups / 345g) Spoon and level your flour—don’t scoop directly from the bag, or you’ll end up with dry bars.
- Baking powder: (1 teaspoon) This gives the bars a little lift without making them cakey.
- Salt: (½ teaspoon) Don’t skip it! Salt balances the sweetness and enhances the butter flavor.
For the Orange Frosting
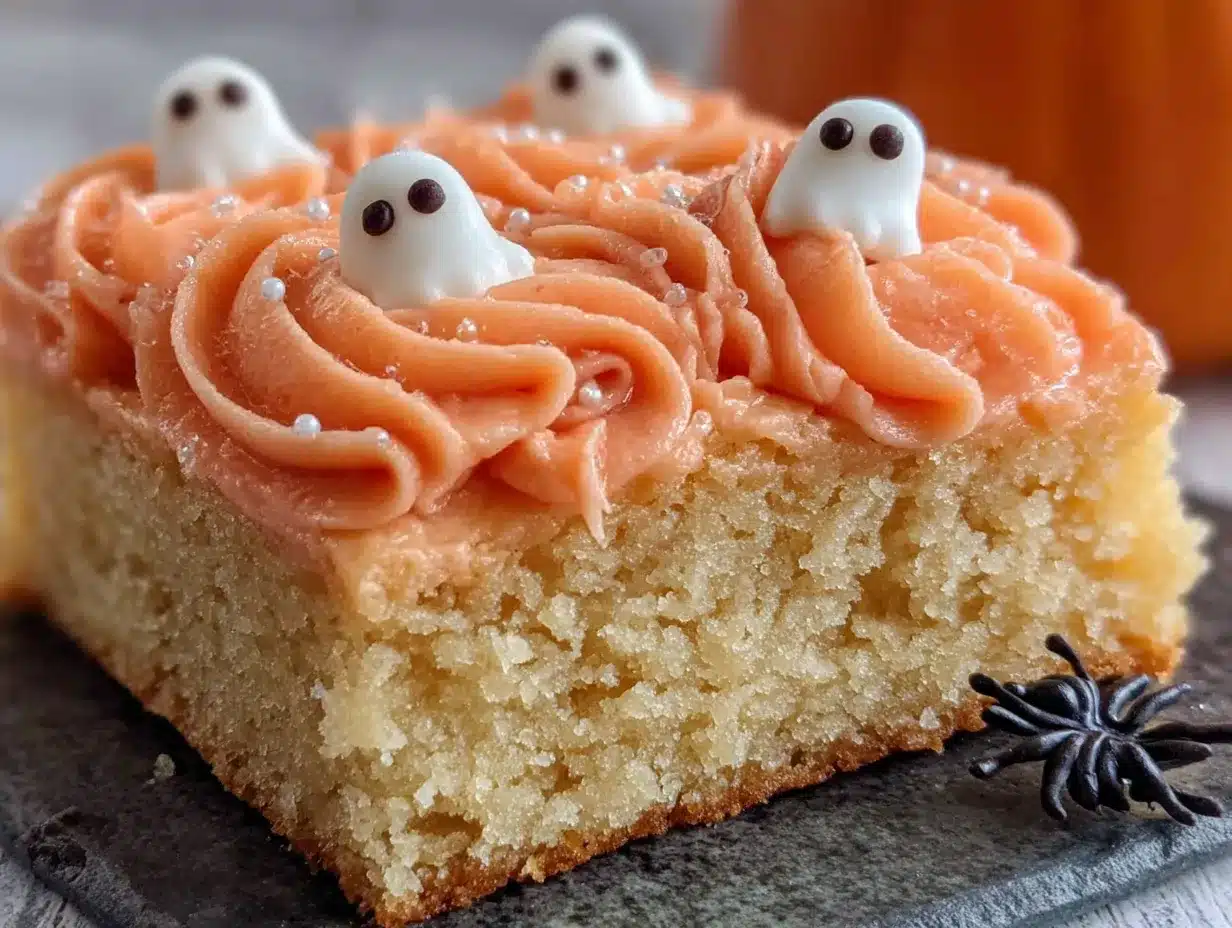
- Unsalted butter, softened: (½ cup / 1 stick / 113g) Same as above—softened is key for a smooth, creamy frosting.
- Powdered sugar: (3 cups / 360g) Sift it if it’s lumpy, but I’m usually too lazy and it works fine.
- Heavy cream or milk: (3-4 tablespoons) Heavy cream makes the frosting extra luscious, but milk works too.
- Vanilla extract: (1 teaspoon) Adds depth to the frosting.
- Orange gel food coloring: (about ½ teaspoon) I prefer gel over liquid because it gives a vibrant color without thinning the frosting. You can also use a mix of red and yellow if that’s all you have—that’s how I stumbled onto this recipe!
- Halloween sprinkles: (¼ cup, for topping) Any mix of ghosts, pumpkins, or classic jimmies works. I love the Wilton Halloween mix.
Ingredient Tips
For the best texture, I recommend using Land O’Lakes butter—it has a consistent fat content that yields reliable results. If you’re using salted butter, reduce the added salt to ¼ teaspoon. For a dairy-free version, use a high-quality vegan butter stick (like Earth Balance) and oat milk in the frosting. The texture will be slightly different but still delicious.
Equipment Needed
You don’t need a fancy kitchen for these bars. Here’s what you’ll need:
- 9×13-inch baking pan: This is the perfect size for thick, chewy bars. A metal pan works best for even browning, but glass or ceramic will work—just watch the bake time.
- Electric hand mixer or stand mixer: You can cream the butter and sugar by hand, but it’ll take some elbow grease. A mixer makes it quick and easy.
- Mixing bowls: One large for the dough, one medium for the frosting.
- Parchment paper: This is non-negotiable for easy removal. Leave an overhang on two sides to lift the bars out cleanly.
- Offset spatula: Great for spreading the frosting smoothly, but a butter knife works too.
- Cooling rack: Helps the bars cool evenly so the frosting doesn’t melt.
If you don’t have a 9×13 pan, you can use two 8×8 pans—just reduce the bake time by about 5 minutes. I’ve also used a disposable aluminum pan in a pinch, and it worked fine, though the bars were slightly softer.
Preparation Method
Let’s get baking! Follow these steps carefully, and you’ll have perfect bars every time.
- Preheat and Prep: Preheat your oven to 375°F (190°C). Line your 9×13-inch baking pan with parchment paper, leaving a 2-inch overhang on the long sides. This will be your lifeline for lifting the bars out later.
- Cream Butter and Sugar: In a large mixing bowl, beat the softened butter and granulated sugar together on medium speed for about 3 minutes. Stop and scrape the bowl halfway through. You want the mixture to be light, fluffy, and pale yellow. This is where the magic happens—don’t rush it.
- Add Eggs and Vanilla: Add the eggs one at a time, beating well after each addition. Then add the vanilla extract and mix until combined. The mixture might look a little curdled—that’s okay, it will come together when you add the flour.
- Mix Dry Ingredients: In a separate bowl, whisk together the flour, baking powder, and salt. Slowly add this to the wet mixture, mixing on low speed until just combined. Be careful not to overmix, or the bars will be tough. The dough will be thick and slightly sticky.
- Press into Pan: Transfer the dough to your prepared pan. Using your hands or a spatula, press it into an even layer. The dough is thick, so take your time. I like to wet my hands slightly to keep the dough from sticking to my fingers.
- Bake: Bake for 18-22 minutes, or until the edges are lightly golden and a toothpick inserted in the center comes out clean or with a few moist crumbs. My oven runs hot, so I check at 18 minutes. The center should look set, not jiggly.
- Cool Completely: Let the bars cool in the pan on a wire rack for at least 30 minutes. Then, using the parchment overhang, lift the entire block of bars out of the pan and transfer to a cutting board. Let them cool completely—about 1 hour total. If you frost them while warm, the frosting will slide right off.
- Make the Frosting: While the bars cool, make the frosting. In a medium bowl, beat the softened butter until creamy. Gradually add the powdered sugar, one cup at a time, alternating with the heavy cream. Beat in the vanilla and orange food coloring until you reach your desired shade. If the frosting is too thick, add another tablespoon of cream. Too thin? Add a bit more powdered sugar.
- Frost and Decorate: Spread the frosting evenly over the cooled bars using an offset spatula. Immediately top with Halloween sprinkles—if you wait, the frosting will start to set and the sprinkles won’t stick. Press them in gently.
- Slice and Serve: Use a sharp knife to cut the bars into squares. I usually get 24 generous bars. For clean cuts, wipe the knife clean between slices. Serve immediately or store for later.
Cooking Tips & Techniques
Over the years, I’ve learned a few tricks that make these bars foolproof. Here are my best tips:
- Don’t Overbake: The number one mistake with cookie bars is overbaking. They should look slightly underdone in the center when you pull them out. They’ll continue to set as they cool. Overbaked bars are dry and crumbly.
- Room Temperature Ingredients: I cannot stress this enough. Cold eggs or butter will result in a dense, uneven texture. Set everything out an hour before you start baking.
- Use a Light Hand: When pressing the dough into the pan, don’t pack it down too hard. You want a gentle, even press. If you compact it, the bars will be tough.
- Chill for Cleaner Cuts: If you want picture-perfect squares, pop the frosted bars in the fridge for 20 minutes before slicing. The frosting firms up, and you’ll get clean edges without dragging.
- My Biggest Failure: The first time I made these, I used liquid food coloring in the frosting. It turned the frosting into a runny mess, and I ended up with a tie-dye puddle on top of my bars. Gel coloring is the way to go—it’s concentrated and doesn’t affect the consistency.
- Multitasking: While the bars are baking, clean up your mixing bowls and make the frosting. That way, when the bars are cool, you can frost and decorate in minutes.
Variations & Adaptations
This recipe is incredibly versatile. Here are some of my favorite twists:
- Chocolate Swirl Bars: Before baking, drop spoonfuls of melted chocolate or Nutella over the dough and swirl it with a knife. It creates a marbled effect that’s gorgeous and delicious.
- Spiced Pumpkin Version: Swap ½ cup of the butter for pumpkin puree, and add 1 teaspoon of pumpkin pie spice to the dry ingredients. The bars will be softer and have a lovely fall flavor. Reduce the bake time by 2-3 minutes.
- Gluten-Free Option: Use a 1:1 gluten-free baking flour blend (I like Bob’s Red Mill). The texture will be slightly more tender, but they hold together well. Don’t overmix, and let them cool completely before slicing.
- Different Frosting Flavors: Skip the orange and try a cream cheese frosting, or add a teaspoon of almond extract to the buttercream for a unique twist. For a chocolate version, replace ¼ cup of powdered sugar with cocoa powder.
- Add Mix-Ins: Fold in ½ cup of mini chocolate chips, white chocolate chips, or crushed candy corn into the dough before pressing into the pan. It adds little pockets of sweetness.
I once made a batch with a layer of salted caramel drizzled over the frosting. It was messy but absolutely incredible. Don’t be afraid to experiment—this dough is forgiving.
Serving & Storage Suggestions
These bars are best served at room temperature, but they’re also delicious straight from the fridge on a warm day. Here’s how to serve and store them:
- Serving Temperature: Let them sit out for 10-15 minutes after refrigerating to soften slightly. The texture is most tender at room temperature.
- Presentation Ideas: Arrange the bars on a festive Halloween platter or a cake stand. You can also cut them into smaller bite-sized squares for a party buffet. Add a few extra sprinkles on the plate for visual pop.
- Complementary Dishes: Serve alongside a glass of cold milk, a warm apple cider, or a pumpkin spice latte. For a dessert table, pair them with chocolate pumpkin bundt cake or caramel apple bites for a full Halloween spread.
- Storage: Store in an airtight container at room temperature for up to 3 days. If you stack them, place a sheet of parchment paper between layers to prevent sticking. For longer storage, refrigerate for up to a week.
- Freezing Instructions: These bars freeze beautifully. Wrap the unfrosted bars tightly in plastic wrap, then in foil, and freeze for up to 3 months. When ready to serve, thaw at room temperature, then frost and decorate. You can also freeze frosted bars—just place them on a baking sheet in the freezer for an hour until firm, then wrap individually.
- Flavor Development: Honestly, these bars taste even better the next day. The flavors meld together, and the texture becomes even more tender. If you can resist eating them all on day one, you’re in for a treat.
Nutritional Information & Benefits
While these are a treat, here’s an estimated breakdown per bar (based on 24 servings):
| Nutrient | Amount per Bar |
|---|---|
| Calories | 245 |
| Fat | 11g |
| Saturated Fat | 7g |
| Carbohydrates | 35g |
| Sugar | 24g |
| Protein | 2g |
| Sodium | 95mg |
These bars are a source of quick energy from the carbohydrates, and the butter provides a small amount of vitamin A. The orange frosting, while mostly sugar, does have a tiny bit of vitamin C from the food coloring—okay, that’s a stretch, but it makes me feel better! For a slightly healthier version, you can reduce the sugar in the dough by ¼ cup without affecting the texture too much.
If you’re watching your sugar intake, consider making a batch of healthy oatmeal cookies for yourself and save these for the kids. Everything in moderation, right?
FAQs
Can I make these sugar cookie bars ahead of time?
Absolutely! You can make the dough up to 2 days in advance and store it in the refrigerator. Let it come to room temperature before pressing into the pan and baking. You can also bake the bars a day ahead, cool them completely, and store them unfrosted in an airtight container. Frost and decorate the day you plan to serve them for the best presentation.
Why did my cookie bars turn out dry?
Dry cookie bars are usually the result of overbaking or overmeasuring the flour. Make sure you spoon the flour into your measuring cup and level it off with a knife. Also, check your oven temperature with an oven thermometer—many ovens run hot. Pull the bars out when a toothpick comes out with a few moist crumbs, not completely clean.
Can I use a different size pan?
Yes, but you’ll need to adjust the bake time. For a 9×9-inch pan, the bars will be thicker and need about 25-28 minutes. For a 9×13-inch pan, stick to the 18-22 minute range. If you use a smaller pan, make sure the dough is spread evenly, and check for doneness a few minutes early.
How do I get the frosting to be a vibrant orange?
Use gel food coloring instead of liquid. Start with a small amount (about ¼ teaspoon) and add more until you reach your desired shade. If you only have liquid coloring, reduce the cream in the frosting by 1 tablespoon to compensate for the extra liquid. You can also use a mix of red and yellow gel colors if you don’t have orange.
Can I freeze these bars with the frosting?
Yes, but it’s better to freeze them unfrosted. If you must freeze them frosted, place the bars on a baking sheet in the freezer for 1 hour until the frosting is firm. Then wrap each bar individually in plastic wrap and store in a freezer bag. Thaw in the refrigerator overnight and let them come to room temperature before serving. The frosting might lose a bit of its shine, but they’ll still taste great.
Conclusion
These Easy Halloween Sugar Cookie Bars with Orange Frosting are the perfect solution for any last-minute baking panic. They’re quick, they’re forgiving, and they look like you spent way more effort than you actually did. I love that I can whip up a batch after dinner and still have time to help with homework or watch a movie. The soft, buttery cookie base paired with the tangy, creamy orange frosting is a combination that never gets old.
I hope you give these a try—whether it’s for a school party, a Halloween gathering, or just because you want something sweet and festive. Feel free to customize them with your favorite sprinkles or mix-ins. I’d love to hear how they turn out! Drop a comment below and let me know what variations you tried, or share a photo of your creation. Happy Halloween, and happy baking!
Pin This Recipe!
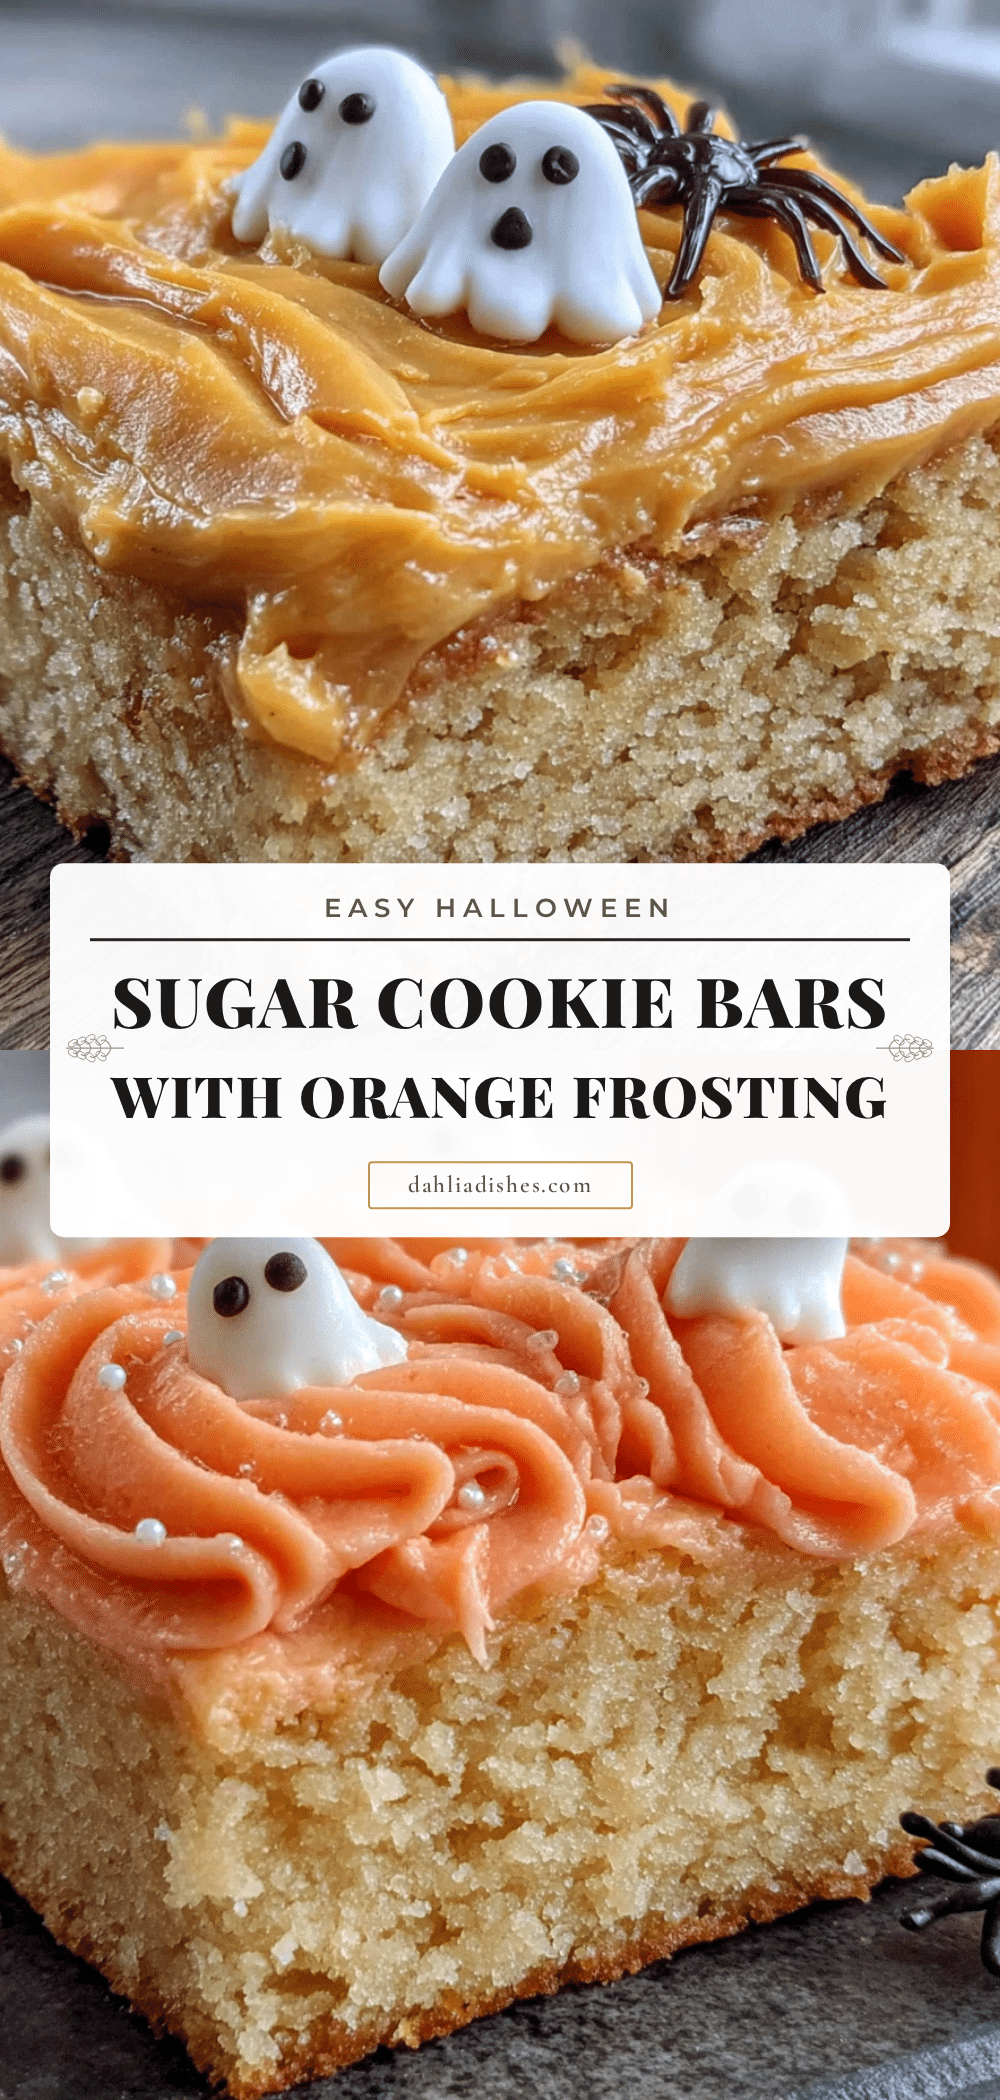
Best Easy Halloween Sugar Cookie Bars with Orange Frosting
These Easy Halloween Sugar Cookie Bars with Orange Frosting are the perfect solution for any last-minute baking panic. They’re quick, forgiving, and look like you spent way more effort than you actually did.
- Prep Time: 15 minutes
- Cook Time: 20 minutes
- Total Time: 35 minutes
- Yield: 24 servings 1x
- Category: Dessert
- Cuisine: American
Ingredients
- 1 cup (2 sticks / 226g) unsalted butter, softened
- 1 ½ cups (300g) granulated sugar
- 2 large eggs, room temperature
- 2 teaspoons vanilla extract
- 2 ¾ cups (345g) all-purpose flour
- 1 teaspoon baking powder
- ½ teaspoon salt
- ½ cup (1 stick / 113g) unsalted butter, softened (for frosting)
- 3 cups (360g) powdered sugar
- 3–4 tablespoons heavy cream or milk
- 1 teaspoon vanilla extract (for frosting)
- ½ teaspoon orange gel food coloring
- ¼ cup Halloween sprinkles
Instructions
- Preheat your oven to 375°F (190°C). Line your 9×13-inch baking pan with parchment paper, leaving a 2-inch overhang on the long sides.
- In a large mixing bowl, beat the softened butter and granulated sugar together on medium speed for about 3 minutes until light, fluffy, and pale yellow.
- Add the eggs one at a time, beating well after each addition. Then add the vanilla extract and mix until combined.
- In a separate bowl, whisk together the flour, baking powder, and salt. Slowly add this to the wet mixture, mixing on low speed until just combined. The dough will be thick and slightly sticky.
- Transfer the dough to your prepared pan. Using your hands or a spatula, press it into an even layer.
- Bake for 18-22 minutes, or until the edges are lightly golden and a toothpick inserted in the center comes out clean or with a few moist crumbs.
- Let the bars cool in the pan on a wire rack for at least 30 minutes. Then, using the parchment overhang, lift the entire block of bars out of the pan and transfer to a cutting board. Let them cool completely—about 1 hour total.
- While the bars cool, make the frosting. In a medium bowl, beat the softened butter until creamy. Gradually add the powdered sugar, one cup at a time, alternating with the heavy cream. Beat in the vanilla and orange food coloring until you reach your desired shade.
- Spread the frosting evenly over the cooled bars using an offset spatula. Immediately top with Halloween sprinkles.
- Use a sharp knife to cut the bars into squares. For clean cuts, wipe the knife clean between slices.
Notes
Don’t overbake—bars should look slightly underdone in the center when pulled out. Use room temperature ingredients for best texture. For cleaner cuts, chill frosted bars in the fridge for 20 minutes before slicing. Gel food coloring is recommended over liquid for vibrant color without thinning the frosting.
Nutrition
- Serving Size: 1 bar
- Calories: 245
- Sugar: 24
- Sodium: 95
- Fat: 11
- Saturated Fat: 7
- Carbohydrates: 35
- Protein: 2
Keywords: Halloween, sugar cookie bars, orange frosting, easy dessert, party treat, cookie bars, fall baking


