Love this? Save it for later!
Share the inspiration with your friends
I was standing in the baking aisle of my local grocery store last Tuesday when the smell of cheap vanilla extract hit me — and suddenly I was eight years old at Mrs. Petrov’s kitchen table, my legs swinging because the chair was too tall. She wasn’t my grandmother or even a relative. She was just the elderly woman who lived three doors down and let me help her bake every Saturday because she saw me staring through her window one too many times. Her kitchen always smelled like butter and sugar, and she had this way of making a cake feel like a secret you were lucky to be part of. I remember the way she’d let me lick the spatula clean, and how she never once told me I was making a mess. That memory hit me so hard I almost dropped the bottle in my hand. Honestly, I grabbed two.
I’ve been chasing that exact feeling ever since — that perfect, slightly imperfect birthday cake with the kind of buttercream that makes you close your eyes. And let me tell you, I’ve made some real disasters along the way. There was the time I forgot the baking powder and ended up with a cake that looked more like a pancake. Another time, I got distracted by a phone call and overmixed the batter so badly the cake came out tough enough to use as a doorstop. But I kept going, because that’s what you do when you’re trying to recreate a piece of your childhood. You keep mixing, keep tasting, keep hoping you’ll get it just right.
Maybe you’ve been there too — standing in your kitchen with flour on your nose, wondering if this time the cake will actually turn out like the one you remember. The one that made you feel special on your birthday, even if the frosting was a little lopsided and the sprinkles were a little uneven. This classic birthday cake with vanilla buttercream is that recipe for me. It’s the one I finally got right after years of trying, and the one that makes me feel like I’m eight years old again, sitting at that old wooden table, waiting for Mrs. Petrov to hand me the spatula. It’s simple, it’s forgiving, and it tastes like the kind of happiness you can actually hold in your hands.
Why You’ll Love This Recipe
This isn’t just another birthday cake recipe — it’s the one you’ll come back to year after year. I’ve tested this version over a dozen times, tweaking the ratios, adjusting the baking time, and even asking my neighbor who used to work in a bakery to taste-test it blind. She gave it a thumbs up, and honestly, that’s all the validation I needed. Here’s why this cake stands out from the rest:
- Quick & Easy : From start to finish, this cake comes together in about an hour and a half, including cooling time. Perfect for last-minute birthday celebrations or when you just need a slice of something sweet on a Tuesday night.
- Simple Ingredients : You probably already have most of these in your pantry. No trips to specialty stores, no hunting down obscure extracts — just butter, sugar, eggs, flour, and a few other basics.
- Perfect for Birthdays : Obviously! But it’s also great for anniversaries, graduations, or any day that feels like it deserves a celebration. I’ve even made it for “just because” Wednesdays.
- Crowd-Pleaser : Kids love it, adults love it, and even my picky uncle who claims he doesn’t like cake asked for seconds. The texture is light, the buttercream is silky, and nobody can resist a classic.
- Unbelievably Delicious : The secret is in the technique — creaming the butter and sugar until it’s actually fluffy (not just “kinda mixed”), and using room-temperature eggs so the batter emulsifies perfectly. It makes a difference you can taste.
What makes this recipe different is that it’s been tested by real people in real kitchens. I’ve made it in a fancy oven and a janky apartment oven that runs 25 degrees hot. I’ve made it with generic store-brand butter and fancy European butter. It works every single time, and that’s the kind of reliability you want when you’re baking for someone you love. This cake isn’t just good — it’s the kind that makes people close their eyes after the first bite and go quiet for a second. That’s the sign of a truly great cake.
What Ingredients You Will Need
This recipe uses simple, wholesome ingredients to deliver a tender crumb and rich, creamy frosting without any fuss. Most of these are pantry staples, which means you can whip up this cake on a whim without a special shopping trip. Let me walk you through each one and share a few tips I’ve picked up along the way.
For the Cake
- Unsalted butter, softened — 1 cup (2 sticks or 226g). I prefer using unsalted so I can control the salt level. Let it sit out for at least 30 minutes before you start. Cold butter won’t cream properly and you’ll end up with a dense cake.
- Granulated sugar — 2 cups (400g). Regular white sugar works best here. I’ve tried using cane sugar and it’s fine, but the texture is slightly different. Stick with standard granulated for the most reliable results.
- Large eggs, room temperature — 4 eggs. This is important! Cold eggs can cause the batter to separate. If you forgot to take them out ahead of time, place them in a bowl of warm water for 5 minutes.
- All-purpose flour — 3 cups (360g). Spoon and level your flour — don’t scoop directly from the bag or you’ll pack it down and end up with a dry cake. I recommend Gold Medal or King Arthur for consistent results.
- Baking powder — 1 tablespoon (14g). Make sure your baking powder is fresh. If it’s been sitting in your cabinet for over a year, it might not work as well. Test it by dropping a little in hot water — if it fizzes, it’s good to go.
- Salt — 1 teaspoon (6g). Fine sea salt or table salt works best. Salt balances the sweetness and enhances the vanilla flavor.
- Whole milk, room temperature — 1 cup (240ml). Whole milk gives the richest texture, but 2% works in a pinch. Avoid skim milk — the cake won’t be as tender.
- Vanilla extract — 2 teaspoons (10ml). Use pure vanilla extract if you can. Imitation works, but the flavor won’t be as deep. I personally love Nielsen-Massey, but any brand you trust will do.
For the Vanilla Buttercream
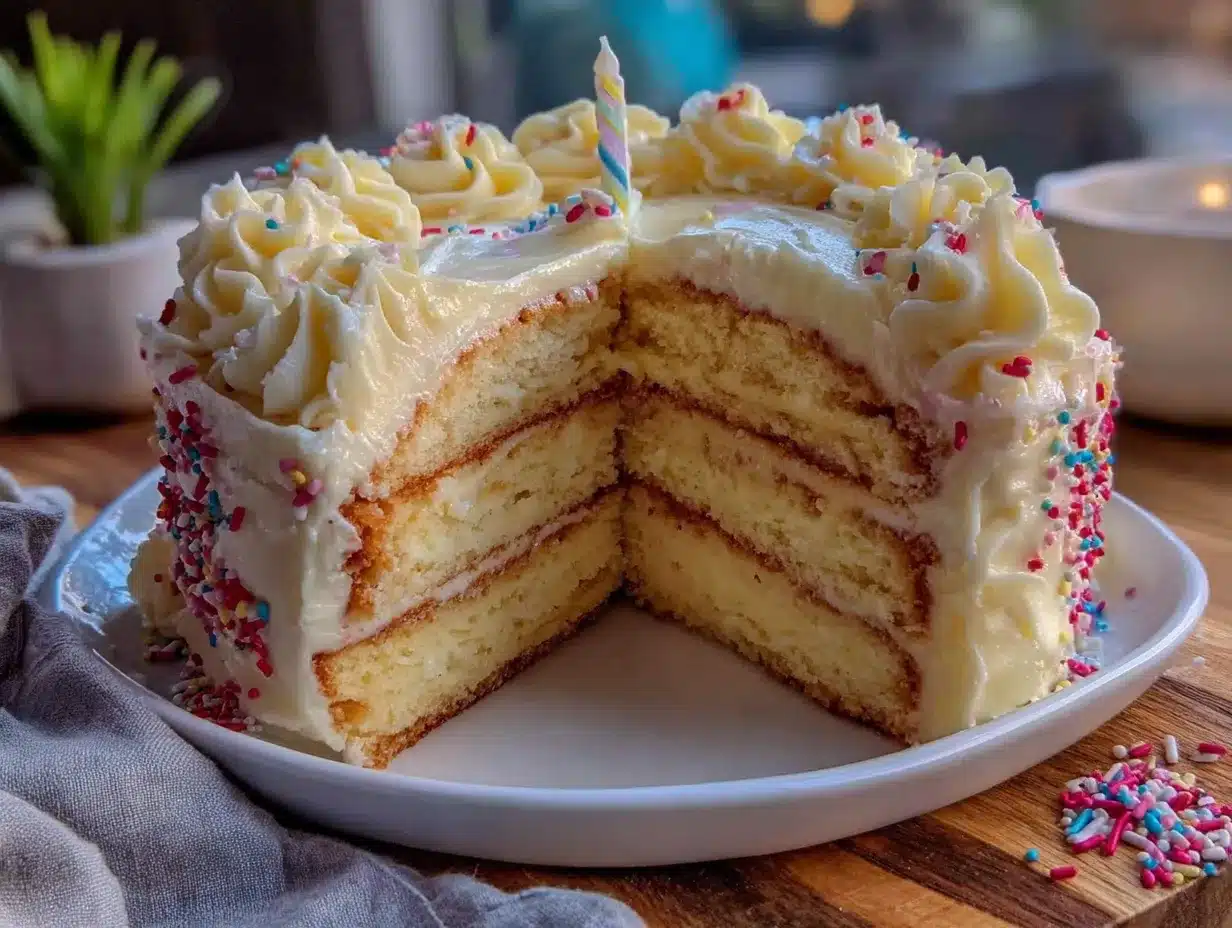
- Unsalted butter, softened — 1½ cups (3 sticks or 340g). Again, room temperature is key. The butter should be soft enough that you can press your finger into it easily, but not melting.
- Powdered sugar — 4 cups (480g). Sift it first to avoid lumps. I know it’s an extra step, but trust me — nobody wants a lumpy buttercream.
- Heavy cream — 3-4 tablespoons (45-60ml). Heavy cream makes the frosting light and fluffy. You can substitute whole milk, but the texture won’t be as luxurious.
- Vanilla extract — 2 teaspoons (10ml). Pure vanilla is even more important here since the flavor is front and center.
- Salt — ¼ teaspoon (1.5g). Just a pinch to cut through the sweetness and balance everything out.
For Decoration (Optional)
- Sprinkles — ¼ cup (about 40g). Rainbow sprinkles are classic, but use whatever makes you happy. I like the jimmies-style sprinkles that don’t bleed color into the frosting.
- Cake stand or serving plate — Something pretty to show off your creation!
Equipment Needed
You don’t need a professional bakery setup to make this cake, but having the right tools makes the process smoother. Here’s what you’ll need:
- Two 9-inch round cake pans — I recommend light-colored metal pans for even baking. Dark pans can cause the edges to brown too quickly. If you only have one pan, you can bake the layers one at a time — just let the pan cool completely between batches.
- Stand mixer or hand mixer — A stand mixer with the paddle attachment is ideal, but a hand mixer works perfectly fine. You’ll be mixing for a while, so pick whichever is more comfortable for you.
- Mixing bowls — At least two medium bowls and one large bowl. I like glass or stainless steel because they don’t retain odors.
- Measuring cups and spoons — Accurate measurements matter in baking. Use dry measuring cups for dry ingredients and liquid measuring cups for wet ingredients.
- Rubber spatula — For scraping down the bowl and folding ingredients. A good spatula is worth its weight in gold.
- Parchment paper — Cut circles to line the bottom of your cake pans. This guarantees your cakes won’t stick, no matter how well you grease the pan.
- Wire cooling rack — Cakes need to cool completely before frosting, and a wire rack allows air to circulate so they cool evenly.
- Offset spatula — For spreading the buttercream smoothly. A butter knife works in a pinch, but an offset spatula makes the job much easier.
- Turntable (optional) — If you frost cakes often, a turntable is a game-changer. But if you’re just making this for a birthday, a flat plate and a steady hand will do just fine.
Preparation Method
Alright, let’s get baking! I’ll walk you through each step with the little details that make a big difference. Take your time, and remember — even if something goes wrong, it’ll still taste delicious.
Step 1: Preheat and Prepare Your Pans
Preheat your oven to 350°F (175°C). While it’s heating up, grease your two 9-inch round cake pans with butter or non-stick spray. Cut circles of parchment paper to fit the bottom of each pan and place them inside. Grease the parchment too, then dust the pans lightly with flour. This double-layer protection means your cakes will come out clean every time. I learned this the hard way after spending 20 minutes trying to pry a stuck cake out of its pan — not fun.
Step 2: Cream the Butter and Sugar
In the bowl of your stand mixer (or a large bowl if using a hand mixer), beat the softened butter on medium speed for about 2 minutes until it’s smooth and creamy. Add the granulated sugar and beat on medium-high speed for 3-5 minutes. The mixture should look light, fluffy, and pale in color. This step is crucial — you’re incorporating air into the butter, which helps the cake rise and gives it a tender texture. Scrape down the sides of the bowl halfway through with your rubber spatula.
Step 3: Add the Eggs
Add the eggs one at a time, beating well after each addition — about 30 seconds per egg. The batter should look smooth and glossy. If it looks curdled or separated, don’t panic. This can happen if your eggs were too cold or if you added them too quickly. Just keep mixing on medium speed for another minute and it should come back together. Add the vanilla extract and beat for another 30 seconds.
Step 4: Combine Dry Ingredients
In a separate medium bowl, whisk together the flour, baking powder, and salt. Whisking ensures the baking powder is evenly distributed so you don’t end up with one part of the cake rising more than another. Set this aside for a moment.
Step 5: Alternate Adding Dry and Wet Ingredients
With the mixer on low speed, add about one-third of the flour mixture to the butter mixture. Beat until just combined — don’t overmix! Then add half of the milk and beat until combined. Repeat with another third of flour, the remaining milk, and finally the last third of flour. Stop the mixer as soon as the last streaks of flour disappear. Overmixing at this stage develops gluten, which can make your cake tough. I’ve done it before and ended up with a cake that was more like bread — still tasty, but not what you want for a birthday.
Step 6: Divide and Bake
Divide the batter evenly between your two prepared pans. Use a kitchen scale if you have one for accuracy, or eyeball it as best you can. Smooth the tops with your spatula. Bake for 25-30 minutes, or until a toothpick inserted into the center comes out clean or with a few moist crumbs. The cakes should be golden brown and pulling away slightly from the edges of the pan. Let them cool in the pans for 10 minutes, then turn them out onto a wire rack to cool completely. Don’t even think about frosting them until they’re fully cool — warm cake will melt your buttercream into a sad, soupy mess.
Step 7: Make the Buttercream
While the cakes are cooling, make the frosting. In your mixer bowl, beat the softened butter on medium speed for 2-3 minutes until it’s pale, smooth, and fluffy. This is called “whipping” the butter, and it’s the secret to a light, airy buttercream. Reduce the speed to low and gradually add the sifted powdered sugar, about 1 cup at a time. The mixture will look thick and crumbly at first — that’s normal. Add the heavy cream, one tablespoon at a time, and beat on medium-high speed for 2-3 minutes until the frosting is light, fluffy, and spreadable. Add the vanilla extract and salt, and beat for another minute. If the frosting is too thick, add a little more cream. If it’s too thin, add a bit more powdered sugar.
Step 8: Assemble and Frost
Place one cake layer on your serving plate or cake stand. Use a dollop of buttercream to stick it to the plate so it doesn’t slide around. Spread about 1 cup of buttercream evenly over the top. Place the second cake layer on top, making sure it’s centered. Spread a thin layer of buttercream over the entire cake — this is called a “crumb coat” and it traps any loose crumbs so your final layer is smooth. Pop the cake in the fridge for 15 minutes to let the crumb coat set. Then apply the remaining buttercream in a thick, even layer. Use your offset spatula to create swirls or smooth it out — whatever you prefer. Top with sprinkles if you’re using them.
Cooking Tips & Techniques
Over the years, I’ve made plenty of mistakes so you don’t have to. Here are my best tips for cake success:
- Room temperature ingredients are non-negotiable. I know it’s tempting to use cold eggs straight from the fridge, but they won’t emulsify properly with the butter. Set everything out an hour before you start baking. Your butter, eggs, and milk should all be at room temperature.
- Don’t overmix the batter. Once you add the flour, mix just until it’s combined. A few small lumps are totally fine — they’ll bake out. Overmixing develops gluten and gives you a dense, tough cake.
- Use a kitchen scale for accuracy. Measuring flour by volume can be inconsistent. If you have a scale, use it. 360 grams of flour is much more reliable than a cup measurement that could vary by 20 grams depending on how you scoop.
- Let the cakes cool completely. I once tried to frost a slightly warm cake because I was in a hurry. The buttercream melted into a puddle and I had to start over. Patience pays off here.
- Chill the cake before the final frosting layer. The crumb coat is your best friend. It seals in the crumbs and gives you a clean canvas for the final layer of buttercream. Fifteen minutes in the fridge makes a world of difference.
- Level your cakes if needed. Sometimes cakes dome in the center. Use a serrated knife to slice off the domed top so your layers stack evenly. Don’t throw away the scraps — they make a great snack!
Variations & Adaptations
This recipe is wonderfully versatile. Here are a few ways to make it your own:
- Chocolate Birthday Cake : Replace ½ cup of the all-purpose flour with ½ cup of unsweetened cocoa powder. Add an extra 2 tablespoons of milk to compensate for the dry cocoa. You’ll get a rich chocolate cake that pairs beautifully with the vanilla buttercream.
- Lemon Birthday Cake : Add the zest of 2 lemons to the sugar and rub it in with your fingers before creaming with the butter. Replace ¼ cup of the milk with fresh lemon juice. The result is a bright, citrusy cake that’s perfect for spring birthdays.
- Gluten-Free Option : Substitute the all-purpose flour with a 1:1 gluten-free baking flour blend. I’ve had good results with Bob’s Red Mill. Add an extra tablespoon of milk since gluten-free flours tend to absorb more liquid.
- Dairy-Free Option : Use vegan butter sticks (like Miyoko’s or Earth Balance) and replace the milk with oat milk or almond milk. The texture will be slightly different, but it’s still delicious. Use a dairy-free heavy cream alternative for the buttercream.
- Funfetti Cake : Fold ½ cup of rainbow sprinkles into the batter just before pouring it into the pans. The sprinkles add color and a slight crunch. Just be gentle — you don’t want the colors to bleed into the batter.
Serving & Storage Suggestions
This cake is best served at room temperature, so take it out of the fridge about 30 minutes before you plan to serve it. The buttercream softens slightly and the cake becomes incredibly tender. Slice with a sharp knife, wiping it clean between cuts for neat pieces.
For storage, keep the cake in an airtight container at room temperature for up to 2 days. If your kitchen is warm or humid, store it in the refrigerator — just let it come to room temperature before serving. You can also freeze the unfrosted cake layers wrapped tightly in plastic wrap and then foil for up to 3 months. Thaw them in the refrigerator overnight before frosting. The buttercream can be made ahead and stored in the fridge for up to a week — just let it soften and rewhip it before using.
The flavors actually develop and deepen after a day or two, so this cake is a great make-ahead option. I’ve found that day-two cake is somehow even better than day-one cake. The vanilla becomes more pronounced and the texture settles into something perfectly moist.
Nutritional Information & Benefits
Let’s be real — this is a celebration cake, not a health food. But here’s the estimated nutritional breakdown per slice (based on 12 servings):
- Calories : Approximately 520 per slice
- Fat : 28g (17g saturated)
- Carbohydrates : 65g (45g sugar)
- Protein : 5g
- Fiber : 1g
- Sodium : 280mg
On the bright side, this cake does contain calcium from the milk and butter, and a small amount of iron from the flour. The eggs provide protein and essential vitamins like B12 and riboflavin. If you’re looking to lighten things up, you can reduce the sugar in the buttercream by using less powdered sugar and adding a bit more cream — but honestly, a birthday cake is meant to be indulgent. One slice isn’t going to derail anything, and the joy it brings is its own kind of nourishment.
This recipe contains gluten, dairy, and eggs. It is not suitable for vegans or those with celiac disease without the substitutions mentioned above.
Conclusion
This classic birthday cake with vanilla buttercream is more than just a recipe — it’s a little piece of happiness you can bake and share. Every time I make it, I think of Mrs. Petrov and her flour-dusted apron, and I smile. I hope this cake brings you the same kind of warmth and joy it’s brought me. Don’t be afraid to make it your own — add extra sprinkles, experiment with different extracts, or pile on as much buttercream as your heart desires. The best cakes are the ones made with love, and this recipe gives you a perfect starting point.
I’d love to hear how your cake turns out! Leave a comment below and let me know if you tried any variations, or just share a photo of your creation. Did you make it for a birthday, or just because? Tell me all about it. And if you’re looking for more classic desserts to add to your rotation, check out my perfect chocolate chip cookies or this easy homemade brownies recipe — they’re both crowd-pleasers that never disappoint. Happy baking, friend!
Frequently Asked Questions
Can I use salted butter instead of unsalted?
Yes, you can. Just reduce the added salt in the recipe to ½ teaspoon for the cake and omit the salt in the buttercream. The frosting might be slightly saltier, which some people actually prefer — it balances the sweetness nicely.
Why did my cake sink in the middle?
This usually happens for one of three reasons: your oven door was opened too early, your baking powder is expired, or the cake was underbaked. Make sure your oven is fully preheated before putting the cake in, and resist the urge to peek until at least 20 minutes of baking time has passed.
Can I make this cake in advance?
Absolutely! You can bake the cake layers up to 2 days ahead and store them wrapped tightly in plastic wrap at room temperature. The buttercream can be made up to a week ahead and refrigerated. Just bring it to room temperature and rewhip it before using.
How do I get smooth buttercream?
The key is to sift your powdered sugar and whip the buttercream for at least 2-3 minutes after adding all the ingredients. If your buttercream still looks lumpy, try warming your mixing bowl with hot water (dry it thoroughly first) and rewhip the frosting. The warmth helps the butter soften and smooth out.
Can I use this recipe for cupcakes?
Yes! This batter makes about 24 cupcakes. Fill cupcake liners about two-thirds full and bake at 350°F (175°C) for 18-22 minutes. The buttercream recipe makes enough to generously frost all 24 cupcakes with a nice swirl on top.
Pin This Recipe!
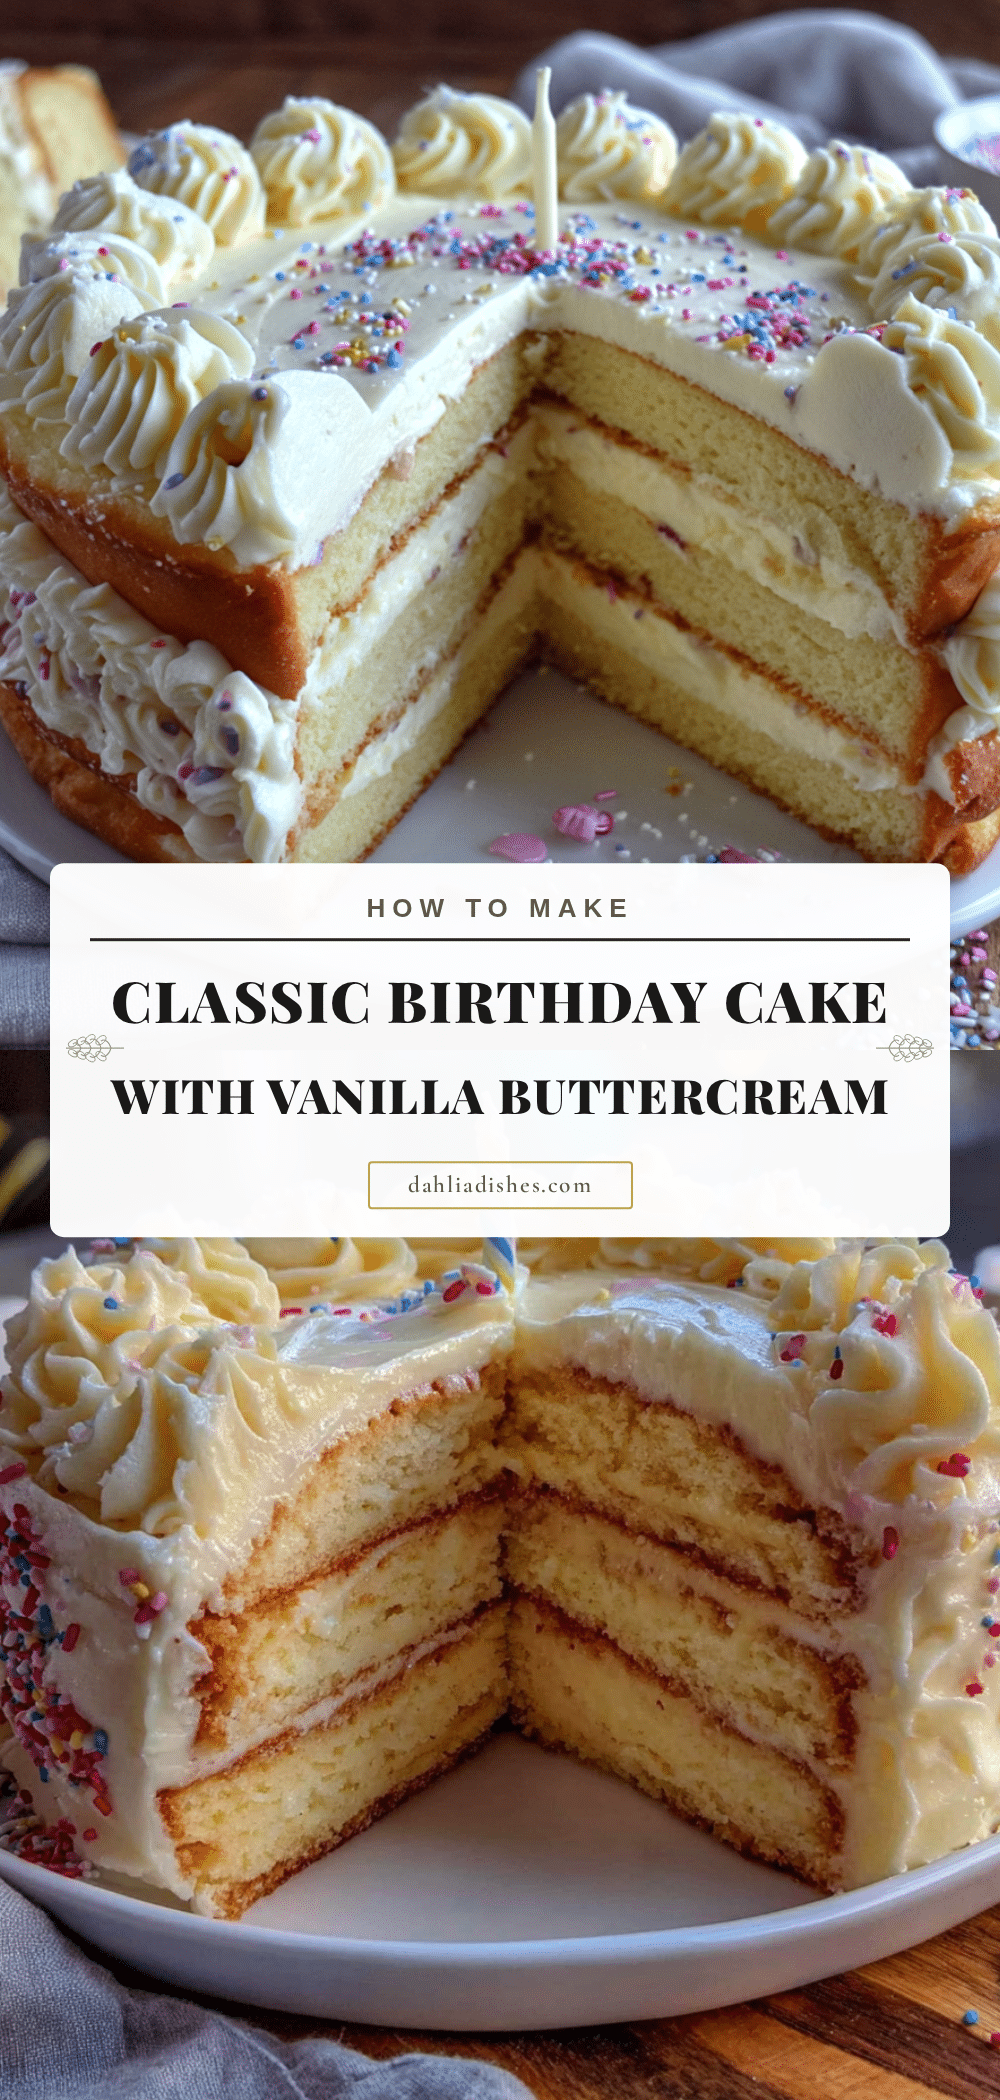
Classic Birthday Cake with Easy Vanilla Buttercream
A tender, classic birthday cake with silky vanilla buttercream that brings back childhood memories. This foolproof recipe yields a light, fluffy cake perfect for any celebration.
- Prep Time: 20 minutes
- Cook Time: 30 minutes
- Total Time: 1 hour 30 minutes (including cooling)
- Yield: 12 servings 1x
- Category: Dessert
- Cuisine: American
Ingredients
- 1 cup (2 sticks or 226g) unsalted butter, softened
- 2 cups (400g) granulated sugar
- 4 large eggs, room temperature
- 3 cups (360g) all-purpose flour
- 1 tablespoon (14g) baking powder
- 1 teaspoon (6g) salt
- 1 cup (240ml) whole milk, room temperature
- 2 teaspoons (10ml) vanilla extract
- 1½ cups (3 sticks or 340g) unsalted butter, softened (for buttercream)
- 4 cups (480g) powdered sugar, sifted
- 3–4 tablespoons (45-60ml) heavy cream
- 2 teaspoons (10ml) vanilla extract (for buttercream)
- ¼ teaspoon (1.5g) salt (for buttercream)
- ¼ cup (about 40g) rainbow sprinkles (optional)
Instructions
- Preheat oven to 350°F (175°C). Grease two 9-inch round cake pans, line bottoms with parchment paper, grease parchment, and dust with flour.
- In a stand mixer or large bowl, beat softened butter on medium speed for 2 minutes until smooth. Add sugar and beat on medium-high for 3-5 minutes until light and fluffy. Scrape down bowl.
- Add eggs one at a time, beating well after each (about 30 seconds per egg). Add vanilla extract and beat 30 seconds.
- In a separate bowl, whisk together flour, baking powder, and salt.
- With mixer on low, add one-third of flour mixture, beat until just combined. Add half of milk, beat until combined. Repeat with another third of flour, remaining milk, and final third of flour. Stop mixing when streaks disappear.
- Divide batter evenly between prepared pans. Smooth tops. Bake 25-30 minutes until toothpick inserted in center comes out clean or with moist crumbs. Cool in pans 10 minutes, then turn out onto wire rack to cool completely.
- For buttercream: Beat softened butter on medium speed 2-3 minutes until pale and fluffy. Reduce speed to low, gradually add sifted powdered sugar (1 cup at a time). Add heavy cream 1 tablespoon at a time, beat on medium-high 2-3 minutes until light and fluffy. Add vanilla and salt, beat 1 minute.
- Place one cake layer on serving plate. Spread about 1 cup buttercream evenly on top. Place second layer on top. Apply thin crumb coat over entire cake, refrigerate 15 minutes. Apply remaining buttercream in thick, even layer. Top with sprinkles if desired.
Notes
Room temperature ingredients are crucial. Don’t overmix batter. Let cakes cool completely before frosting. Chill cake after crumb coat for smooth final layer. Cake can be made ahead; flavors deepen after a day.
Nutrition
- Serving Size: 1 slice
- Calories: 520
- Sugar: 45
- Sodium: 280
- Fat: 28
- Saturated Fat: 17
- Carbohydrates: 65
- Fiber: 1
- Protein: 5
Keywords: birthday cake, vanilla cake, buttercream, classic cake, celebration cake, easy cake recipe


