Love this? Save it for later!
Share the inspiration with your friends
The woman at the farmers’ market stall watched me staring at her bag of flaky sea salt for a solid minute before she finally spoke. “You’re overthinking it,” she said, not unkindly. “Salt is just salt until you put it in something worth remembering.” I laughed, embarrassed, and told her I was trying to figure out how to make a caramel ice cream that didn’t taste like pure sugar—something with a little edge, you know? She reached under her table and pulled out a wrinkled index card, handwritten in purple ink. “My daughter’s recipe,” she said. “She’s a pastry chef in Portland. Says this is the one thing people beg her for.” I thanked her, bought two bags of her salt, and walked away thinking I’d probably never use that card. That was three summers ago, and honestly, I haven’t made a single batch of ice cream from a box since. This recipe has that effect on you. It’s the kind of thing you make once, mess up the timing on the caramel (I definitely did), and then immediately start planning your next batch while you’re still licking the spatula clean. There’s something about the way the salt hits the sweet cream that just makes sense—like the universe finally got the balance right. Maybe you’ve been there, standing in front of your freezer at 10 p.m., spoon in hand, wondering how something so simple became your whole personality. Yeah. This is that recipe.
Why You’ll Love This Recipe
Let me tell you, I’ve tested a lot of no-churn ice cream recipes over the years. Some were too icy, some were too sweet, and some just tasted like frozen whipped cream with regrets. This one? It’s different. I brought a batch to a neighborhood potluck last July and watched a grown man scrape the bottom of the bowl with a tortilla chip because he couldn’t find a spoon. That’s the kind of energy we’re working with here.
- No ice cream maker required – I mean it. You don’t need any fancy equipment. Just a bowl, a whisk, and a freezer that actually works.
- Simple ingredients – Heavy cream, sweetened condensed milk, sugar, butter, vanilla, and salt. That’s it. You probably have most of this right now.
- Perfect for summer entertaining – This is the dessert you pull out when the grill is still smoking and everyone’s too full for pie. It’s light, it’s cold, and it makes people happy.
- Unbelievably creamy – The texture is honestly better than most churned ice creams. The sweetened condensed milk does something magical here—it keeps the ice cream soft and scoopable straight from the freezer, no microwaving required.
- Crowd-pleaser – Kids love the caramel, adults love the salt, and everyone loves that it tastes like you spent way more effort than you actually did.
What makes this recipe different from the dozens of other no-churn recipes out there? It’s the salted caramel ripple. Most recipes just swirl in a thin caramel that freezes into hard, icy shards. This one uses a cooked caramel sauce that stays soft and fudgy even when frozen, so every bite has that perfect salty-sweet ribbon running through it. I spent three batches getting that ratio right—one was too runny, one crystallized on me, and one I accidentally turned into brittle. This version is the Goldilocks. It’s the one I keep coming back to, summer after summer.
What Ingredients You Will Need
This recipe uses simple, everyday ingredients, but the way they come together is honestly kind of magical. The caramel sauce is the star here, so don’t skimp on the salt quality—it really does make a difference.
- 2 cups heavy cream (cold) – This needs to be straight from the fridge. Warm cream won’t whip properly, and we need those stiff peaks to create the ice cream base. I use Organic Valley or Horizon—both whip up beautifully.
- 1 can (14 ounces) sweetened condensed milk – This is non-negotiable for the no-churn texture. It adds sweetness and keeps the ice cream from freezing into a brick. I’ve tried making this with evaporated milk and sugar, and it just isn’t the same.
- 1 teaspoon vanilla extract – Pure vanilla, not imitation. It adds warmth and depth to the caramel. Nielsen-Massey is my go-to, but any pure extract works fine.
- 1 cup granulated sugar – For the caramel. Regular white sugar is best here—brown sugar adds too much molasses flavor and throws off the color.
- 6 tablespoons unsalted butter (cut into pieces) – Salted butter will make the caramel too salty, so stick with unsalted and control the salt yourself.
- 1/2 cup heavy cream (room temperature) – This goes into the caramel sauce. If it’s too cold, it’ll seize up the caramel and you’ll get lumps. Leave it on the counter for 15 minutes before you start.
- 1 1/2 teaspoons flaky sea salt – This is the finishing touch. Maldon is my favorite—it has those delicate, crunchy flakes that dissolve slowly on your tongue. Regular table salt will just make it taste salty, not nuanced.
Ingredient Tips & Substitutions
- For the cream: You can substitute coconut cream (the thick kind from a can, not the refrigerated stuff) for a dairy-free version. Whip it the same way—it works surprisingly well.
- For the sweetened condensed milk: There are dairy-free versions available now (Nature’s Charm makes a good one), but the texture will be slightly softer. Still delicious, just a little less scoopable.
- For the salt: If you don’t have flaky sea salt, use kosher salt at about half the amount. Don’t use table salt—it’s too fine and will dissolve completely, leaving you with a one-note salty bite.
Equipment Needed
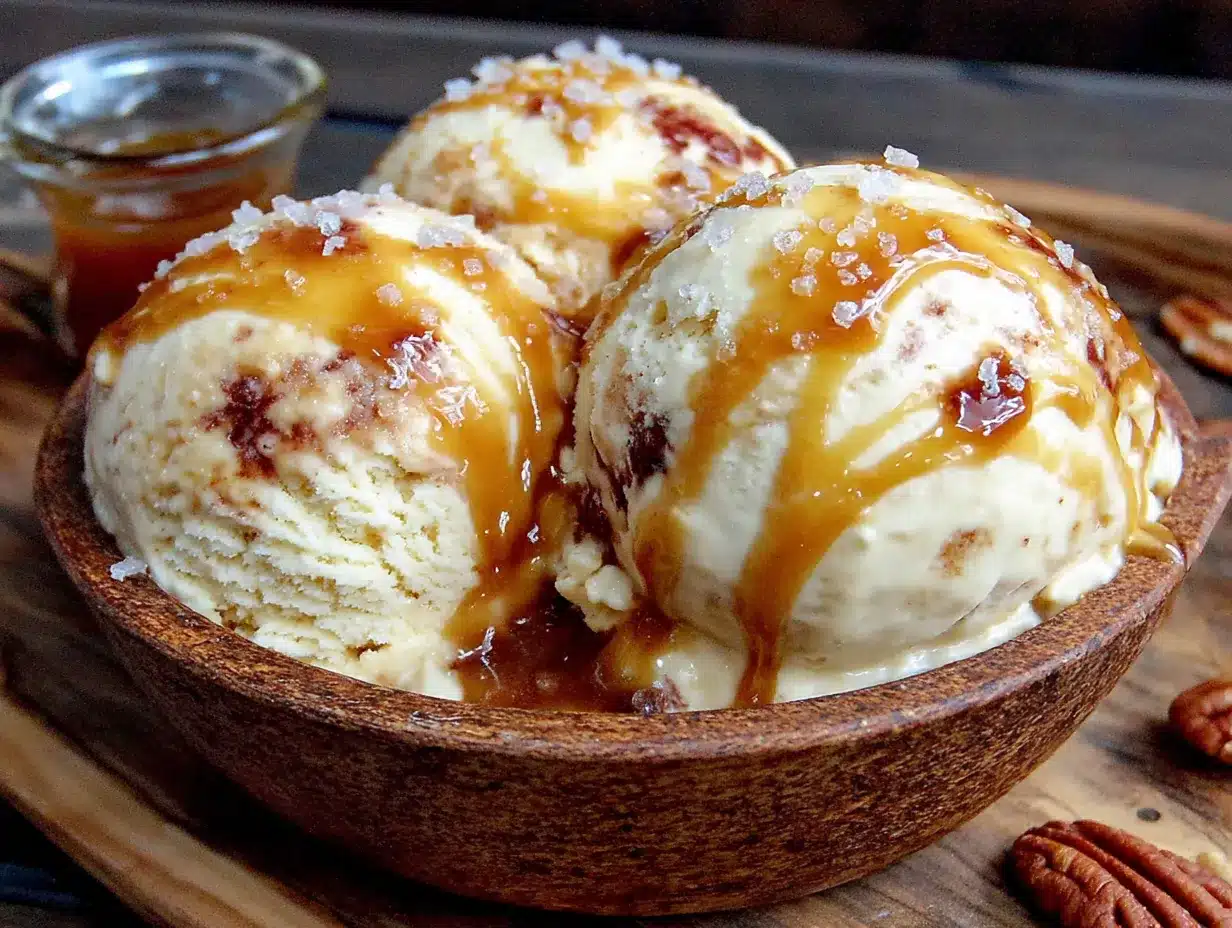
You don’t need much for this recipe, which is honestly the whole point. Here’s what you’ll need:
- Large mixing bowl – For whipping the cream. Metal or glass works best—plastic bowls can retain grease and prevent the cream from whipping properly.
- Hand mixer or stand mixer – You can whip cream by hand with a whisk, but it’ll take about 8-10 minutes and your arm will definitely feel it. A hand mixer does the job in 3 minutes flat.
- Medium saucepan – For making the caramel. A heavy-bottomed saucepan distributes heat more evenly and reduces the chance of burning the sugar.
- Candy thermometer (optional but helpful) – You don’t strictly need one, but if you’re nervous about caramel, it takes the guesswork out. You’re aiming for 340°F for the amber color.
- 8×4-inch loaf pan – For freezing the ice cream. A metal pan freezes faster than glass, but either works. If you use glass, just expect it to take an extra hour or two to fully set.
- Parchment paper or plastic wrap – To line the pan and prevent sticking. Trust me on this one—I learned the hard way after spending 20 minutes chiseling frozen ice cream out of an unlined pan.
I picked up my favorite loaf pan at a thrift store for two dollars, and it’s honestly the best one I own. You don’t need fancy equipment here—just stuff that works.
Preparation Method
Step 1: Make the Salted Caramel Sauce
Start by making the caramel sauce first, because it needs time to cool before you swirl it into the ice cream base. Trust me, hot caramel will melt your whipped cream into a sad, soupy mess.
In a medium saucepan over medium heat, add 1 cup of granulated sugar in an even layer. Don’t stir it yet—just let it sit and start melting around the edges. This takes about 3-4 minutes. When you see the edges turning golden, gently swirl the pan (don’t stir!) to encourage even melting. The sugar will clump up at first, then gradually smooth out. Be patient—it takes about 6-8 minutes total to get a deep amber color.
Once the sugar is completely melted and the color of a copper penny (about 340°F if you’re using a thermometer), remove the pan from heat and immediately whisk in the 6 tablespoons of butter, one piece at a time. The mixture will bubble up violently—don’t panic, that’s normal. Keep whisking until the butter is fully incorporated and the caramel is smooth.
Slowly drizzle in the 1/2 cup of room-temperature heavy cream while whisking constantly. Again, it’ll bubble up, so go slow. Once all the cream is in, whisk in 1 teaspoon of the flaky sea salt. Let the caramel cool in the pan for 10 minutes, then transfer it to a heatproof bowl and let it cool completely to room temperature. Don’t rush this—I once put warm caramel into the fridge and ended up with a crystallized mess.
Step 2: Whip the Cream
Pour the 2 cups of cold heavy cream into a large mixing bowl. Using a hand mixer or stand mixer fitted with the whisk attachment, beat the cream on medium-high speed until stiff peaks form. This takes about 3-4 minutes with a mixer, or 8-10 minutes by hand. You’ll know it’s ready when you lift the whisk and the cream holds its shape without drooping. Be careful not to over-whip—if you go too far, you’ll end up with butter, and that’s a different recipe entirely.
Step 3: Make the Ice Cream Base
In a separate bowl, whisk together the entire can of sweetened condensed milk and the 1 teaspoon of vanilla extract until smooth. Gently fold this mixture into the whipped cream using a rubber spatula. The trick here is to fold, not stir—you want to keep as much air in the cream as possible. Fold until just combined, with no white streaks remaining. It should look like a thick, luscious mousse.
Step 4: Layer and Swirl
Line your loaf pan with parchment paper, leaving a little overhang on the sides (this makes lifting the ice cream out later a breeze). Spread about one-third of the ice cream base into the bottom of the pan. Drizzle about one-third of the cooled caramel sauce over the top. Use a butter knife or skewer to gently swirl the caramel into the cream—don’t overdo it, or you’ll lose the distinct ribbons. Repeat with another layer of cream, another drizzle of caramel, and another gentle swirl. Finish with the remaining cream and caramel.
Step 5: Freeze
Sprinkle the remaining 1/2 teaspoon of flaky sea salt over the top. Cover the pan tightly with plastic wrap and place it in the freezer. Freeze for at least 6 hours, but overnight is better. The ice cream needs that full time to set up properly—if you rush it, you’ll get a soft, scoopable mess that doesn’t hold its shape.
Cooking Tips & Techniques
I’ve made this recipe about a dozen times now, and I’ve definitely learned a few things the hard way. Here’s what I wish someone had told me before my first attempt:
- Don’t walk away from the caramel – I know it’s tempting to start cleaning up while the sugar melts, but caramel can go from perfect to burnt in about 30 seconds. Stay close, watch the color, and trust your eyes more than your timer.
- Room temperature cream for the caramel is non-negotiable – I learned this after my fourth batch seized up into a grainy, lumpy mess. Cold cream shocks the hot caramel and causes the sugar to crystallize. Set your cream out 15 minutes ahead of time.
- Use a metal loaf pan if you can – Metal conducts cold much better than glass, so your ice cream will freeze faster and more evenly. If you use glass, plan for an extra 2 hours of freezing time.
- Let the ice cream sit for 5 minutes before scooping – Straight from the freezer, this stuff is rock hard. Let it sit on the counter for 5-10 minutes, and it’ll soften to that perfect scoopable texture.
- Don’t skip the parchment paper – I thought I could just spray the pan with nonstick spray and call it a day. I was wrong. The ice cream stuck so badly that I ended up eating it in crumbled chunks with a fork. Parchment paper saves your sanity.
Variations & Adaptations
This recipe is incredibly flexible, and I’ve tried quite a few variations over the years. Here are some of my favorites:
- Chocolate-Salted Caramel – Add 1/4 cup of unsweetened cocoa powder to the sweetened condensed milk before folding it into the whipped cream. It turns the base into a chocolate ice cream, and the salted caramel ribbons cut through the richness beautifully. I made this for a birthday party last year, and it was gone in 20 minutes.
- Vegan Version – Swap the heavy cream for two cans of full-fat coconut cream (chilled overnight and whipped) and use a dairy-free sweetened condensed milk. The coconut flavor is subtle but present, so it works best if you’re already a fan of coconut-based desserts.
- Bourbon-Salted Caramel – Add 2 tablespoons of bourbon to the caramel sauce after you take it off the heat. The alcohol keeps the caramel slightly softer in the freezer, and the smoky warmth pairs perfectly with the salt. I tried this on a whim one New Year’s Eve, and it’s been a holiday staple ever since.
- Espresso Ripple – Dissolve 1 tablespoon of instant espresso powder in 1 tablespoon of hot water and drizzle it into the ice cream base before swirling. The coffee flavor doesn’t overpower the caramel—it just adds a little depth and cuts through the sweetness.
Serving & Storage Suggestions
This ice cream is best served straight from the freezer with a 5-minute rest on the counter. Scoop it into chilled bowls or sugar cones—the cold helps the ice cream hold its shape longer. I like to top each serving with an extra pinch of flaky sea salt and a drizzle of warm caramel sauce (just warm up some leftover sauce in the microwave for 10 seconds).
For a full dessert experience, serve it alongside a warm brownie or a slice of apple pie. The contrast between hot and cold, fudgy and creamy, is honestly unbeatable. I’ve also been known to sandwich it between two chocolate cookies for an impromptu ice cream sandwich—no regrets.
Storage is simple: keep the ice cream tightly covered with plastic wrap or transfer it to an airtight container. It will keep in the freezer for up to 2 weeks, though honestly, it never lasts that long in my house. After about 10 days, the texture starts to get a little icy on the surface, so try to finish it within the first week for the best experience.
If you’re making this ahead for a party, you can freeze it up to 5 days in advance. Just make sure to press a piece of parchment paper directly onto the surface before sealing—it prevents freezer burn and keeps the texture creamy.
Nutritional Information & Benefits
Let’s be real—this is a treat, not a health food. But that doesn’t mean it’s devoid of any redeeming qualities. Here’s a rough breakdown per serving (based on 8 servings):
| Nutrient | Amount per Serving |
|---|---|
| Calories | 420 |
| Total Fat | 28g |
| Saturated Fat | 18g |
| Carbohydrates | 42g |
| Protein | 4g |
| Sodium | 320mg |
The heavy cream provides a good dose of vitamin A and healthy fats, which help your body absorb fat-soluble vitamins. The sweetened condensed milk adds calcium and protein, though it’s definitely on the sugary side. And the flaky sea salt? Well, it’s not exactly a health ingredient, but it does help balance electrolytes—if you’re looking for a silver lining. Honestly, this is a dessert you eat because it makes you happy, not because it’s good for you. And sometimes, that’s exactly what you need.
This recipe is not gluten-free friendly as written, but it can easily be made gluten-free by ensuring all your ingredients are certified gluten-free (most are, but always check labels). It’s also vegetarian-friendly.
Conclusion
This no-churn salted caramel ice cream has become my go-to summer dessert for a reason. It’s simple enough to make on a Tuesday night when you’re craving something sweet, but impressive enough to serve at a backyard barbecue where everyone thinks you spent hours on it. The combination of rich, buttery caramel and delicate flakes of sea salt is one of those flavor pairings that just works—it’s satisfying without being overwhelming, indulgent without being heavy.
I love that this recipe came from a handwritten index card from a stranger at a farmers’ market. It reminds me that the best recipes aren’t always the ones with the most steps or the fanciest ingredients—they’re the ones that someone took the time to write down and pass along. So if you make this, don’t be afraid to tweak it. Add more salt if you like it bold. Use less caramel if you prefer a milder sweetness. Make it your own, and then share it with someone who needs a little summer joy.
I’d love to hear how yours turns out! Drop a comment below and let me know if you tried any variations, or tag me in your photos on social media. Happy scooping!
Frequently Asked Questions
Can I use salted butter instead of unsalted?
You can, but you’ll want to reduce the added salt in the caramel sauce. Start with half the flaky salt called for, then taste and adjust. Salted butter can vary widely in saltiness, so it’s better to go light and add more later if needed.
Why did my caramel crystallize?
Caramel crystallizes when sugar granules splash onto the sides of the pan or when you stir it too early. To avoid this, use a clean, dry saucepan and gently swirl the pan instead of stirring. If you see crystals forming, you can brush the sides of the pan with a wet pastry brush to dissolve them.
How long does this ice cream last in the freezer?
It’s best within the first week, but it will keep for up to 2 weeks if stored properly. After that, the texture starts to get icy. To extend its life, press a piece of parchment paper directly onto the surface before sealing the container—it prevents freezer burn.
Can I make this without a hand mixer?
Absolutely! You can whip the cream by hand with a whisk, but it will take about 8-10 minutes of steady whisking. It’s a great arm workout, honestly. Just make sure your cream is very cold and your bowl is clean—any trace of grease will prevent the cream from whipping.
Can I double this recipe?
Yes, but you’ll need to use a larger pan (a 9×5-inch loaf pan works well) or divide it between two pans. The freezing time will also increase by about 2 hours because there’s more volume to freeze. Just be patient and let it set fully before scooping.
Pin This Recipe!
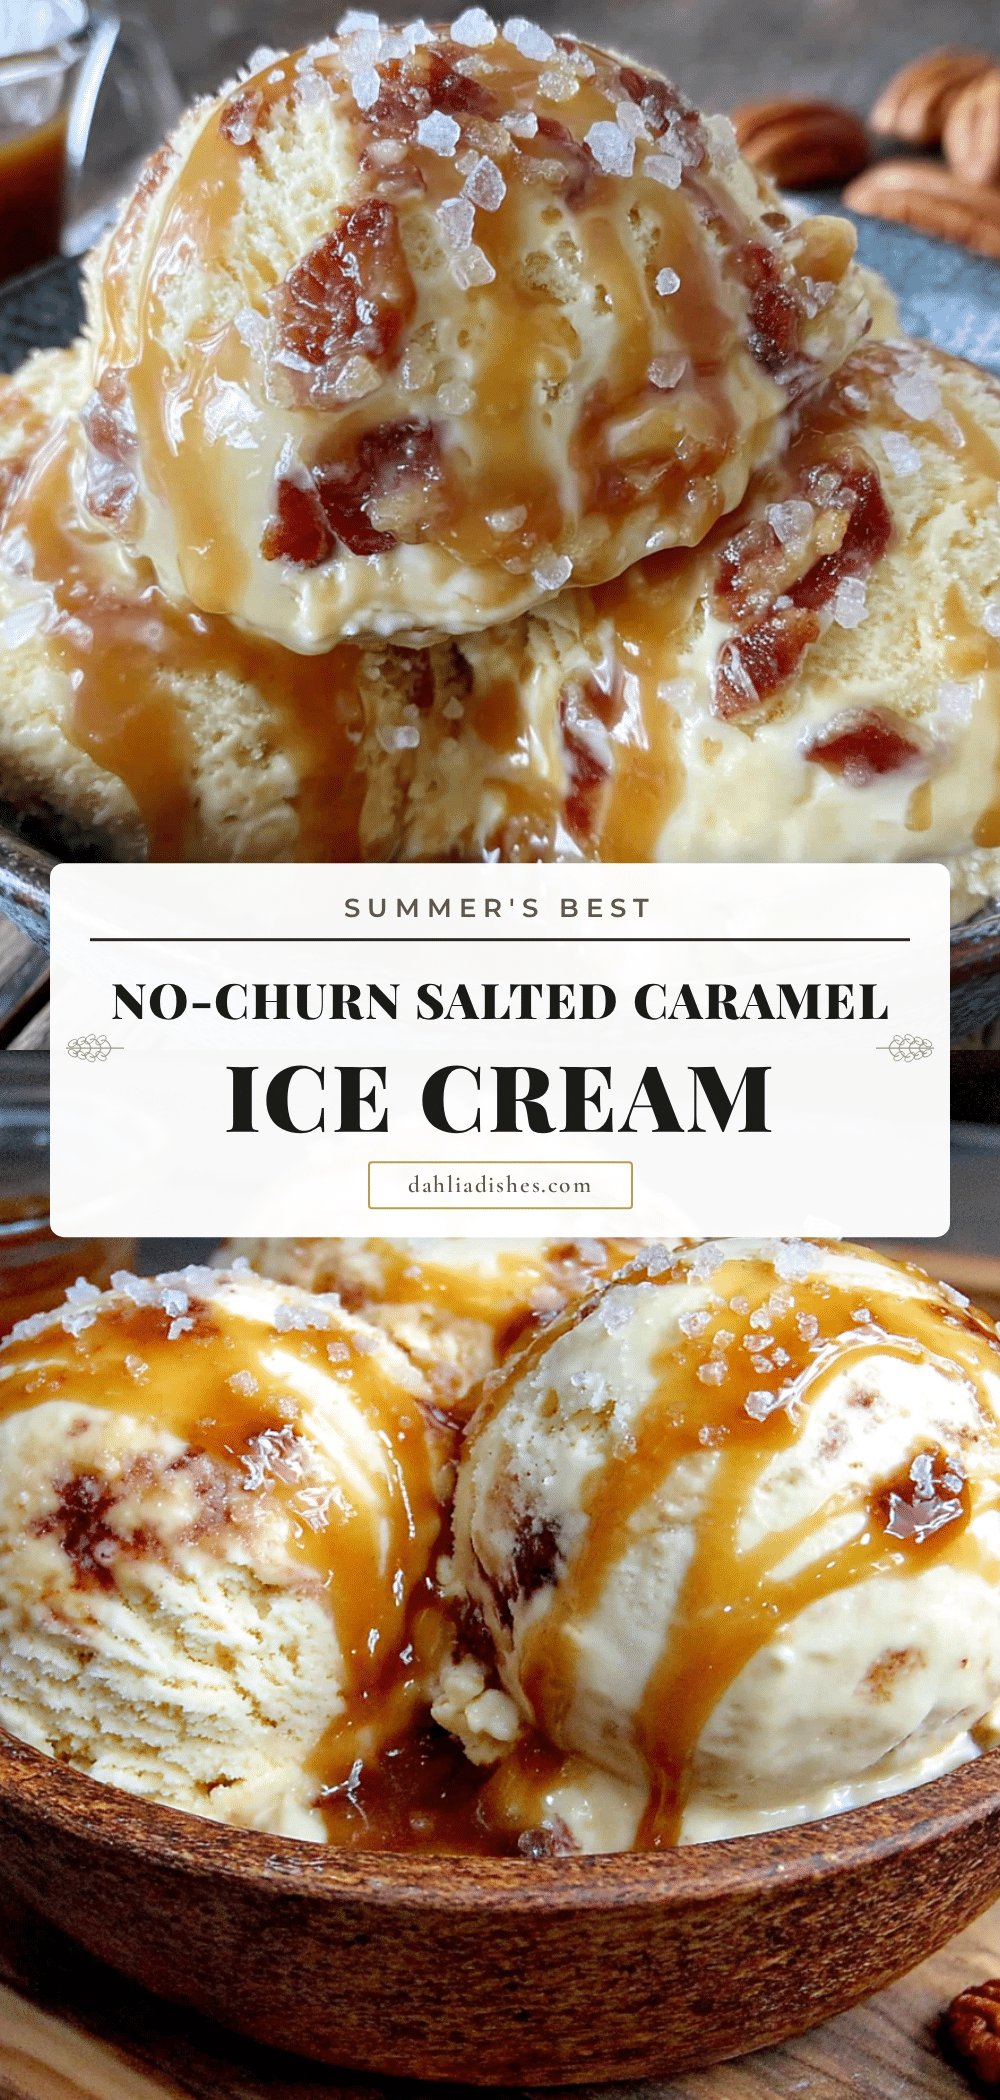
Summers Best No-Churn Salted Caramel Ice Cream
This no-churn salted caramel ice cream is incredibly creamy and features a soft, fudgy salted caramel ripple. Made without an ice cream maker, it’s the perfect summer dessert that tastes like you spent hours on it.
- Prep Time: 20 minutes
- Cook Time: 15 minutes
- Total Time: 6 hours 35 minutes (includes freezing)
- Yield: 8 servings 1x
- Category: Dessert
- Cuisine: American
Ingredients
- 2 cups heavy cream (cold)
- 1 can (14 ounces) sweetened condensed milk
- 1 teaspoon vanilla extract
- 1 cup granulated sugar
- 6 tablespoons unsalted butter (cut into pieces)
- 1/2 cup heavy cream (room temperature)
- 1 1/2 teaspoons flaky sea salt
Instructions
- Make the Salted Caramel Sauce: In a medium saucepan over medium heat, add 1 cup of granulated sugar in an even layer. Let it melt without stirring until the edges turn golden (about 3-4 minutes). Gently swirl the pan to encourage even melting until the sugar is a deep amber color (about 6-8 minutes, or 340°F). Remove from heat and immediately whisk in the 6 tablespoons of butter, one piece at a time. Slowly drizzle in the 1/2 cup of room-temperature heavy cream while whisking constantly. Whisk i…
- Whip the Cream: Pour the 2 cups of cold heavy cream into a large mixing bowl. Beat with a hand mixer or stand mixer on medium-high speed until stiff peaks form (about 3-4 minutes).
- Make the Ice Cream Base: In a separate bowl, whisk together the sweetened condensed milk and vanilla extract until smooth. Gently fold this mixture into the whipped cream using a rubber spatula until just combined.
- Layer and Swirl: Line a loaf pan with parchment paper. Spread one-third of the ice cream base into the pan. Drizzle one-third of the cooled caramel sauce over the top and gently swirl with a butter knife. Repeat with another layer of cream and caramel, then finish with the remaining cream and caramel.
- Freeze: Sprinkle the remaining 1/2 teaspoon of flaky sea salt over the top. Cover tightly with plastic wrap and freeze for at least 6 hours, preferably overnight.
Notes
Don’t walk away from the caramel; it can burn quickly. Use room-temperature cream for the caramel to prevent crystallization. Let the ice cream sit for 5 minutes before scooping for best texture. Store tightly covered for up to 2 weeks.
Nutrition
- Serving Size: 1 serving
- Calories: 420
- Sugar: 40
- Sodium: 320
- Fat: 28
- Saturated Fat: 18
- Carbohydrates: 42
- Protein: 4
Keywords: no-churn ice cream, salted caramel, summer dessert, easy ice cream, no ice cream maker


