Love this? Save it for later!
Share the inspiration with your friends
The neighborhood cookie swap was in three days and I’d completely forgotten. Everyone else would be bringing those elaborate, multi-day projects—you know the ones. Layered bar cookies with homemade caramel, intricate French macarons, those perfectly uniform sandwich cookies that look like they came from a bakery. And me? I had a half-stick of butter, one egg, and a vague memory of a recipe my grandmother used to make when she wasn’t feeding an army. I stood in my kitchen on a Tuesday night, staring at the pantry like it owed me something, and honestly? I was ready to just show up with a store-bought pie and call it a day.
But then I spotted the chocolate chips tucked behind a bag of flour, and something clicked. I didn’t need a massive batch. I didn’t need fancy equipment or ingredients I’d have to hunt down at three different stores. What I needed was a small-batch chocolate chip cookies recipe that made exactly enough to share without leaving me with a week’s worth of temptation sitting on my counter. I mean, let’s be real—who actually needs 36 cookies staring at them from the kitchen counter?
So I pulled out my mixer, crossed my fingers, and threw together what I thought would be a decent attempt. The power went out halfway through chilling the dough—typical, right? So I sat there in the dark, dough in the fridge, hoping for the best. When the oven finally fired back up and those cookies came out golden and puffy, I knew I’d stumbled onto something special. They won the swap. Not because they were fancy, but because they tasted like the cookies you actually want to eat. Maybe you’ve been there too—needing a dessert that feels special without the stress of a full production. That’s what this perfect small-batch chocolate chip cookies recipe is all about.
Why You’ll Love This Recipe
Let me tell you why this isn’t just another cookie recipe floating around the internet. I’ve tested this one more times than I care to admit, tweaking ratios and baking times until it was absolutely right. Here’s what makes it stand out:
- Quick & Easy: From start to finish, you’re looking at about 30 minutes of active time. The dough needs a quick chill, but that’s hands-off time where you can clean up or pour yourself a cup of coffee.
- Simple Ingredients: No weird specialty flours or obscure extracts. Butter, sugar, eggs, flour, chocolate chips—the usual suspects you probably already have in your kitchen.
- Perfect for Gatherings: This is your secret weapon for potlucks, cookie swaps, or when you’re asked to bring dessert at the last minute. Twelve cookies is the perfect amount—enough to share, not so many that you’re stuck with leftovers for a week.
- Crowd-Pleaser: I’ve brought these to neighborhood gatherings, office parties, and family dinners. They disappear every single time. Kids love them, adults sneak seconds, and someone always asks for the recipe.
- Unbelievably Delicious: The texture is what gets people. Crispy edges, soft and chewy centers, with pools of melted chocolate in every bite. It’s that perfect cookie texture that feels like a warm hug.
What makes this different from every other chocolate chip cookie recipe? It’s the ratio. I spent weeks testing different butter-to-flour ratios, different sugar combinations, different chilling times. This version gives you that bakery-quality texture without needing to chill the dough overnight or use fancy techniques. It’s the kind of cookie that makes you close your eyes after the first bite. Honestly, it’s comfort food reimagined—faster, simpler, but with the same soul-soothing satisfaction. Perfect for impressing your dinner party guests without spending all day in the kitchen.
What Ingredients You Will Need
This recipe uses simple, wholesome ingredients to deliver that classic chocolate chip cookie experience. Nothing fancy here—just the good stuff that works together beautifully.
For the Cookie Dough
- ½ cup unsalted butter, softened (1 stick, 113g) — I prefer using European-style butter like Kerrygold for richer flavor, but standard unsalted butter works perfectly too. Make sure it’s truly softened to room temperature, not melted.
- ½ cup granulated sugar (100g) — Regular white sugar adds that slight crunch to the edges. Don’t substitute with superfine sugar here.
- ¼ cup packed light brown sugar (50g) — This is where the chewiness comes from. Make sure it’s packed firmly into the measuring cup. Dark brown sugar works too if that’s what you have, but it’ll give a slightly deeper molasses flavor.
- 1 large egg, room temperature — Cold eggs can seize up the butter and make the dough stiff. Let yours sit on the counter for 15-20 minutes before starting.
- 1 teaspoon vanilla extract — Pure vanilla extract makes a difference here. I’ve tried imitation and it’s just not the same. My go-to is Nielsen-Massey, but any pure vanilla will work.
- 1½ cups all-purpose flour (180g) — Spoon and level your flour for accurate measuring. Scooping directly from the bag packs in too much and makes dense cookies.
- ½ teaspoon baking soda — Make sure it’s fresh. Old baking soda won’t give you that proper spread and rise.
- ¼ teaspoon salt — Fine sea salt is my preference. It dissolves more evenly than kosher salt in this quantity.
- 1 cup semi-sweet chocolate chips (175g) — Here’s my secret: use a mix of chips and chopped chocolate bars if you can. The chips hold their shape while the chopped bits create those melty pools. Ghirardelli chips are my standby, but use whatever you love.
Optional Add-Ins
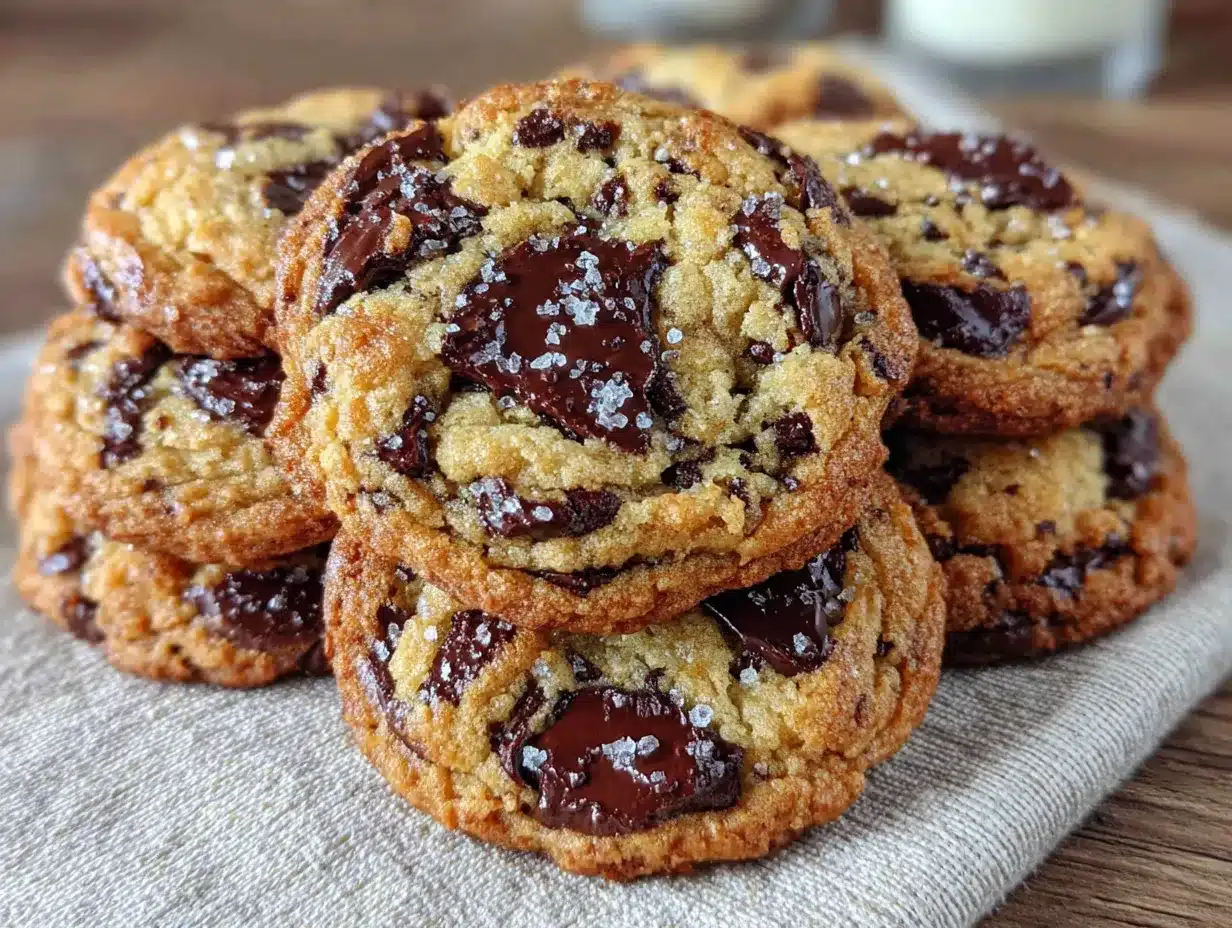
- Flaky sea salt for topping — A sprinkle right when they come out of the oven takes these to another level. Maldon is my favorite.
- ½ cup chopped walnuts or pecans — Toast them first for extra flavor. Spread on a baking sheet at 350°F for 5-7 minutes.
For substitutions, you can use dairy-free butter like Earth Balance if needed, though the texture will be slightly different. Gluten-free all-purpose flour blends work well, but add an extra tablespoon of milk to compensate for the dryness. I’ve tested this with Bob’s Red Mill 1-to-1 and it turned out great.
Equipment Needed
You don’t need a professional bakery setup for these cookies. Here’s what you’ll actually use:
- Electric mixer — A stand mixer with the paddle attachment is ideal, but a hand mixer works just fine. I’ve even made these with a wooden spoon when my mixer was in the shop—it just takes a little more elbow grease.
- Large mixing bowl — Any medium-large bowl will do. I use my favorite ceramic one that’s seen better days but still gets the job done.
- Baking sheet — A half-sheet pan is perfect. If you only have a smaller one, bake in two batches. Avoid dark nonstick sheets if possible—they can make the bottoms brown too quickly.
- Parchment paper — Non-negotiable for me. It prevents sticking and makes cleanup a breeze. Silicone baking mats work too, but they can affect spread slightly.
- Cookie scoop or tablespoon — A #40 scoop (about 1.5 tablespoons) gives you perfectly uniform cookies. I got mine at a restaurant supply store for five bucks.
- Cooling rack — Lets air circulate so the bottoms don’t get soggy. A wire rack from any kitchen store works.
- Measuring cups and spoons — Accurate measuring matters more than you think. I use metal measuring cups for dry ingredients and glass ones for liquids.
If you don’t have a cookie scoop, just use two spoons to portion the dough. It’s not as pretty, but the cookies will taste the same. And honestly, slightly imperfect cookies have more charm anyway.
Preparation Method
- Cream the butter and sugars. In your mixing bowl, beat the softened butter, granulated sugar, and brown sugar together on medium speed for 2-3 minutes until light and fluffy. You’re looking for a pale, creamy texture that looks almost like frosting. Scrape down the sides of the bowl halfway through. Don’t rush this step—proper creaming incorporates air that helps the cookies rise.
- Add the egg and vanilla. Crack your room-temperature egg into the mixture, add the vanilla extract, and beat on low until just combined. About 30 seconds is all you need. Overmixing here can make the cookies tough. The mixture might look slightly curdled at this point—that’s totally normal, especially if your egg was a touch cold.
- Mix the dry ingredients separately. In a small bowl, whisk together the flour, baking soda, and salt. This ensures the leavening agents are evenly distributed. I use a fork for this because it’s quick and I don’t have to dirty another whisk.
- Combine wet and dry. Add the flour mixture to the butter mixture in two additions, mixing on low speed after each until just incorporated. You should still see a few streaks of flour when you stop. Fold in the chocolate chips with a spatula—this prevents overmixing and keeps the dough tender. The dough should be soft but not sticky. If it feels too wet, add a tablespoon more flour.
- Chill the dough. Cover the bowl with plastic wrap and refrigerate for at least 30 minutes. This is crucial—chilled dough spreads less and gives you thicker, chewier cookies. I’ve forgotten this step before and ended up with flat, greasy cookies that spread into one giant cookie. Learn from my mistake. You can chill for up to 48 hours if you want to prep ahead.
- Preheat the oven. About 15 minutes before you’re ready to bake, preheat your oven to 350°F (175°C). Line your baking sheet with parchment paper. While the oven heats, take the dough out of the fridge—it’ll be firm but scoopable.
- Portion the dough. Use your cookie scoop or a tablespoon to portion out 12 equal balls of dough, about 1.5 tablespoons each. Place them 2 inches apart on the prepared baking sheet. I usually fit 6 cookies per sheet and bake in two batches. Don’t overcrowd—they need room to spread.
- Bake. Place the sheet in the center of the oven and bake for 10-12 minutes. At 10 minutes, the edges should be golden brown and the centers should still look slightly underdone and puffy. That’s exactly what you want. They’ll continue cooking on the hot sheet after you pull them out. For softer cookies, go with 10 minutes. For crispier ones, push to 12.
- Cool on the sheet. Let the cookies rest on the baking sheet for 5 minutes. This is when the magic happens—the centers set up while the edges stay crispy. After 5 minutes, transfer them to a wire rack to cool completely. If you’re adding flaky sea salt, sprinkle it on right when they come out of the oven so it sticks.
Your kitchen will smell incredible at this point. Try not to eat all twelve before your guests arrive—I speak from experience.
Cooking Tips & Techniques
After making these cookies more times than I can count, I’ve picked up a few tricks that make a real difference. Let me save you some trial and error.
Temperature matters more than you think. I once made these in a hurry and used cold butter straight from the fridge. The dough was lumpy, the cookies spread unevenly, and they came out dense and sad. Room temperature butter isn’t just a suggestion—it’s the key to that perfect texture. Leave your butter out for at least an hour before starting, or cut it into small cubes and let it sit for 30 minutes.
Don’t skip the chill. I know, I know—you want cookies now. But that 30 minutes in the fridge is what gives you those thick, bakery-style cookies instead of flat, greasy pucks. I’ve tested this side by side, and the chilled dough always wins. If you’re really in a rush, pop the portioned dough balls in the freezer for 15 minutes instead.
Watch your oven like a hawk. Every oven runs differently. My old apartment oven ran 25 degrees hot and I burned three batches before I figured it out. Invest in an oven thermometer—they’re cheap and they’ll save your cookies. Also, rotate your baking sheet halfway through if your oven has hot spots.
Multitask smartly. While the first batch bakes, scoop the second batch onto parchment paper on a plate and pop it in the fridge. That way, the second batch is chilled and ready to go as soon as the first one comes out. Your cookies will be more consistent this way.
Use a kitchen scale if you have one. Measuring flour by volume is notoriously inconsistent. One cup can vary by 20-30 grams depending on how you scoop. A $15 kitchen scale eliminates that guesswork and gives you perfect cookies every time. I resisted buying one for years, and now I can’t imagine baking without it.
Variations & Adaptations
One of the best things about this recipe is how easily it adapts. Here are some variations I’ve tried and loved:
Double Chocolate Chip Cookies
Replace 2 tablespoons of the flour with 2 tablespoons of unsweetened cocoa powder. Use white chocolate chips instead of semi-sweet for a gorgeous contrast. These are dangerously good—I brought them to a book club meeting and they were gone before we even started discussing the book.
Gluten-Free Version
Swap the all-purpose flour with a good gluten-free 1-to-1 baking blend. I’ve had the best luck with Bob’s Red Mill. Add 1 tablespoon of milk to the dough since gluten-free flours tend to be more absorbent. The texture is slightly more delicate, but honestly? Most people won’t notice the difference.
Vegan Adaptation
Use vegan butter sticks (not the spreadable kind in a tub) and replace the egg with a flax egg—1 tablespoon ground flaxseed mixed with 3 tablespoons water, let sit for 5 minutes until gel-like. The cookies will be a bit flatter but still delicious. I made these for a friend with dairy and egg allergies and she asked for the recipe twice.
Browned Butter Version
This one takes a few extra minutes but adds incredible nutty flavor. Brown the butter in a saucepan over medium heat until it turns amber and smells toasty, about 5-7 minutes. Let it cool completely before creaming with the sugars. You’ll lose a bit of volume during browning, so add 1 tablespoon of milk to compensate. The flavor is worth the extra effort—trust me.
Add-In Swaps
Try white chocolate chips with dried cranberries, dark chocolate chunks with toasted pecans, or butterscotch chips with a sprinkle of cinnamon. I once added crushed pretzels for a salty-sweet combo that was absolutely addictive. The base recipe is forgiving enough to handle almost any add-in you can dream up.
Serving & Storage Suggestions
These cookies are best served slightly warm, when the chocolate is still melty and the edges have that perfect crispness. If you’re hosting a dinner party, bake them just before your guests arrive so the kitchen smells amazing and the cookies are fresh. Arrange them on a wooden board or a pretty plate—they look rustic and inviting without needing any fancy presentation.
For a cookie platter, pair these with some classic sugar cookies or brownie bites for variety. They also go beautifully with a glass of cold milk, a cup of hot coffee, or a scoop of vanilla ice cream sandwiched between two cookies for an impromptu ice cream sandwich. I’ve served them alongside a cheese board before (weird, I know, but the salty-sweet combo works) and they were a hit.
Storage: Keep leftover cookies in an airtight container at room temperature for up to 5 days. Place a slice of bread in the container—it absorbs excess moisture and keeps the cookies soft. Replace the bread every couple of days. I learned this trick from my grandmother and it works like magic.
Freezing: These freeze beautifully. You can freeze the baked cookies for up to 3 months in a zip-top bag. To refresh them, pop them in a 300°F oven for 5 minutes. Even better, freeze the raw dough balls on a baking sheet, then transfer to a freezer bag. Bake straight from frozen, adding 2-3 minutes to the baking time. This way, you can have fresh cookies in 15 minutes whenever the craving hits.
The flavor actually improves after a day or two—the flavors meld together and the texture becomes even more chewy. Not that they usually last that long in my house.
Nutritional Information & Benefits
Here’s the approximate nutritional breakdown per cookie (based on 12 cookies):
- Calories: 245
- Total Fat: 13g
- Saturated Fat: 8g
- Cholesterol: 38mg
- Sodium: 135mg
- Total Carbohydrates: 32g
- Dietary Fiber: 1g
- Sugars: 20g
- Protein: 3g
While these aren’t health food by any stretch, there are a few bright spots. The dark chocolate chips contain antioxidants called flavonoids that support heart health. The butter provides fat-soluble vitamins A, D, E, and K. And honestly? Sometimes the mental health benefit of enjoying a warm, homemade cookie is worth more than any nutritional metric.
This recipe is vegetarian-friendly and can be made gluten-free or vegan with the substitutions mentioned above. It contains dairy, eggs, and gluten in its standard form, so keep that in mind for guests with allergies.
I believe in balance—these cookies are a treat, meant to be enjoyed in moderation. One or two with a glass of milk is the perfect way to satisfy a sweet craving without going overboard.
Conclusion
This small-batch chocolate chip cookies recipe has become my go-to for a reason. It’s the recipe I turn to when I need something reliable, something that never fails to bring a smile to people’s faces. Whether you’re bringing them to a neighborhood gathering, serving them at a dinner party, or just treating yourself on a quiet Tuesday evening, these cookies deliver that perfect combination of crispy edges, chewy centers, and melty chocolate that everyone craves.
I love that this recipe gives you just enough to share without leaving you with a mountain of leftovers. It’s forgiving enough for beginners but produces results that impress even the most experienced bakers. And honestly? The way your kitchen smells while these are baking is worth the effort alone.
I’d love to hear how these turn out for you. Did you try any of the variations? Add your own twist? Drop a comment below and let me know—I read every single one and I’m always looking for new ideas to try. And if you loved this recipe, share it with a friend who needs a perfect small-batch cookie in their life. Happy baking, friend!
Frequently Asked Questions
Can I make this dough ahead of time?
Absolutely! You can refrigerate the dough for up to 48 hours before baking. In fact, the flavor gets even better as the ingredients meld together. Just let it sit at room temperature for 10 minutes before scooping if it’s too firm.
Why did my cookies spread too much?
This usually happens when the dough isn’t chilled enough, the butter was too soft, or your oven wasn’t hot enough. Make sure your butter is softened but not melted, chill the dough for the full 30 minutes, and use an oven thermometer to verify your oven temperature.
Can I double this recipe?
Of course! Simply double all the ingredients for 24 cookies. The baking time stays the same, but you’ll need to bake in batches or use two baking sheets. If using two sheets, rotate them halfway through baking for even results.
What’s the best way to soften butter quickly?
Cut your cold butter into small cubes and let it sit on the counter for 15-20 minutes. You can also microwave it in 5-second intervals, but be careful—you want it soft, not melted. Melted butter will change the cookie texture completely.
Can I use milk chocolate chips instead of semi-sweet?
Yes, but the cookies will be sweeter since milk chocolate has more sugar and less cocoa. If you have a sweet tooth, go for it. I’d recommend reducing the granulated sugar by 2 tablespoons to balance things out. Dark chocolate chips are also wonderful for a less sweet, more sophisticated flavor.
Pin This Recipe!
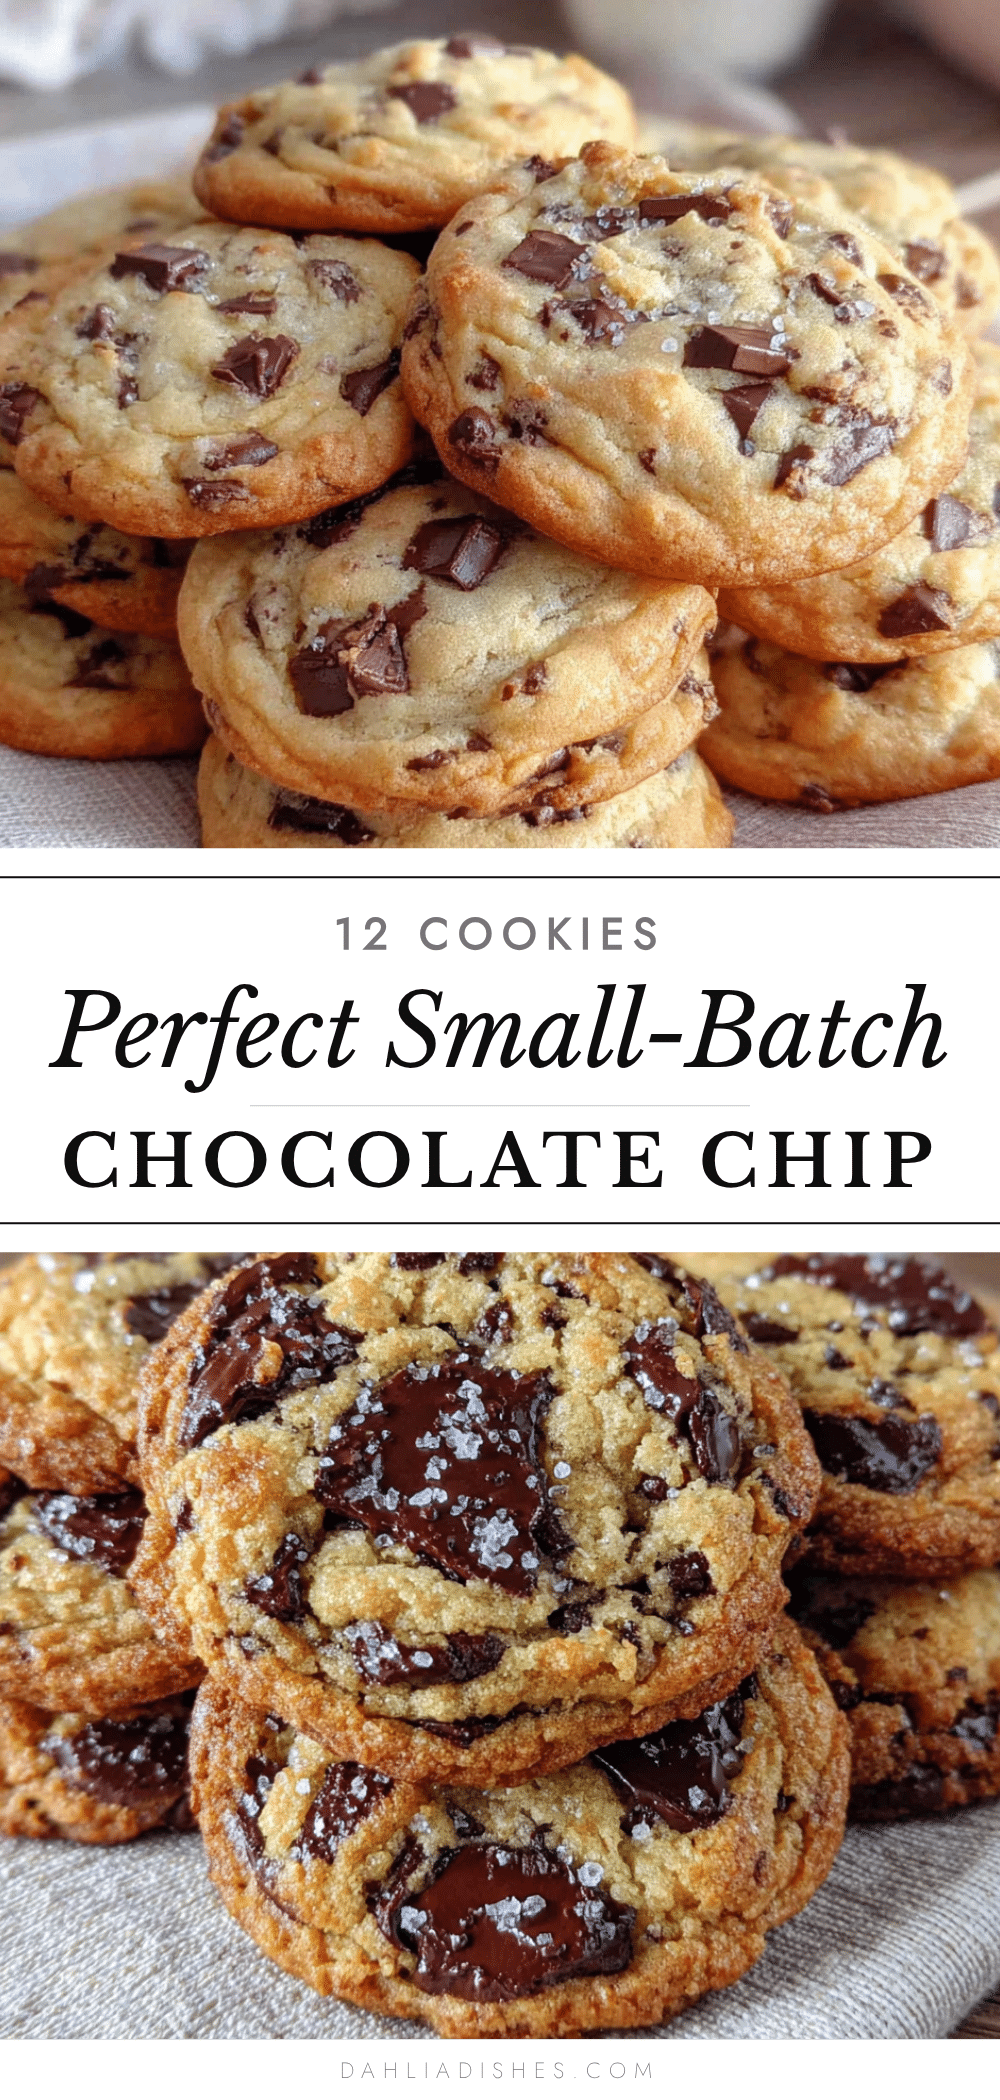
The Perfect Small-Batch Chocolate Chip Cookies Recipe

This small-batch chocolate chip cookies recipe yields 12 perfectly golden cookies with crispy edges, soft and chewy centers, and pools of melted chocolate in every bite. Quick and easy to make with simple ingredients, it’s the perfect dessert for potlucks, cookie swaps, or last-minute gatherings.
- Prep Time: 15 minutes
- Cook Time: 10-12 minutes
- Total Time: 30 minutes (plus 30 minutes chilling)
- Yield: 12 cookies 1x
- Category: Dessert
- Cuisine: American
Ingredients
- ½ cup unsalted butter, softened (1 stick, 113g)
- ½ cup granulated sugar (100g)
- ¼ cup packed light brown sugar (50g)
- 1 large egg, room temperature
- 1 teaspoon vanilla extract
- 1½ cups all-purpose flour (180g)
- ½ teaspoon baking soda
- ¼ teaspoon salt
- 1 cup semi-sweet chocolate chips (175g)
- Flaky sea salt for topping (optional)
- ½ cup chopped walnuts or pecans (optional)
Instructions
- Cream the butter and sugars. In your mixing bowl, beat the softened butter, granulated sugar, and brown sugar together on medium speed for 2-3 minutes until light and fluffy. Scrape down the sides of the bowl halfway through.
- Add the egg and vanilla. Crack your room-temperature egg into the mixture, add the vanilla extract, and beat on low until just combined, about 30 seconds.
- Mix the dry ingredients separately. In a small bowl, whisk together the flour, baking soda, and salt.
- Combine wet and dry. Add the flour mixture to the butter mixture in two additions, mixing on low speed after each until just incorporated. Fold in the chocolate chips with a spatula.
- Chill the dough. Cover the bowl with plastic wrap and refrigerate for at least 30 minutes.
- Preheat the oven. About 15 minutes before baking, preheat your oven to 350°F (175°C). Line your baking sheet with parchment paper.
- Portion the dough. Use a cookie scoop or tablespoon to portion out 12 equal balls of dough, about 1.5 tablespoons each. Place them 2 inches apart on the prepared baking sheet.
- Bake. Place the sheet in the center of the oven and bake for 10-12 minutes. At 10 minutes, the edges should be golden brown and the centers should still look slightly underdone and puffy.
- Cool on the sheet. Let the cookies rest on the baking sheet for 5 minutes. After 5 minutes, transfer them to a wire rack to cool completely. If adding flaky sea salt, sprinkle it on right when they come out of the oven.
Notes
For best results, use room temperature butter and egg. Chilling the dough for at least 30 minutes is crucial for thick, chewy cookies. For softer cookies, bake for 10 minutes; for crispier, bake for 12. The flavor improves after a day or two. Store in an airtight container at room temperature for up to 5 days. Freeze baked cookies for up to 3 months or raw dough balls for up to 3 months.
Nutrition
- Serving Size: 1 cookie
- Calories: 245
- Sugar: 20
- Sodium: 135
- Fat: 13
- Saturated Fat: 8
- Carbohydrates: 32
- Fiber: 1
- Protein: 3
Keywords: small-batch chocolate chip cookies, easy chocolate chip cookies, quick cookie recipe, homemade cookies, dessert for gatherings


