Love this? Save it for later!
Share the inspiration with your friends
Jen wasn’t trying to impress anyone. I’d stopped by to drop off a casserole dish she’d lent me—the one with the chip in the handle that I keep meaning to replace—and the smell hit me before I even got through the screen door. It was warm and deep, like brown sugar melting into butter, with this little whisper of something smoky underneath. I stood there on her porch for a second, just breathing it in, while her dog nudged my hand for attention.
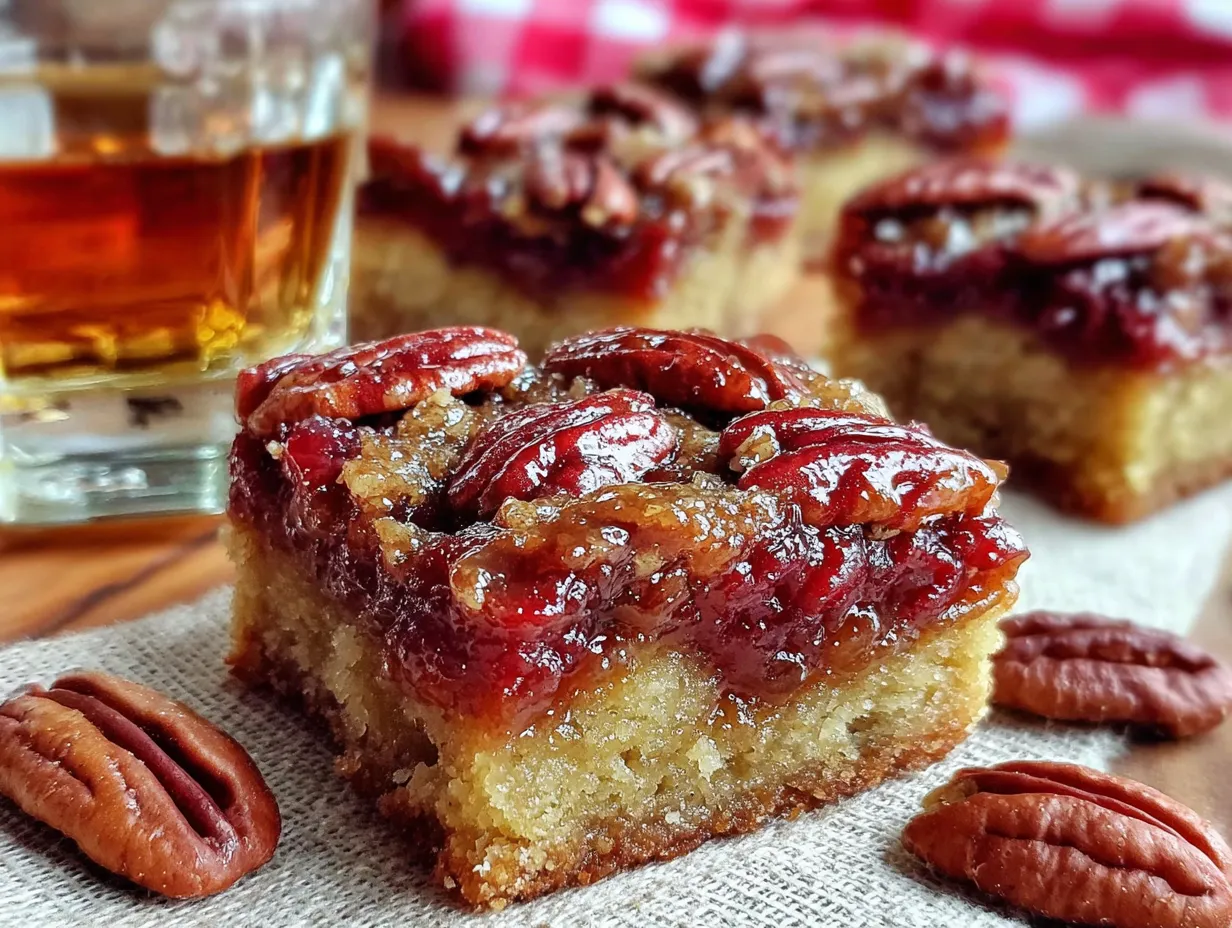
“What is that?” I asked, probably sounding a little too eager as I followed her into the kitchen. She shrugged and pointed at a baking dish on the counter. “Oh, just some bars I threw together for the bake sale tomorrow.” Just some bars. She said it like it was nothing, like she hadn’t just created what smelled like the coziest thing I’d ever encountered. I peeked over and saw this golden, crumbly crust with a glossy, dark amber filling on top, speckled with pecans. It looked like something from a bakery window.
She handed me a warm piece, still a little soft in the center, and honestly? I closed my eyes after the first bite. It had that perfect balance—buttery and nutty, with a hit of bourbon that wasn’t showy, just present. And the maple? It was there, but it wasn’t cloying. She mentioned she’d lightened it up a bit, used maple instead of corn syrup, cut back on the butter in the crust. I mean, you’d never know it was lighter. That’s the thing about Jen—she makes wholesome look effortless.
I asked for the recipe before I left, and she scribbled it on the back of a receipt. I’ve made it maybe six times since then. Maybe you’ve been there—you taste something at a friend’s house and you can’t stop thinking about it. That’s this bar. It’s the kind of recipe that stays with you, not because it’s fancy, but because it’s just so dang good.
Why You’ll Love This Recipe
Let me tell you why these Lighter Maple Bourbon Pecan Pie Bars have become my go-to for everything from holiday gatherings to random Tuesday cravings. I’ve tested this recipe more times than I can count, tweaking the balance of maple and bourbon until it was just right. Here’s what makes it stand out:
- Quick & Easy: You’re looking at about 30 minutes of active time. The oven does the rest. Perfect for when you need a showstopper dessert without spending all day in the kitchen.
- Simple Ingredients: No weird specialty items here. Butter, flour, maple syrup, bourbon (or vanilla if you’re skipping the alcohol), eggs, and pecans. Chances are you’ve got most of this already.
- Perfect for Holidays & Everyday: These bars are elegant enough for Thanksgiving dessert tables but casual enough for a Sunday afternoon treat with coffee.
- Crowd-Pleaser: I’ve brought these to potlucks, family dinners, and office parties. They disappear fast. Kids love them, adults love them, and nobody guesses they’re a lighter version.
- Unbelievably Delicious: The texture is what gets me every time—that crisp, buttery shortbread crust against the soft, chewy pecan filling. And the flavor? Deep, rich, and just the right amount of sweet.
What makes this different from every other pecan pie bar out there is the swap. Instead of heavy corn syrup and loads of refined sugar, we’re using pure maple syrup and a touch of bourbon to build complexity. The crust uses less butter than traditional recipes, but you’d never miss it. It’s comfort food reimagined—lighter, faster, but with the same soul-soothing satisfaction that makes you close your eyes after the first bite.
What Ingredients You Will Need
This recipe uses simple, wholesome ingredients to deliver bold flavor and satisfying texture without the fuss. Most of these are pantry staples, and I’ve included notes on substitutions where they work well.
For the Crust
- 1 ½ cups all-purpose flour (I prefer King Arthur for consistent results, but any brand works)
- ½ cup unsalted butter, cold and cut into small cubes (cold butter is key for a flaky crust)
- ¼ cup granulated sugar (just enough to give the crust a hint of sweetness)
- ¼ teaspoon salt (balances the sweetness and enhances the buttery flavor)
- 2-3 tablespoons ice water (add slowly—you might not need all of it)
For the Filling
- ¾ cup pure maple syrup (not pancake syrup—use the real stuff for that deep, complex sweetness)
- ¼ cup brown sugar, packed (light or dark both work; dark gives a richer molasses note)
- 2 large eggs, room temperature (room temp eggs blend more smoothly into the filling)
- 2 tablespoons unsalted butter, melted
- 2 tablespoons bourbon (I recommend Bulleit or Maker’s Mark for a smooth, oaky flavor. You can substitute with 1 teaspoon vanilla extract plus 1 tablespoon water if preferred)
- 1 teaspoon vanilla extract
- ¼ teaspoon salt
- 1 ½ cups pecan halves or chopped pecans (toasted lightly for extra flavor—see tip below)
Ingredient Tip: For the best texture, toast your pecans in a dry skillet over medium heat for 3-4 minutes until they smell fragrant. Keep them moving so they don’t burn. This little step makes a big difference in the final flavor.
Substitution Guide: If you’re gluten-sensitive, you can use a 1:1 gluten-free baking flour blend in the crust. For a dairy-free version, use cold vegan butter in the crust and melted coconut oil in place of the butter in the filling. The texture will be slightly different, but still delicious.
Equipment Needed
You don’t need a fancy kitchen to pull these off. Here’s what you’ll need:
- 9×9-inch baking pan (an 8×8 works too, but your bars will be a little thicker and may need an extra 2-3 minutes of baking time)
- Parchment paper (for easy lifting—don’t skip this or you’ll be wrestling with stuck bars)
- Mixing bowls (one medium for the crust, one medium for the filling)
- Pastry cutter or fork (for cutting butter into the flour for the crust. A food processor works too if you’re in a hurry)
- Whisk (for the filling)
- Measuring cups and spoons
- Sharp knife (for clean cuts—use a plastic knife for the neatest slices, I learned this the hard way)
Budget-Friendly Tip: If you don’t have a pastry cutter, just use two forks or your fingertips. I actually prefer using my hands—you can feel when the butter is properly incorporated. Just work quickly so the butter stays cold.
Preparation Method
Let’s get to it. Here’s how to make these bars, step by step.
- Preheat your oven to 350°F (175°C). Line your 9×9-inch pan with parchment paper, leaving some overhang on two opposite sides. This creates handles for lifting the bars out later.
- Make the crust. In a medium bowl, whisk together the flour, sugar, and salt. Add the cold, cubed butter. Use a pastry cutter or your fingertips to work the butter into the flour until the mixture looks like coarse meal with some pea-sized butter pieces still visible. Drizzle in 2 tablespoons of ice water and stir with a fork until the dough just comes together. If it seems dry, add another tablespoon of water.
- Press the crust into the pan. Transfer the dough to your prepared pan. Press it evenly into the bottom—not up the sides. Use the bottom of a measuring cup to get it nice and flat. This helps the crust bake evenly. Prick the dough all over with a fork (this prevents it from puffing up).
- Blind bake the crust. Bake for 15-18 minutes, until the edges are just starting to turn golden. The center might still look a little pale—that’s fine. Remove from the oven and let it cool slightly while you make the filling. Pro tip: If the crust puffs up during baking, gently press it down with the back of a spoon.
- Prepare the filling. In a medium bowl, whisk together the maple syrup, brown sugar, eggs, melted butter, bourbon, vanilla extract, and salt. Whisk until everything is smooth and well combined. Don’t over-whisk—you don’t want to incorporate too much air.
- Add the pecans. Stir in the toasted pecans until they’re evenly coated in the maple mixture.
- Pour the filling over the crust. Carefully pour the pecan filling over the warm pre-baked crust. Spread it evenly with a spatula. The pecans will float to the top a bit—that’s exactly what you want.
- Bake. Return the pan to the oven and bake for 22-26 minutes. The filling should be set around the edges but still have a slight jiggle in the center when you gently shake the pan. It will continue to set as it cools. The top should be a deep golden brown and slightly puffed.
- Cool completely. This is the hardest part, I know. Let the bars cool in the pan on a wire rack for at least 2 hours. For the cleanest slices, refrigerate for another hour before cutting. I’ve rushed this step and ended up with a gooey mess—trust me, patience pays off here.
- Slice and serve. Use the parchment overhang to lift the entire block of bars out of the pan. Place on a cutting board and slice into 16 squares with a sharp knife. Wipe the knife clean between cuts for neat edges.
Cooking Tips & Techniques
After making these bars more times than I’d like to admit, I’ve picked up a few tricks that make a real difference.
Keep your butter cold. For the crust, cold butter is non-negotiable. Warm butter gets absorbed into the flour instead of creating those little pockets of steam that make the crust flaky. If your kitchen is warm, pop the cubed butter in the freezer for 10 minutes before you start.
Don’t overwork the dough. Mix the crust dough just until it comes together. Overmixing develops gluten, which makes the crust tough instead of tender. A few streaks of flour are totally fine.
Watch the filling carefully. Every oven runs a little differently. Start checking your bars at the 22-minute mark. The filling should be set around the edges but still have a slight wobble in the very center. It will firm up as it cools. Overbaking leads to a dry, cracked filling—still tasty, but not as pretty.
Let them cool completely. I cannot stress this enough. I once cut into these bars after 45 minutes because I couldn’t wait, and the filling just spilled everywhere. They need time to set up properly. Overnight in the fridge is even better.
Use a plastic knife for cutting. This one blew my mind. A plastic knife (like the ones from a disposable cutlery pack) glides through the bars without dragging the filling. The slices come out so clean. I learned this from a pastry chef friend and it’s a game-changer.
Variations & Adaptations
One of the best things about this recipe is how flexible it is. Here are some variations I’ve tried and loved:
Bourbon-Free Version: Skip the bourbon and use 1 teaspoon of vanilla extract plus 1 tablespoon of water or apple cider. The maple flavor still shines, and it’s perfect for kids or anyone avoiding alcohol.
Chocolate Maple Pecan Bars: Sprinkle ½ cup of dark chocolate chips over the crust before pouring in the filling. The chocolate melts into the pecan layer and adds a rich, fudgy element. I made this for a holiday party and people went crazy for it.
Gluten-Free Adaptation: Substitute the all-purpose flour with a 1:1 gluten-free baking blend that contains xanthan gum. The texture is slightly more crumbly, but the flavor is still fantastic. I’ve used Bob’s Red Mill 1:1 Baking Flour with great results.
Spiced Variation: Add ½ teaspoon of cinnamon and ¼ teaspoon of nutmeg to the filling. The warm spices complement the maple and bourbon beautifully. This is my go-to version for fall gatherings.
Nut-Free Option: Replace pecans with toasted pumpkin seeds or sunflower seeds. The texture is different, but you still get that satisfying crunch. Alternatively, you can make a maple bourbon blondie by omitting the nuts entirely.
Serving & Storage Suggestions
These bars are versatile when it comes to serving. Here’s how I like to enjoy them:
Serving Temperature: They’re fantastic at room temperature, but I actually prefer them chilled straight from the fridge. The filling firms up and has this almost caramel-like chewiness that’s addictive. If you want them warm, pop a bar in the microwave for 10-15 seconds and add a scoop of vanilla ice cream on top.
Presentation Ideas: Dust with a little flaky sea salt right before serving—it cuts through the sweetness and adds a lovely crunch. For holidays, arrange them on a platter with fresh rosemary sprigs and cranberries for a festive look.
Storage: Keep the bars in an airtight container in the refrigerator for up to 5 days. Layer them with parchment paper between each layer to prevent sticking. They actually get better on day two as the flavors meld together.
Freezing: These freeze beautifully. Wrap individual bars in plastic wrap, then place them in a freezer-safe bag. They’ll keep for up to 3 months. Thaw in the refrigerator overnight or at room temperature for about 30 minutes before serving.
Reheating: For that just-baked warmth, reheat in a 300°F oven for 5-7 minutes. The microwave works in a pinch, but the oven keeps the crust crisp.
Nutritional Information & Benefits
Here’s the thing—these are still a treat, but they’re a smarter treat compared to traditional pecan pie bars. Using maple syrup instead of corn syrup cuts down on processed sugars, and the reduced butter in the crust saves on saturated fat. Pecans are packed with healthy fats, fiber, and antioxidants. They’re good for your heart and help keep you full longer.
Estimated per bar (based on 16 servings):
- Calories: 210
- Fat: 13g
- Saturated Fat: 5g
- Carbohydrates: 22g
- Fiber: 1g
- Sugar: 15g
- Protein: 3g
Dietary Considerations: This recipe is vegetarian. For a dairy-free version, use vegan butter in both the crust and filling. To make it gluten-free, use a 1:1 gluten-free flour blend. It contains eggs, dairy, and tree nuts (pecans).
I love that I can enjoy these bars without the heavy, overly sweet feeling that comes with traditional pecan pie. They satisfy that deep craving for something rich and nutty, but they don’t weigh you down. It’s about balance, you know?
Conclusion
These Lighter Maple Bourbon Pecan Pie Bars are everything I want in a dessert—easy to make, packed with flavor, and just a little bit lighter than the classic. They’ve earned a permanent spot in my recipe rotation, and I honestly don’t see that changing anytime soon.
I love how adaptable they are. Whether you’re sticking to the original recipe or trying one of the variations, they always turn out delicious. And the best part? You get to say you made pecan pie bars from scratch in about 30 minutes of hands-on time. That’s a win in my book.
I’d love to hear how yours turn out! Did you try a variation? Did you sneak a piece before they were fully cooled like I always do? Drop a comment below and let me know. And if you share them on social media, tag me—I love seeing your creations. Happy baking, friends!
Frequently Asked Questions
Can I use dark corn syrup instead of maple syrup?
You can, but it will change the flavor profile significantly. Maple syrup gives these bars a more complex, less cloying sweetness. If you do use corn syrup, reduce the brown sugar to 2 tablespoons since corn syrup is sweeter.
Do I have to use bourbon? What can I substitute?
Not at all. You can substitute the bourbon with 1 teaspoon of vanilla extract plus 1 tablespoon of water or apple juice. The bars will still be delicious—just without that oaky, smoky depth that bourbon adds.
Why did my filling turn out runny?
This usually happens for two reasons: either the bars weren’t baked long enough, or they weren’t cooled completely before cutting. The filling needs time to set. Make sure the edges are set and the center has only a slight jiggle before pulling them out of the oven. Then, be patient during cooling!
Can I make these bars ahead of time?
Absolutely. In fact, they taste even better the next day. Bake them, cool completely, and store in the refrigerator. They’ll keep for up to 5 days. You can also freeze them for up to 3 months.
How do I get clean, neat slices?
Chill the bars thoroughly in the refrigerator for at least an hour after they’ve cooled to room temperature. Use a sharp knife and wipe it clean between each cut. For the absolute cleanest slices, use a plastic knife—it glides through without dragging the filling.
Pin This Recipe!
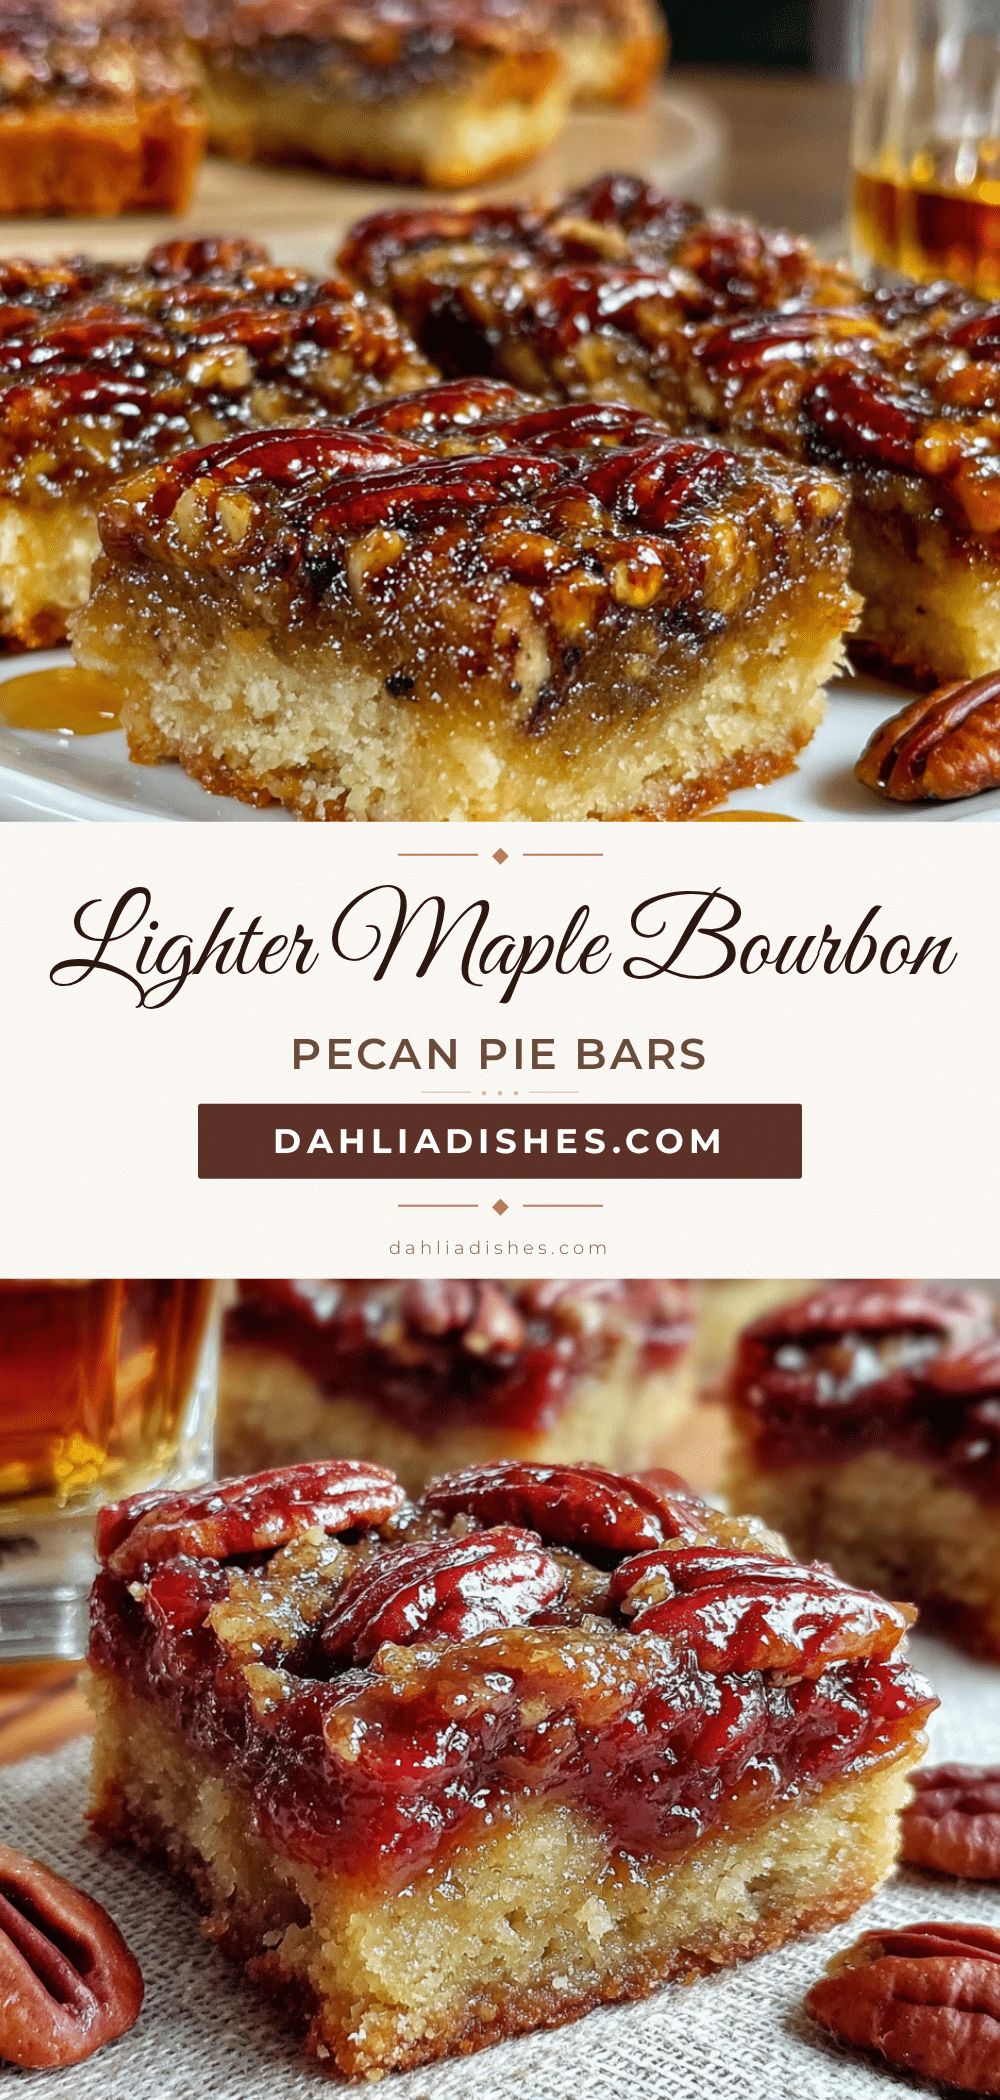
Lighter Maple Bourbon Pecan Pie Bars
These Lighter Maple Bourbon Pecan Pie Bars are a quick and easy 30-minute recipe that delivers all the rich, nutty flavor of traditional pecan pie with a lighter twist. Made with pure maple syrup and a touch of bourbon, they feature a buttery shortbread crust and a chewy pecan filling that’s perfect for holidays or everyday treats.
- Prep Time: 15 minutes
- Cook Time: 30 minutes
- Total Time: 45 minutes
- Yield: 16 servings 1x
- Category: Dessert
- Cuisine: American
Ingredients
- 1 ½ cups all-purpose flour
- ½ cup unsalted butter, cold and cut into small cubes
- ¼ cup granulated sugar
- ¼ teaspoon salt
- 2–3 tablespoons ice water
- ¾ cup pure maple syrup
- ¼ cup brown sugar, packed
- 2 large eggs, room temperature
- 2 tablespoons unsalted butter, melted
- 2 tablespoons bourbon (or 1 teaspoon vanilla extract plus 1 tablespoon water)
- 1 teaspoon vanilla extract
- ¼ teaspoon salt
- 1 ½ cups pecan halves or chopped pecans, toasted
Instructions
- Preheat your oven to 350°F (175°C). Line your 9×9-inch pan with parchment paper, leaving some overhang on two opposite sides.
- Make the crust: In a medium bowl, whisk together the flour, sugar, and salt. Add the cold, cubed butter. Use a pastry cutter or your fingertips to work the butter into the flour until the mixture looks like coarse meal with some pea-sized butter pieces still visible. Drizzle in 2 tablespoons of ice water and stir with a fork until the dough just comes together. If it seems dry, add another tablespoon of water.
- Press the crust into the pan: Transfer the dough to your prepared pan. Press it evenly into the bottom—not up the sides. Use the bottom of a measuring cup to get it flat. Prick the dough all over with a fork.
- Blind bake the crust: Bake for 15-18 minutes, until the edges are just starting to turn golden. Remove from the oven and let it cool slightly while you make the filling.
- Prepare the filling: In a medium bowl, whisk together the maple syrup, brown sugar, eggs, melted butter, bourbon, vanilla extract, and salt until smooth and well combined.
- Add the pecans: Stir in the toasted pecans until evenly coated.
- Pour the filling over the crust: Carefully pour the pecan filling over the warm pre-baked crust. Spread it evenly with a spatula.
- Bake: Return the pan to the oven and bake for 22-26 minutes. The filling should be set around the edges but still have a slight jiggle in the center when you gently shake the pan.
- Cool completely: Let the bars cool in the pan on a wire rack for at least 2 hours. For the cleanest slices, refrigerate for another hour before cutting.
- Slice and serve: Use the parchment overhang to lift the entire block of bars out of the pan. Place on a cutting board and slice into 16 squares with a sharp knife. Wipe the knife clean between cuts for neat edges.
Notes
Keep butter cold for a flaky crust. Don’t overwork the dough. Watch the filling carefully to avoid overbaking. Let bars cool completely before cutting for clean slices. Use a plastic knife for the neatest cuts. Bars can be stored in an airtight container in the refrigerator for up to 5 days or frozen for up to 3 months.
Nutrition
- Serving Size: 1 bar
- Calories: 210
- Sugar: 15
- Sodium: 95
- Fat: 13
- Saturated Fat: 5
- Carbohydrates: 22
- Fiber: 1
- Protein: 3
Keywords: pecan pie bars, maple bourbon, lighter dessert, easy pecan bars, holiday dessert, 30-minute recipe


