Love this? Save it for later!
Share the inspiration with your friends
My sister swore she hated deviled eggs. For years. Wouldn’t touch them at family gatherings, claimed the texture reminded her of something she couldn’t quite name, and made a point of announcing her distaste every single Easter. Then last Halloween, I caught her standing alone in my kitchen, eating these Quick Halloween Deviled Egg Eyeballs straight off the platter before the party even started. She had yolk on her chin and zero shame about it.
Honestly, I didn’t set out to convert anyone that night. I was just trying to throw together a spooky snack that didn’t require a trip to three different stores or an hour of sculpting something that would fall apart before the first guest arrived. The power had flickered twice that afternoon, my toddler had dumped an entire bag of candy corn on the floor, and I was working with what I had in the fridge. Which, on a Tuesday before Halloween, wasn’t much.
But here’s the thing about these Quick Halloween Deviled Egg Eyeballs—they look like you tried. They look like you spent an afternoon crafting something genuinely creepy. And maybe you have been there, standing in your kitchen at 5 PM with a party starting at 6, wondering why you volunteered to bring anything at all. These eggs are the answer to that specific kind of panic. They come together in under 20 minutes, use ingredients you probably already have, and somehow manage to be both adorable and unsettling at the same time. That’s a hard balance to strike, let me tell you.
The first time I made them, I used black olives for the pupils and squirted Sriracha mixed with mayo for the bloodshot veins. My nephew screamed. Then he ate four of them. That’s when I knew this recipe was staying in my rotation.
Why You’ll Love This Recipe
Let’s be real for a second—Halloween snacks can be exhausting. Between the themed cupcakes that take three hours and the fondant decorations that look nothing like the Pinterest photo, it’s easy to burn out before the party even starts. These Quick Halloween Deviled Egg Eyeballs are the opposite of that.
- Ready in under 20 minutes: Hard-boil the eggs ahead of time, and you’re looking at maybe 10 minutes of actual assembly. That’s faster than most store-bought snacks.
- Simple ingredients: Eggs, mayo, mustard, olives, and a little paprika. That’s it. No specialty stores, no obscure spices, no last-minute substitutions that ruin everything.
- Perfect for Halloween parties: Whether it’s a school potluck, a neighborhood gathering, or just a spooky movie night at home, these fit right in without being overly complicated.
- Crowd-pleaser: Kids love the creepy factor, adults appreciate the classic deviled egg flavor, and everyone reaches for them first. I’ve watched platters disappear in under five minutes.
- Unbelievably delicious: Underneath the spooky exterior, these are genuinely good deviled eggs. Creamy yolks, tangy mustard, that perfect paprika finish. The eyeball design is just a bonus.
What makes these different from every other Halloween deviled egg recipe out there? It’s the technique. I figured out that piping the yolk mixture creates a smooth, round base that actually looks like an eyeball instead of a lumpy mess. And the bloodshot veins? A tiny squeeze of Sriracha mixed with mayo gives you that gross-but-perfect effect without overwhelming the flavor. I’ve tested this about a dozen times across different parties and family dinners. This version works every single time.
Honestly, this is the kind of recipe that makes you close your eyes after the first bite. It’s nostalgia and comfort food wrapped up in something that looks like it crawled out of a horror movie. That’s a pretty rare combination.
What Ingredients You Will Need
This recipe uses simple, pantry-friendly ingredients to create something that looks far more complicated than it actually is. Most of these are probably in your kitchen right now.
For the Deviled Eggs
- 6 large eggs: Use the freshest eggs you can find for easier peeling, but honestly, eggs that are a week old actually peel better. It’s a weird kitchen truth.
- 3 tablespoons mayonnaise: I prefer Duke’s or Hellmann’s for that tangy, creamy base. Avoid Miracle Whip here—it’s too sweet and throws off the balance.
- 1 teaspoon yellow mustard: Adds that classic deviled egg tang. You can use Dijon if you want a sharper flavor, but yellow mustard gives it that nostalgic potluck taste.
- 1/4 teaspoon salt: Fine sea salt works best because it dissolves evenly into the yolk mixture.
- 1/8 teaspoon black pepper: Freshly ground if you have it, but pre-ground works fine too.
- 1/4 teaspoon paprika: For garnish and that subtle smoky flavor. Smoked paprika adds a nice depth if you want to experiment.
For the Eyeball Decoration
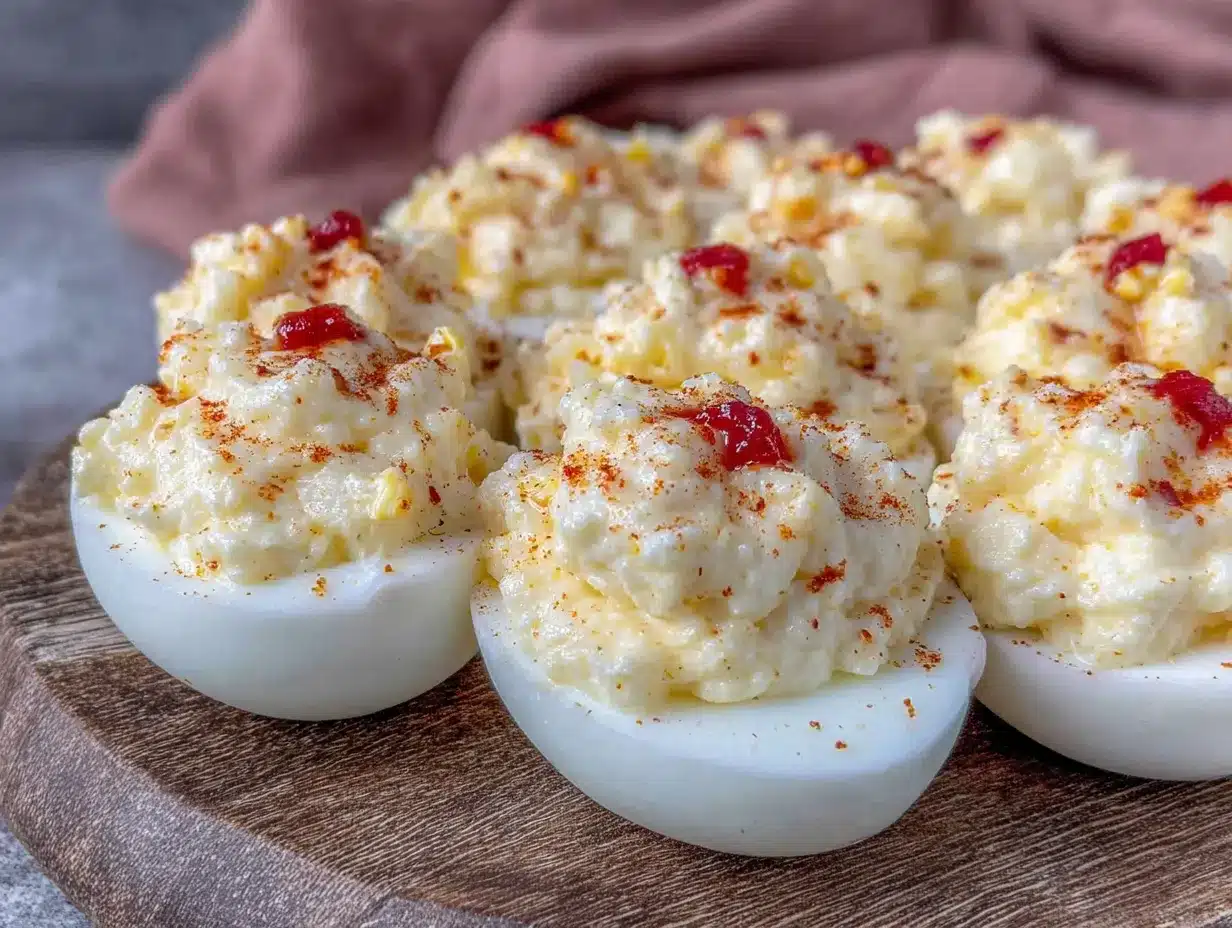
- 6 black olives: Sliced into rounds for the pupils. Canned olives work perfectly here—just drain them well so they don’t make the eggs watery.
- 1 tablespoon mayonnaise: Mixed with a few drops of red food coloring or Sriracha for the “bloodshot” effect. I’ve used both, and honestly, the Sriracha version tastes better and looks more authentic.
- Optional: Fresh chives or green onion: Snipped into tiny pieces to look like broken blood vessels. This is purely for aesthetics, but it does add a nice pop of green.
Ingredient selection tip: Look for large eggs that are uniform in size so your deviled eggs look consistent. If you’re using Sriracha for the bloodshot effect, start with a tiny amount—a little goes a long way, and you want the flavor to complement, not overpower, the egg mixture.
Substitution guidance: Use avocado oil mayo for a healthier option, or swap in vegan mayo if needed. For the mustard, stone-ground mustard adds a nice texture if you’re feeling fancy. And if olives aren’t your thing, you can use black sesame seeds or small capers for the pupils instead.
Equipment Needed
You don’t need much for this recipe, which is honestly my favorite part. Here’s what you’ll want on hand:
- Saucepan with lid: For boiling the eggs. Any medium-sized pot works fine.
- Mixing bowl: Medium size for mashing the yolks and combining ingredients.
- Fork or potato masher: For breaking down the yolks into a smooth paste. A fork works fine, but a potato masher makes it even faster.
- Piping bag or zip-top bag: For piping the yolk mixture into the egg whites. A zip-top bag with the corner snipped off works perfectly and saves you from buying a piping bag.
- Sharp knife: For slicing the olives into thin rounds. A paring knife is ideal.
- Small spoon: For scooping out the yolks. A melon baller works even better if you have one.
- Serving platter: Something flat and light-colored makes the eyeballs pop visually. I use a white ceramic platter, and the contrast is perfect.
Budget-friendly tip: Skip the piping bag entirely. I’ve used a sandwich bag for years, and it works just as well. Just be careful not to squeeze too hard or the bag might split at the seam.
Preparation Method
Let’s walk through this step by step. I’ve tested this method more times than I care to admit, and these little details make all the difference.
- Boil the eggs: Place your 6 eggs in a single layer in a saucepan and cover them with cold water by about an inch. Bring the water to a rolling boil over high heat. Once it’s boiling, cover the pot, turn off the heat, and let the eggs sit for exactly 12 minutes. This gives you hard-boiled eggs with firm whites and fully cooked yolks—no gray rings around the outside.
- Ice bath: While the eggs are sitting, fill a bowl with ice water. When the 12 minutes are up, transfer the eggs to the ice bath using a slotted spoon. Let them sit for at least 5 minutes. This stops the cooking process and makes peeling significantly easier. I learned this the hard way after years of peeling eggs that looked like they’d been through a war.
- Peel the eggs: Gently tap each egg on the counter to crack the shell all over, then roll it between your palms to loosen the shell. Start peeling from the wider end where the air pocket is—the membrane tends to be looser there. Rinse the peeled eggs under cold water to remove any tiny shell fragments.
- Slice the eggs: Using a sharp knife, slice each egg in half lengthwise. Wipe the knife clean between cuts for the cleanest edges. You should have 12 egg white halves.
- Remove the yolks: Gently pop out the cooked yolks into a medium mixing bowl. Be careful not to tear the egg whites—if one does tear, set it aside for snacking and use the prettier halves for the eyeballs.
- Mash the yolks: Use a fork to break the yolks into fine crumbs. You want them as smooth as possible with no large lumps. This takes about a minute of consistent mashing.
- Add the wet ingredients: Add 3 tablespoons mayonnaise, 1 teaspoon yellow mustard, 1/4 teaspoon salt, and 1/8 teaspoon black pepper to the mashed yolks. Stir until everything is well combined and the mixture is smooth and creamy. Taste it here and adjust the seasoning if needed. I usually add a tiny pinch more salt.
- Prepare the piping bag: Spoon the yolk mixture into a zip-top bag and seal it, squeezing out as much air as possible. Snip off a small corner of the bag—about 1/4 inch wide. This gives you enough control to pipe neat rounds without the mixture spilling out everywhere.
- Pipe the yolk mixture: Arrange the egg white halves on your serving platter. Pipe the yolk mixture into each egg white, filling it generously so it mounds slightly above the edge. You want a rounded dome shape that resembles an eyeball. If you’re not using a piping bag, you can spoon the mixture in and smooth it with the back of the spoon.
- Add the pupils: Place a black olive slice in the center of each yolk mound, pressing it gently so it sticks. The olive should sit right in the middle to create the illusion of a pupil.
- Create the bloodshot effect: In a small bowl, mix 1 tablespoon mayonnaise with a few drops of red food coloring or 1/4 teaspoon Sriracha. Stir until the color is evenly distributed. Using a toothpick or the tip of a knife, draw thin lines outward from the olive pupil to the edge of the yolk mixture. These lines should look like broken blood vessels—messy and uneven is actually better here.
- Garnish and chill: If using, sprinkle a few snipped chives around the edges for extra creepy detail. Sprinkle a tiny pinch of paprika over the entire platter for color. Refrigerate the deviled eggs for at least 30 minutes before serving. This helps the flavors meld and makes the eyeballs look even more realistic.
Sensory cue: When you pipe the yolk mixture, it should feel smooth and slightly firm, not runny. If it seems too loose, add a bit more mashed yolk to thicken it. If it’s too stiff, add another teaspoon of mayo.
Cooking Tips & Techniques
I’ve made these Quick Halloween Deviled Egg Eyeballs more times than I can count, and I’ve definitely learned a few things the hard way. Let me save you some trouble.
Perfect hard-boiled eggs every time: The biggest mistake people make is overcooking the eggs. That green ring around the yolk? That’s from cooking them too long or at too high a temperature. The covered pot method I shared above is foolproof. I’ve used it for years, and it never fails. If you’re in a hurry, you can also steam the eggs—place them in a steamer basket over boiling water for exactly 12 minutes, then transfer to an ice bath.
Peeling without destroying the whites: Older eggs peel more easily than fresh ones. If you’re planning ahead, buy your eggs a week before you need them. And always peel under running cold water—the water helps separate the membrane from the white, making the shell slip off in larger pieces.
Making the yolk mixture ahead of time: You can prepare the yolk mixture up to two days in advance and store it in the fridge in a piping bag. When you’re ready to assemble, just let it sit at room temperature for 10 minutes to soften slightly before piping. This is a lifesaver on party day.
Keeping the eggs stable: If your deviled eggs are wobbling on the platter, slice a tiny sliver off the bottom of each egg white half to create a flat base. This keeps them from rolling around and ruining your careful decoration work.
My biggest failure: The first time I made these, I used too much Sriracha in the bloodshot mixture and ended up with eggs that were genuinely spicy. Not ideal for a kids’ party. Now I use just a tiny drop mixed with mayo, and it gives the perfect color without the heat. Or I use red food coloring if kids are the main audience.
Variations & Adaptations
One of the best things about this recipe is how easy it is to adapt. Here are a few ways I’ve changed it up over the years.
Dietary adaptations: For a dairy-free version, use vegan mayo and skip the paprika garnish. For a lower-fat option, substitute half the mayo with plain Greek yogurt—it adds protein and tang without sacrificing creaminess. I’ve tried this myself, and honestly, the difference is barely noticeable.
Different pupil options: Black olives are classic, but you can use sliced black sesame seeds for a more subtle look, or capers for a briny twist. My daughter once insisted on using blue food coloring on the olives to make “alien eyeballs.” It looked ridiculous, but the kids at the party loved it.
Spicy version: Add a pinch of cayenne pepper or a dash of hot sauce to the yolk mixture for a kick. The heat pairs surprisingly well with the creamy texture. I made this version for a Halloween party with adult friends, and it was the first platter to empty.
Smoky version: Substitute regular paprika with smoked paprika and add 1/4 teaspoon of liquid smoke to the yolk mixture. This gives the eggs a subtle campfire flavor that works beautifully with the olive pupils.
Make it a full Halloween spread: Pair these with mummy hot dogs (pigs in a blanket with mustard eyes) and ghost-shaped cheese slices for a complete spooky snack table. Everything can be prepped ahead, which makes hosting so much less stressful.
Serving & Storage Suggestions
These Quick Halloween Deviled Egg Eyeballs are best served cold, straight from the fridge. The chilled yolk mixture holds its shape better, and the olive pupils stay firmly in place.
Serving temperature: Pull them out of the fridge about 10 minutes before serving so they’re not ice-cold, but don’t let them sit at room temperature for more than 2 hours. Deviled eggs are a perishable food, and food safety matters, especially at parties where they might sit out for a while.
Presentation ideas: Arrange the eyeballs on a black or dark purple platter for maximum spooky contrast. I like to scatter a few fake spiders or plastic eyeballs around the platter for extra Halloween flair. You can also serve them on a bed of fresh herbs like parsley or dill—the green adds a nice pop of color.
Storage instructions: Store leftover deviled eggs in an airtight container in the refrigerator for up to 3 days. Place them in a single layer with a piece of plastic wrap pressed directly against the surface to prevent them from drying out. Do not freeze deviled eggs—the texture will be completely ruined.
Reheating tips: Deviled eggs are served cold, so there’s no reheating involved. If you’re making them a day ahead, just assemble them the morning of your party and keep them refrigerated. The flavors actually meld and improve after a few hours in the fridge.
Flavor development: I’ve noticed that these deviled eggs taste even better the next day. The mustard and mayo have time to meld with the yolks, creating a deeper, more rounded flavor. Just be aware that the paprika garnish might lose a bit of its vibrant color overnight.
Nutritional Information & Benefits
Let’s be honest—deviled eggs aren’t health food, but they’re not exactly junk food either. Here’s the breakdown for one serving (two deviled egg halves):
| Nutrient | Amount per Serving |
|---|---|
| Calories | 140-160 |
| Protein | 10g |
| Fat | 11g |
| Carbohydrates | 2g |
| Fiber | 0g |
| Sugar | 1g |
Health benefits: Eggs are a fantastic source of high-quality protein and contain essential nutrients like vitamin D, vitamin B12, and choline, which supports brain health. The olive pupils add healthy monounsaturated fats and a small amount of iron. If you use Greek yogurt in place of some mayo, you’ll also get a probiotic boost and extra calcium.
Dietary considerations: This recipe is naturally gluten-free and low-carb, making it suitable for keto and paleo diets. It contains eggs and may contain dairy depending on your mayo choice. Always check labels if you’re serving guests with allergies.
Personal wellness perspective: I love that these deviled eggs offer a protein-packed snack that actually fills you up, unlike a lot of Halloween treats that are pure sugar. They’re satisfying enough to keep the kids from bouncing off the walls before the candy rush.
Conclusion
These Quick Halloween Deviled Egg Eyeballs are proof that you don’t need hours in the kitchen or a dozen specialty ingredients to create something genuinely impressive. They’re creepy, they’re delicious, and they come together in the time it takes to watch one episode of your favorite show.
I love this recipe because it’s the kind of thing that makes people stop and smile. There’s something satisfying about watching a room full of guests do a double-take before reaching for another one. And honestly, the fact that my sister—who swore she hated deviled eggs—now requests these every Halloween? That’s the kind of win I’ll take any day.
So go ahead and make these for your next Halloween party. Customize them with different pupils, adjust the spice level, or just keep them classic. Whatever you do, don’t be surprised when they disappear faster than anything else on the table.
Have you tried these Quick Halloween Deviled Egg Eyeballs? I’d love to hear how they turned out! Drop a comment below with your own variations or tag me in your photos. And if you’re looking for more spooky snack ideas, be sure to check out our other Halloween recipes. Happy haunting!
Frequently Asked Questions
Can I make these deviled eggs a day ahead?
Absolutely. You can hard-boil and peel the eggs up to two days in advance. Assemble the yolk mixture and pipe it into the whites the morning of your party. Just add the olive pupils and bloodshot veins right before serving so they look fresh.
How do I keep the olive pupils from falling off?
Press the olive slice gently into the yolk mixture right after piping, while the mixture is still soft. The yolk acts like glue and holds the olive in place. If you’re worried about them sliding, you can dab a tiny bit of the bloodshot mayo mixture under the olive before placing it.
Can I use a different type of olive?
Yes! Black olives look the most like realistic pupils, but you can use green olives stuffed with pimento for a different color contrast, or kalamata olives for a deeper, more intense flavor. Just make sure they’re sliced thin enough to sit flat on the yolk.
How long do these deviled eggs last in the fridge?
Stored in an airtight container, these deviled eggs will stay fresh for up to 3 days. However, the bloodshot veins may start to bleed into the yolk mixture after 24 hours, so they look best if eaten within the first day.
Can I freeze deviled eggs?
I don’t recommend freezing deviled eggs. The texture of the egg whites becomes rubbery and watery when thawed, and the yolk mixture separates and becomes grainy. These are best made fresh or up to a day ahead.
Pin This Recipe!

Quick Halloween Deviled Egg Eyeballs – Easy Spooky Snack

These Quick Halloween Deviled Egg Eyeballs are a creepy, delicious snack that comes together in under 20 minutes using simple ingredients. Perfect for Halloween parties, they look like you spent hours crafting them but are surprisingly easy to make.
- Prep Time: 15 minutes
- Cook Time: 12 minutes
- Total Time: 27 minutes
- Yield: 6 servings (2 deviled egg halves per serving) 1x
- Category: Appetizer
- Cuisine: American
Ingredients
- 6 large eggs
- 3 tablespoons mayonnaise
- 1 teaspoon yellow mustard
- 1/4 teaspoon salt
- 1/8 teaspoon black pepper
- 1/4 teaspoon paprika
- 6 black olives, sliced into rounds
- 1 tablespoon mayonnaise (for bloodshot effect)
- Red food coloring or Sriracha (a few drops or 1/4 teaspoon)
- Optional: Fresh chives or green onion, snipped
Instructions
- Place 6 eggs in a single layer in a saucepan and cover with cold water by about an inch. Bring to a rolling boil over high heat, then cover, turn off heat, and let sit for exactly 12 minutes.
- Transfer eggs to an ice bath and let sit for at least 5 minutes.
- Peel the eggs, starting from the wider end. Rinse under cold water.
- Slice each egg in half lengthwise. You should have 12 egg white halves.
- Remove the yolks and place them in a medium mixing bowl.
- Mash the yolks with a fork until smooth with no large lumps.
- Add 3 tablespoons mayonnaise, 1 teaspoon yellow mustard, 1/4 teaspoon salt, and 1/8 teaspoon black pepper to the mashed yolks. Stir until smooth and creamy.
- Spoon the yolk mixture into a zip-top bag, seal, and snip off a small corner (about 1/4 inch wide).
- Arrange the egg white halves on a serving platter. Pipe the yolk mixture into each, mounding it slightly above the edge.
- Place a black olive slice in the center of each yolk mound, pressing gently.
- In a small bowl, mix 1 tablespoon mayonnaise with a few drops of red food coloring or 1/4 teaspoon Sriracha. Using a toothpick or knife tip, draw thin lines outward from the olive to the edge of the yolk mixture.
- If using, sprinkle snipped chives around the edges. Sprinkle a tiny pinch of paprika over the platter. Refrigerate for at least 30 minutes before serving.
Notes
For easier peeling, use eggs that are a week old. Pipe the yolk mixture while it’s still soft to help the olive pupils stick. The bloodshot effect can be made with Sriracha for flavor or red food coloring for a milder taste. Deviled eggs taste even better the next day after flavors meld.
Nutrition
- Serving Size: 2 deviled egg halves
- Calories: 150
- Sugar: 1
- Sodium: 250
- Fat: 11
- Saturated Fat: 3
- Carbohydrates: 2
- Protein: 10
Keywords: Halloween deviled eggs, spooky snack, eyeball deviled eggs, easy Halloween appetizer, deviled eggs recipe


