Love this? Save it for later!
Share the inspiration with your friends
I was standing in the checkout line at Target last October—two days before Halloween—when I saw it. A tiny plastic cauldron filled with bright orange cheese puffs, gummy worms spilling over the sides, and a spider ring perched on the rim like some kind of creepy-crawly crown. The mom in front of me was holding it up for her toddler, who was absolutely losing his mind with joy. And I felt this weird, sharp pang in my chest. Not for the snack itself, but for the feeling it gave me—that specific Halloween magic I used to feel as a kid, when the air got cold and the world turned orange and black for one perfect night. I wanted to bottle that, honestly. But I also wanted it to taste like something I’d actually want to eat.
So I went home, dumped my cart of boring groceries on the counter, and started pulling out everything that felt even a little bit festive. A wedge of brie that looked like a ghost if you squinted. Some dark grapes that could pass for eyeballs. Crackers shaped like bats if you used a cookie cutter. And that’s how this Light & Festive Halloween Charcuterie Board was born—not from a recipe book or a Pinterest pin, but from a random Tuesday night craving for something that felt like a party without feeling like a sugar coma. I mean, let’s be real: most Halloween snacks are just candy disguised as dinner. And sure, I love candy. But I also love not waking up feeling like I ate my weight in high-fructose corn syrup.
This board became my little obsession. I kept tweaking it—adding a smear of goat cheese here, swapping pretzels for snap peas there—until it hit that sweet spot between spooky and satisfying. The kind of spread that makes you feel like you’re at a grown-up Halloween party, even if you’re just eating it on your couch in sweatpants. And honestly? That’s the whole point. Maybe you’ve been there too—staring at a bag of candy corn and wondering if there’s a better way to celebrate. Something that still feels festive, but doesn’t leave you regretting your life choices. I know I have. And this board? It’s the answer I didn’t know I was looking for.
Why You’ll Love This Recipe
Let me tell you why this Light & Festive Halloween Charcuterie Board has become my go-to for every spooky season gathering. I’ve tested this board at three different Halloween parties now—including one where I accidentally dropped the entire platter of olives on the floor (true story, I cried a little)—and it still came together beautifully. Here’s what makes it special:
- Quick & Easy: This board comes together in under 20 minutes. Seriously. No cooking, no baking, just arranging and snacking. Perfect for those last-minute Halloween cravings or when the doorbell starts ringing for trick-or-treaters and you haven’t eaten dinner yet.
- Simple Ingredients: No fancy grocery trips needed. You likely already have most of these items in your fridge—cheese, crackers, fruit, maybe some deli meat. The “spooky” part comes from how you arrange them, not from expensive specialty items.
- Perfect for Halloween Parties: Whether it’s a kid-friendly gathering, a grown-up cocktail hour, or just a cozy night in with a scary movie, this board fits the vibe. It’s festive without being over-the-top, and it looks way more impressive than it actually is.
- Crowd-Pleaser: I’ve served this to picky eaters, health-conscious friends, and kids who only want candy—and every single person found something to love. The variety means there’s always a bite for everyone.
- Unbelievably Delicious: The texture and flavor combo here is next-level. You get creamy cheese, crunchy crackers, sweet fruit, salty meat, and just a hint of that Halloween fun—all in one bite. It’s comfort food reimagined: healthier, faster, but with the same soul-soothing satisfaction.
What makes this recipe different from the rest? It’s the balance. Most Halloween boards lean heavy on processed snacks and candy. This one keeps things light—fresh produce, quality cheeses, smart portions—while still delivering that festive, spooky feel. It’s perfect for impressing guests without stress, or turning a simple Tuesday night into something memorable. And honestly? It’s the kind of board that makes you close your eyes after the first bite, because it just tastes that good.
What Ingredients You Will Need
This recipe uses simple, wholesome ingredients to deliver bold flavor and satisfying texture without the fuss. Most of these are pantry staples or easy to find at any grocery store. The key is choosing items that look festive when arranged together—think dark colors, orange accents, and fun shapes.
For the Cheese Selection
- Brie cheese (8 oz wheel) – Look for a soft, ripe brie. The white rind looks ghostly against dark grapes. I prefer Président or a store-brand triple cream for extra richness.
- Aged cheddar (6 oz, sliced into triangles) – The deep orange color screams Halloween. Choose a sharp cheddar for bold flavor.
- Goat cheese log (4 oz) – The white, crumbly texture looks like cobwebs when you break it apart. I like the one from Vermont Creamery.
- Smoked gouda (4 oz, cubed) – The smoky flavor adds depth, and the orange rind fits the color scheme perfectly.
For the Meats
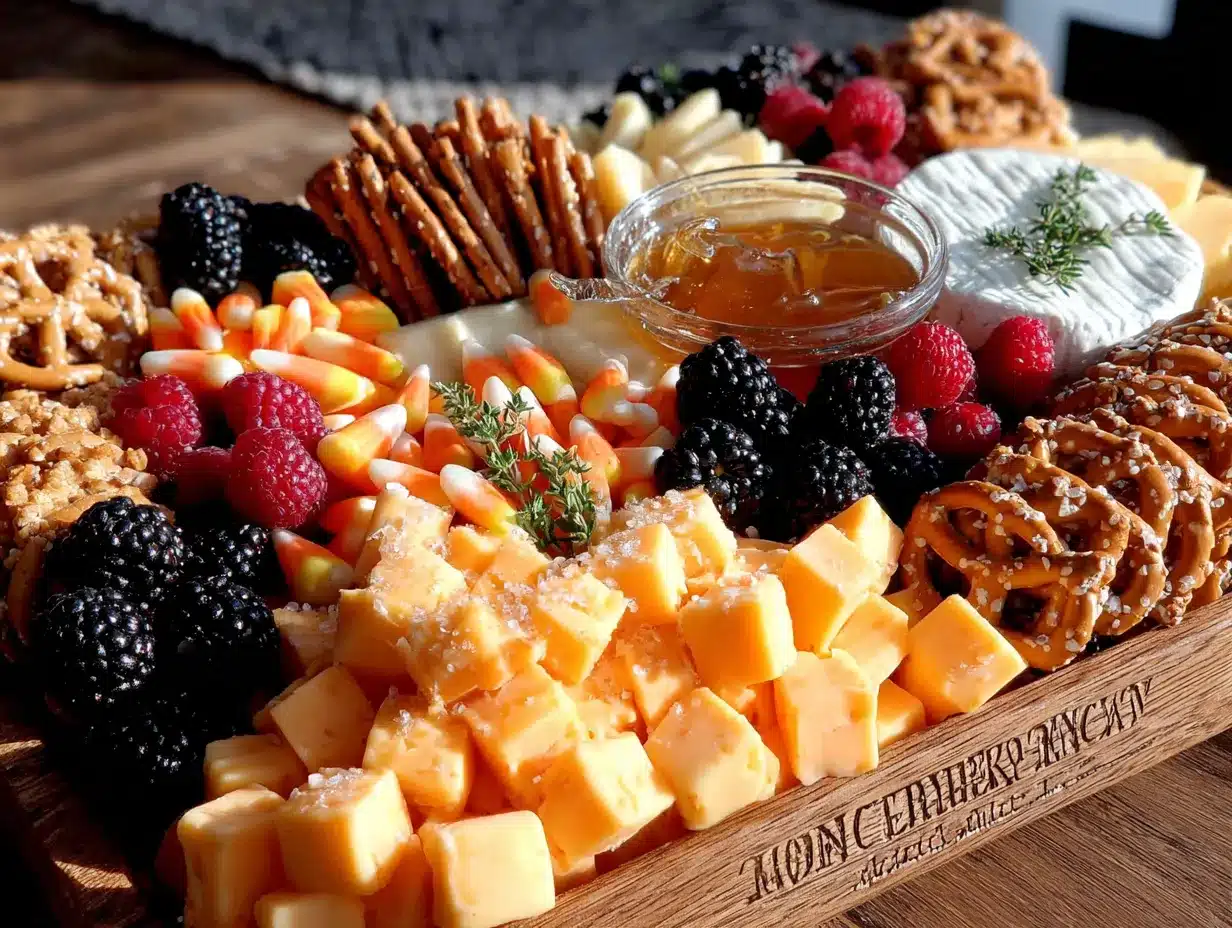
- Prosciutto (4 oz, thinly sliced) – Drape it in waves for a “spooky” look. The salty, delicate texture balances the creamy cheese.
- Salami (4 oz, sliced into rounds) – Use peppered salami for a little kick. The deep red color contrasts nicely with the lighter cheeses.
- Turkey pepperoni (3 oz) – A lighter option that still gives that savory, meaty bite. Plus, the small rounds look like little Halloween moons.
For the Fruits & Vegetables
- Red seedless grapes (1 cup) – They look like little eyeballs when clustered together. Wash and dry them well so they don’t make the board soggy.
- Blackberries (1/2 cup) – Their dark, almost black color is perfect for Halloween. Plus, they add a tart pop that cuts through the rich cheese.
- Dried apricots (1/2 cup) – The bright orange color is pure Halloween. I like the unsulfured kind for a more natural taste.
- Baby carrots (1 cup) – Their orange color and finger-like shape are perfect for a spooky vibe. Slice them in half lengthwise for “witch fingers.”
- Cucumber slices (1 cup) – Use a round cookie cutter to make ghost or bat shapes. Or just slice them into rounds for a fresh, crunchy element.
For the Crunchy Elements
- Dark rye crackers (1 cup) – The dark color fits the theme, and they hold up well to soft cheese. I recommend Ry Krisp or Wasa.
- Pretzel sticks (1 cup) – They look like little broomsticks or bones. Plus, they add that satisfying salt crunch.
- Pumpkin seeds (1/4 cup, toasted) – A seasonal touch that adds texture. You can buy them pre-toasted or toast your own with a little salt.
- Almonds (1/4 cup, smoked or roasted) – The smoky flavor pairs beautifully with the gouda. Plus, their brown color fits the earthy Halloween palette.
For the Spooky Touches
- Black olives (1/2 cup, pitted) – They look like creepy little eyes. Use kalamata for a richer flavor.
- Edible eyes (a small handful) – These are totally optional but so fun. Find them at baking supply stores or online. They add that “monster” vibe.
- Fresh rosemary sprigs (a few) – Use them to decorate the board like “spooky trees” or “witch’s broomsticks.” Purely decorative, but they smell amazing.
- Pumpkin-shaped cookie cutters (for cutting cheese or fruit) – Not an ingredient, but worth mentioning. They make everything look instantly festive.
Substitution Guidance
For a dairy-free version, swap all cheeses with plant-based alternatives—cashew brie, almond milk cheddar, and coconut milk goat cheese work well. For a gluten-free board, use rice crackers or veggie chips instead of rye crackers. And if you’re watching sodium, choose low-sodium meats and unsalted nuts. The beauty of a charcuterie board is its flexibility—you can swap almost anything based on what you have or what you like.
Equipment Needed
You don’t need much to build this board, which is part of why I love it. Here’s what I use:
- Large wooden cutting board or serving platter (at least 12×18 inches) – I use a round acacia wood board I found at HomeGoods for $15. A baking sheet lined with parchment works in a pinch, though it’s not as pretty.
- Small bowls or ramekins (2-3) – For holding olives, pumpkin seeds, and edible eyes. I use little ceramic ramekins from IKEA.
- Cheese knives (at least 2) – One for soft cheese (brie) and one for hard cheese (cheddar). If you don’t have cheese knives, a butter knife and a paring knife work fine.
- Small cookie cutters (pumpkin, ghost, bat shapes) – Optional but fun. I bought a set of Halloween cookie cutters at the dollar store and they’ve lasted three seasons.
- Tongs or small spoons – For serving the olives and seeds. Not strictly necessary, but keeps things tidy.
- Parchment paper (optional) – If your board is porous or you want easy cleanup, line it with parchment. I do this when I’m serving a crowd.
That’s it. No special equipment required. If you don’t have a large board, use a few smaller plates arranged together. I’ve done this on a marble pastry board, a plastic cutting board, and even a clean pizza stone—all worked perfectly.
Preparation Method
Here’s how I build this board step by step. I’ve made it enough times to know what works and what doesn’t—trust me, I learned the hard way that putting soft cheese next to wet fruit makes a mess. Follow these steps and you’ll have a beautiful, spooky board in under 20 minutes.
- Start with the cheese (5 minutes). Place the brie wheel in the center of your board—it’s the anchor. Slice the aged cheddar into triangles and arrange them in a fan shape to the left of the brie. Crumble the goat cheese into a small pile on the right side, leaving some chunks intact for texture. Cube the smoked gouda and scatter it near the cheddar. Pro tip: Let the cheeses sit at room temperature for 15 minutes before serving—they’ll be creamier and more flavorful.
- Add the meats (3 minutes). Drape the prosciutto slices in loose waves near the brie. Don’t fold them too tightly—you want them to look airy and almost ghost-like. Arrange the salami rounds in a overlapping row next to the prosciutto. Scatter the turkey pepperoni rounds in a small cluster near the edge of the board. If you’re using pepperoni, a quick tip: blot them with a paper towel first to remove excess oil, or they’ll make the board greasy.
- Place the fruits and vegetables (5 minutes). Cluster the red grapes in a small pile near the top of the board—they should look like a bunch of little eyeballs watching you. Scatter the blackberries near the goat cheese for a dark, moody contrast. Arrange the dried apricots in a small fan shape near the cheddar—their bright orange color pops beautifully. Place the baby carrots in a small pile at the bottom left, pointing outward like little witch fingers. Lay the cucumber slices (cut into shapes if you’re using cookie cutters) near the center. One thing I learned the hard way: pat all fruits and vegetables dry with a paper towel before placing them on the board. Wet produce makes the cheese slide and the crackers get soggy.
- Fill in with crunchy elements (3 minutes). Arrange the dark rye crackers in a row along the right side of the board, slightly overlapping. Place the pretzel sticks in a small bundle near the top—they look like a pile of broomsticks or tiny bones. Sprinkle the pumpkin seeds and almonds in small gaps around the board, filling in any empty spaces. This is where the board starts to look full and abundant, even if you’re using modest amounts.
- Add the spooky touches (2 minutes). Spoon the black olives into a small bowl or ramekin and place it near the center of the board. Add the edible eyes to another small bowl and nestle it near the brie. Tuck a few fresh rosemary sprigs around the edges of the board—they look like little spooky trees and smell amazing. If you have any small Halloween decorations (like plastic spiders or skeleton hands), place them strategically around the board for extra fun. Just make sure they’re clean and food-safe.
- Final touches (2 minutes). Step back and look at your board. Fill any obvious gaps with extra crackers, nuts, or fruit. The board should look full but not crowded—you want people to be able to reach everything without knocking things over. If you’re serving immediately, you’re done. If not, cover the board loosely with plastic wrap and refrigerate for up to 2 hours. Just remember to let it sit at room temperature for 15 minutes before serving so the cheese softens.
And that’s it. Honestly, the hardest part is not eating all the cheese while you’re arranging it. I’ve definitely been guilty of that more than once.
Cooking Tips & Techniques
After making this board about a dozen times—including one disastrous attempt where I used wet grapes and everything slid off the board like a cheese avalanche—I’ve picked up a few tricks that make a real difference.
Room temperature cheese is non-negotiable. I know it’s tempting to just pull everything straight from the fridge, especially when you’re in a hurry. But cold cheese is bland cheese. Let your brie, cheddar, and gouda sit out for at least 15 minutes before assembling the board. The flavors open up completely, and the texture becomes creamier and more spreadable. I learned this the hard way when I served a board at a party and everyone said the cheese tasted like nothing. Now I set a timer.
Layer textures strategically. A good charcuterie board is all about contrast. You want soft cheese next to crunchy crackers, sweet fruit next to salty meat, smooth spreads next to rough nuts. I like to place the creamy brie next to the crunchy pretzel sticks, and the tangy goat cheese near the sweet blackberries. This way, every bite offers something different. If you put all the soft things together and all the crunchy things together, the board feels flat and boring.
Don’t overcrowd the board. This was my biggest mistake early on. I’d try to fit everything on one board, and it would look like a chaotic pile of food. Leave small gaps between items so people can see what’s available and reach for things without knocking over a pile of olives. If you have too much food, use a second board or a small plate on the side. It’s better to have two boards that look intentional than one board that looks like a food explosion.
Use the “rule of threes” for visual appeal. Group items in clusters of three or five—three slices of cheese here, five crackers there, three apricots next to them. Odd numbers are more visually appealing than even numbers. I’m not sure why this works, but it does. Every time I break this rule, the board looks a little off.
Prep everything before you start arranging. Wash and dry all produce. Slice the cheese. Arrange the meats. Have your bowls and ramekins ready. Once you start building the board, you don’t want to stop and wash grapes or hunt for a knife. I learned this the hard way when I had to pause mid-arrangement to run to the store for more crackers. Now I lay everything out on the counter first, then start building.
Variations & Adaptations
One of the best things about this board is how easy it is to customize. I’ve tried several variations depending on the occasion, what’s in season, and who’s coming over.
Kid-Friendly Version: Swap the strong cheeses (like goat cheese and smoked gouda) for milder options like mozzarella balls or colby jack. Replace the prosciutto with turkey roll-ups or ham slices. Add a small bowl of candy corn or pumpkin-shaped chocolates for a sweet touch. I made this version for my niece’s Halloween party, and the kids went straight for the cheese cubes and candy—the adults appreciated the lighter options too.
Vegan Halloween Board: Use plant-based cheeses (cashew brie, almond milk cheddar) and skip the meats entirely. Add extra roasted vegetables like bell pepper strips and zucchini slices. Use hummus or a pumpkinseed pesto as a dip. I tried this for a vegan friend’s party, and honestly, I barely missed the dairy. The key is to use flavorful spreads and crunchy vegetables to keep things interesting.
Spicy Twist: Add a small bowl of spicy honey or hot pepper jelly for drizzling over the brie. Use peppered salami and add a few pickled jalapeños for heat. Sprinkle chili flakes over the goat cheese. My husband loves this version—he says the sweet-spicy combo is addictive.
Fall Harvest Board: Swap the blackberries for sliced apples or pears (brush them with lemon juice to prevent browning). Add roasted pumpkin wedges and a small bowl of maple syrup for dipping. Use cinnamon-spiced almonds instead of plain ones. This version feels cozy and autumnal, perfect for a Halloween night that’s actually chilly outside.
Low-Carb/Keto Adaptation: Skip the crackers and pretzels entirely. Add extra cucumber slices, celery sticks, and bell pepper strips for crunch. Use full-fat cheeses and meats. Add a small bowl of guacamole or cream cheese dip. I’ve served this to keto friends, and they loved having something festive that fit their diet.
Serving & Storage Suggestions
This board is best served at room temperature, so let it sit out for about 15 minutes after assembling. I like to serve it with small plates and napkins so people can build their own little bites. If you’re hosting a party, set the board on a coffee table or kitchen island where people can gather around and graze.
What to serve alongside: A glass of crisp white wine (like Sauvignon Blanc) or a light beer pairs beautifully with the cheeses. For a non-alcoholic option, sparkling water with a splash of cranberry juice fits the Halloween color scheme. You can also add a small bowl of popcorn tossed with nutritional yeast and smoked paprika for extra crunch.
Storage: If you have leftovers (which is rare in my house), store the components separately. Cheese should be wrapped in wax paper and placed in an airtight container. Meats should be wrapped tightly in plastic wrap. Fruits and vegetables should be stored in separate containers. Crackers and pretzels should be kept in a dry, airtight container to stay crunchy. Assemble the board fresh the next day—it only takes a few minutes.
How flavors develop: Honestly, this board tastes best the day it’s made. The cheese is at its peak, the crackers are crunchy, and the fruit is fresh. If you absolutely must make it ahead, prep all the components the night before and assemble the board the next day. The cheese will still be good, but the crackers might soften slightly if they’re near moist ingredients.
Nutritional Information & Benefits
Here’s a rough estimate for a serving size of about 4-5 ounces of cheese, 2 ounces of meat, and a handful of fruits and nuts (about 1/4 of the board):
- Calories: 380-450
- Protein: 20-25g
- Fat: 28-32g (mostly from cheese and nuts)
- Carbohydrates: 15-20g (from fruit and crackers)
- Fiber: 3-5g
- Sugar: 8-12g (natural from fruit)
- Sodium: 600-800mg (varies by cheese and meat choice)
The health benefits here come from the quality of the ingredients. Cheese provides calcium and protein. Nuts and seeds offer healthy fats and fiber. Fruit adds antioxidants and vitamins. Compared to a traditional Halloween snack of candy and chips, this board offers real nutritional value while still feeling indulgent. It’s a great option for anyone who wants to enjoy the holiday without the sugar crash.
Dietary considerations: This board contains dairy and gluten (from crackers). For a dairy-free version, use plant-based cheeses. For gluten-free, use rice crackers or veggie chips. Always check labels on processed meats for added sugars or preservatives if that’s a concern.
Conclusion
This Light & Festive Halloween Charcuterie Board has become a tradition in my house—not because it’s fancy or complicated, but because it captures that Halloween feeling without the sugar overload. It’s the board I make when I want to feel like I’m celebrating, even if it’s just a Tuesday night with a scary movie and a glass of wine. It’s the board I bring to parties when I want to impress without stressing. And honestly? It’s the board I make when I just want to eat cheese and feel festive.
I hope you give it a try and make it your own. Swap in your favorite cheeses, add your go-to snacks, and have fun with the spooky decorations. That’s the beauty of a charcuterie board—it’s never the same twice, and it always feels personal. If you make this for your Halloween gathering, I’d love to hear about it. Leave a comment below and tell me what spooky touches you added. Did you use edible eyes? A plastic spider? A skeleton hand reaching for the cheese? I want to know!
Here’s to a Halloween that’s light, festive, and full of good bites. Happy snacking!
Frequently Asked Questions
Can I make this board ahead of time?
You can prep all the components the night before, but I recommend assembling the board no more than 2 hours before serving. This keeps the crackers crunchy and the fruit fresh. If you assemble it too early, the moisture from the fruit and vegetables can make the crackers soft and the cheese slide around.
How do I keep the board from looking messy?
The key is to group similar items together and leave small gaps between clusters. Use small bowls or ramekins for loose items like olives and seeds. And pat all fruits and vegetables dry with a paper towel before placing them on the board—wet produce is the number one cause of a messy board.
What if I don’t like certain cheeses or meats?
No problem at all! This board is totally customizable. Swap out any cheese or meat for something you prefer. The important thing is to keep a balance of textures and flavors—soft and hard cheeses, mild and bold meats, sweet and savory fruits. As long as you have that variety, the board will work.
Can I make this board for a nut-free household?
Absolutely. Just skip the almonds and pumpkin seeds, and use extra crackers or vegetable sticks for crunch. Make sure to check labels on crackers and pretzels to ensure they’re processed in a nut-free facility if that’s a concern.
How many people does this board serve?
This board serves about 6-8 people as an appetizer or snack. If you’re serving it as a light meal (like for a Halloween movie night), it serves 4-6 people. If you’re feeding a crowd, just double the quantities and use a larger board or two boards side by side.
Pin This Recipe!
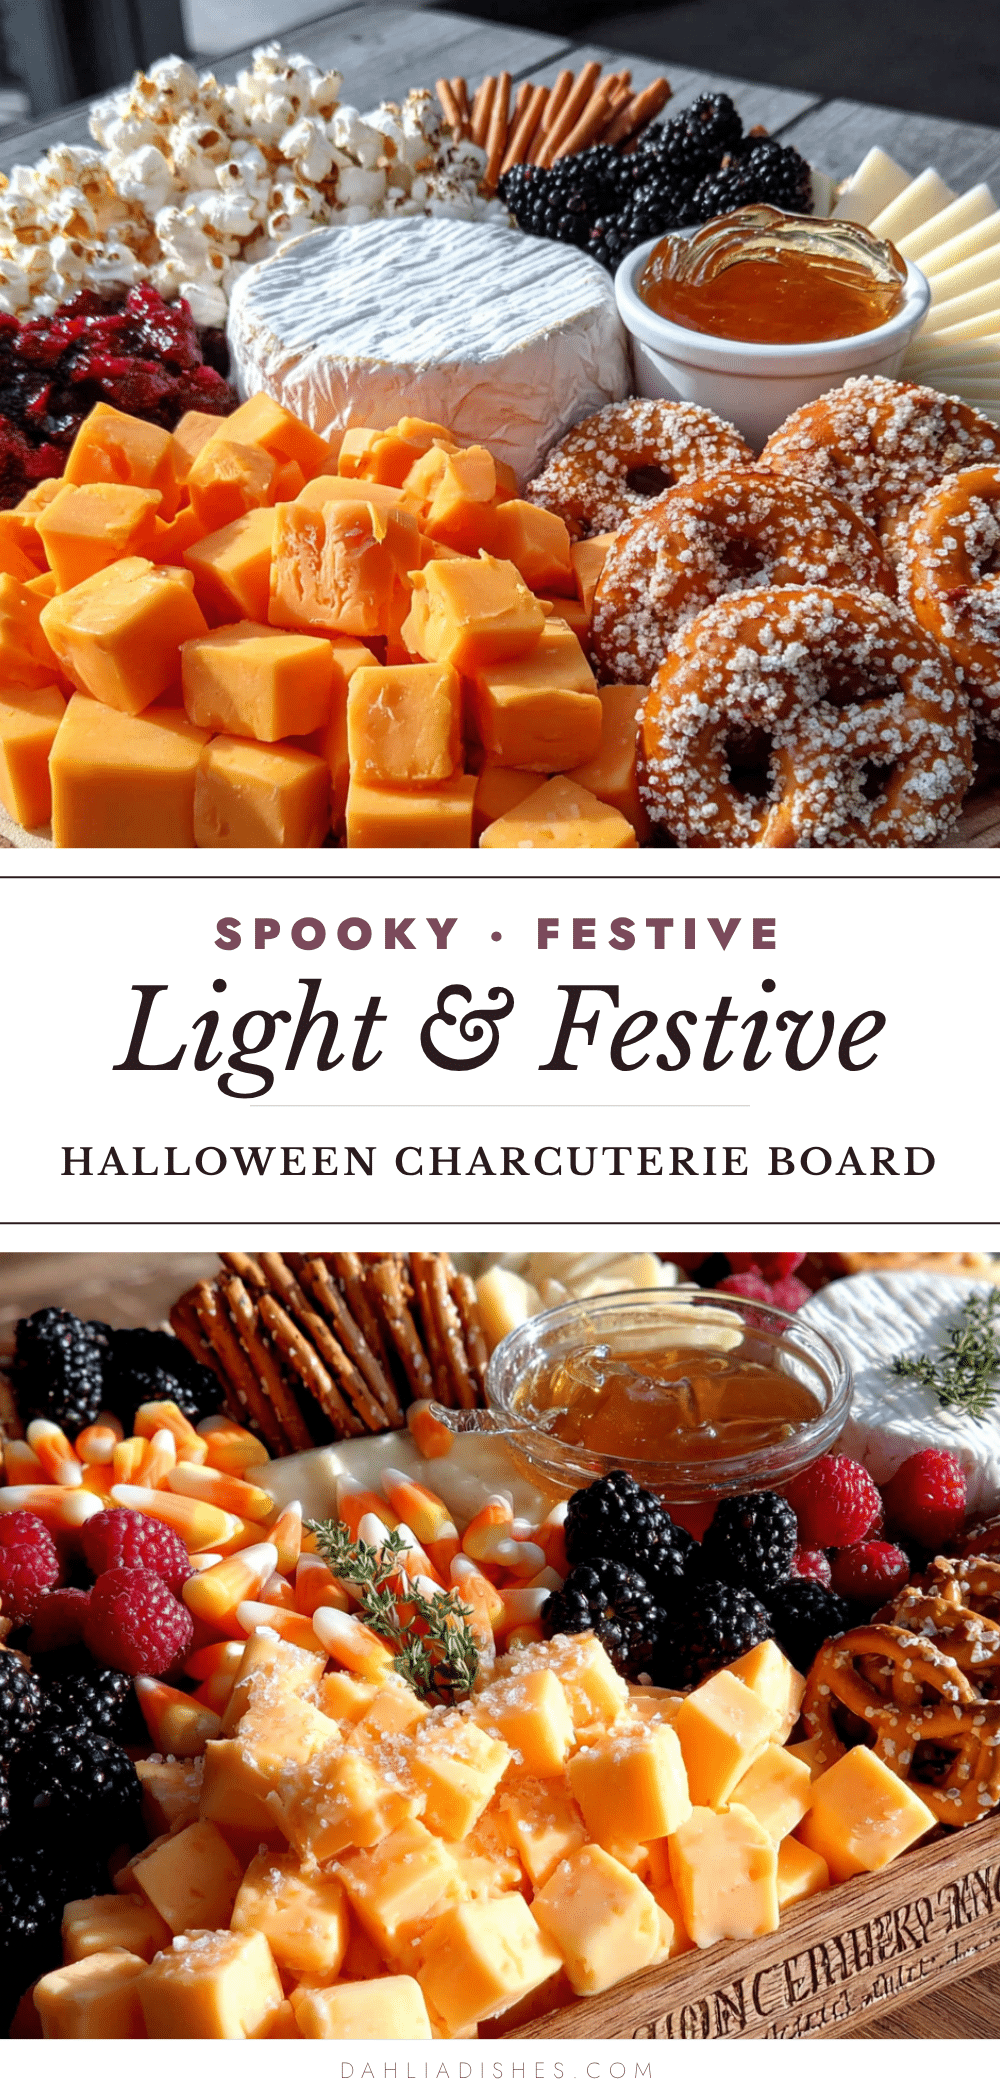
Light & Festive Halloween Charcuterie Board
A quick and easy Halloween charcuterie board that balances festive spooky vibes with wholesome ingredients. Perfect for parties, movie nights, or a simple Tuesday night celebration without the sugar overload.
- Prep Time: 20 minutes
- Cook Time: 0 minutes
- Total Time: 20 minutes
- Yield: 6-8 servings 1x
- Category: Appetizer
- Cuisine: American
Ingredients
- 8 oz Brie cheese wheel
- 6 oz Aged cheddar, sliced into triangles
- 4 oz Goat cheese log
- 4 oz Smoked gouda, cubed
- 4 oz Prosciutto, thinly sliced
- 4 oz Salami, sliced into rounds
- 3 oz Turkey pepperoni
- 1 cup Red seedless grapes
- 1/2 cup Blackberries
- 1/2 cup Dried apricots
- 1 cup Baby carrots, halved lengthwise
- 1 cup Cucumber slices, cut into shapes if desired
- 1 cup Dark rye crackers
- 1 cup Pretzel sticks
- 1/4 cup Pumpkin seeds, toasted
- 1/4 cup Almonds, smoked or roasted
- 1/2 cup Black olives, pitted
- Edible eyes (optional, for decoration)
- Fresh rosemary sprigs (for decoration)
Instructions
- Start with the cheese: Place the brie wheel in the center of the board. Slice aged cheddar into triangles and arrange in a fan shape to the left of the brie. Crumble goat cheese into a small pile on the right side. Cube smoked gouda and scatter near the cheddar. Let cheeses sit at room temperature for 15 minutes before serving.
- Add the meats: Drape prosciutto slices in loose waves near the brie. Arrange salami rounds in an overlapping row next to the prosciutto. Scatter turkey pepperoni rounds in a small cluster near the edge of the board. Blot pepperoni with a paper towel to remove excess oil.
- Place the fruits and vegetables: Cluster red grapes in a small pile near the top of the board. Scatter blackberries near the goat cheese. Arrange dried apricots in a small fan shape near the cheddar. Place baby carrots in a small pile at the bottom left, pointing outward. Lay cucumber slices near the center. Pat all fruits and vegetables dry with a paper towel before placing.
- Fill in with crunchy elements: Arrange dark rye crackers in a row along the right side of the board, slightly overlapping. Place pretzel sticks in a small bundle near the top. Sprinkle pumpkin seeds and almonds in small gaps around the board to fill empty spaces.
- Add the spooky touches: Spoon black olives into a small bowl and place near the center. Add edible eyes to another small bowl and nestle near the brie. Tuck fresh rosemary sprigs around the edges. Optionally add clean, food-safe Halloween decorations.
- Final touches: Step back and fill any obvious gaps with extra crackers, nuts, or fruit. The board should look full but not crowded. Serve immediately, or cover loosely with plastic wrap and refrigerate for up to 2 hours. Let sit at room temperature for 15 minutes before serving.
Notes
Let cheeses sit at room temperature for 15 minutes before serving for best flavor. Pat all fruits and vegetables dry to prevent sogginess. For a dairy-free version, use plant-based cheeses. For gluten-free, use rice crackers or veggie chips. The board can be prepped the night before but assemble no more than 2 hours before serving.
Nutrition
- Serving Size: About 1/4 of the boa
- Calories: 380450
- Sugar: 812
- Sodium: 600800
- Fat: 2832
- Saturated Fat: 1216
- Carbohydrates: 1520
- Fiber: 35
- Protein: 2025
Keywords: Halloween charcuterie board, spooky snack board, easy Halloween appetizer, festive cheese board, light Halloween snack, party platter, no-cook appetizer


